• 3/4 cup white, granulated sugar
• 1 egg
• 1/4 tsp. vanilla extract
• 1/4 cup milk
• 1 tbsp. and 1 1/2 tsp. butter, melted
1. Preheat the cupcake maker as directed.
2. In a large bowl, sift together our, baking powder,
baking soda, cocoa, sugar and salt. Set aside.
3. In a separate bowl, beat together egg and melted
butter, then stir in the vanilla.
4. Add the our mixture to the wet mixture alternately
with the milk. Beat well.
5. Carefully pour into cavities. Close the lid and cook
for 5-10. Check after 5 minutes. Open lid with a pot
holder or oven mitt.
6. Remove each cupcake with wooden or plastic
spoon. Place on plate and allow to cool.
CARE AND MAINTENANCE
1. Do not clean the unit as long as the device is hot.
Danger of burns!
2. Open the lid and clean the baking plates with a
sponge or cloth. Damp the sponge or cloth with a
bit of hot water.
3. Never immerse the device in water or allow water to
ow over the baking plates.
4 If you do not use the device for a long period, store
it preferably in the original packaging.
CAUTION: Never use solvents and abrasives, hard
brushes, metallic or sharp objects for cleaning. Solvents
are harmful to health and attack the plastic parts.
Abrasive cleaners and tools scratch the surface.
DISPOSAL
Proper disposal of this product.
This label indicates that, in the EU, electronic
devices cannot be disposed of with regular
household waste.
Please use the return or collections systems of your
municipality or contact the seller where you purchased
this product.
INFORMATION AND SERVICE
If you have question or concerns about your product,
please visit our website:
www.westinghouse-lifestyle.com, or contact our
oversea ofces/agents.
In line with our policy of continuous product
development, we reserve the right to change product,
packaging and documentation specications without
notice.
Baking
plate
12 3 4
English
Ready light
indicator (red)
Power light
indicator
(green)
Handle
INTENDED USE
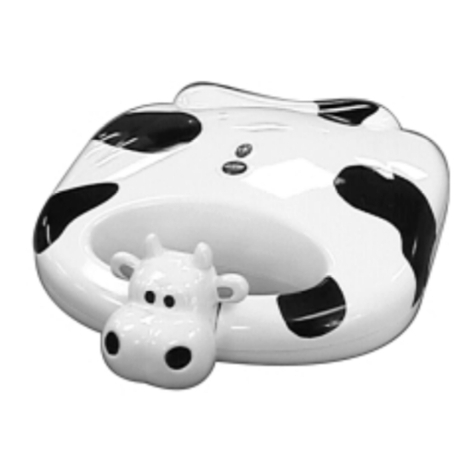
This device is suitable for making cup cakes only. Any
other use may result in damage to the device or injuries.
IMPORTANT SAFEGUARDS
General
1. Read this manual before first use thoroughly. It
contains important information for your safety
as well as for the use and maintenance of the
equipment. Keep these instructions for future
reference and pass it on with the device.
2. Pay particular attention to the warnings on the
device and in this instruction manual.
3. Use the device only for its intended purpose.
Improper use may lead to hazards.
4. This device is designed for household use only,
not for staff kitchen areas in shops, offices and
other working environments, farm houses, by
clients in hotels, motels and other residential type
environments, bed and breakfast type environments
use. It is not suitable for commercial use.
5. In the event of improper use or wrong operation, we
do not accept any liability for resulting damages.
6. The use of accessories and components not
expressly recommended by the manufacturer may
result in injuries or damages and voids the warranty.
7. This device is not intended to be used by persons
(including children) with reduced physical, sensory
or mental abilities or lack of experience and / or
lack of knowledge unless they are supervised by a
person responsible for their safety or have received
instructions on how to use the device.
8. Children should be supervised to ensure that they
do not play with the device.
9. Never leave the device unsupervised while it is
switched on.
10. Do not place heavy objects on top of the device.
11. Never immerse electrical parts of the device in water
during cleaning or operation. Never hold the device
under running water.
12. Do not under any circumstances attempt to repair
the device yourself. For servicing and repairs, please
consult an authorised dealer or qualified customer
service centre.
13. This device should not be operated with an external
clock timer or separate remote control system.
Power supply
1. The mains voltage must match the information on
the rating label of the device.
2. The power plug is used as the disconnect device.
Please be sure that the power plug is in operable
condition.
3. Only removing the power plug can separate the
device completely from the mains supply.
4. Avoid damages to the power cord that may be
caused by kinks or contact with sharp corners.
5. Make sure, the device, including power cord and
power plug are not exposed to hot surfaces.
6. Only unplug from the power outlet by the plug itself.
Do not pull on the cord.
7. Disconnect the power plug when the device is not
in use, in case of malfunctions, prior to attaching
accessories and prior to each cleaning.
8. If the power cord or the casing of the device is
damaged or if the device is dropped, the device may
not be used before it is examined by a professional
electrician.
9. A damaged power cord may only be replaced by the
manufacturer or a workshop commissioned by the
manufacturer or by a similarly qualified person in
order to avoid hazards.
Installation location
1. Place the device on a at, sturdy and heat-resistant
surface.
2. Put the device in a place which is out of reach of
children.
3. Do not operate this device near ammable materials
(e.g. curtains, textiles, walls) and never cover it.
Ensure that there is always a sufcient safe distance
from ammable materials.
4. Use this device in dry indoor areas only and never
outdoors.
5. Warning: Do not use this device near water or heavy
moisture; e.g. in a damp basement or beside a
swimming pool or bathtub.
6. In order to reduce the risk of fire and electric shock,
do not expose the device to re (replace, grill,
candles, cigarettes and so on) or water (water
drops, water splashes, vases, tubs, ponds and so on).
7. Keep this device away from all heat sources like for
example, ovens, hot plates and other heat-producing
devices/objects.
8. Protect this device from extreme heat (over 35°C)
and cold (under 5°C) as well as from direct sunlight
and dust.
Specific safety instructions
1. Danger of burns! The temperature of surfaces which
can be touched can be very high during operation.
Therefore, hold the device by the handles only.
2. Never cover the cup cake maker while it is in
operation – it could overheat and catch fire.
3. Remove the hot cup cakes from the cup cake maker
carefully in order to prevent injuries.
4. Parts of the device become very hot. Unplug the
power cord and allow the device to cool sufciently
before cleaning or storing.
5. Clean the device and other accessories after
each use. Refer to the Chapter CARE AND
MAINTENANCE
BEFORE FIRST USE
1. Carefully take the device and its accessories out of the
packaging. Retain the packaging in case you would like
to store the device away or transport it at a later date.
If you choose to dispose of the packaging, then please
do so according to the applicable legal regulations.
2. Check the packaging contents for completeness and
damages. Should the contents in the packaging not
be complete or be damaged, do not use the device.
Return it to your retail outlet immediately.
3. The upper and lower baking plates are covered with
non-stick coating. Use only utensils made of suitable
synthetic material or wood in order not to damage it.
Utensils must not have sharp corners and edges.
4. Clean the device as described in the CARE AND
MAINTENANCE section.
5. Season the cooking plates (top and base) with a little
vegetable oil and remove any excess oil with absorbent
kitchen paper towel. After the initial seasoning, there
is no need to season the plates before each use as the
pastry leaves the plates slightly seasoned. Avoid using
spray on oils
USING THE CUP CAKE MAKER
1. Grease the baking surfaces with a little bit of fat or
oil. Do not use cooking sprays!
2. Prior to baking, allow the device to heat up for 5
minutes or at least wait until the ready lamp (red)
goes out. During the baking process the ready lamp
(red) will go on and off which indicates that the
device keeps the temperature constant.
3. Flap the lid up. Touch only the handles since the
device is already very hot.
4. With a suitable spoon, ll the batter up to the rim
of the 7 cavities on the lower baking plate. Do not
overfill. Remove the spilled batter.
5. Now close the lid and allow batters to be baked for
approx. 5 minutes* or until they are brown (*this
time specication refers to the recipe below).
6. When cup cakes are ready, open the lid by the
handle and remove cup cakes with a suitable utensil.
Caution! Cup cakes are very hot. Place the prepared
cup cakes preferably on a grate and allow them to
cool down.
7. Now you can bake more cup cakes. Always make
sure that the baking plates are clean prior to refilling
the cavities, and wait until the ready lamp (red) goes
out.
8. When you have finished baking, disconnect the
power plug from the socket and allow the device to
cool down completely prior to cleaning.
RECIPES
• With the cup cake maker you can create delicious,
miniature cupcakes and muffins in a matter of
minutes!
• You can even use pre-packaged mixes. Simply
follow the directions on the box, ll the individual
sections in the lower cavities, close lid and let cook
for about 5-10 minutes, checking them after the first
5 minutes. Soon you will have delicious snacks and
desserts ready to serve.
• Try topping off your treats with frosting and add
sprinkles, nuts, grated coconut, candies or chocolate
chips.
Vanilla cupcakes
• 2/3 cup our
•1/4 cup and 2 tbsp. sugar
• 1 egg
•1/2 tsp. vanilla extract
•1/4 tsp. nutmeg
•1/2 tsp. baking powder
•1/4 cup of buttermilk
1. Preheat the cupcake maker as directed. Mix dry
ingredients.
2. Stir in buttermilk, vanilla and egg. Beat with a fork.
Carefully pour into pastry wells.
3. Close the Lid and cook for 5-10 minutes until light
golden brown in color. Check after 5 minutes.
4. Open Lid with a pot holder or oven mitt.
5. Remove each cupcake with wooden or plastic
spoon. Place on plate and serve.
6. Once the cupcakes have cooled, you may also
choose to add your favorite frosting and toppings.
Chocolate cupcakes
• 2/3 cup all-purpose, unbleached our
• 1/4 cup and 2 tbsp. unsweetened cocoa powder
• 1/8 tsp. baking soda
• 1 tsp. baking powder
• 1/8 tsp. salt
