The information contained in this leaflet was accepted as correct at the date of publication. However, we reserve the right to make any necessary changes, in line with product development and
trading conditions. Although all reasonable care has been taken to make it as complete and accurate as possible, no liability can be accepted for any inaccuracies or omissions. E+OE.
Whittan Group
Halesfield 6
Telford, Shropshire
TF7 4LN, United Kingdom
T0800 169 5151
www.whittan.com
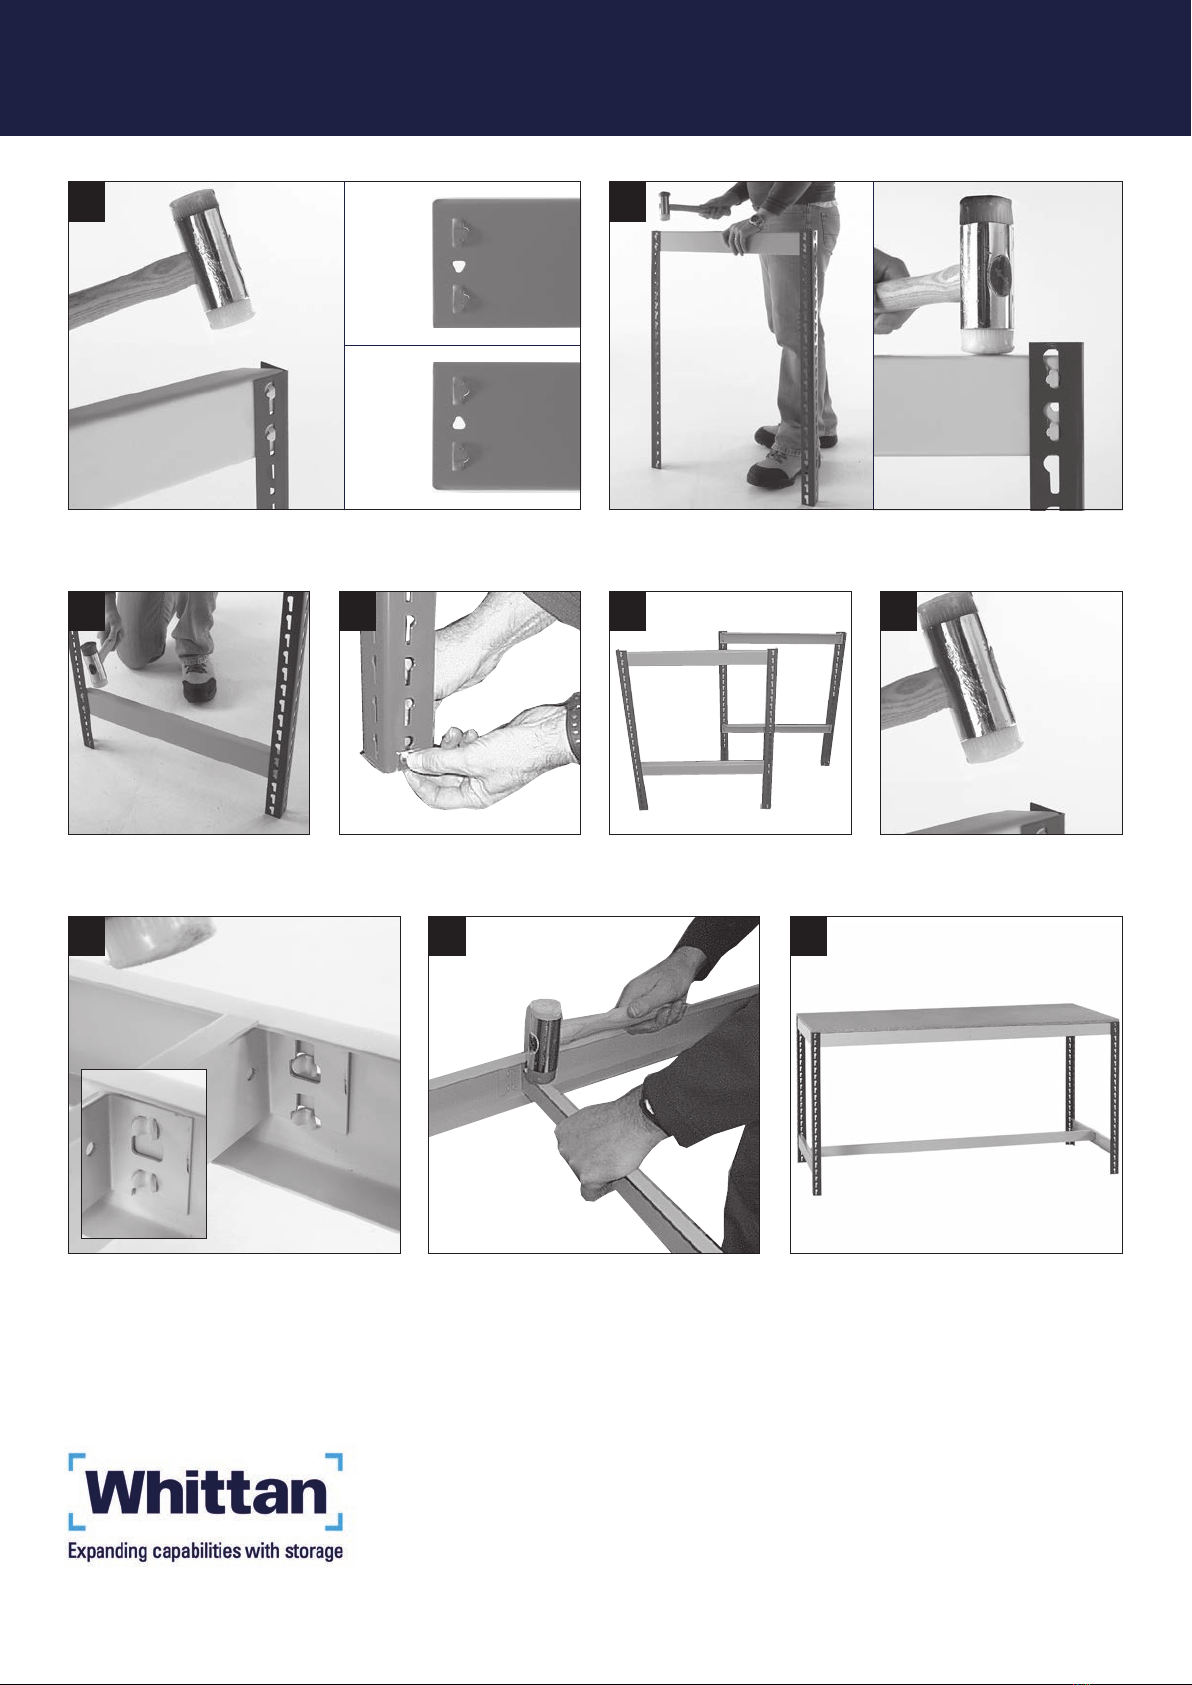
Bench assembly
1 2
Beams simply tap into uprights. Arrow should face down for correct
assembly.
Tap in top short beam. Ensure beam securely locates into upright.
✔
✘
3
Add bottom short beam at the
desired position.
4
Bolt a foot plate to the base of
each upright.
5
Assemble both end frames.
6
Position ‘T’ bar onto lugs in the centre of the
bottom short beams and tap down to locate.
7
Locate decking supports. Slots in the decking
supports locate into lugs at the centre of the
long beams. Fit to top level.
8
Drop in chipboard shelf onto the framework.
The bench is now ready for use.
Take care to avoid trapping fingers when
locating shelves.
6
Tap in long beam at top to create
framework.


