Widex Compass User manual

Compass quick guide
22/04/2010
ChildFit
When working with very young children, it is not always possible to obtain all of the information
necessary for an accurate hearing aid fitting. To that end, Widex has developed the ChildFit procedure
which differs from our usual fitting procedure. ChildFit gives you a very precise estimated first fitting
based on only a few items of information about the child. And in addition to our new ChildFit procedure,
the Widex Baby hearing aid has been especially designed for infants and young children.
Widex Baby
Follow the procedure below to perform a binaural fitting of Widex Baby hearing aids. For details re:
choosing the correct earwire size and assembly, see Compass video.
Step 1: Removal of the Baby hearing aid battery doors is required in order to attach the programming
cables. Please see instructions and pictures 1a, 1b, 1c, and 1d below:
I. Using tool open battery door (1a) and gently position the programming cable wire at the edge of
the door (1b)
II. Proceed to close the door, holding the cable firmly in place as shown below (1c)
1a
1b 1c
III. The door should gently pop off. Please do not attempt to remove door in any other manner to
avoid breakage.
IV. The programming adaptor is connected at the hinge area in the same manner as replacing a
battery door (1d).
1d

Compass quick guide
Page 2
Before the fitting session
Audiometric information must be obtained before you fit hearing aids. For young children, this may have
been done by means of auditory brainstem audiometry (ABR), auditory steady state responses (ASSR),
or it may have been possible to measure a few behavioral thresholds for the audiogram.
You can prepare for the fitting session in order to make it as short and easy for the child as possible.
Before your client arrives, you can do the following:
1. Select your client in your database, and open Compass.
2. Connect the hearing aids.
3. Select Detect connected hearing aid(s). Compass finds the hearing aids and displays the Online
communication window.
4. Select OK to open the Preconditions window, where you can change any of the conditions used in
connection with the fitting. For example, you may wish to change the information about the
conditions used for establishing the audiogram in the database, or you may choose to change
the default Widex Pediatric Rationale to the Desired Sensation Level approach (DSLv5).

Compass quick guide
Page 3
5. When you have finished defining the preconditions, select OK. Compass uses the age,
audiometric, and precondition information to estimate the fitting data and display it in the Fitting
window. The sound is turned on in the hearing aids at this point.
6. If you wish to obtain an in-situ RECD measurement, select the RECD button to open the RECD
wizard. Then select Widex in-situ RECD to continue. When you have connected the hearing aid
parts and positioned the RECD probe, you are ready to calibrate and obtain the RECD
measurement. The calibration may be performed as part of the hearing aid pre-fitting. From the
Fitting window, you can also open the Sensogram window or the Feedback test window, so that
you can obtain this information.
The ChildFit procedure
When your client arrives for the fitting session, do the following:
1. Explain the hearing aid fitting procedure to the parent (or older child).
2. Make sure that Compass is open, and that the hearing aids are connected. If you wish to mute
the hearing aids, you can do this by means of the mute icons in the toolbar.
3. Place the hearing aids on the child’s ears, and make sure that the correct size of eartip or mold is
used.
4. If it is possible, you should perform an in-situ RECD measurement and a feedback test.
Depending on the child’s age, it may also be possible to obtain a Sensogram.

Compass quick guide
Page 4
2a 2b 2c
5. To perform a Widex in-situ RECD measurement, attach a Widex probe tube to the end of the
white RECD “grip”. Remove the hearing aid microphone cover as shown in 2a above. Position
the RECD microphone attachment as shown, 2b. It should snap in place when positioned
properly. Insert the end of the probe tube into the eartip (2b), and place on desktop in a quiet
environment for calibration (2c).
Remove the probe from the eartip and position it in the child’s ear canal after otoscopy. After
performing a Widex in-situ RECD measurement, be sure to remove the probe from the child’s ear
immediately after performing the measurement. Remove the RECD grip and reposition the
microphone cover.
If you are able to perform VRA or play audiometry, proceed to the Sensogram window. After the
Sensogram, a feedback test may be performed if the fitting room is quiet and if the child is able
to remain quiet for the test signals.
6. Confirm hearing aid fitting goals have been met by means of real ear or simulated real ear
measurements and/or behavioral testing if possible. See [Fine-tuning] section for details re:
verification set-up.
Depending on your observations, you may decide not to make fine tuning adjustments during the first
visit, but in later sessions you may want to fine tune the hearing aids.
Questionnaires
The ChildFit procedure has two questionnaires that are very helpful in determining how far the child is in
its development and how well the hearing aids work for the child. They are accessible from the Client or
the Finalizesections of Compass.
Parent questionnaire
This questionnaire is a list of practical questions about the hearing aid, how much the child uses it, and
how well it works for the child. The top of the Parent questionnaire window contains information about
the child, and an option to print it.
The list of questions is below the basic information. Select the appropriate answer(s) for each question.
Some questions are followed by a list of radio buttons, and for these you can only enter one answer.
Other questions let you list more than one answer. These questions are followed by a number of check
boxes.
Hearing checklist
The second questionnaire is the Hearing checklist that can help you determine whether the child is
developing as expected.
At the top of the Hearing checklist window you can see the child’s age and various data about the fitting
and the checklist. You can also print it, either as an empty list or with the data you have entered.

Compass quick guide
Page 5
The checklist is split up into six levels, each level corresponding to a certain age. You can move between
the levels by means of the drop-down list above the questions.
Move to the relevant level, and answer as many of the questions in the checklist as you can. For each
item, select the appropriate answer. You can choose between the answers Never, Sometimes and
Always. You can use the date field to indicate the date of the observation.
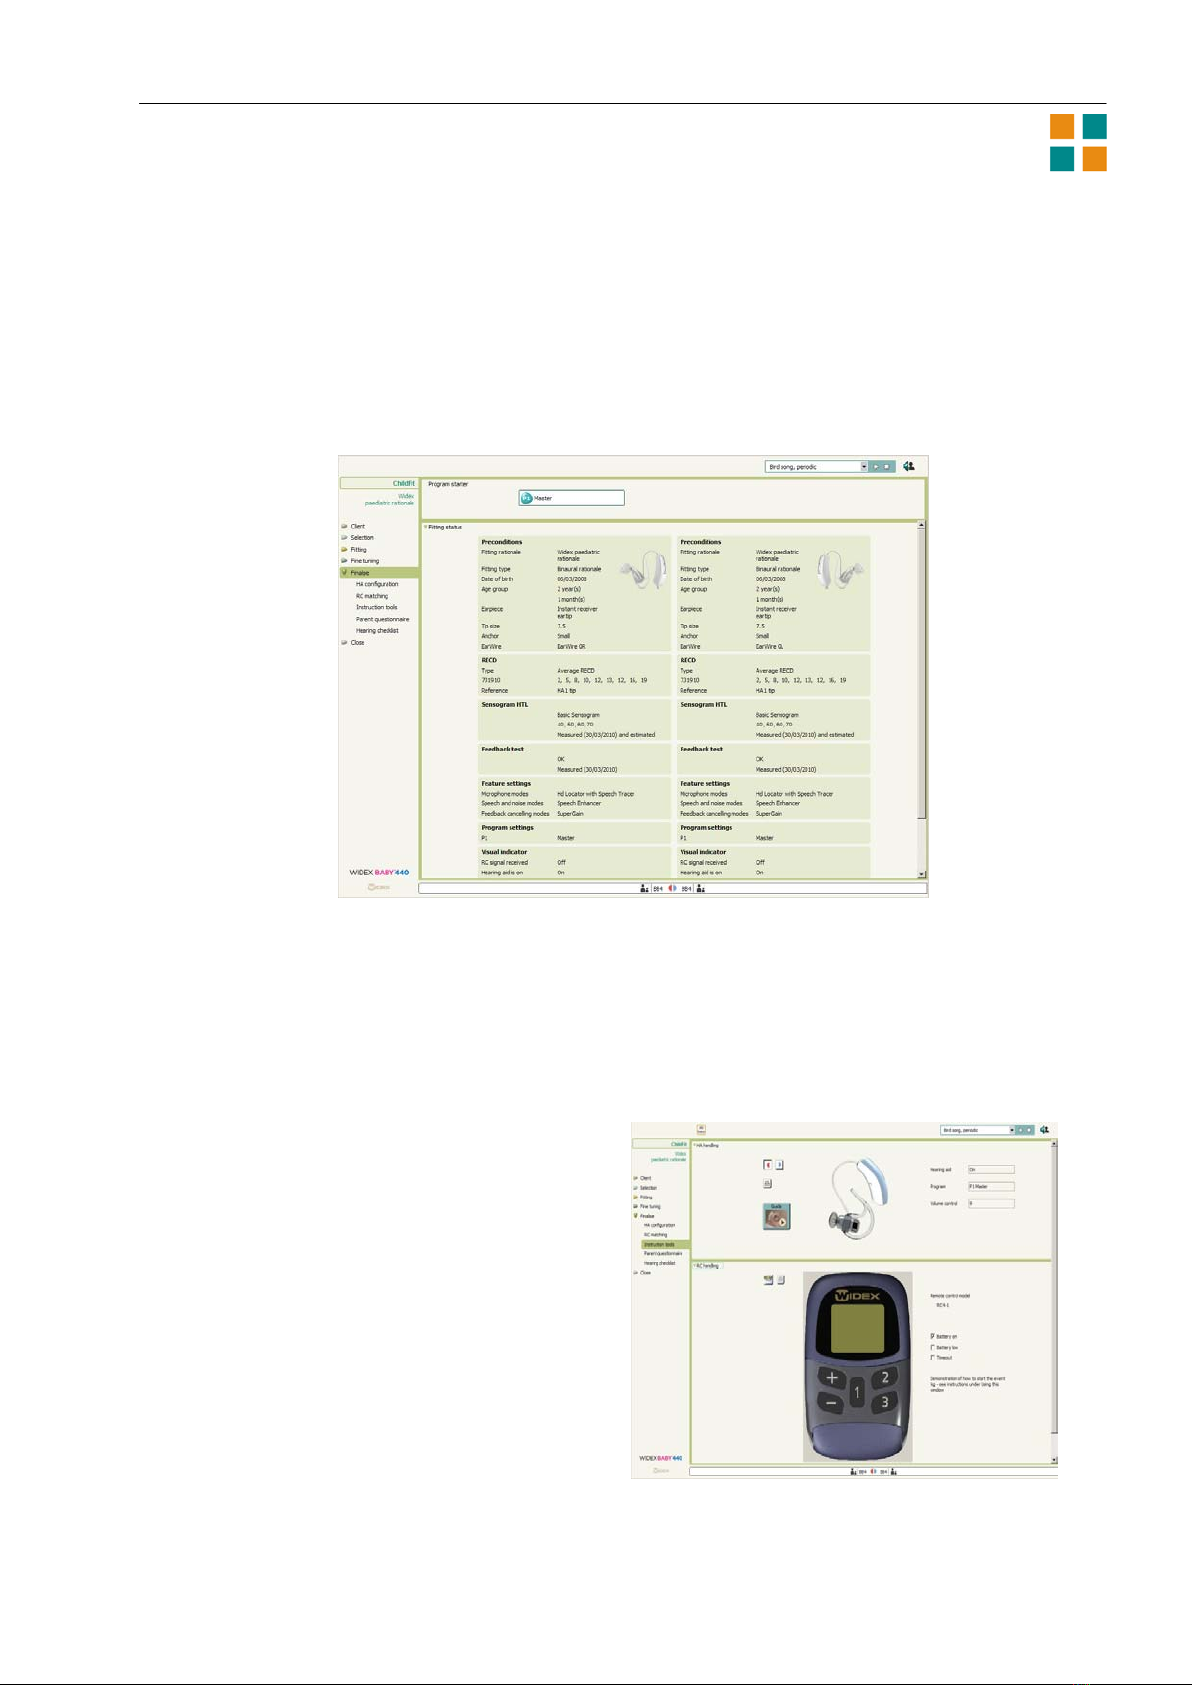
Fine tuning under ChildFit
When you have finished the basic fitting under ChildFit, you can use the fine tuning options to assure
that you have achieved the optimum hearing aid performance.
In many fine tuning windows selections are binaural, but you can turn off Binaural adjustment to
make changes to the right and left hearing aids individually. When the red and the blue parts of
the Binaural adjustment symbol are connected by a black ring, Binaural adjustment is turned on,
and when the two parts are separate, the feature is turned off.
Graphics
The standard view in Fine tuning is the SoundTracker aided view. This shows the hearing aid
performance for the current sound environment. You can use this view to check whether the hearing
aids are providing the child with sufficient gain.
Besides the graphics views available for PrecisionFit, you have one modified and two extra graphics
views under ChildFit:
Output vs. frequency. This view shows the long-term output and MPO responses as a function
of frequency. You can choose the input levels you want to display, and you can choose to display
the targets.
Aided gain vs. frequency. This view shows the long-term gain (REAG or coupler gain) as a
function of frequency. You can choose the input levels you want to display, and you can choose
between the measurements In-situ, 711 and 2cc.
Simulated aided thresholds.The thresholds are calculated on the basis of the Sensogram
thresholds, adding the hearing aid gain and including all individual fitting data. The simulated
aided thresholds can be trusted to predict the actual aided performance with the hearing aids
placed in the child’s ears.
You can find more information about the graphics views in the Compass user’s manual.
Program starter
If you have defined more than one listening program in the hearing aids, use the Program starter panel
in the upper part of the Fine tuning window to shift between the different programs.
Fine tuning parameters
You can change the settings of the individual listening programs and features using the Fine tuning
parameters. This section of Compass lets you adjust the individual parameters in the hearing aids.
In the Gain settings panel you can adjust the insertion gain parameters individually, or you can adjust
loud and soft sounds generally by means of the Loud sounds and Soft sounds settings.
Note: If you have selected the DSL fitting rationale for your fitting, available IG parameters are IG soft
and IG loud only, i.e., IG normal is not available. Therefore, for DSL this feature is not displayed. Please
refer to the solution guide for advice on how to perform fine tuning with the DSL fitting rationale.
The Feature settings panel contains the settings for Microphone modes, Speech and noise modes and
Feedback cancelling modes. Use the drop-down lists if you need to change any of the settings.

Compass quick guide
Page 6
From the Fine tuning section of Compass you also have access to the Sound Diary and the
Documentation windows. You can find information about these windows in the Compass user’s manual.
ISTS test mode
The International Speech Test Signal (ISTS) is a standard speech signal consisting of small segments of
female speech in different languages. This signal corresponds to a general speech signal and can be used
for standardized measurements.
The graphics part of the ISTS test mode window shows the Output vs. frequency curves. You can choose
to see Insertion gain vs. frequency or Aided gain vs. frequency curves instead. In the area between the
two graphics displays (left and right), you can define what to show in the graphics. The options available
depend on the type of graphics you have chosen.
At the bottom of the window you can see the present fine tuning settings in the hearing aids. All gain
settings and feature settings are displayed, but you cannot change any settings from the ISTS test mode
window.
When you select the Activate test mode button, the test mode starts, using the graphics settings you
have defined. While the test mode is running, the Locator is set in the omni position, and other feature
settings remain as defined in the hearing aid. When you have finished using the test mode, select OK in
the Test mode active dialog box displayed on the screen.
The pictures below illustrate the test set-up in the Audioscan VerifitTM system. Use the disk-shaped
adapter and putty to attach the Baby hearing aid eartip to the HA-1 (ITE) coupler (3a-3b). If you are
using a custom earmold, the disk is not necessary. Position the hearing aid front microphone facing the
Verifit left loudspeaker (3c). This is particularly important if you are not engaging the test mode.

Compass quick guide
Page 7
3a 3b 3c
ChildFit tools
Besides the questionnaires you have access to a number of other tools that can help you make your
fitting as precise as possible. The tools are available from the toptool bar in the Fine tuning window.
Program manager
You can open the Program manager from Fitting or Fine tuning. Use this tool to define other
programs in the hearing aids besides the Master program.
ClearBand tool
This tool lets you adjust the high-frequency gain by means of two parameters: One adjusts the
gain in the frequency range 5000-7000 Hz, and the other adjusts the gain in the frequency
range 7000-10000 Hz.
MPO manager
The Maximum Power Output tool shows the prescribed MPO values in SPL and HL for the four
basic bands in the hearing aid. You can, however, change and lock the MPO setting by means of
this tool.
Solution guide
You can open the Solution guide from the Fine tuning window. Use this tool if there is a specific
problem with the hearing aids. Compass can give you a number of possible solutions to a
problem and change the relevant settings for you before you close the tool.
Compression view
Use the Compression view tool to see compression threshold and compression ratio data for the
low-level and the high-level compression segments. The window shows the data for the four
basic frequencies in the hearing aid.
Recalculate
You can open the Recalculate tool from the Fine tuning window. Use this tool to set the fine
tuning settings to the default values.

Compass quick guide
Page 8
Finalize
Before you end a fitting, use the Finalizesection to make sure that everything is set correctly and that
the parents have the necessary knowledge about their child’s hearing aids. The Finalizewindow shows
information about the fitting and the adjustments you have made. This gives you an overview of the
hearing aid settings.
HA configuration
Use HA configuration to define the settings of the visual indicator (the light-emitting diode) on the
hearing aid. This indicator can flash whenever the hearing aid is on, or when a specific program is active
in the hearing aid.
RC matching
The remote control must be matched with the hearing aids before it can be used. The matching
procedure is a simple wizard in Compass. Follow
the directions on the screen.
The Instruction tools are on-screen tools that let
you teach the parents how to use the hearing aid
and the remote control and how to clean and
maintain the hearing aid.
Use the HA handling and the RC handling panels to
demonstrate how the hearing aid and the remote
control work. In the Toptool bar you find a 3D
tutor. Click an icon at the top of the 3D tutor
window to activate the corresponding procedure.
When you have run the full procedure, numbered
buttons are displayed on your screen. Use these
buttons to play the individual parts of the
procedure. You can repeat any difficult parts of the
procedures as many times as necessary.
Table of contents
Other Widex Hearing Aid manuals

Widex
Widex CROS FUSION User manual

Widex
Widex MENU3 User manual

Widex
Widex C2-XP Clear 220 Series User manual

Widex
Widex m4-m User manual

Widex
Widex Senso Vita SV-19 User manual

Widex
Widex Evoke E-FM User manual

Widex
Widex COM-DEX User manual

Widex
Widex Daily Series User manual

Widex
Widex THE MENU SERIES ME-19 User manual

Widex
Widex Mind 330 Series User manual

Widex
Widex FM+DEX User manual

Widex
Widex Menu series User manual

Widex
Widex EVOKE User manual

Widex
Widex C4-m User manual

Widex
Widex MOMENT Series User manual

Widex
Widex U-PA User manual

Widex
Widex SCOLA Buddy User manual

Widex
Widex AIKIA-m User manual

Widex
Widex Daily D-FA User manual

Widex
Widex AIKIA AK-9 User manual