WiebeTech LLC
P r o S A T A S S 8 Q u i c k S t a r t G u i d e - 4 -
NOTE: If the total capacity of your volume exceeds
2TB, it is likely you will encounter problems using that
volume on most current operating systems. If that is the
case, you will most likely wish to divide the capacity into
two or more volumes of less than 2TB each. Please
see the section labeled, "Working with volumes > 2TB."
Connecting to a DHCP-enabled network
On DHCP networks, a new IP address is dynamically assigned to the ProSATA SS8 as soon as
the network detects it. Simply type this IP address into a web browser on your computer. This
will access the ProSATA’s GUI, which you will use to configure the unit.
Connecting to a static network or directly to a computer
1. Check your computer’s IP address. To do this in Windows, open Network Connections
in the Control Panel. Double click on your network and then click on the Support tab.
Your computer’s IP address will be displayed.
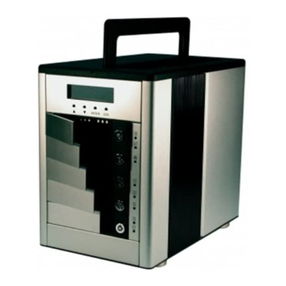
2. On the ProSATA’s LCD interface, press ENT and then scroll up or down to Change IP
Setting.
3. Press ENT and find Static.
4. Press ENT again and change the IP address to closely match what your computer is
using. For example, if your computer's IP address is 192.168.000.009 you could change
the ProSATA's IP to 192.168.000.007. Everything but the last set of three digits must be
the same! When changing the IP address you'll notice that a box flashes over the digit
to be changed. While the digit is selected, press up or down to change it. Press ENT to
move to the next digit. After the IP is set, press ENT all the way to the end and confirm
the settings change. To confirm, press up for yes and then press ENT again.
5. Type the ProSATA’s new IP address into a web browser on your computer. This will
access the ProSATA’s GUI, which you will use to configure the unit.
Not sure what type of network you have?
If the IP address displayed on the LCD starts with 169.254 or 192.168, this indicates that the
network is probably not DHCP-enabled. Use the instructions for a static network.
Step 5: Configure the RAID
You will use the built-in browser-based GUI to set up a RAID and create logical volumes on the
ProSATA. To launch the GUI, open a web browser on your computer and then type the
ProSATA’s IP address into the URL bar. (See previous step.)
The GUI’s main page should load, displaying a picture of the ProSATA with several options to
the right. When you click on any option, you will be prompted for a user name and password.
The user name is "admin" and the default password is "1234."
1. Click on Volume Group, then Volume Config.
2. Choose New. Select the RAID level you would like to use (usually RAID 5). If there is
an error saying "Disk is not enough" you'll need to go to Physical Disk, select all of the
disks you wish to include in the Volume group, and press the "Free Disk" button.
3. Click on Select PD. Select all the hard drives you wish to put into the new RAID set.
You’ll need to confirm your choice.
4. Now go to User Data Volume and
choose New. Select the capacity
you want for this UDV (User Data
Volume).
