manuals.online logo
Brands
  1. Home
  2. •
  3. Brands
  4. •
  5. WindowMaster
  6. •
  7. Controllers
  8. •
  9. WindowMaster WMS 309 Service manual

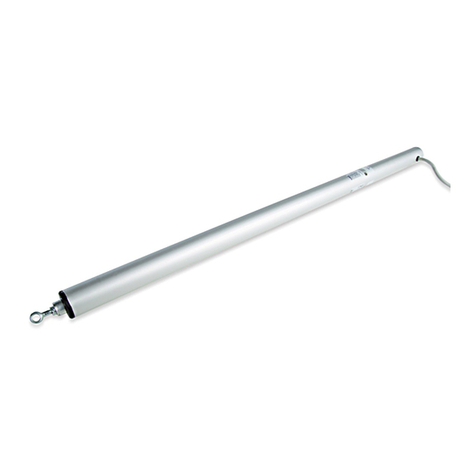
WindowMaster WMS 309 Service manual

WMS 309/309M
WMS 309/309M install 0818-UK-D-DK ©WindowMaster 2007, 2018 ®WindowMaster is a registered trademark used under licence by WindowMaster International A/S
WindowMaster International A/S Skelstedet 13, DK-2950 Vedbæk
Attention! To avoid personal injury during
installation, do not connect motor to power
supply until installation is complete.
—Electrically operated windows may cause
personal injury if body parts are caught
within the operating area of the window,
please follow the enclosed safety
instructions.
—Should not be fitted to a window, which is
used for emergency escape/access.
—Make sure that mains voltage is
disconnected when cleaning or other
maintenance/service of the window is
being undertaken, and ensure that it
cannot be unintentionally reconnected.
—Window actuators for SHE: If the window
actuator has been exposed to
temperatures above 90°C it has to be
checked by a WindowMaster technician.
—The actuator is a 24 V DC product and
must not be connected to the mains
voltage, as it thereby will be damaged.
—Make sure that the window is in suitable
condition for electric operation.
—It is recommended to grease window
hinges at least once a year after
installation of the motor unit.
—For safety reasons we recommend to
install opening restrictors on bottom-hung
windows..
—For all WindowMaster products it is
recommended to make a WindowMaster
service contract to ensure long life and a
reliable functioning of the product.
—WindowMaster window actuators must
only be connected to genuine
WindowMaster power supplies. If power
supplies other than WindowMaster are
used for connection to WindowMaster
window actuators then this will invalidate
in full any warranty or guarantee for
WindowMaster window actuators.
WindowMaster take no responsibility for
the performance of WindowMaster
products or third party products in this
instance.
—Installation in rooms with a high level of
humidity must comply with relevant
regulations (contact a qualified electrician
if necessary).
—Protect against humidity in connection with
transportation, storing and installation.
—Operating conditions: Ambient
temperature -5°C to +74°C, max. 90%
relative humidity (not condensating).
—The product must be disposed of in
conformity with national regulations for
electronic waste and not with usual
household waste.
—The packing can be disposed of together
with ordinary household waste.
—We reserve the right to make technical
changes.
—K rperverletzungsgefahr: Ein ö
plötzliches, unkontrolliertes Öffnen des
Fensters während der Montage ist zu
verhindern. Der Antrieb darf während der
Montage nicht an der Stromversorgung
angeschlossen sein
—Elektrisch betätigte Fenster können
Klemmgefahr für Körperteile zur Folge
haben, die sich im Funktionsbereich des
Fensters befinden, sehen Sie bitte die
mitgelieferte Sicherheitsanweisungen.
—Der Antrieb darf nicht auf ein Fenster, das
als Notausstieg verwendet werden soll,
montiert werden.
—Bei Reinigung oder Wartung des Fensters
ist die Stromversorgung zu unterbrechen,
und sicherstellen, dass sie nicht
versehentlich wiedereingeschaltet werden
kann.
—Für RWA-Fensterantrieb: Falls der
Fensterantrieb Temperaturen über 90°C
ausgesetzt war, muss er von
WindowMaster Service-Technikern
übgeprüft werden.
—Der Antrieb ist ein 24 V DC Produkt und
darf nicht an eine andere Spannung
angeschlossen werden, da der Antrieb
hierdurch beschädigt wird.
—Den für die elektrische Bedienung
erforderlichen Zustand des Fensters
sichern.
—Es wird empfohlen, die Fensterbeschläge
einmal im Jahr zu schmieren.
—Aus Sicherheitsgründen empfehlen wir an
Kippflügeln Fangscheren einzubauen
—Es wird empfohlen, einen WindowMaster
Wartungsvertrag abzuschließen, um eine
lange Lebensdauer und die einwandfreie
Funktion des Produktes zu gewährleisten.
—Wir empfehlen, den oder die eingesetzten
WindowMaster Fensterantriebe nur mit
original WindowMaster Steuereinheiten zu
betreiben, da ansonsten keine
Garantieansprüche für die Antriebe
gewährt werden können.
—Bei Montage in Feuchträumen sind die
geltenden Bestimmungen einzuhalten
(wenn notwendig, wenden Sie sich an
einen Elektroinstallateur).
—Bei Transport, Lagerung und Einbau die
Antriebe gegen Feuchtigkeit schützen.
—Umgebungsbedingungen: Umgebungs-
temperatur -5 °C zu +74°C, max. 90%
relatives feuchtigkeit (nicht
kondensierend).
—Das Produkt ist nach Nationalen
Bestimmungen als elektronischer Müll zu
entsorgen und darf nicht in den Hausmüll
gelangen.
—Die Verpackung kann zusammen mit dem
allgemeinen Haushaltsmüll beseitigt
werden.
—Technische Änderungen vorbehalten.
—Fare for legemsbeskadigelse: Pas på
vinduet ikke pludselig åbner eller lukker
ukontrolleret under montage. Motoren må
ikke være tilsluttet spænding under selve
montagen.
—Elbetjente vinduer kan indebære
klemningsrisiko for legemsdele, der
befinder sig inden for vinduets
funktionsområde, se venligst vedlagte
sikkerhedsfolder.
—Bør ikke monteres på et vindue der
benyttes som nødudgang.
—Ved pudsning eller anden
vedligeholdelse/service af
vinduet/tilbehøret skal netspænding
afbrydes, og det skal sikres, at den ikke
uforvarende kan genindkobles.
—Røgventilationsmotorer: Hvis
vinduesåbnerne har været udsat for
temperaturer over 90°C, skal den
serviceres af WindowMaster.
—Motoren er et 24 V DC produkt og må ikke
tilsluttes netspænding, da den derved
bliver ødelagt.
—Sørg for, at vinduet er i en stand, der gør
det velegnet til elektrisk betjening.
—Det anbefales, at vinduets beslag smøres
mindst én gang årligt.
—Af hensyn til sikkerheden anbefales det
ved kipvinduer at montere
sikkerhedsbeslag.
—Det anbefales at tegne en WindowMaster
serviceaftale for at sikre en lang levetid
samt en upåklagelig funktion af
WindowMaster produktet.
—Det anbefales, at WindowMaster
vinduesåbnere tilkobles originale
WindowMaster styreenheder. Hvis
styreenheder fra anden leverandør
tilkobles WindowMaster vinduesåbnere
bortfalder WindowMasters
garantiforpligtelse, og det er følgende op
til andre at sikre sig, at kombinationen af
produkter fra forskellige leverandører
fungerer problemfrit og efter hensigten.
—Montering i rum med høj fugtighed skal
følge relevante regulativer (Kontakt om
nødvendigt en autoriseret elektriker).
—Beskyt imod fugt i forbindelse med
transport, opbevaring og indbygning.
—Motorens arbejdsområde: -5 °C til +74°C, i
maks. 90% fugtighed (ikke
kondenserende).
—Emballagen kan bortskaffes sammen med
almindeligt husholdningsaffald.
—Elektriske produkter må ikke smides ud
med almindeligt husholdningsaffald, men
skal bortskaffes i henhold til nationale
regler for elektronisk affald.
—Emballagen kan bortskaffes sammen med
almindeligt husholdningsaffald.
—Der tages forbehold for tekniske
ændringer.
D DK
In case of technical problems, please
contact WindowMaster, see telephone list.
Bei technischen Problemen wenden Sie
sich bitte an WindowMaster, siehe
Telefonliste.
Ved tekniske problemer kontakt
WindowMaster.
UK
English: Important information
Deutsch: Wichtige Informationen
Dansk: Vigtig information
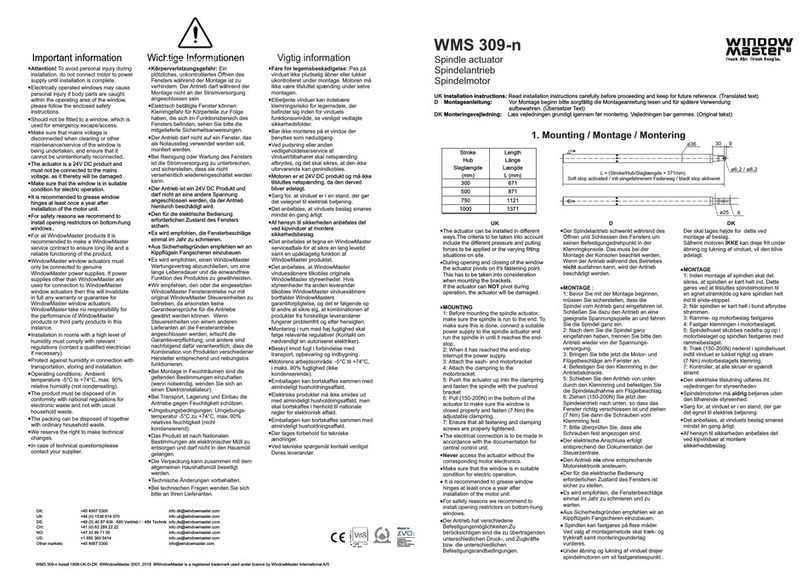
UK Installation instruction:
Read installation instructions carefully before proceeding and keep for future reference.
Motor brackets and chain brackets are to be ordered separately.
D Montageanleitung: .
Vor Montagebeginn bitte sorgfältig die Montageanleitung lesen und für spätere Verwendung
aufbewahren.
Motorbeschläge und Kettenbeschläge müssen separat bestellt werden.
DK installationsvejlednig
Læs vejledningen omhyggeligt igennem før montering. Vejledningen bør gemmes til senere brug.:
Motorbeslag og rammebeslag skal bestilles separat.
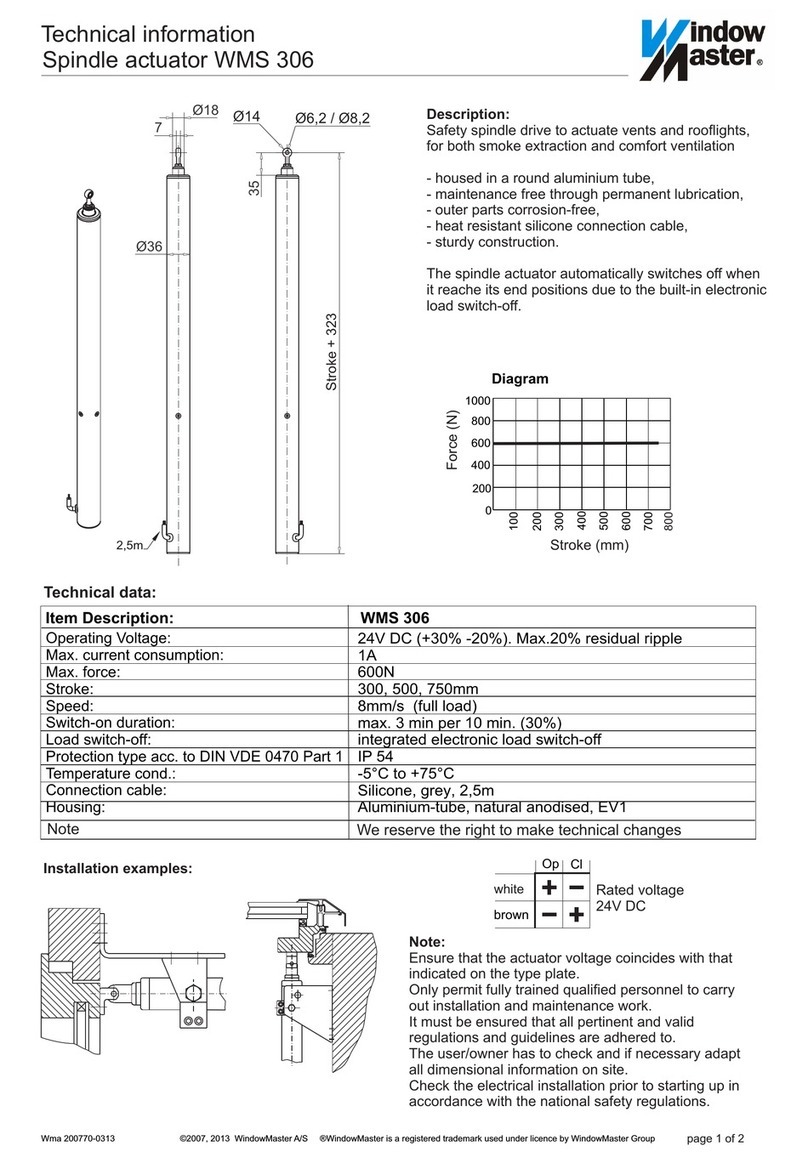
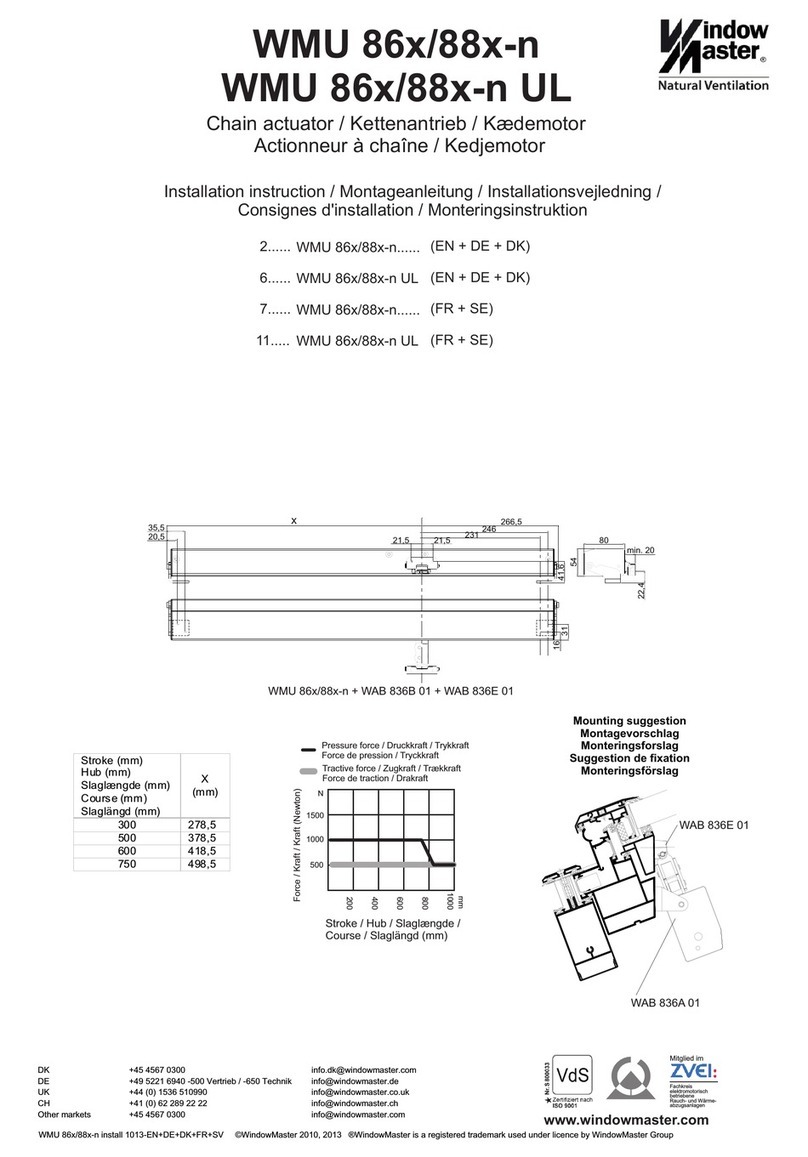
Technical data / Technische Daten / Tekniske data
Supply voltage / Anschlussspannung / Tilslutningsspænding 24 VDC (+30%-20%)
Ripple / Restwelligkeit / Rippel Max. 20%
Power consumption / Stromaufnahme / Strømforbrug 1,0 A
Consumption of power / Leistungsaufnahme / Effektforbrug Max. 24 W
Open circuit voltage / Leerlaufspannung / Tomgangsspænding Max. 32 VDC
Switch-on duration / Einschaltdauer / Driftstid ED Max. 30% (Max. 3 Min. pro 10 Min.)
IP IP 54
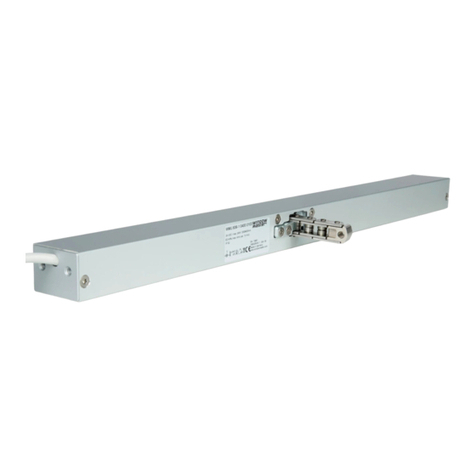
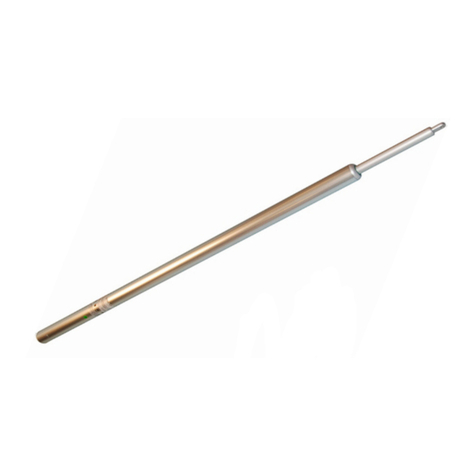
Spindle actuator / Spindelantrieb / Spindelmotor
DK: +45 4567 0300 [email protected]
UK: +44 (0) 1536 614 070 [email protected]
DE: +49 (0) 40 87 409 -560 Vertrieb / - 484 Technik i[email protected]
CH: +41 (0) 62 289 22 22 [email protected]
NO: +47 33 99 71 00 [email protected]
US: +1 650 360 5414 [email protected]
Other markets: +45 4567 0300 [email protected]
ø6,2 / ø8,2
8
9
30
ø25
ø36
L = (Stroke/Hub/Slaglængde + 371mm)
Soft stop activated / mit eingefahrenem Federweg / blødt stop aktiveret
—The actuator can be installed in different
ways.The criteria to be taken into account
include the different pressure and pulling
forces to be applied or the varying fitting
situations on site.
—During opening and closing of the window
the actuator pivots on it's fastening point.
This has to be taken into consideration
when mounting the brackets.
If the actuator can NOT pivot during
operation, the actuator will be damaged.
—MOUNTING
1: Before mounting the spindle actuator,
make sure the spindle is run to the end. To
make sure this is done, connect a suitable
power supply to the spindle actuator and
run the spindle in until it reaches the end-
stop.
2: When it has reached the end-stop
interrupt the power supply.
3: Attach the sash- and motorbracket
4: Attach the clampring to the
motorbracket.
5: Push the actuator up into the clampring
and fasten the spindle with the pushrod
bracket
6: Pull (150-200N) in the bottom of the
actuator to make sure the window is
closed properly and fasten (10 Nm) the
adjustable clampring.
7: Ensure that all fastening and clamping
screws are properly tightened.
The electrical connection is to be made in
—
accordance with the documentation for
central control unit.
Never access the actuator without the
—
corresponding motor electronics.
—Make sure that the window is in suitable
condition for electric operation.
— It is recommended to grease window
hinges at least once a year after
installation of the motor unit.
For safety reasons we recommend to
—
install open ng restrictors on bottom-hung i
windows.
—Der Antrieb hat verschiedene
Befestigungsmöglichkeiten.Zu
berücksichtigen sind die zu übertragenden
unterschiedlichen Druck-, und Zugkräfte
bzw. die unterschiedlichen
Befestigungsrandbedingungen.
—Der Spindelantrieb schwenkt während des
Öffnen und Schliessen des Fensters um
seinen Befestigungsdrehpunkt in der
Klemringkonsole. Das muss bei der
Montage der Konsolen beachtet werden.
Wenn der Antrieb während des Betriebes
nicht ausfahren kann, wird der Antrieb
beschädigt werden.
—MONTAGE ;
1: Bevor Sie mit der Montage beginnen,
müssen Sie sicherstellen, dass die
Spindel vom Antrieb ganz eingefahren ist.
Schließen Sie dazu den Antrieb an eine
geeignete Spannungsquelle an und fahren
Sie die Spindel ganz ein.
2: Nach dem Sie die Spindel ganz
eingefahren haben, trennen Sie bitte den
Antrieb wieder von der Spannungs-
versorgung.
3: Bringen Sie bitte jetzt die Motor- und
Flügelbeschläge am Fenster an.
4: Befestigen Sie den Klemmring in der
Antriebskonsole.
5: Schieben Sie den Antrieb von unten
durch den Klemmring und befestigen Sie
die Spindelaufnahme am Flügelbeschlag.
6: Ziehen (150-200N) Sie jetzt den
Spindelantrieb nach unten, so dass das
Fenster richtig verschlossen ist und ziehen
(10 Nm) Sie dann die Schrauben vom
Klemmring fest.
7: Bitte überprüfen Sie, dass alle
Schrauben fest angezogen sind.
—Der elektrische Anschluss erfolgt
entsprechend der Dokumentation der
Steuerzentrale.
—Den Antrieb nie ohne entsprechende
Motorelektronik ansteuern.
—Der für die elektrische Bedienung
erforderlichen Zustand des Fensters ist
sicher zu stellen.
—Es wird empfohlen, die Fensterbeschläge
einmal im Jahr zu schmieren und zu
warten.
—Aus Sicherheitsgründen empfehlen wir an
Kippflügeln Fangscheren einzubauen.
— Spindlen kan fastgøres på flere måder.
Ved valg af montagemetode skal træk- og
trykkraft samt monteringsunderlag
vurderes.
—Under åbning og lukning af vinduet drejer
spindelmotoren om sit fastgørelsespunkt .
Der skal tages højde for dette ved
montage af beslag.
Såfremt motoren IKKE kan dreje frit under
åbning og lukning af vinduet, vil den blive
ødelagt.
—MONTAGE
1: Inden montage af spindlen skal det
sikres, at spindlen er kørt helt ind. Dette
gøres ved at tilsluttes spindelmotoren til
en egnet strømkilde og køre spindlen helt
ind til ende-stoppet.
2: Når spindlen er kørt helt i bund afbrydes
strømmen.
3: Ramme- og motorbeslag fastgøres
4: Fastgør klemringen i motorbeslaget.
5: Spindelhuset skubbes nedefra og op i
motorbeslaget og spindlen fastgøres med
rammebeslaget.
6: Træk (150-200N) nederst i spindlehuset
indtil vinduet er lukket rigtigt og stram
(10 Nm) motorbeslagets klemring.
7: Kontroller, at alle skruer er spændt
stramt.
—Den elektriske tilslutning udføres iht.
vejledningen for styreenheden
—Spindelmotoren må aldrig betjenes uden
den tilhørende styreenhed.
Sørg for, at vinduet er i en stand, der gør
—
det egnet til elektrisk betjening.
Det anbefales, at vinduets beslag smøres
—
mindst én gang årligt.
—Af hensyn til sikkerheden anbefales det
ved kipvinduer at montere
sikkerhedsbeslag.
Stroke
Hub
Slaglængde
(mm)
Length
Länge
Længde
L (mm)
300 671
500 871
750 1121
1000 1371
WMS 309 WMS 309M
Connection
Anschluss
Tilslutning
Connection
Anschluss
Tilslutning
br
br
wh/ws/hv
wh/ws/hv
Open
Auf
Åbn
-
-
+
+
gr NV-COMM
Installation/ Montage/ Montering
—The running direction of the actuators
(OPEN/CLOSED) changes as the motor
voltage polarity changes.
—Ensure that a min. 0.5 s delay is allowed
between the OPEN and CLOSED
commands.
—Ensure that the power supply of the
ventilation compact unit is such that the
start torque of the actuators can draw up
to four times the overall power for a short
period (min. 1 s) without the motor voltage
dropping below 24V/DC.
—Die Laufrichtung der Antriebe (AUF/ZU)
ändert sich mit der Umpolarisierung der
Motorspannung.
—Zwischen den AUF- und ZU-Befehlen muß
eine Verzögerung von min. 0,5 Sec
vorhanden sein.
—Die Stromversorgung der Zentrale muss
so ausgelegt sein, dass kurzzeitig (min. 1
Sec.), im Startmoment der Antriebe, der 4-
fache Gesamtstrom entnommen werden
kann, ohne dass die Motorspannung von
24V/DC unterschritten wird bzw. kurzzeitig
einbricht.
—Spindelmotorens løbsretning (ÅBN / LUK)
vendes, når polariteten på
motorspændingen vendes.
—Kontroller at der er en forsinkelse på 0,5s
mellem ÅBN- og LUK-kommandoen.
—Centralens strømforsyningen skal kunne
håndtere op til 4 gange startbelastningen
af spindelmotorerne i minimum 1s uden at
motorspændingen går under 24V DC eller
kortvarigt falder ud
UK
UK
D
D
DK
DK
NV-COMM:
Communikation from WEC xxM and WSC xxM
Kommunikation aus WEC xxM und WSC xxM
Kommunikation fra WEC xxM og WSC xxM
Connection / Anschluss / Tilslutning
Installation examples Montagebeispiele eksempler / / Monterings
UK: WLL Extension cable is available as a standard product and is to be ordered separately.
Observe the following wiring minimum dimensions (apply only to one window actuator).
When WMS 309is used in NV Advance™ controlsystem only max. 50m cable.
D: Als eine weiterführende Leitung/Verlängerung ist eine WLL Standardleitung lieferbar und
gesondert zu bestellen.
Bitte folgende Leitungsquerschnitte beachten (gilt nur für einen Antrieb).
Wenn WMS 309 im NV Advance™ Steuersystem genutzt wird - nur max. 50m Kabel benutzen.
DK: Forlængerledning kan leveres som standardvare (WLL kabel) og skal bestilles separat.
Følgende mindste tværsnit skal overholdes (gælder kun for én vinduesåbner).
Når WMS 309 anvendes i NV Advance™ styresystemer dog max. 50m kabel.
20m 40m 60m 95m
0,75 mm² 1,50 mm² 2,50 mm² 4,00 mm²
Up to / bis zu / op till
Dimensions
Querschnitt
tværsnit
UK: Notice the lenght and the working area of the spindle actuator
D: Achtung - Schwenkbereich sowie Einbautiefe beachten
DK: Vær opmærksom på spindlens længde og arbejdsområde
**
*
*
WSB 300 0011
WSB 300 0003
WAB 909 1370
WSB 300 0012
WSB 300 0002
WAB 909 1370
WSB 300 0012
WSB 300 0001

This manual suits for next models

1

Other WindowMaster Controllers manuals

WindowMaster WMS 409-n Service manual

WindowMaster

WindowMaster WMS 409-n Service manual

WindowMaster WMS 306 Manual

WindowMaster

WindowMaster WMS 306 Manual

WindowMaster WMX 814-n Service manual

WindowMaster

WindowMaster WMX 814-n Service manual

WindowMaster WMX 526 User manual

WindowMaster

WindowMaster WMX 526 User manual

WindowMaster WMS 309-n Service manual

WindowMaster

WindowMaster WMS 309-n Service manual

WindowMaster WMS 306 Manual

WindowMaster

WindowMaster WMS 306 Manual

WindowMaster MotorController WCC 310 Service manual

WindowMaster

WindowMaster MotorController WCC 310 Service manual

WindowMaster MotorController User manual

WindowMaster

WindowMaster MotorController User manual

WindowMaster WMS 306-n Service manual

WindowMaster

WindowMaster WMS 306-n Service manual

WindowMaster WMU 86x/88x-n User manual

WindowMaster

WindowMaster WMU 86x/88x-n User manual

WindowMaster WMU 836-n UL Service manual

WindowMaster

WindowMaster WMU 836-n UL Service manual

WindowMaster WCC 103 BT User manual

WindowMaster

WindowMaster WCC 103 BT User manual

WindowMaster WIC 01M User manual

WindowMaster

WindowMaster WIC 01M User manual

WindowMaster WSC 304 6102 User manual

WindowMaster

WindowMaster WSC 304 6102 User manual

WindowMaster WMX 523 Service manual

WindowMaster

WindowMaster WMX 523 Service manual

WindowMaster WMU 936-n User manual

WindowMaster

WindowMaster WMU 936-n User manual

WindowMaster WMU 836 03 User manual

WindowMaster

WindowMaster WMU 836 03 User manual

WindowMaster WSK 510 User manual

WindowMaster

WindowMaster WSK 510 User manual

WindowMaster WCC 103BT User manual

WindowMaster

WindowMaster WCC 103BT User manual

WindowMaster WCC 106 A User manual

WindowMaster

WindowMaster WCC 106 A User manual

WindowMaster MotorController WCC 310 UL Service manual

WindowMaster

WindowMaster MotorController WCC 310 UL Service manual

WindowMaster MotorController WCC 103 User manual

WindowMaster

WindowMaster MotorController WCC 103 User manual

WindowMaster WMS 409 Service manual

WindowMaster

WindowMaster WMS 409 Service manual

WindowMaster WMI 101 User manual

WindowMaster

WindowMaster WMI 101 User manual

Popular Controllers manuals by other brands

SyxthSense SYX66 Series Commissioning Guide

SyxthSense

SyxthSense SYX66 Series Commissioning Guide

Vacon 100 INDUSTRIAL user manual

Vacon

Vacon 100 INDUSTRIAL user manual

Grundfos BoosterpaQ PFU 2000 instructions

Grundfos

Grundfos BoosterpaQ PFU 2000 instructions

Victron energy BlueSolar MPPT 75/10 manual

Victron energy

Victron energy BlueSolar MPPT 75/10 manual

EASTHOUSE EM-1701A-C10 operating instructions

EASTHOUSE

EASTHOUSE EM-1701A-C10 operating instructions

ICD NeoGCP3 user manual

ICD

ICD NeoGCP3 user manual

Argus Cordex CXC How to connect

Argus

Argus Cordex CXC How to connect

Emerson Dixell XR75CX Series Installation and operation manual

Emerson

Emerson Dixell XR75CX Series Installation and operation manual

Springtree SM-8 User manual and installation guide

Springtree

Springtree SM-8 User manual and installation guide

Peak PAC4 Quick instruction guide

Peak

Peak PAC4 Quick instruction guide

SSS Siedle ATLC 670 Series Product information

SSS Siedle

SSS Siedle ATLC 670 Series Product information

Allen-Bradley CompactLogix 5370 L1 quick start

Allen-Bradley

Allen-Bradley CompactLogix 5370 L1 quick start

Eaton DILE Series instruction manual

Eaton

Eaton DILE Series instruction manual

THORLABS DRV001 user guide

THORLABS

THORLABS DRV001 user guide

Telwin CONVERTER 300 instruction manual

Telwin

Telwin CONVERTER 300 instruction manual

Sprinte ASP 116 evolution Installation & maintenance manual

Sprinte

Sprinte ASP 116 evolution Installation & maintenance manual

Air Torque EDITION 2010 DR/SC Installation, Maintenance and Operating Instruction Manual

Air Torque

Air Torque EDITION 2010 DR/SC Installation, Maintenance and Operating Instruction Manual

Aprilaire 8126 Installation and operation manual

Aprilaire

Aprilaire 8126 Installation and operation manual

manuals.online logo
manuals.online logoBrands
  • About & Mission
  • Contact us
  • Privacy Policy
  • Terms and Conditions

Copyright 2025 Manuals.Online. All Rights Reserved.