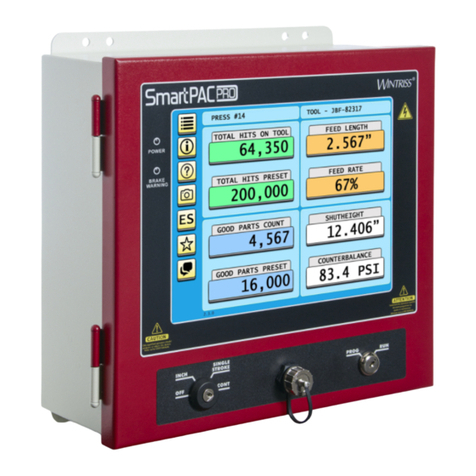
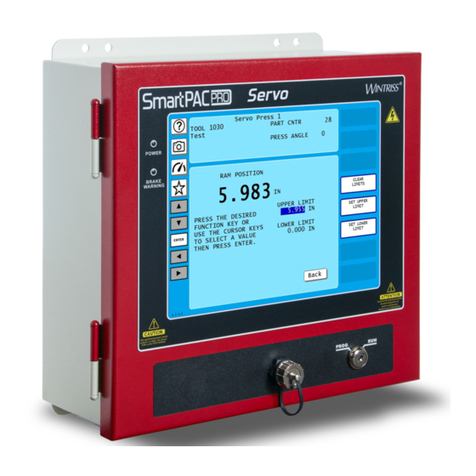
Wintriss SmartPAC User manual

Instruction Sheet April 2020 1145200
Upgrading from Original SmartPAC or SmartPAC 2 to SmartPAC PRO Revision A 1
Wintriss Controls Group 978-268-2700 toll free 800-586-8324
Instruction Sheet –Upgrading from
Original SmartPAC or SmartPAC 2 to
SmartPAC PRO
This document shows you how to replace your existing original SmartPAC (SmartPAC 1) or
SmartPAC 2 with SmartPAC PRO.
Refer to your SmartPAC PRO Installation Manual (1143200), as needed.
Checking That Mounting Location Can Accommodate SmartPAC PRO.......................................1
Recording SmartPAC Initialization Settings Before Upgrading .....................................................2
Backing Up the Tools on Your Existing SmartPAC........................................................................2
UsingtheSmartPAC2USBDiskBACKUP/RESTOREInstalledOptiontoBackUpTools...................3
Removing Your Existing SmartPAC...............................................................................................3
Mounting Your SmartPAC PRO .....................................................................................................4
MountingYourControl EnclosureSmartPACPRO.........................................................................................4
MountingYourPanelMountSmartPACPRO..................................................................................................4
Terminating Cable Shields...............................................................................................................4
Wiring Your SmartPAC PRO..........................................................................................................4
Restoring(Copying) ToolstotheSmartPACPRO.........................................................................................12
Appendix A –Backing Up Tools Using SmartPAC Backup and Restore (SBR)................................16
Installing SBR on Your Laptop .....................................................................................................17
Connecting Your Laptop to SmartPAC.........................................................................................18
Backing Up Tools..........................................................................................................................19
Responding to Errors That Interrupt Processing............................................................................25
Responding to a Checksum Error..................................................................................................27
Checking That Mounting Location Can Accommodate
SmartPAC PRO
The SmartPAC PRO control enclosure and panel mount are larger than the control enclosure and
panel mount models of original SmartPAC and SmartPAC 2.
Before you start the process of upgrading to a SmartPAC PRO, make sure the mounting location has
enough space. See your SmartPAC PRO Installation Manual for the space required to install
SmartPAC PRO, either control enclosure or panel mount, including clearance required in front of or
behind the mounting surface:
•Control enclosure: 18 in. (457 mm) clearance required in front of the mounting surface
•Panel mount: 6 in. (152 mm) clearance required behind the mounting surface
NOTICE
If the existing installation location provides insufficient space, find another location for the
SmartPAC PRO. Follow the guidelines in your SmartPAC PRO Installation Manual.

1145200 Upgrading from Original SmartPAC or SmartPAC 2 to SmartPAC PRO
2 Instruction Sheet
Recording SmartPAC Initialization Settings Before
Upgrading
NOTICE
Original SmartPAC or SmartPAC 2 Initialization settings cannot be restored to SmartPAC PRO
using SBR. Be sure to copy Initialization settings to a paper form or take photos before the backup
so you can enter them manually into SmartPAC PRO after you have restored the tool settings.
Also, delete any obsolete tools before backup.
Copy the following settings listed below to a paper form or take photos before the backup. You don’t
need to record settings for AutoSetPAC, WaveFormPAC, ProPAC, or RamPAC, since this
information is stored at the PAC.
•Position Sensor (If Installed): Enabled or Disabled
•Counter Setup Mode: Incremented in All Modes or Not Incremented in Inch Mode
•Press Name
•Brake Monitor: Stop and Start Time Limits
•Custom Cam Names
•Auto Advance Settings (If Used)
•Custom Sensor Names
•Sensor Enable Mode: Manual Enable, Auto by Tool, Auto by Sensor
•Setup Mode: Inch or Disabled
•Tool Information
•Security Access: All Settings
•Installed Options (if applicable): Settings for SFC (Set Communications), PM Monitor, SFI,
MultiPAC
You don’t need to record settings for AutoSetPAC, WaveFormPAC, ProPAC, or RamPAC (Note:
This information is stored at the PAC).
Backing Up the Tools on Your Existing SmartPAC
Use one of the methods below to back up (copy) the tool settings from your existing SmartPAC.
•If your existing unit is a SmartPAC 2 with the BACKUP/RESTORE installed option, back up
(copy) the tools onto a USB drive according to Using the SmartPAC 2 USB Disk
BACKUP/RESTORE Installed Option to Back Up Tools, below.
•If your existing SmartPAC is either an original SmartPAC or a SmartPAC 2 without the
BACKUP/RESTORE installed option, back up (copy) the tools onto a USB drive according to
Appendix A –Backing Up Tools Using SmartPAC Backup and Restore (SBR), page 16.

Upgrading from Original SmartPAC or SmartPAC 2 to SmartPAC PRO 1145200
Instruction Sheet 3
Using the SmartPAC 2 USB Disk BACKUP/RESTORE Installed
Option to Back Up Tools
NOTICE
These instructions require the SmartPAC 2 firmware to be V10.08 or higher and have the USB
Disk Backup as an installed option. If your unit does not have this installed option contact your
Wintriss Rep or Wintriss Customer Service department for upgrade and ordering information
(Installed USB Disk Backup - P/N 9679619).
NOTICE
Original SmartPAC or SmartPAC 2 Initialization settings cannot be restored to SmartPAC PRO. Be
sure to copy Initialization settings to a paper form or take photos before the backup (Recording
SmartPAC Initialization Settings Before Upgrading, above) so you can enter them manually into
SmartPAC PRO after you have restored the tool settings.
You should delete any obsolete tools before performing the backup.
Back up your tools on a USB disk using the BACKUP/RESTORE feature on the Initialization Menu.
Follow the instructions in Backing Up Tools to a USB Disk in Chapter 4 of your SmartPAC 2 User
Manual. After you back up the tool information to the USB disk, proceed with your SmartPAC PRO
upgrade.
Keep the USB drive in a safe place until ready to load into your SmartPAC PRO.
NOTICE
If you are upgrading an original SmartPAC or a SmartPAC 2 without the BACKUP/RESTORE
installed option, back up the tool information according to the instructions in Appendix A –Backing
Up Tools Using SmartPAC Backup and Restore (SBR), page 16.
Removing Your Existing SmartPAC
NOTICE
Before removing your existing original SmartPAC or SmartPAC 2, back up your tool data and
record the installation settings as described in Recording SmartPAC Initialization Settings Before
Upgrading, page2.
To uninstall your existing SmartPAC, follow these steps:
1. Mark cables and disconnect terminal blocks from the terminal block connectors. Remove from
your existing unit.
2. Remove and set aside in a safe place any PAC modules from your existing SmartPAC
3. Remove mounting fasteners and remove SmartPAC control enclosure or panel mount unit.

1145200 Upgrading from Original SmartPAC or SmartPAC 2 to SmartPAC PRO
4 Instruction Sheet
Mounting Your SmartPAC PRO
Mounting Your Control Enclosure SmartPAC PRO
Follow the instructions in your SmartPAC PRO Installation Manual for mounting the SmartPAC
PRO control enclosure.
Mounting Your Panel Mount SmartPAC PRO
Referring to your SmartPAC PRO Installation Manual, enlarge the cutout in your panel or console to
fit the SmartPAC PRO, making sure 6 in. (152 mm) clearance exists behind the panel.
Follow the instructions in your installation manual for mounting SmartPAC PRO panel mount.
Terminating Cable Shields
NOTICE
TERMINATE CABLE SHIELDS CORRECTLY TO MINIMIZE ELECTROMAGNETIC
INTERFERENCE (EMI)
Shielded cables are used with the SmartPAC PRO Servo. For effective shielding, terminate the
cable shields as near as possible to the terminal block you are wiring to.
NOTICE
TERMINATE BOTH ENDS OF SHIELD
Be sure to terminate cable shields at both ends (for example, at SmartPAC PRO Servo and DSI 2).
For each shielded cable, perform the following steps.
1. Strip the cable jacket back about 3 inches.
2. You can terminate the shield braid or drain wire to either a chassis ground stud or under the screw
on a PC board standoff. Find one of these as close as possible to the terminal block you are
wiring.
3. Connect the shield drain wire or braid to the chassis ground stud or beneath the screw in the PC
board standoff.
4. Connect the insulated wires to their designated positions on the terminal block.
Wiring Your SmartPAC PRO
Connect the wires you removed from your existing SmartPAC according to the appropriate wiring
table. Refer to the wiring diagrams at the end of your SmartPAC PRO Installation Manual.
•Table 1. Original SmartPAC to SmartPAC PRO Conversion Wiring, below
•Table 2. SmartPAC 2 to SmartPAC PRO Conversion Wiring, page 8
Refer to the wiring diagrams at the end of your SmartPAC PRO Installation Manual.

Upgrading from Original SmartPAC or SmartPAC 2 to SmartPAC PRO 1145200
Instruction Sheet 5
When you have completed making wiring connections, perform the procedures in Final Checkout in
your installation manual.
Table 1. Original SmartPAC to SmartPAC PRO Conversion Wiring
Original SmartPAC
SmartPAC PRO RTS
Signal Type
Connector
Pin
number
Connector
Pin number
Done
Main Power ** PS Module Plug
L1
TB101
201
Line
L1
L2
TB101
202
New
L2
Grd
TB101
203
Chas
Grd
Zero Cam
Z Cam
TB101
211
TB5
248
Input Check / Stop Circuit
A (input ck.)
TB101
205
TB4
205
B (input ck.)
TB101
206
TB4
206
E-STOP
TB101
207
TB4
207
E-STOP
TB101
208
TB4
208
T-STOP
TB101
209
TB4
209
T-STOP
TB101
210
TB4
210
Resolver Port
S1
TB106
213
TB3
213
S2
TB106
214
TB3
214
R1
TB106
215
TB3
215
S3
TB106
216
TB3
216
R2
TB106
217
TB3
217
S4
TB106
218
TB3
218

1145200 Upgrading from Original SmartPAC or SmartPAC 2 to SmartPAC PRO
6 Instruction Sheet
Original SmartPAC
SmartPAC PRO RTS
Signal Type
Connector
Pin
number
Connector
Pin number
Done
Position Sensor (if used)
+V
TB107
245
TB5
245
POS.
TB107
246
TB5
246
GRD.
TB107
247
TB5
247
WPC Port ( Integration only)
+RXD
TB104
219
TB8
327
-RXD
TB104
220
TB8
328
+TXD
TB104
221
TB8
329
-TXD
TB104
222
TB8
330
GRD.
TB104
223
TB8
326
Remote Dual Op Station Select (Optional Remote Reset Switch)
GRD.
TB202
256
TB5
Rem rest
TB202
257
TB5
249
Op Sta. 1
TB202
253
TB2 HMI
Bd 4
24vdc
Op Sta. 2
TB202
254
TB2 HMI
Bd 3
24vdc
WPC Adjustment Lockout Switch (Optional)
GRD.
TB202
256
TB5
247
Lockout
TB202
255
TB5
251
Remote Reset (Optional)
GRD.
TB203
258
TB5
247
Remote
Res.
TB203
257
TB5
249

Upgrading from Original SmartPAC or SmartPAC 2 to SmartPAC PRO 1145200
Instruction Sheet 7
Original SmartPAC
SmartPAC PRO RTS
Signal Type
Connector
Pin
number
Connector
Pin number
Done
AutoSetPAC / WaveFormPAC 2 or 4 Channel (Optional)
GRD.
TB102
240
TB6
240
+RXD2
TB102
241
TB6
241
-RXD2
TB102
242
TB6
242
+TXD2
TB102
243
TB6
243
-TXD2
TB102
244
TB6
244
SFI (Optional)
+RXD1
TB102
235
TB6
235
-RXD1
TB102
236
TB6
236
TXD1
TB102
237
TB6
237
+TXD1
TB102
238
TB6
238
-TXD1
TB102
239
TB6
239
GRD.
TB102
240
TB6
240
MultiPAC (Special Port - Optional)
+RXD3
TB103
224
TB7
224
-RXD3
TB103
225
TB7
225
TDX3
TB103
226
TB7
226
+TXD3
TB103
227
TB7
227
-TXD3
TB103
228
TB7
228
GRD.
TB103
229
TB7
229

1145200 Upgrading from Original SmartPAC or SmartPAC 2 to SmartPAC PRO
8 Instruction Sheet
Original SmartPAC
SmartPAC PRO RTS
Signal Type
Connector
Pin
number
Connector
Pin number
Done
PACNet (Optional)
GRD.
TB103
229
TB7
229
+RXD4
TB103
230
TB7
230
-RXD4
TB103
231
TB7
231
TXD4
TB103
232
TB7
232
+TXD4
TB103
233
TB7
233
-TXD4
TB103
234
TB7
234
NOTE: Connect all shields / ground wires to chassis ground
Table 2. SmartPAC 2 to SmartPAC PRO Conversion Wiring
SmartPAC 2
SmartPAC PRO RTS
Signal Type
Connector
Pin
number
Connector
Pin
number
Done
Main Power ** PS Module Plug
L1
Grey Plug
201
Line
L1
L2
Grey Plug
202
Neu
L2
Grd
Chas
Grd
Chas
Grd
Zero Cam
ZCam
TB107
248
TB5
248
Input Check / Stop Circuit
A (input ck.)
TB102
205
TB4
205
B (input ck.)
TB102
206
TB4
206
E-STOP
TB102
207
TB4
207
E-STOP
TB102
208
TB4
208
T-STOP
TB102
209
TB4
209
T-STOP
TB102
210
TB4
210

Upgrading from Original SmartPAC or SmartPAC 2 to SmartPAC PRO 1145200
Instruction Sheet 9
SmartPAC 2
SmartPAC PRO RTS
Signal Type
Connector
Pin
number
Connector
Pin
number
Done
Resolver Port
S1
TB101
213
TB3
213
S2
TB101
214
TB3
214
R1
TB101
215
TB3
215
S3
TB101
216
TB3
216
R2
TB101
217
TB3
217
S4
TB101
218
TB3
218
Shield
TB101
212
TB3
212
Position Sensor (if used)
+V
TB107
245
TB5
245
POS.
TB107
246
TB5
246
GRD.
TB107
247
TB5
247
WPC Port ( Integration only)
+RXD
TB105
327
TB8
327
-RXD
TB105
328
TB8
328
+TXD
TB105
329
TB8
329
-TXD
TB105
330
TB8
330
GRD.
TB105
326
TB8
326
Remote Dual Op Station Select (Optional Remote Reset Switch)
GRD.
TB107
256
TB5
Rem rest
TB107
257
TB5
249
Op Sta. 1
TB107
254
TB2 HMI
Bd 4
24vdc
Op Sta. 2
TB107
253
TB2 HMI
Bd 3
24vdc

1145200 Upgrading from Original SmartPAC or SmartPAC 2 to SmartPAC PRO
10 Instruction Sheet
SmartPAC 2
SmartPAC PRO RTS
Signal Type
Connector
Pin
number
Connector
Pin
number
Done
WPC Adjustment Lockout Switch (Optional)
GRD.
TB107
250
TB5
247
Lockout
TB107
251
TB5
251
Remote Reset (Optional)
GRD.
TB107
250
TB5
247
Remote Res.
TB107
249
TB5
249
AutoSetPAC / WaveFormPAC 2 or 4 Channel (Optional)
GRD.
TB103
240
TB6
240
+RXD2
TB103
241
TB6
241
-RXD2
TB103
242
TB6
242
+TXD2
TB103
243
TB6
243
-TXD2
TB103
244
TB6
244
SFI (Optional)
+RXD1
TB103
235
TB6
235
-RXD1
TB103
236
TB6
236
TXD1
TB103
237
TB6
237
+TXD1
TB103
238
TB6
238
-TXD1
TB103
239
TB6
239
GRD
TB103
240
TB6
240

Upgrading from Original SmartPAC or SmartPAC 2 to SmartPAC PRO 1145200
Instruction Sheet 11
SmartPAC 2
SmartPAC PRO RTS
Signal Type
Connector
Pin
number
Connector
Pin
number
Done
MultiPAC (Special Port - Optional)
+RXD3
TB104
224
TB7
224
-RXD3
TB104
225
TB7
225
TXD3
TB104
226
TB7
226
+TDX3
TB104
227
TB7
227
-TDX3
TB104
228
TB7
228
GRD.
TB104
229
TB7
229
PACNet (Optional)
GRD.
TB104
229
TB7
229
+RXD4
TB104
230
TB7
230
-RXD4
TB104
231
TB7
231
TXD4
TB104
232
TB7
232
+TXD4
TB104
233
TB7
233
-TXD4
TB104
234
TB7
234
NOTE: Connect all shields / ground wires to chassis ground

1145200 Upgrading from Original SmartPAC or SmartPAC 2 to SmartPAC PRO
12 Instruction Sheet
Restoring (Copying) Tools to the SmartPAC PRO
Follow the steps below to restore your original SmartPAC or SmartPAC 2 tools to the SmartPAC
PRO that you previously backed up (copied) to a USB disk.
1. Insert the USB disk into the SmartPAC PRO USB connector on the front of the unit. When the
“USB disk has been inserted” message appears, press Cancel (Figure 1).
Figure 1. “USB Disk Detected” Message
2. Press Advanced (Figure 2).
Figure 2. Backup and Restore Utility Menu Advanced

1145200 Upgrading from Original SmartPAC or SmartPAC 2 to SmartPAC PRO
14 Instruction Sheet
5. Press the tool file you want (Figure 5).
Figure 5. Select a File Below
6. Tools that are checked will be restored to the SmartPAC PRO. Uncheck any of the tools you do
not want restored. Then press Convert to Spro (Figure 6).
Figure 6. Convert to Spro

Upgrading from Original SmartPAC or SmartPAC 2 to SmartPAC PRO 1145200
Instruction Sheet 15
7. The conversion process and restoring of your tools to the SmartPAC PRO takes only a moment to
complete. When you see the Conversion completed! message (Figure 7), press Exit. Then
navigate to the Tool Manager in Program Menu and verify that the tools have been restored.
Figure 7. Conversion completed! Message
8. Re-enter into the SmartPAC PRO all relevant Initialization data that you copied or took photos of
before starting your upgrade.
9. Load a tool and make any adjustments, if necessary, to operate the press.

1145200 Upgrading from Original SmartPAC or SmartPAC 2 to SmartPAC PRO
16 Instruction Sheet
Appendix A –Backing Up Tools Using
SmartPAC Backup and Restore (SBR)
This appendix shows you how to install the SmartPAC Backup and Restore (SBR) utility and use it to
back up (copy) up to 200 tools from your original SmartPAC or SmartPAC 2 onto a USB drive. After
you install your SmartPAC PRO, copy the tools from the USB drive to the SmartPAC PRO, as
described in Restoring (Copying) Tools to the SmartPAC PRO, page 12.
In order to use SBR, you must be running original SmartPAC or SmartPAC 2 with SBR/PACNet or
LETS as an installed option.
This appendix is organized in the following sections:
Installing SBR on Your Laptop, page 17
Connecting Your Laptop to SmartPAC, page 18
Backing Up Tools, page 19
Responding to Errors That Interrupt Processing, page 25
Responding to a Checksum Error, page 27
NOTICE
ORIGINAL SMARTPAC (SMARTPAC 1) FIRMWARE AND INSTALLED OPTION
REQUIREMENTS
SBR requires your original SmartPAC firmware to be version 7.95 or above (see the next NOTICE)
and have one of the following installed options:
•PACNet/RST
•SFC/LETS
•Third-party communications
NOTICE
FOR ORIGINAL SMARTPAC (SMARTPAC 1): KNOW THE FIRMWARE VERSION NUMBER
BEFORE CONTACTING YOUR WINTRISS REPRESENTATIVE.
Your Wintriss representative needs to know the firmware version number of your original
SmartPAC. Find the version number on the List of Installed Options screen in Initialization.
Firmware versions 7.95 and earlier reside on a 4 MB board; versions 7.95 and later are on an 8 MB
board. An 8 MB board is required to access PACNet/RSR for backing up your tool settings.
Firmware versions 7.95 and earlier will NOT work with the 8MB board, which must have current
firmware (i.e., versions later than 7.95) with or without SFI. In order to allow backup of original
SmartPAC data, the 8 MB board must also have the PACNet/RSR option installed.
The procedure for converting from a 4 MB to an 8 MB board must be followed exactly. When
SmartPAC displays the message “IF YOU HAVE JUST UPDATED THE FIRMWARE IN THIS
SMARTPAC, PRESS THE ENTER KEY TO SHIFT THE TOOL NUMBER TABLES,” make sure to
press ENTER to have the conversion work properly. Once converted to an 8 MB board, your
original SmartPAC cannot use the 4 MB board again.

Upgrading from Original SmartPAC or SmartPAC 2 to SmartPAC PRO 1145200
Instruction Sheet 17
Installing SBR on Your Laptop
NOTICE
YOU MAY NEED ADMINISTRATOR PRIVILEGES TO INSTALL SBR ON SOME SYSTEMS
On some Windows operating systems, you may need Administrator privileges to install SBR.
SBR is compatible with the Windows 10 operating system. To install the software on your laptop or
other computer, do the following:
1. Download the SBR files you receive from Wintriss Customer Service.
NOTICE
CLOSE ALL APPLICATIONS BEFORE STARTING INSTALLATION
If other applications are running on your computer during execution of the SBR installation
program, SBR may not install successfully. Make sure to close all applications on your computer
before launching the installation program.
2. Open the SBR Install Package folder, and click on the Setup icon.
3. When a screen with the message “Welcome to the SBR Install installation program” displays,
click on OK. The screen shown in Figure A - 1 displays.
Figure A - 1. SBR Begin Installation Screen
4. Click on the large button at upper left on the SBR Begin Installation screen (see Figure A - 1) if
you want SBR installed in the destination directory shown in the Directory: field in the lower half
of the screen. The Choose Program Group screen, shown in Figure A - 2, displays.
NOTICE
If you want to specify a different directory for the SBR software installation, click on Change
Directory, navigate to the directory you want in the “Directories:” window on the Change Directory
screen, and click on OK. Then click on the large button in the top half of the Begin Installation
screen.

1145200 Upgrading from Original SmartPAC or SmartPAC 2 to SmartPAC PRO
18 Instruction Sheet
Figure A - 2. SBR Install –Choose Program Group Screen
5. Click on Continue if you want SBR installed in the group shown in the “Program Group:”
window (“SBR” is the default entry).
If you want to specify a different Program Group name, select an item in the “Existing Groups:”
window by clicking on it, or type a new entry in the “Program Group:” window, then click on
Continue.
6. A screen displays briefly, showing the progress of the installation, followed by a screen
displaying the message “SBR Install Setup was completed successfully.” Click on OK to return
to your desktop.
Connecting Your Laptop to SmartPAC
ELECTRIC SHOCK HAZARD
Before making any wiring connections turn off and disconnect power from the SmartPAC you are
backing up and from the machinery it is connected to.
Failure to comply with these instructions could result in death or serious injury.
CAUTION
DAMAGE TO BOARD FROM STATIC DISCHARGE
Ground yourself before touching circuit boards or chips by touching a large metal object such as
the press. Static electricity can destroy electronic components.
Failure to comply with these instructions could result in property damage.
To establish communications between your laptop and the SmartPAC you wish to back up, you need
to connect the computer’s serial port to the communications port on the SmartPAC. The
communications port is labelled TB103 on original SmartPAC, TB104 on SmartPAC 2. To make the
connection, use an SBR cable (Wintriss part #4199105) with a 9-pin DB-9 female connector at one

Upgrading from Original SmartPAC or SmartPAC 2 to SmartPAC PRO 1145200
Instruction Sheet 19
end to plug into the serial port on the laptop and an 11 pin Phoenix connector at the other end to plug
into TB103 or TB104 on the SmartPAC.
NOTICE
If your laptop does not have a serial port or the serial port is not configured with 9 pins, you will
have to use a serial adapter to connect to the SmartPAC. Older adapters may not be compatible
with Windows 10. Contact Wintriss Tech Support for help or more information about the serial
adapter.
To connect your laptop to a SmartPAC, using the SBR cable, do the following:
1. With your laptop and SmartPAC both turned off, plug the Phoenix connector at one end of the
cable into TB103 on the original SmartPAC board or TB104 on the SmartPAC 2 board. The
connector can be inserted in only one orientation.
2. Plug the DB-9 connector at the other end of the cable into your computer’s serial port.
NOTICE
If you are using a serial converter, plug the DB-9 connector into the mating DB-9 connector on the
adapter. Plug the other end of the adapter into a USB port on your laptop.
3. Turn on power at the SmartPAC, and turn on the laptop.
Backing Up Tools
To back up tools from an original SmartPAC or SmartPAC 2, do the following:
1. On your existing SmartPAC, check to make sure the CPU number in the communications menu is
set to 1:
Original SmartPAC: “CPU NUMBER = 1”
See Communications (optional) in Chapter 4 - Initialization Mode of your original SmartPAC
manual
SmartPAC 2: “RSR/SBR CPU NUMBER = 1”
See SETUP DATA COMMS (Optional) in Chapter 4 - Initialization Mode of your SmartPAC
2 manual
2. With the SmartPAC control turned on and the laptop wired to the control (see previous section),
launch the SBR program by clicking on Start | Programs | SBR (or the Program Group you
specified during installation) | SBR. The SBR Startup screen displays briefly, then a screen with
the caption “SBR” followed by the SBR version number displayed on the title bar appears.
3. Click on File | Settings on the SBR screen. The SBR Settings screen with the General tab selected
displays (see Figure A - 3).

1145200 Upgrading from Original SmartPAC or SmartPAC 2 to SmartPAC PRO
20 Instruction Sheet
Figure A - 3. SBR Settings Screen, General Tab
4. If you want to change the disk location to which tools will be backed up (the default is
“C:\Wintriss”), click on Browse to the right of the “Tool Storage Path:” field on the General tab,
then navigate to the folder you want on the Browse for Folder screen, and click on OK. You are
returned to the General tab with the folder you selected displayed in the “Tool Storage Path:”
window.
5. Make sure that the Use PC radio button is selected in the Backup/Restore Initiation Method field
and the Serial radio button is selected in the Communication Method field. These are the default
settings. If Use PC and Serial are not selected, select them.
6. Click Apply.
If you have selected “C:\Wintriss” as the backup destination and no folder by that name exists on
your computer, a screen will display asking if you want to create that folder. Click on OK to
create the folder.
7. Click on the SmartPACs tab.
8. Click Add (see Figure A - 5). The Add SmartPAC screen displays (see Figure A - 4), on which
you enter identification information about the SmartPAC you are backing up. Information must
be entered in all fields.
This manual suits for next models
2
Table of contents
Other Wintriss Controllers manuals
Popular Controllers manuals by other brands

Carson
Carson SPEED 11T operating instructions

Advantage Controls
Advantage Controls MegaTronMT manual

RLE Technologies
RLE Technologies SeaHawk LD300 quick start guide

Evco
Evco EVFTFT219 installation guide

MODELTRENO
MODELTRENO Intellibox operating manual

Siemens
Siemens Flowrite 599 Series installation instructions