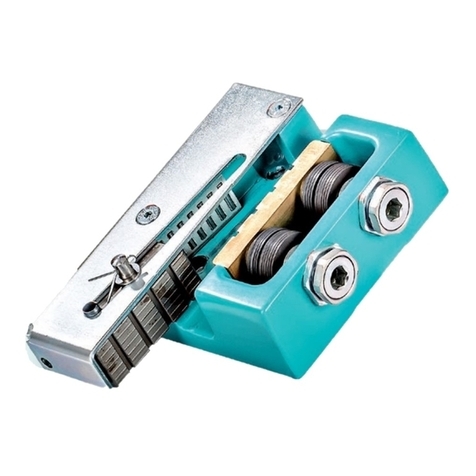
WITTUR Duplex SGB03 User manual

OPERATING INSTRUCTION
SGB03 - Duplex
Progressive Type Safety Gear
© Copyright WITTUR 2016
Code PM.7.000115.EN
E
07.08.2020
Ve sion
Date
www.wittur.com
O iginal Inst uction
No pa t of this publication may be ep oduced o t anslated, even in pa t, without p io w itten pe mission f om
WITTUR. Subject to change without notice!
Product manufacturer reference can be found on
the product type label. For any support or further
questions please contact your trading office.
*D7A5MGB$111*

Contents Page
1 General information prior to installation
1.1 Description and functions . . . . . . . . . . . . . . . . . . . . . . . . . . . . . . . . . . . . . . . . . . . . . . . . . . . . . . .2
1.2 Liability and guarantee . . . . . . . . . . . . . . . . . . . . . . . . . . . . . . . . . . . . . . . . . . . . . . . . . . . . . . . . . .3
1.3 Safety precautions . . . . . . . . . . . . . . . . . . . . . . . . . . . . . . . . . . . . . . . . . . . . . . . . . . . . . . . . . . . . .3
1.4 Preparation . . . . . . . . . . . . . . . . . . . . . . . . . . . . . . . . . . . . . . . . . . . . . . . . . . . . . . . . . . . . . . . . . . . .4
1.5 Advice for when working on safety components . . . . . . . . . . . . . . . . . . . . . . . . . . . . . . . . . . . .4
1.6 Content of supply . . . . . . . . . . . . . . . . . . . . . . . . . . . . . . . . . . . . . . . . . . . . . . . . . . . . . . . . . . . . . .5
1.6.1 Safety gear . . . . . . . . . . . . . . . . . . . . . . . . . . . . . . . . . . . . . . . . . . . . . . . . . . . . . . . . . . . . .5
1.6.2 Safety gear with housing and separate synchronization . . . . . . . . . . . . . . . . . . . . . . .5
1.6.3 Safety gear with housing and integrated synchronization . . . . . . . . . . . . . . . . . . . . . .6
2 ame plate, designation, identification
2.1 Labelling according to EN81 (CE) and B7588 (China) . . . . . . . . . . . . . . . . . . . . . . . . . . . . . . .7
2.2 Labelling according to ASME A17.1 . . . . . . . . . . . . . . . . . . . . . . . . . . . . . . . . . . . . . . . . . . . . . . .8
2.3 Labelling according to Notification No. 2010-0009 (Korea) . . . . . . . . . . . . . . . . . . . . . . . . . . .8
3 Installation and adjustment
3.1 ripping wedge synchronization and adjustment . . . . . . . . . . . . . . . . . . . . . . . . . . . . . . . . . . .9
3.2 Alignment of safety gear housing . . . . . . . . . . . . . . . . . . . . . . . . . . . . . . . . . . . . . . . . . . . . . . . .11
3.3 Assembling and adjustment of housing and synchronization . . . . . . . . . . . . . . . . . . . . . . . . .13
3.3.1 Safety gear with housing and separate synchronization . . . . . . . . . . . . . . . . . . . . . . .13
3.3.2 Safety gear with housing and integrated synchronization . . . . . . . . . . . . . . . . . . . . . .15
3.4 Electrical installation of the safety gear contact . . . . . . . . . . . . . . . . . . . . . . . . . . . . . . . . . . . .17
3.4.1 Safety gear contact . . . . . . . . . . . . . . . . . . . . . . . . . . . . . . . . . . . . . . . . . . . . . . . . . . . . . .17
4 Function testing
4.1 Static functions test . . . . . . . . . . . . . . . . . . . . . . . . . . . . . . . . . . . . . . . . . . . . . . . . . . . . . . . . . . . .19
4.2 Dynamic functions test . . . . . . . . . . . . . . . . . . . . . . . . . . . . . . . . . . . . . . . . . . . . . . . . . . . . . . . . .20
4.2.1 ripping test for car safety gear . . . . . . . . . . . . . . . . . . . . . . . . . . . . . . . . . . . . . . . . . . .20
4.2.2 ripping test for counterweight safety gear . . . . . . . . . . . . . . . . . . . . . . . . . . . . . . . . .21
4.2.3 Required check after gripping tests . . . . . . . . . . . . . . . . . . . . . . . . . . . . . . . . . . . . . . . . .22
4.2.4 Visual checks after a safety gear test . . . . . . . . . . . . . . . . . . . . . . . . . . . . . . . . . . . . . . .22
4.3 ripping distance . . . . . . . . . . . . . . . . . . . . . . . . . . . . . . . . . . . . . . . . . . . . . . . . . . . . . . . . . . . . . .23
4.3.1 Measuring of gripping distance . . . . . . . . . . . . . . . . . . . . . . . . . . . . . . . . . . . . . . . . . . . .23
4.3.2 Check of gripping distance “s” . . . . . . . . . . . . . . . . . . . . . . . . . . . . . . . . . . . . . . . . . . . .23
5 Maintenance, inspection and repair
5.1 Maintenance and inspection . . . . . . . . . . . . . . . . . . . . . . . . . . . . . . . . . . . . . . . . . . . . . . . . . . . . .24
5.1.1 eneral . . . . . . . . . . . . . . . . . . . . . . . . . . . . . . . . . . . . . . . . . . . . . . . . . . . . . . . . . . . . . . . .25
5.1.2 Maintenance and inspection check list . . . . . . . . . . . . . . . . . . . . . . . . . . . . . . . . . . . . . .25
5.1.3 Cleaning of guide rails . . . . . . . . . . . . . . . . . . . . . . . . . . . . . . . . . . . . . . . . . . . . . . . . . . .25
5.2 Returning tests . . . . . . . . . . . . . . . . . . . . . . . . . . . . . . . . . . . . . . . . . . . . . . . . . . . . . . . . . . . . . . . .25
5.3 Operational life time of the safety gears . . . . . . . . . . . . . . . . . . . . . . . . . . . . . . . . . . . . . . . . . . .26
5.4 Carrying out repairs . . . . . . . . . . . . . . . . . . . . . . . . . . . . . . . . . . . . . . . . . . . . . . . . . . . . . . . . . . . .26
5.5 Disposal of Material . . . . . . . . . . . . . . . . . . . . . . . . . . . . . . . . . . . . . . . . . . . . . . . . . . . . . . . . . . . .26
5.6 Spare parts list . . . . . . . . . . . . . . . . . . . . . . . . . . . . . . . . . . . . . . . . . . . . . . . . . . . . . . . . . . . . . . . . .27
5.6.1 Safety gear with housing and separate synchronization . . . . . . . . . . . . . . . . . . . . . . .27
5.6.2 Safety gear with housing and integrated synchronization . . . . . . . . . . . . . . . . . . . . . .28
A EX A
Progressive Type Safety Gear
SGB03 - Duplex
Operating instructions
Blatt/
sheet
D7A5M B.001
Datum/
date
16.03.2002
Stand/
version
E-07.08.2020
eprüft/
approved
WAT/KKR
Änderungen vorbehalten! Subject to change without notice!
E
E
E
E
E

1.1 Description and functions
The progressive type safety gear S B03 is a combination
of c-type springs, frame and friction elements, which are
activated by a movable activating wedge. The braking
force is variable by means of an adjustable counter wedge.
The basic function of the safety gear is, if the lift car
exceeds its rated speed upon descent, the overspeed gov-
ernor cuts in when its tripping speed is reached and trig-
gers the safety gear on the lift car via the governor rope.
The lift car is brought to a standstill and clamps onto the
guide rails.
The setting is carried out in the factory (according to the
load and rail conditions) and sealed. Later adjustments will
not be necessary and are in any case prohibited for safety
reasons.
The progressive safety gear is released by lifting the car.
This returns the clamped brake wedge to its initial posi-
tions.
The operating range is defined as follows:
• max. elevator speed [v]
2,50 m/s
• width of guide rail head [k]
15,88 - 31,75 mm
• min. mass to be gripped [Fmin]
8.100 kg
• max. mass to be gripped [Fmax]
17.692 kg
• max. tripping force of the overspeed governor
2350 N
• temperature during operation
-20 ... +50°C
• temperature during storage
-40 ... +70°C
• max. air humidity
95% / +25°C
93% / +40°C
Progressive Type Safety Gear
SGB03 - Duplex
Operating instructions
Blatt/
sheet
D7A5M B.002
Datum/
date
16.03.2002
Stand/
version
E-07.08.2020
eprüft/
approved
WAT/MZE
Änderungen vorbehalten! Subject to change without notice!
1 General information prior to installation
k=19-31,75 mm k=15,88; 16 mm
1. ripping wedge 8. Hexagon castle nut
2. Transport roller 9. Split pin
3. Counter wedge 10. Lead seal
4. Adjustment screw 11. Fixing for lever
5. Resetting spring 12. Lifting rod
6. Locking nut 13. Distancer bushing
7. Spring washer
Care must be taken that there is no ice
on the guide rails during normal run!
E

1.2 Liability and guarantee
This operating manual is written for people who
are familiar with lift servicing and installation.
Sufficient knowledge of lifts is essential.
WITTUR does not take responsibility for damage
caused by improper handling, or for damage
caused as a result of actions other than those stat-
ed in these operating instructions.
The WITTUR guarantee may be voided if parts
other than those described in these instructions
are installed.
Unless stated otherwise, the following is not per-
missible due to technical safety reasons:
• The use of components other than those
installed
• Carrying out modifications, of any kind on the
safety gear
• Installing two different brake heads with dif-
ferent index numbers together
• Destruction of the lead seal
If the lead seal is shacked, the complete set of
safety gears has to be replaced.
• Combining different component
types
• Installing progressive safety gears intended for
other employment than that stipulated
• Carrying out faulty or improper maintenance
or inspection checks
• Using unsuitable accessories, spare parts or
operating material which has neither been re-
leased by the WITTUR Company nor consists of
original WITTUR spare parts
1.3 Safety precautions
Installers and servicing personnel are fundamen-
tally responsible for their safety while working.
The monitoring and following of all valid safety
rules and legal conditions is required in order to
prevent personal injury and damage to materials
during installation, maintenance and repair work.
This refers especially to the corresponding accident
prevention rules.
Important safety advice and danger warnings are
emphasized with the following symbols:
eneral danger warning
High danger risk warning (i.e. crushing
edge, cutting edge etc.).
Risk of damage to machinery parts (i.e. due
to incorrect installation, or such like).
Important information sign
These operating instructions belong with the
whole installation and must be kept in a safe place
at all times (i.e. machine room).
The proper assembly and installation of WITTUR
safety gears requires correspondingly well trained
fitting engineers. The responsibility of training lies
with the company appointed to carry out the
work.
Progressive Type Safety Gear
SGB03 - Duplex
Operating instructions
Änderungen vorbehalten! Subject to change without notice!
Blatt/
sheet
D7A5M B.003
Datum/
date
16.03.2002
Stand/
version
C-31.01.2011
eprüft/
approved
WAT/MZE

Before starting installation work:
Only properly trained personnel may carry
out work, or be allowed access to the
installation site.
- Attach safety devices to guard against falling
(platform or harnesses)
- Cover any floor openings
- Secure installation tools or objects against
accidental falling
- Lift shaft openings should be cordoned off
and suitable warning signs should be erected
when working in shaft openings
- Work involving electrical equipment should
only be carried out by an electrical engineer or
qualified personnel.
1.4 Preparation
Before beginning installation work it is in your
own interest to ascertain the constructional and
spatial conditions. Where (workshop or on site)
and when which installation operations can or
must be carried out. It is therefore recommended
to take all the given circumstances into account
and to plan the various operational sequences in
advance, rather than carrying them out prema-
turely and in an unconsidered manner.
On the receipt of the delivery the goods or com-
ponents should be checked for correctness and
completeness with the order sheet.
The following should be checked also:
- the factory and order number must correspond
- the details on the name plate must correspond
to those on the order
- the elevator speed
- the width and type of guide rail used
- the total load (mass to be gripped)
1.5 Advice for when working on
safety components
Safety gears are classified as safety components. It
is most important that the standards and guide-
lines described in this section are complied with as
well as those given in the rest of this operating
manual.
These instructions, and especially the sec-
tion on safety precautions, should be read
and fully understood before work begins.
Safety devices require special attention. It is com-
pulsory that they function perfectly to ensure
danger free installation operation.
Safety devices that can only be adjusted after
installation should be done so immediately after
installation.
Operation of safety devices installed ex-works
must be tested immediately.
If it is necessary to disassemble a safety device
during servicing or repair, they should be reassem-
bled and checked with the required tests, as soon
as the work has been carried out.
Progressive Type Safety Gear
SGB03 - Duplex
Operating instructions
Blatt/
sheet
D7A5M B.004
Datum/
date
16.03.2002
Stand/
version
C-31.01.2011
eprüft/
approved
WAT/MZE
Änderungen vorbehalten! Subject to change without notice!

1.6 Content of supply
1.6.1 Safety gear
After delivery, check the saftey gear for damage
and for full delivery of parts. The content of sup-
ply covers:
- Operating instructions manual
- Two left handed and two right handed safety
gears incl. housing and lifting rod (adjusted
and sealed at the factory)
- Optional synchronization incl.
safety gear switch and
governor rope fixing
1.6.2 Safety gear with housing and separate
synchronization
After delivery, check the saftey gear for damage
and for full delivery of parts. The content
of supply covers:
- Operating instructions manual
- Two left handed and two right hand-
ed safety gears (pre-adjusted and
sealed at the factory)
- Safety gear housing (pre-assembled)
- Synchronization incl. safety gear
switch and govenor rope fixing
- Mounting- and fixing screw-pack-
ages
Progressive Type Safety Gear
SGB03 - Duplex
Operating instructions
Blatt/
sheet
D7A5M B.005
Datum/
date
16.03.2002
Stand/
version
E-07.08.2020
eprüft/
approved
WAT/KKR
Änderungen vorbehalten! Subject to change without notice!
Safety gear switch
Housing
Lifting rod
Synchronization rod
Housing
overnor rope fixing
E

After delivery, check the saftey gear for damage
and for full delivery of parts. The content of sup-
ply covers:
- Operating instructions manual
- Two left handed and two right handed safety
gears (pre-adjusted and sealed at the factory)
- Safety gear housing and synchronization lever
incl. saftey gear switch (pre-assembled)
- Synchronization linkage and govenor rope
fixing
- Mounting- and fixing screw-packages
Progressive Type Safety Gear
SGB03 - Duplex
Operating instructions
Blatt/
sheet
D7A5M B.006
Datum/
date
16.03.2002
Stand/
version
E-07.08.2020
eprüft/
approved
WAT/KKR
Änderungen vorbehalten! Subject to change without notice!
1.6.3 Safety gear with housing and
integrated synchronization
Safety gear
Safety gear housing
Synchronization lever
Safety gear switch
E

The safety gear identification indicators are locat-
ed on the side of the safety gear housing.
2.1 Labelling according to E 81 (CE)
and GB7588 (China)
These consist of a name plate and a identification
sticker which give following data:
Progressive Type Safety Gear
SGB03 - Duplex
Operating instructions
Blatt/
sheet
D7A5M B.007
Datum/
date
16.03.2002
Stand/
version
D-11.04.2016
eprüft/
approved
WAT/MZE
Änderungen vorbehalten! Subject to change without notice!
2 ame plate, designation, identification
!
"
#
$%&
#
'
#
#
" '"
"
$%&
'
(
"
(
)
)
*
&*
&
+,-
.
/-
01/-
&&&&&&&&&&&&&&&
&&&&&&&&&&&&&&&
2
!.
.
.
.
3.
.
&&&&&&&&&&&&&&&
3.
"
*
&
&
.
!
#
#$%&
'
.
#
#
( '
$%&
" '
"
)
*
)
.
.
!.
(
"
"
&&&&&&&&&&&&&&&
01/-
/-
2
4(5
+,-
.
/-
*6
6((3%
2
.
47#%%4 80'#
9:44;<%;4<:%(2
!
Tripping speed
Vmax (m/s, fpm)
Mass to be gripped
Fmax (kg, lb)
Serial number
Order number /
Elevator number
(refer to delivery or order
sheet)
Type term of safe-
ty gear
Date of manufacture
Identification label
according EN81 (CE)
Elevator nominal speed
V (m/s, fpm)
adjustement value
a (mm)
uide rail head width
k (mm) uide rail conditions
Type A (drawn)
Type B (machined)
oiled / dry
Type-examination num-
ber acc. to EN81 or CTE
and CE-label
Identification label
according B7588

!
"
"
# $
%$#
& #$
%
$ &$
%
'$$
&&($
)*++,-./
0+12
3$$'.3
2
2
450
$($6$#63
7.8$
2
!
!
3$(3/$(
79:
7
4
49:
Tripping speed
Vmax (m/s, fpm)
Mass to be gripped
Fmax (kg, lb)
Serial number
Order number /
Elevator number
(refer to delivery or order
sheet)
Type term of safe-
ty gear
Date of manufacture
Elevator nominal speed
V (m/s, fpm)
adjustement value
a (mm)
uide rail head width
k (mm)
uide rail conditions
drawn (Type A)
machined (Type B)
oiled / dry
Type-examination
number
2.2 Labelling according to ASME
A17.1
For ASME A17.1 the same identification label as
used for EN81 and CTE is included in the delivery.
The name plate is according ASME A17.1 require-
ments which gives following data:
2.3 Labelling according to
otification o. 2010-0009
(Korea)
For Notification No. 2010-0009 (Korea) one label
including all required values is used which gives
following data:
Progressive Type Safety Gear
SGB03 - Duplex
Operating instructions
Blatt/
sheet
D7A5M B.008
Datum/
date
16.03.2002
Stand/
version
E-07.08.2020
eprüft/
approved
WAT/MZE
Änderungen vorbehalten! Subject to change without notice!
Type term of safe-
ty gear
Mass to be gripped
Fmax (kg, lb) required force to
activate the safety gear
(N, lbf)
Tripping speed
Vmax (m/s, fpm)
E

3.1 Gripping wedge synchronization
and adjustment
After installation of the car frame and the guides,
the correct centering and adjustment of the safe-
ty gear with regard to the rails has to be done.
When mounting the safety gear, observe
the position of the overspeed governor
rope. The position of the lifting lever of the
rope at the safety gear cannot be changed
if the safety gear is built in.
(1) Slacken nuts (1) and (2). The springs (3) have
to be completely loosened and the fixing links
(4) of both safety gears have to rest against
the spring block (5).
(2) Screw in the two nuts (2) against the spring
(3) and then compress the springs with a fur-
ther 1.5 turns of each nut.
The compression is correct if the distance
between the ends of the springs is approx-
imately 155 mm, respectively 165 mm (see
figure above).
Progressive Type Safety Gear
SGB03 - Duplex
Operating instructions
Änderungen vorbehalten! Subject to change without notice!
3 Installation and adjustment
Blatt/
sheet
D7A5M B.009
Datum/
date
16.03.2002
Stand/
version
C-31.01.2011
eprüft/
approved
WAT/MZE
4
5
0
>0
4
5
0
(1-7)
upper safety gear
lower safety gear
k=19-31,75 mm k=15,88; 16 mm

(3) Tighten the counter nuts (1).
(4) Slacken the nut (7), turn the lifting rod (6) and
adjust its length so that the fixing link (4) of
the upper safety gear projects approximately
1mm above the spring block.
The fixing link of the lower safety gear is to
remain in contact with its spring block.
(5) Tighten the locking nut (7).
(6) Check the position of the distancer bushing (8)
and adjust it if necessary (distance 150mm),
see figure above.
(7) Adjust the lifting rod on the opposite safety
gear in the same way.
Adjust the synchronization in accordance
with the instructions for the car frame or
the counter weight safety gear (see also
chapter 3.3).
(8) Activate the synchronization by hand and
check that both safety gears are activated at
the same time.
(9) Check the horizontal movement of the safety
gear to be sure that the counter wegde (2) is
able to access the guide rail when the safety
gear is activated.
(10)Check the horizontal adjustment of the grip-
ping wedge.
Progressive Type Safety Gear
SGB03 - Duplex
Operating instructions
Blatt/
sheet
D7A5M B.010
Datum/
date
16.03.2002
Stand/
version
C-31.01.2011
eprüft/
approved
WAT/MZE
Änderungen vorbehalten! Subject to change without notice!
Edge of gripping wedge
0
~1
upper safety gear
lower safety gear
~ 3.5mm
(10)
(4)

Progressive Type Safety Gear
SGB03 - Duplex
Operating instructions
Blatt/
sheet
D7A5M B.011
Datum/
date
16.03.2002
Stand/
version
C-31.01.2011
eprüft/
approved
WAT/MZE
Änderungen vorbehalten! Subject to change without notice!
3.2 Alignment of safety gear housing
The safety gear housings have to be well
aligned to the guide rail. The alignment
which can be done with the safety gear body
itself, may cover only small deviations.
Following mailfunctions may occur if
the alignment is done inaccurately:
• unintended gripping of the grip-
ping wedge
• no 100% braking extent

If there is safety gear delivered with safety gear
housing adjust the correct running clearance
according to below instructions (this is also valid
for adequate housing types).
This kind of instruction is valid for
following WITTUR car frames:
WCF series
WCS60
1
3
1
3
12
X
Progressive Type Safety Gear
SGB03 - Duplex
Operating instructions
Blatt/
sheet
D7A5M B.012
Datum/
date
16.03.2002
Stand/
version
C-31.01.2011
eprüft/
approved
WAT/MZE
Änderungen vorbehalten! Subject to change without notice!
1
3
1
3
12
X
(1)
(2)
Screw in the screw (1) so that the counter
wedge (3) contacts the guide rail
Sliding guide shoes:
Slacken the screw (1) approx. 1.5 turns so
that the distance (X) between the counter
wedge (3) and the guide rail becomes 2mm
Roller guide shoes:
Slacken the screw (1) approx. 3 turns so
that the distance (X) between the counter
wedge (3) and the guide rail becomes 4mm
1
3
1
3
12
X
(3)
Lock the setting with the lock nut (2)

4
5
(2)
M16x40
Progressive Type Safety Gear
SGB03 - Duplex
Operating instructions
Blatt/
sheet
D7A5M B.013
Datum/
date
16.03.2002
Stand/
version
E-07.08.2020
eprüft/
approved
WAT/MZE
Änderungen vorbehalten! Subject to change without notice!
1
(3)
2
3
(1)
1
6
3.3 Assembling and adjustment of
housing and synchronization
3.3.1 Safety gear with housing and
separate synchronization
If there is safety gear delivered with safety gear
housing and synchronization do the assembling
and adjustment as follows:
(1) Fit the synchronization-axles (1) into the
lower cross beam of the car frame - insert the
sliding-bushes (2) and fix the axle with the
delivered clamp-flats (3).
(2) Mount the safety gear housing (4) to the
lower cross beam of the car frame (by means
of threaded-plates (5) and screws M16x40).
Take care of tightening torque
Screw M16: 195Nm!
(3) Fasten the safety gear lifting lever (6) to the
synchronization-axle (1).
E

(4) Install the synchronization rod (7) to the axles
(1) - secure with pin (8). Adjust the length by
means of the adjustment nut and lock with
nuts (9).
(5) Mount the fixing bracket (10) to the cross-
beam profile and hook in the synchronization
retaining spring (11).
(6) Fix the governor rope housing (13) to the safe-
ty gear lever - install the governor rope (use
delivered rope clips).
(7) Fit the safety gear contact (12) to the beam
profile.
(8) Check the safety gear - synchronization func-
tion. If both safety gears do not grip at the
same time (refer also to chapter 3.1), adjust
the length of the synchronization rod by use
of the adjustment nut (refer also to chapter
3.2).
Progressive Type Safety Gear
SGB03 - Duplex
Operating instructions
Blatt/
sheet
D7A5M B.014
Datum/
date
16.03.2002
Stand/
version
C-31.01.2011
eprüft/
approved
WAT/MZE
Änderungen vorbehalten! Subject to change without notice!
7
8
(4)
(5)
(7)
7
9
10
12
13
11
Switch cam
Rope clip
Adjustment nut
(6)
Lever for AK=267

If there is safety gear delivered with safety gear
housing and integrated synchronization do the
assembling and adjustment as follows:
(1) Mount the safety gear housing (1) to the
lower cross beam of the car frame (by means
of threaded-plates (2) and screws M16x40).
(2) Check if the connecting link (3) on the gover-
nor rope side is on the bottom side. Install
the fork joint (4) with two plain washers (5)
and the pin (6) on both sides.
(3) Measure the distance X between the two fork
joints (4). The total length of the needed
threaded bars should be X - 1 3/8“ (X - 35mm).
This is an empirically determined value, where
there is still enough space to set the synchro-
nization with the turnbuckle.
(4) Cut the threaded bars to reach the needed
length (X - 1 3/8“) in total. One of the
threaded bars must be a left threaded bar.
(5) The delivery content includes a left threaded
bar and two right threaded bars. If you need
both right threaded bars, connect them with
the long nut (7) and counter the long nut on
both sides.
Progressive Type Safety Gear
SGB03 - Duplex
Operating instructions
Blatt/
sheet
D7A5M B.015
Datum/
date
16.03.2002
Stand/
version
E-07.08.2020
eprüft/
approved
WAT/KKR
Änderungen vorbehalten! Subject to change without notice!
3.3.2 Safety gear with housing and
integrated synchronization (1)
1
2
M16x40
(2)
3
4
5
6
ovenor rope side
7
right threaded bar right threaded bar
counter the long nut with two nuts
44
E
DB - 451mm (17 3/4“)

Progressive Type Safety Gear
SGB03 - Duplex
Operating instructions
Blatt/
sheet
D7A5M B.016
Datum/
date
16.03.2002
Stand/
version
E-07.08.2020
eprüft/
approved
WAT/KKR
Änderungen vorbehalten! Subject to change without notice!
(6) Connect the left threaded bar with the left
threaded fork joint and the right threaded
bar with the right threaded fork joint and
counter both sides with a nut.
(7) Connect the left threaded bar and the right
threaded bar with the turnbuckle (8). After
setting the synchronization with the turn-
buckle, the turnbuckle must be countered on
both sides with a nut.
All screw connections must be screwed far
enough and countered with a nut.
8
E

Progressive Type Safety Gear
SGB03 - Duplex
Operating instructions
Blatt/
sheet
D7A5M B.017
Datum/
date
16.03.2002
Stand/
version
16.03.2002
eprüft/
approved
WAT/MZE
Änderungen vorbehalten! Subject to change without notice!
(1) Connect the contact.
(2) Test the safety gear contact function - adjust
if necessary.
(3) Adjust the switch horizontally on its fixing
bracket.
Adjusting dimension: 3-5 mm from the
guard peak
The contact must brake just before safety
gear gripping!
3.4.1 Safety gear contact
- use category: AC 15, A300, Ue/Ie240V (3A)
- thermal current: Ithe = 10A
- insulation voltage: Ui= 250V AC (EN81)
300V AC (ASME)
- protection type: IP 43
- approved in accordance: VDE 0470
IEC/EN 60947-5-1
(1-3)
Safety gear contact
3.4 Electrical installation of the safe-
ty gear contact
Work involving electrical equipment
should only be carried out by an electrical
fitter or qualified personnel.
Before carrying out work, switch off all
voltage to installation equipment.
Take note of the following when laying the
connection cable:
• that the single polarity cables have dou-
ble insulation
• the use and laying of cables is governed
by the EMC
The safety gear contact opens the lift in -
stal lation’s remotely controlled safety cir-
cuit.
23 24
11 12

Operational reliability of the installation is assured.
The quality and function of individual components
are subject to thorough inspection and is checked
before dispatch from our works. The safety gear
system should undergo an operational test before
commissioning or before possible inspection from
a technical institute.
First test run after installation
Before the first test run:
The protective coating of grease is to be
carefully removed from the guide rails!
Clean the guide rails!
The cleaning of the guide rail must be
done with a disc brake cleaner or a similar
fluid. It is not allowed to do mechanical
cleaning like grinding. If the surface can-
not be cleaned properly contact the man-
ufacturer.
Clear all people and objects from the lift
shaft before commencing the test run.
Risk of crushing injuries!
The entire lift travel path should be slowly trav-
elled (in inspection mode) before the functions
tests. Attention should be paid to the clearance of
all fastened parts, especially with regards to the
guide brackets/safety gear devices. Find and
remove any protruding bolts or other dangerous
restrictions well in advance.
Preparations before tests:
When sliding guides shoes are used, a thin
coating of the guide rail oil is to be applied
to the guide rails.
When roller guide shoes are used the guide
rail must not be lubricated at all.
The lubrication oil must not include high
pressure additives.
• Check the activating force of the safety gear
synchronization (it should be between 400
and 500 N). This value can be higher if the
travel height is over 75m. Calculate the mini-
mum required force F1as follows:
F1= mass of overspeed governor rope x down-
wards acceleration x safety factor (2)
e.g.: F1min = 100kg x 1,5m/s 2 x 2=300N
This is the minimum force which should be
measured on the car frame safety gear
synchronization to prevent unintended
gripping. If the force is less than the
retaining spring of the safety gear syn-
chronization must be adjusted.
• Check the tripping force of the overspeed gov-
ernor F2:
This force must be at least twice as high as
the force measured on the safety gear syn-
chronization.
e.g.: F1= 300N =>
F2min = 2 x F1= 2 x 300 = 600N
The maximum tripping force F2max of the
overspeed governor is 2350N.
Progressive Type Safety Gear
SGB03 - Duplex
Operating instructions
Änderungen vorbehalten! Subject to change without notice!
4 Function testing
Blatt/
sheet
D7A5M B.018
Datum/
date
16.03.2002
Stand/
version
C-31.01.2011
eprüft/
approved
WAT/MZE

4.1 Static functions test
The function of the safety gear is to be checked
with empty car and at service speed before the real
safety gear test is performed.
• Activate the safety gear actuating lever (or
the overspeed governor rope as well by means
of the tripping function if available) manually.
At the same time, use the emergency control
or inspection run control to gradually lower
the car.
• Check if both duplex-safety gears work at the
same time. (gripping marks on the guide rails
must be on the same height). If the safety
gears are not working simultaneously the
safety gear synchronization must be readjust-
ed.
• After a few centimeters, the car should be
caught on the left and right by the safety
gear.
• The safety gear contact should respond.
• Then release the safety gear by running up the
car. Check that the actuating mechanism and
the safety gear contact have returned to their
initial positions.
For rated speed lower 1,5 m/s the dynamic
safety gear test can be done when the
function test is shown to be ok.
If the rated speed is above 1.5 m/s, anoth-
er safety gear test must be done with rated
load in the car and at a speed of 1,5 m/s.
Measure the gripping distance as shown in
section 4.2. From the tripping speed vand
the gripping distance sthe retardation R
can be calculated according to the follow-
ing formula.
R = v2/ (2 x s)
The retardation Rshould be within 6 m/s2and 8
m/s2.
If the retardation is not correct the safety
gear must be replaced (please contact WIT-
TUR).
The real safety gear test can be performed
when the above mentioned tests are ok.
Progressive Type Safety Gear
SGB03 - Duplex
Operating instructions
Blatt/
sheet
D7A5M B.019
Datum/
date
16.03.2002
Stand/
version
16.03.2002
eprüft/
approved
WAT/MZE
Änderungen vorbehalten! Subject to change without notice!
Table of contents
Other WITTUR Safety Equipment manuals