Operating the light via the light switch
Actions after a power cut
If the light is switched on, the colour temperature can be set by pressing the wall switch again. Switch the light off and back on again after an
interval of 3 to max. 10 seconds. Each time the button is pressed, the colour temperature (CCT) at 100% brightness switches to the next level
(3000K - 4200K -6000K - 3000K - 4200K - 6000K etc.).
If the light is disconnected from power for longer than 10 seconds, for example if the light is switched off via the switch or during a power cut, the
light will switch on with the most recently set colour temperature and brightness when power is restored.
Please take note of this, particularly if the light is unsupervised and in standby mode.
Establishing the connection with the remote control
Should it become necessary to connect a new remote control to the light, for example if the original remote control is lost or faulty, disconnect the
light from power for approx. 20 seconds, for example by switching it off via the light switch or by disconnecting the mains p lug. Then, take the
remote control to be connected with batteries inserted (see “information about handling batteries”) and switch the power back on. Then, press the
button once within the first 3 seconds. The light confirms that the connection has been established successfully by flashing twice.
To break the connection, disconnect the light from power for at least 20 seconds, for example, by switching it off via the light switch or by
disconnecting the mains plug. Switch the light’s power supply back on. Then, press the button five times within the first 3 seconds. The light
confirms that the connection has been broken successfully by flashing four times.
It is possible to control several lights in this range with one remote control to form a group of lights, for example to operate all the lights in one
room at the same time. Each light can also be connected with more than one remote control. Proceed as described in the first section to connect
each remote control with the light.
If the light does not react to the remote control, carry out the following troubleshooting steps:
If the distance between the remote control and the light is too great, this can lead to problems with the radio transmission of the switch
commands. If necessary, reduce the distance between the remote control and the light.
If the remote control is not working, check whether the batteries have been inserted correctly (see “information about handling batteries”).
Used-up batteries in the remote control can also be a reason for the distance shortening or functional problems. In this case, replace the batteries
as quickly as possible (see “information about handling batteries”).
Re-establish the connection between the light and the remote control, as described in the first section.
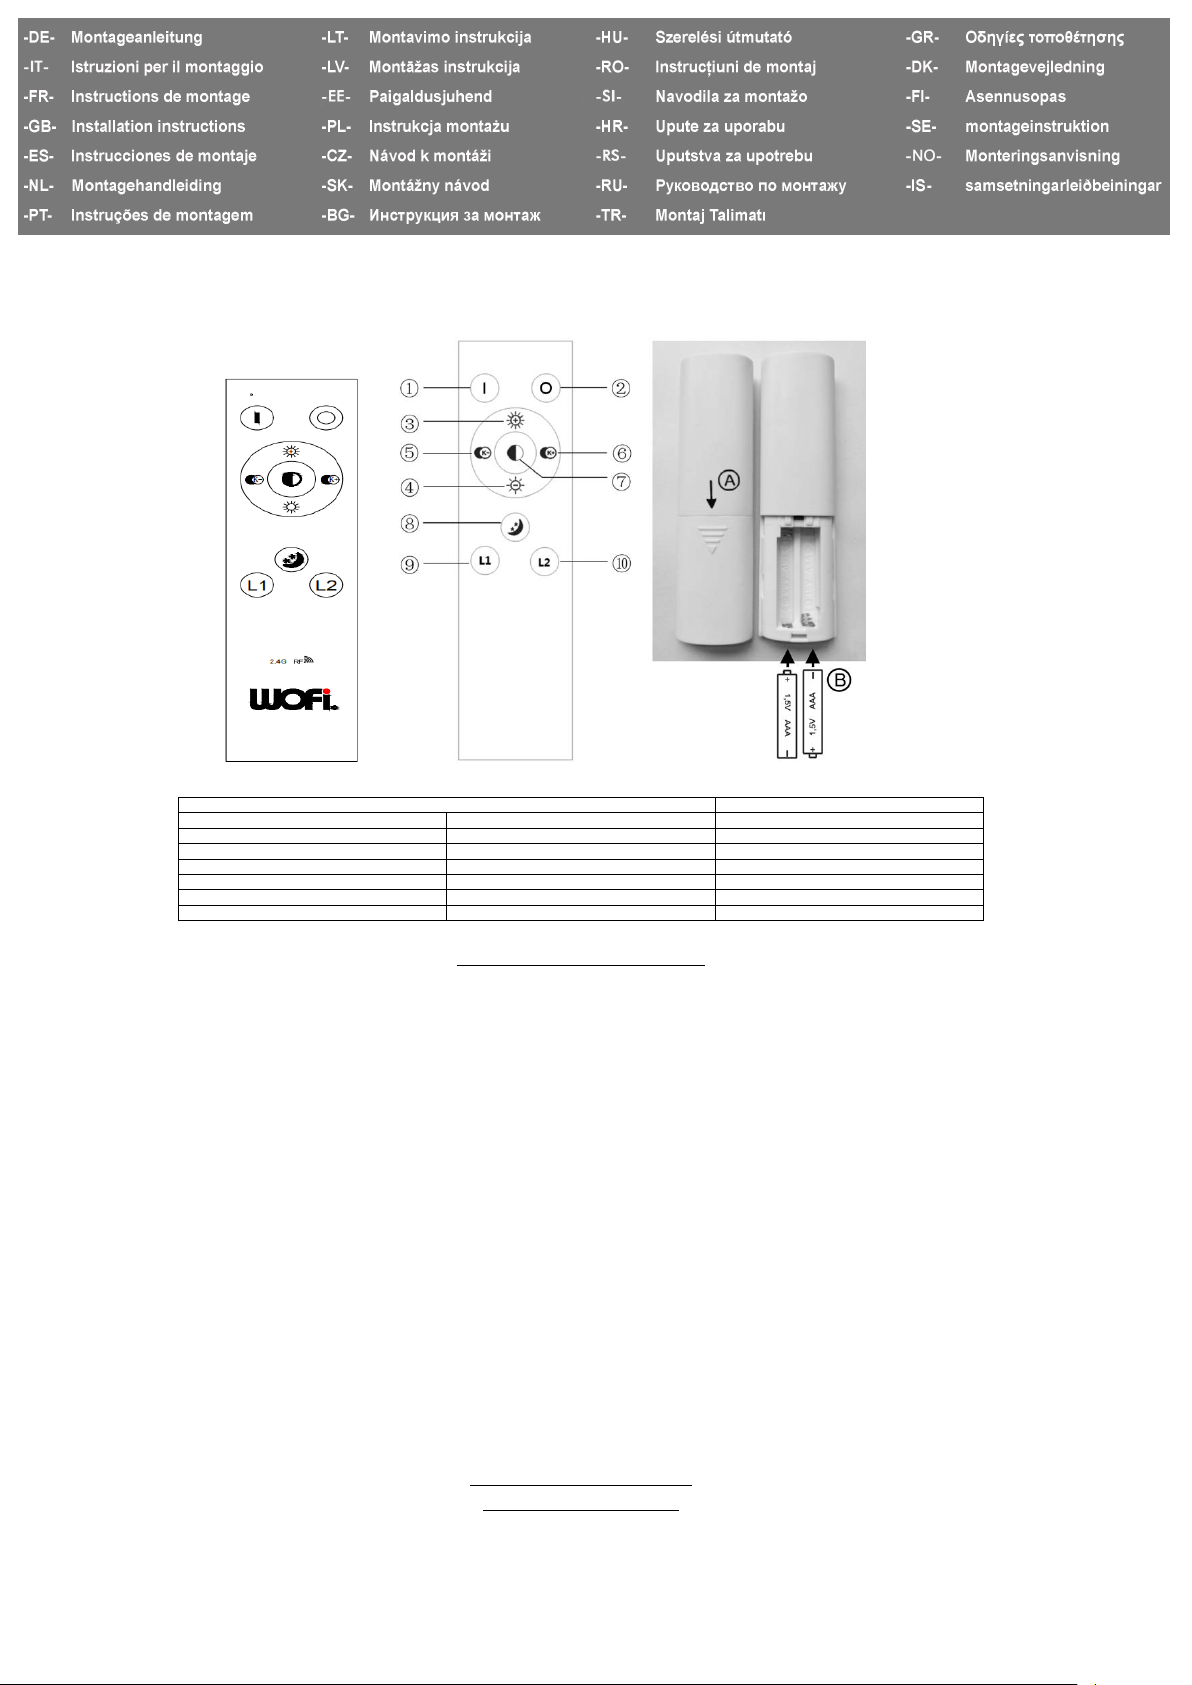
Information about handling batteries
To insert the batteries, open the battery compartment in the direction of the arrow on the bottom of the remote control (A). Place two AAA
batteries in the battery compartment (B), paying attention to the correct polarity. Close the battery compartment. Functional problems or a
reduction in the reach of the remote control are signs that the batteries are close to being used up. In this case, the batteries must be replaced.
Change them as described in this section.
Please observe the following points:
If swallowed, batteries may present a potential danger to your life.
For this reason, keep the batteries out of reach of children.
Remove depleted batteries as quickly as possible to prevent the risk of leaking.
Always change all batteries at the same time. Never use batteries with different charges, from different brands or of a different quality.
GB 12/19
Wortmann & Filz GmbH . Im Langel 6 . D-59872 Meschede
WOFI LEUCHTEN
+49/(0)2903-449 449 +49/(0)2903 - 449 459 service@wo.de www.wo.de