INSTALLATION, OPERATION & MAINTENANCE
INSTALLATION, OPERATION & MAINTENANCEINSTALLATION, OPERATION & MAINTENANCE
INSTALLATION, OPERATION & MAINTENANCE
Tel: 1300 79 1954 Web: www.stoddart.com.au Email: fse@stoddart.com.au
Page of 3
Due to continuous product research and development, the information contained herein is subject to change without notice
Table of Contents
General Recommendations......................................................................................................................................3
General Safety..............................................................................................................................................3
Service ..........................................................................................................................................3
Sharp Edges...................................................................................................................................3
Power Cables .................................................................................................................................3
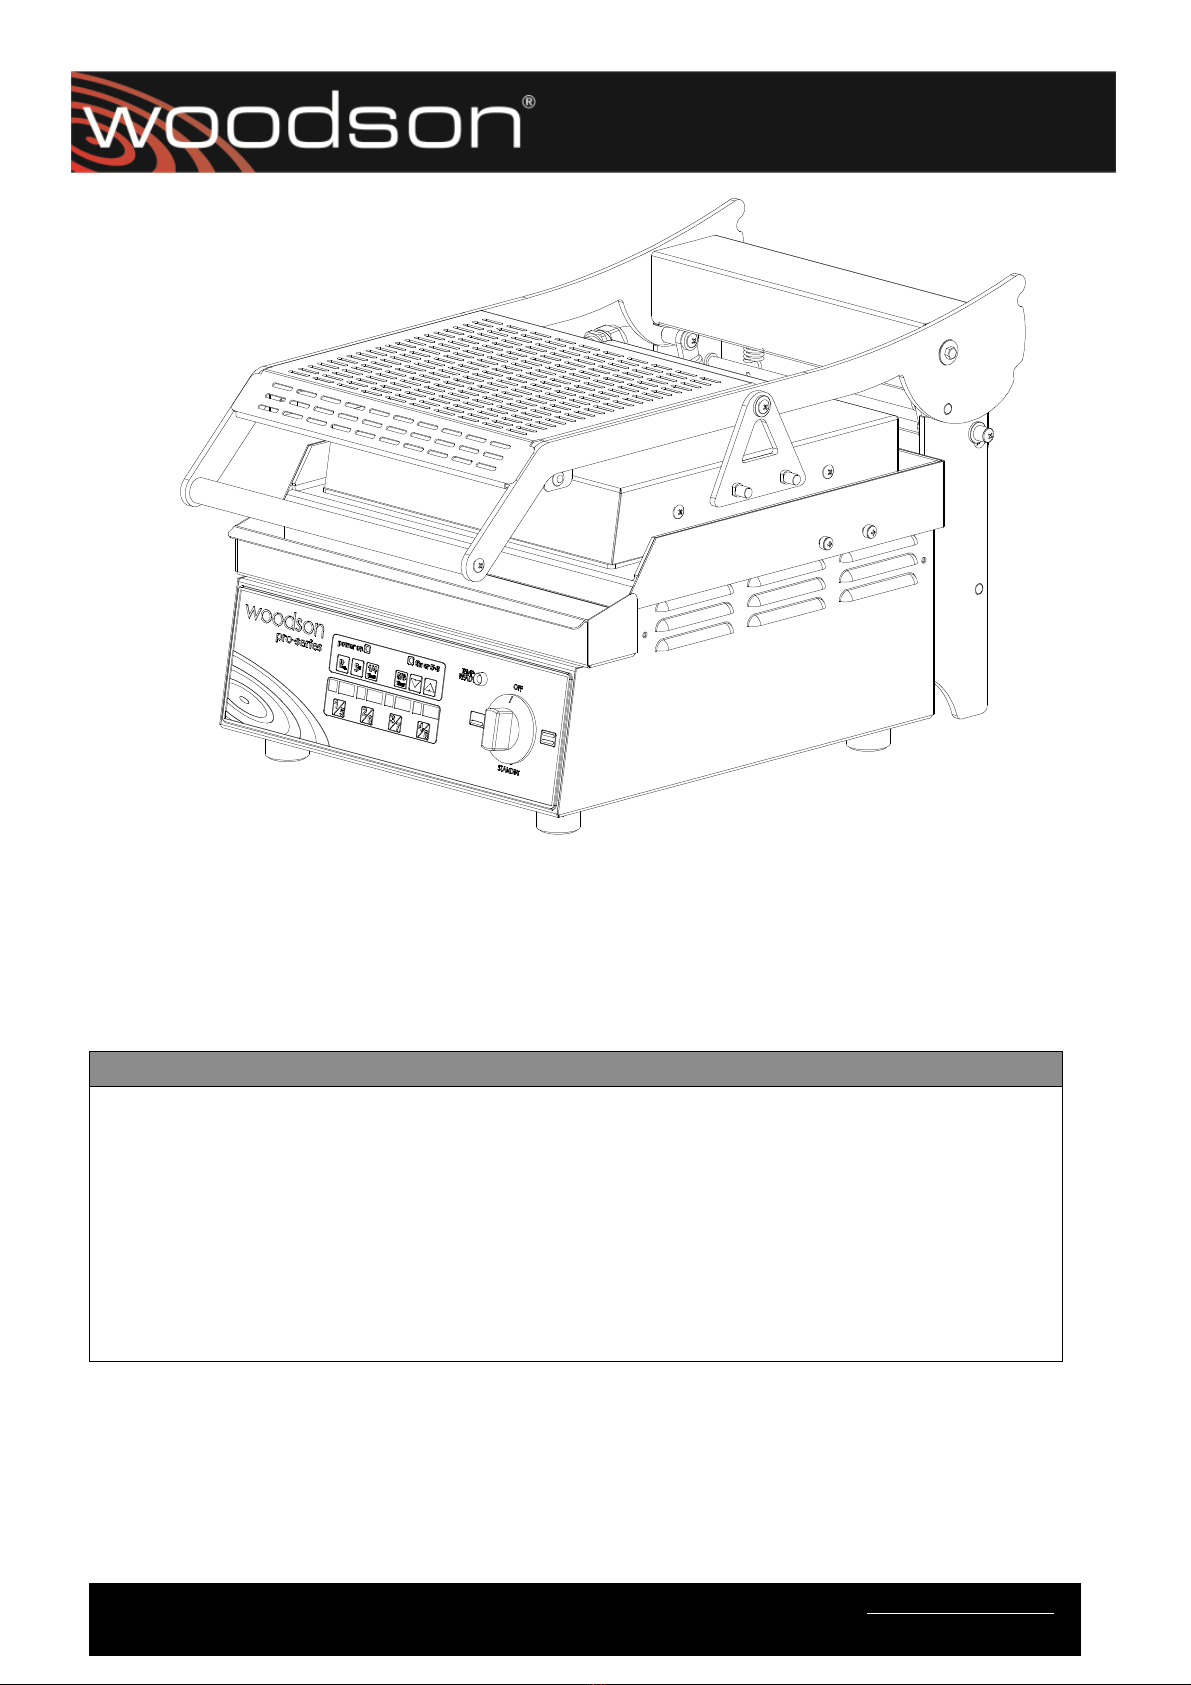
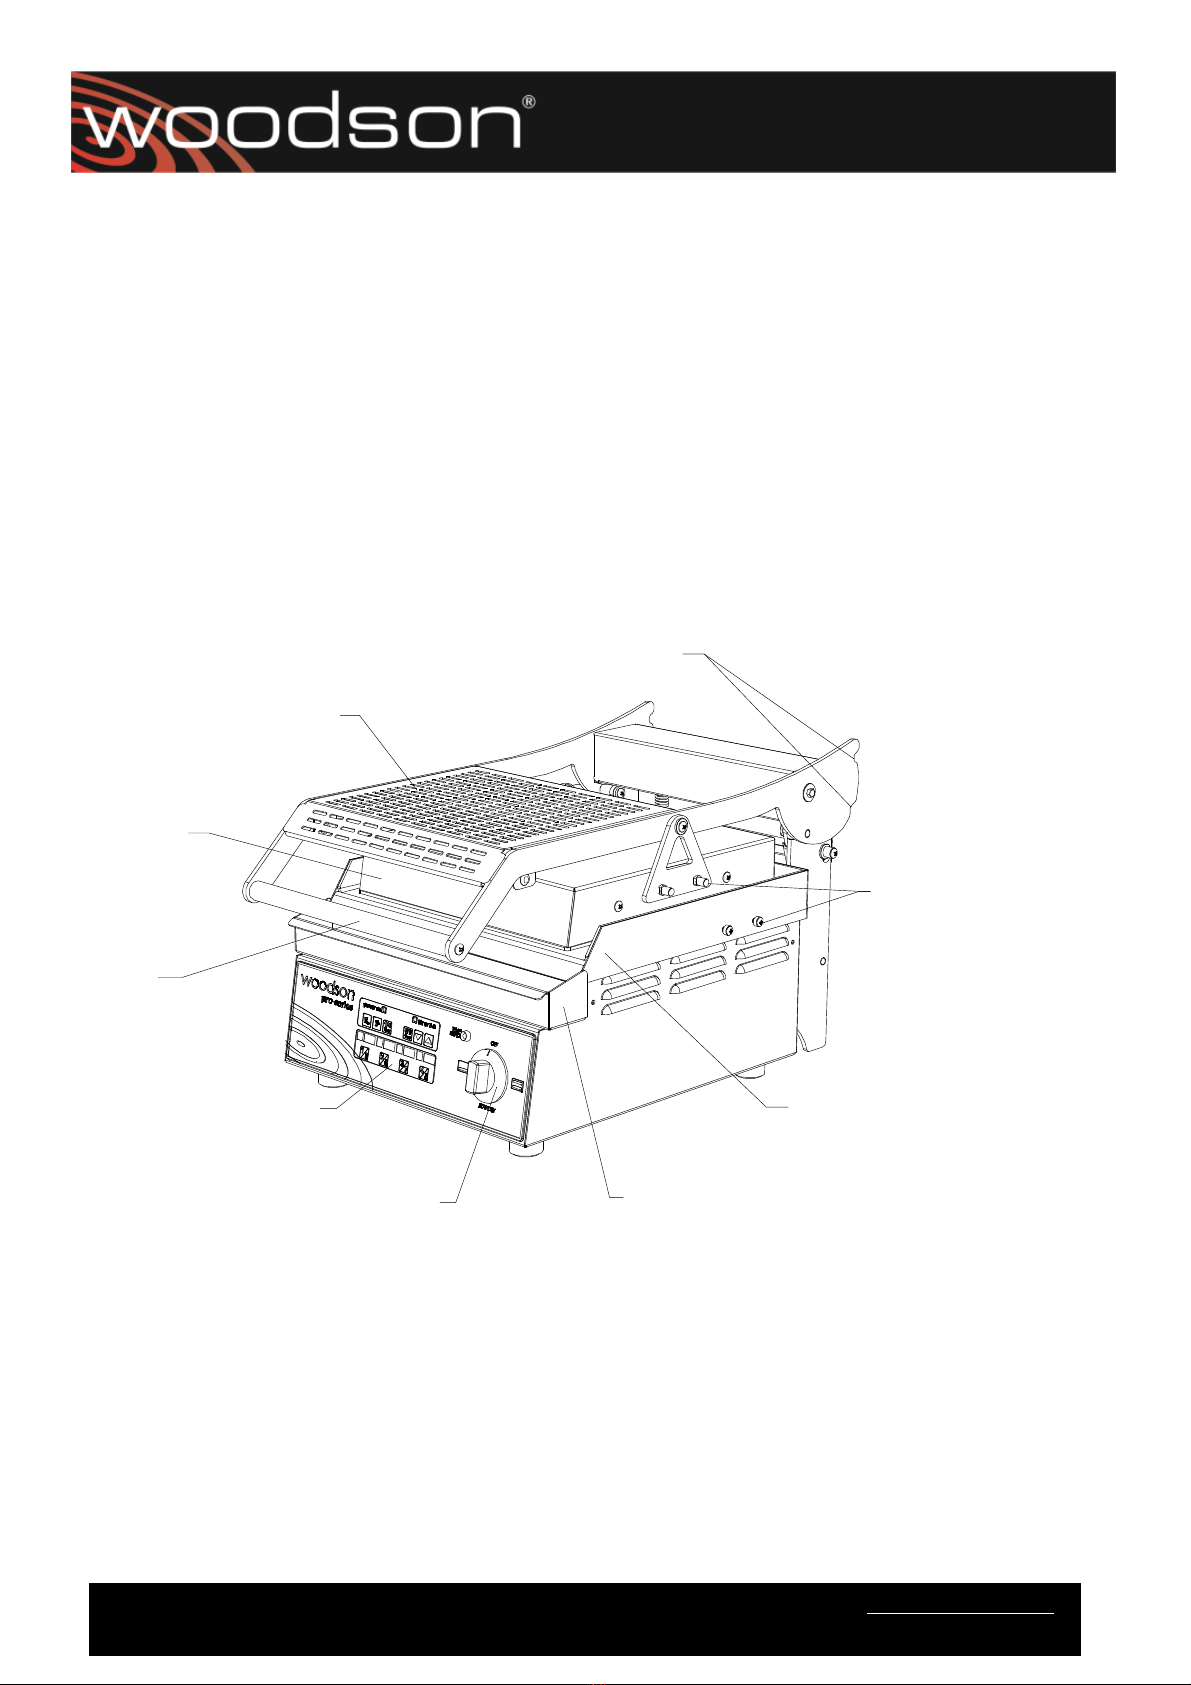
Introduction .................................................................................................................................................4
Product Overview...........................................................................................................................4
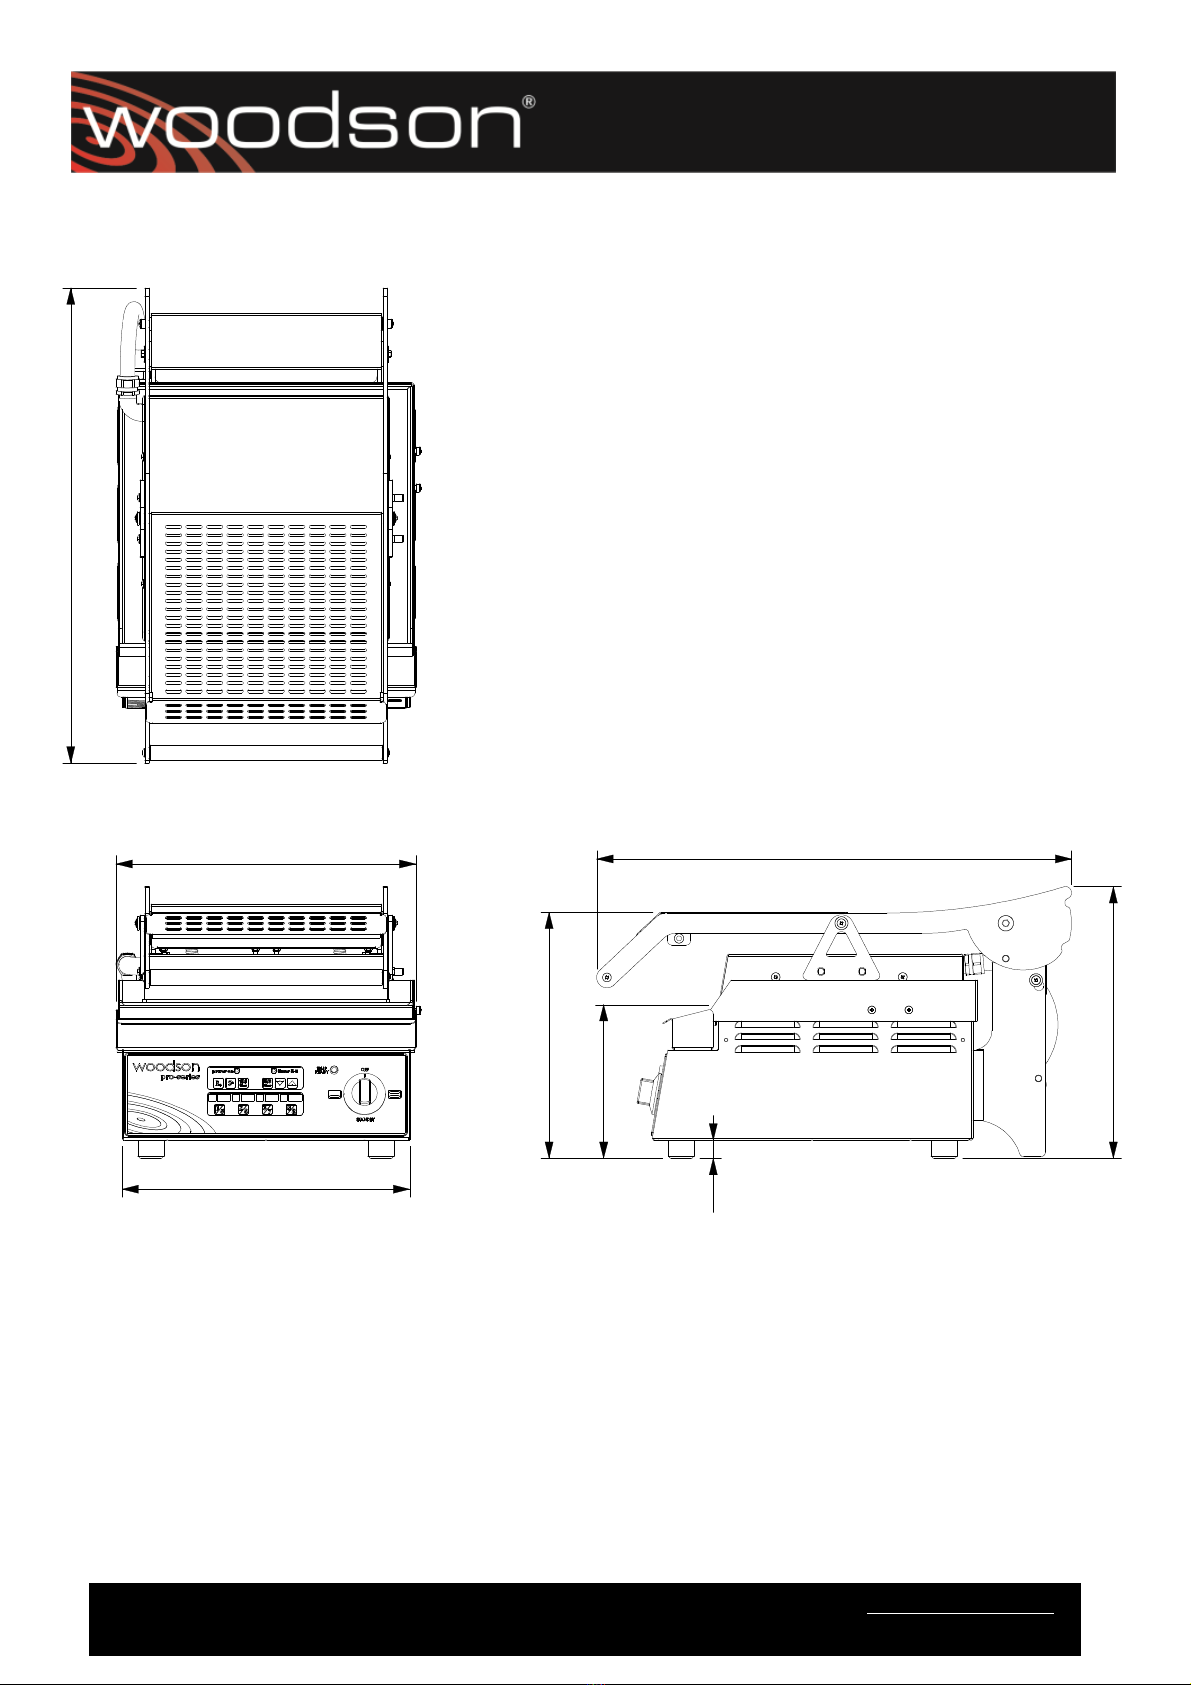
Specifications ...............................................................................................................................................5
Technical Specifications..................................................................................................................5
Technical/Connection Diagram........................................................................................................6
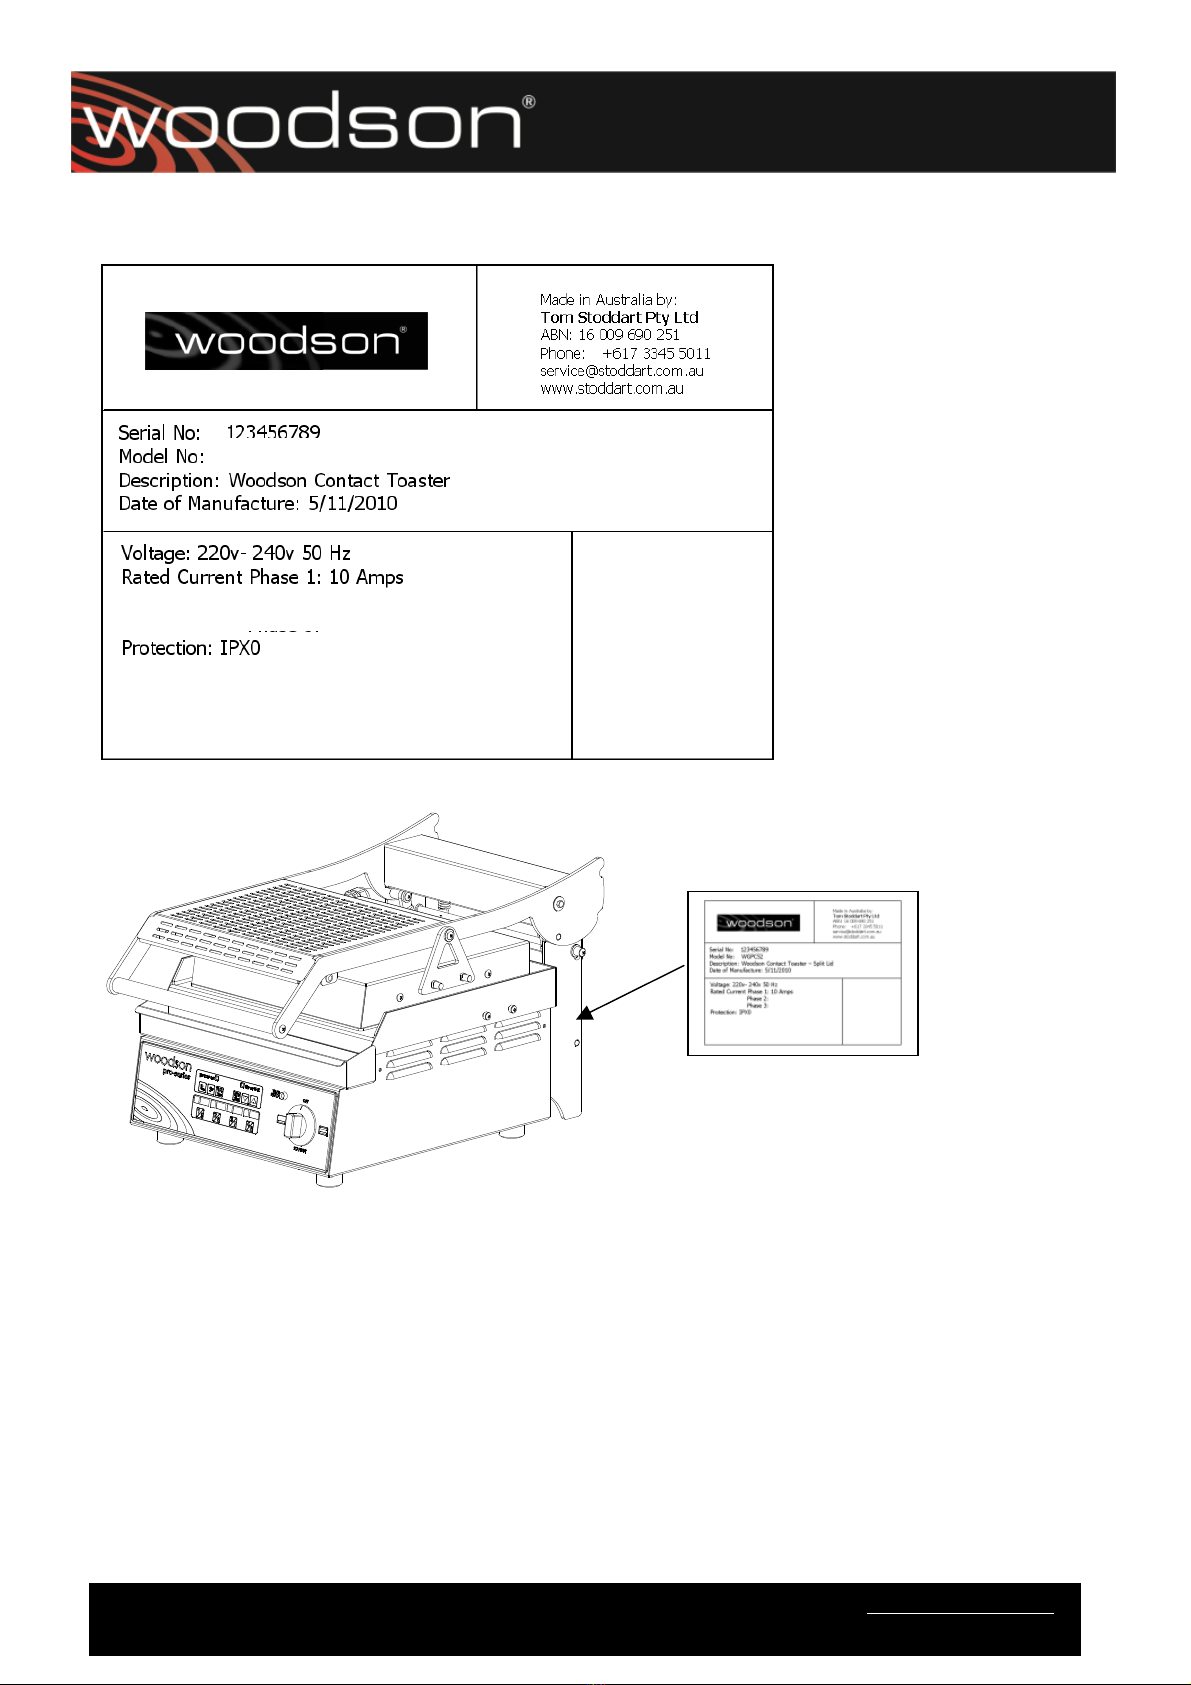
Rating Plate ...................................................................................................................................6
Rating Plate ...................................................................................................................................7
Installation .............................................................................................................................................................7
Installation .............................................................................................................................................................8
General Precautions......................................................................................................................................8
Setting Up....................................................................................................................................................9
Handling ........................................................................................................................................9
Site Preparation .............................................................................................................................9
Unpacking......................................................................................................................................9
First Time Operation.......................................................................................................................9
Electrical Connection...................................................................................................................................10
Operation .............................................................................................................................................................11
General Recommendations..........................................................................................................................11
Operating Instructions ...............................................................................................................................11
Operating Instructions ................................................................................................................................1
Setting the Timers ......................................................................................................................................13
Timer Adjustment.........................................................................................................................13
Temperature Adjustment ............................................................................................................................14
After Hours ................................................................................................................................................14
Information..................................................................................................................................14
Cleaning Procedure.....................................................................................................................................14
Materials Required .......................................................................................................................14
External Surfaces .........................................................................................................................15
Maintenance .........................................................................................................................................................15
Routines.....................................................................................................................................................15
Schedules ....................................................................................................................................15
Log Books....................................................................................................................................15
Inspection....................................................................................................................................15
Faults ..........................................................................................................................................15
Stainless Steel Protection............................................................................................................................16
Cleaning ......................................................................................................................................16
Corrosion Protection.....................................................................................................................16
Surface Finish ..............................................................................................................................16
Water Damage ...........................................................................................................................................17
Information..................................................................................................................................17
Access to Electrical Wiring and Mechanical Parts............................................................................17
Replacements.............................................................................................................................................18
Electronic Controller, Temperature Probe ......................................................................................18
Electrical Parts .............................................................................................................................18
Mechanical Parts ..........................................................................................................................18
For Servicing and Parts ...............................................................................................................................18
Electrical Diagrams ...............................................................................................................................................19
Spare Parts/ Assembly Diagram............................................................................................................................. 0
Warranty .............................................................................................................................................................. 0
Warranty .............................................................................................................................................................. 1
Appendix 1 – Australian Warranty and Importer/Distributor Contact Details .................................................. 1
Australian Warranty Policy & Procedure....................................................................................................... 1
WARRANTY REQUEST FORM....................................................................................................................... 7