Worthington Bernzomatic BZ8250HT User manual

08/19/16
INSTRUCTION MANUAL
Trigger-Start Torches
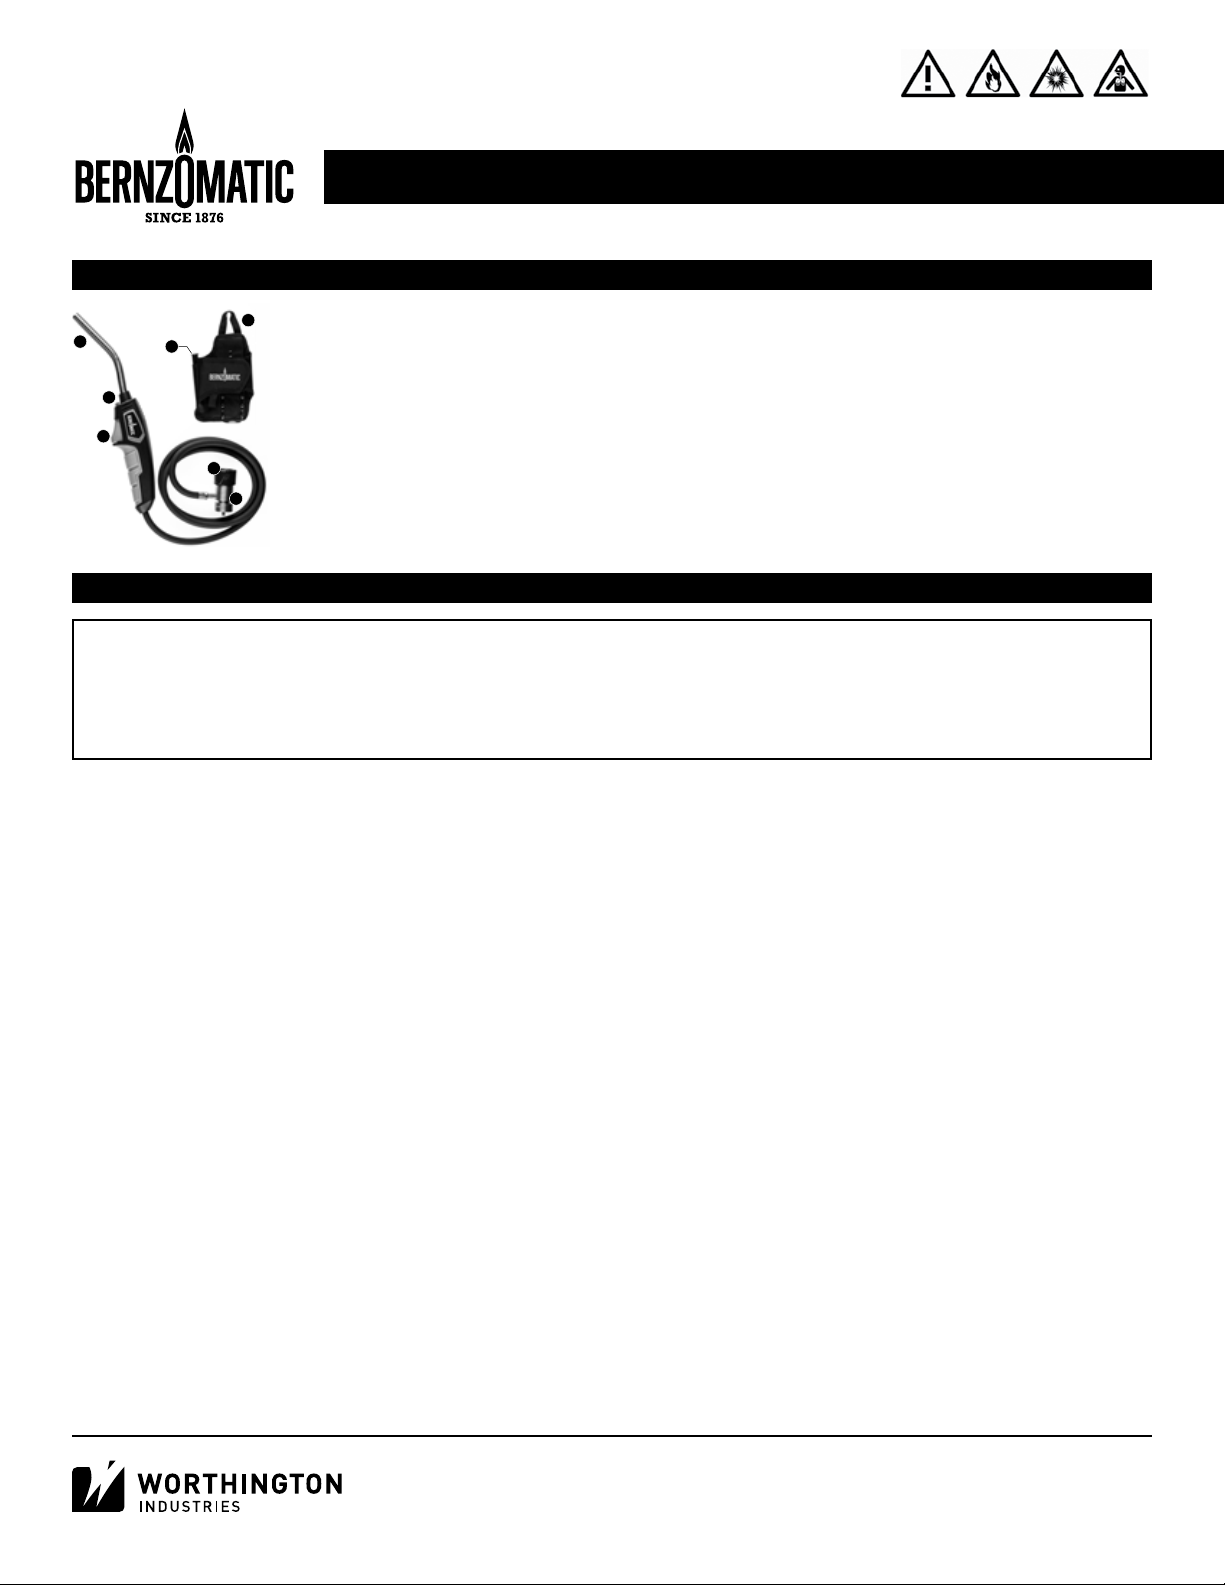
Models: BZ8250HT
DANGER
This torch is used with a flammable product. Failure to comply with these warnings and
instructions may result in an explosion or fire that may cause property damage, serious
personal injury or death.
Read and comply with the instructions and warnings in this manual and familiarize yourself
with the torch before lighting and using. Review instructions and warnings periodically to
maintain awareness. Do not try to operate before reading instructions.
Torches are to be used only with hand held gas cylinders specifically designated for
use with torches.
WARNING
• Keep torch out of reach of children and anyone who has not read instructions. Do not point torch towards face, other
persons or flammable objects. Never attempt to use torch as a cigarette lighter.
• Disconnect cylinder when not in use.
• Never attempt to modify the torch construction and never use unapproved accessories or fuels.
• Treat the torch as you would any fine tool or instrument. Do not drop, throw, or otherwise abuse.
• Do not use a leaking, damaged or malfunctioning torch.
• Always wear safety glasses, protective gloves and use proper tools to handle hot work.
• Radiant energy can harm your eyes. Wear glasses having an appropriate lens shade number (see 29 CFR 1926.102)
for the torch operation being done; brazing and light cutting (3 or 4), medium cutting and light welding (4 or 5), heavy
cutting and medium/heavy welding (5-8).
• Work only in well-ventilated areas. Avoid the fumes from fluxes, lead-based paint, and all metal heating operations. Be
careful to avoid fumes from cadmium plating and galvanized metal- remove these coatings in the area to be heated by
filing or sanding prior to heating.
Materials used in the construction of this device may contain brass (which may contain lead), a chemical known to the
State of California to cause birth defects or other reproductive harm.
Combustion by-products produced when using this device contain chemicals known to the State of California to cause
cancer, birth defects, or other reproductive harm.
1
1
1
2
1
3
1
4
1
6
1
51
7
DANGER INCENDIE EXPLOSION FUMES

08/19/16
• Never use torch to strip lead paint.
• Be careful when using the torch outdoors on sunny or windy days. Bright light makes it difficult to see the torch’s
flame. Wind may carry the torch’s heat back towards you or other areas not intended to be heated. Windy conditions
may also cause sparks to be blown into other areas with combustible materials.
• Heating a surface may cause heat to be conducted to adjoining surfaces that may be combustible or become
pressurized when heated. Always check to make sure no unintended parts or materials are being heated.
• Be aware that the tip of the torch can get extremely hot during use. Take precautions to protect yourself and others
from accidental burns.
• Never use the torch on or near combustibles. Be careful around motor vehicles or any gasoline-fired products and
beware of hidden fuel lines and tanks.
• Always make certain the torch is placed on a level surface when connected to the fuel cylinder to reduce the risk of
accidental tip over. Be sure the torch is not pointed in a direction which could cause nearby objects to ignite when the
torch is set down.
• Be careful not to overheat surrounding materials. Use a heat shield when necessary.
• Never leave the torch unattended when lit.
• Never attempt to repair or heat a gasoline tank, a chemical drum, an aerosol can, a compressed gas container that
held flammable liquid or gas or any other chemical. Heating these is extremely dangerous, especially after they have
been emptied because vapors may still be in the container.
• Always have a fire extinguisher and a bucket of water near the torch and work area.
• This torch consumes oxygen and must only be used in well ventilated areas. Do not use in a confined space.
ASSEMBLY
1. Make sure regulator valve (1) is OFF by turning adjustment knob (2) clockwise until it stops. A light stop is sufficient.
Do not force.
2. Hold regulator (1) valve and thread fuel gas cylinder into regulator by turning the fuel gas cylinder clockwise, hand
tighten only. Do not force.
3. Check all joints and couplings periodically to insure against loose connections. With valve (2) closed, without lighting,
test all connections with soapy water. If bubbles appear, gas is leaking and torch must be repaired or replaced. NEVER
USE A FLAME TO CHECK FOR LEAKS. Make this test in a well ventilated and spark-free area and where there are not
open flames.

08/19/16
USING THE HOLSTER
1. Assemble the cylinder into holster (6) using diagram provided below.
2. Attach holster to belt using belt clip on reverse side of holster. Right
handed users, attach on your right side. Left-handed users, attach on your
left side.
3. Insert torch burn tip into metal tube on side of holster (7)
IMPORTANT
Placing belt clip on correct side of waist will enable you to quickly, and naturally, release cylinder from holster in an
emergency. When the cylinder is in the holster, do not move about vigorously or hit the cylinder. When using a support
other than your belt, do not permit the cylinder to be pulled by “stretching” the hose.
LIGHTING AND OPERATION
DANGER
Tipping the gas cylinder more than 60 degrees from its upright position may cause torch to flare. The torch has a built-
in regulator that controls pressure and reduces the risk of pulsating or yellow flames when used other than upright. It is
recommended to start working with a disposable hand torch cylinder at room temperature and to keep torch upright as
much as possible.
1. Remove torch from holster tube.
2. Open regulator valve (1) fully by turning adjustment knob (2) counter clockwise until it stops. Do not force. Always fully open
valve when lighting to prevent damage to ignition system. Never look into the burner tube (5) or point in unsafe direction.
3. Point torch in a safe direction and pull ignition button (3). Repeat if necessary while adjusting the valve (2) slightly.
4. After the torch lights the flame may be adjusted.
5. To adjust flame, turn the adjustment knob (2) to the required setting.
6. After use, make sure the regulator valve (1) is closed by turning adjustment knob (2) fully clockwise until it stops.
Do not force.
TO ENGAGE LOCK
1. To engage flame lock feature, with ignition button (3) depressed, press the lock button (4) down. Do not force.
2. While holding lock button (4) down, release the ignition button (3).
TO DISENGAGE LOCK
1. To release flame lock, pull ignition button (3) until lock releases.

08/19/16
ADDITIONAL WARNINGS
• Make sure the torch is cool before installing or removing cylinder and accessories. Using a low flame can cause
damage to the burn tube and ignition system.
• Check all joints and couplings periodically to insure against loose connections. With valve open, without lighting,
test all connections with soapy water. If bubbles appear, gas is leaking and torch must be repaired or replaced.
NEVER USE A FLAME TO CHECK FOR LEAKS. Make this test in a well ventilated and spark-free area and where
there are no open flames.
• In cold weather the size of the flame will be smaller. To produce a larger flame, pre-warm the cylinder
to room temperature prior to use.
STORAGE
REMOVE CYLINDER FROM TORCH WHEN NOT IN USE
1. Turn ignition button to the off position. Make sure regulator valve is closed by turning flame adjustment knob fully
clockwise until it stops. Do not force.
2. When torch is cool, disconnect cylinder and store torch and cylinder separately and out of reach of children. Observe
cautions on cylinder label.
3. Do not expose cylinders to temperatures in excess of 120ºF.
4. Store cylinders in well ventilated areas.
Check out the collection of welding equipment & soldering tools we offer.
Table of contents
Other Worthington Flashlight manuals

Worthington
Worthington LS10 User manual

Worthington
Worthington ST500 User manual

Worthington
Worthington Bernzomatic WT2201 User manual

Worthington
Worthington Bernzomatic TS4000 User manual

Worthington
Worthington ST2200 User manual

Worthington
Worthington MT16 User manual

Worthington
Worthington WT2301 User manual

Worthington
Worthington Bernzomatic WT2201 User manual