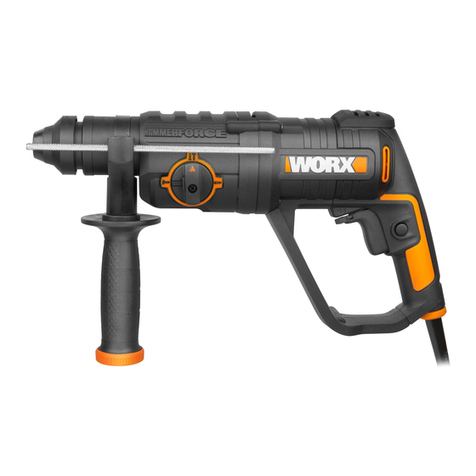
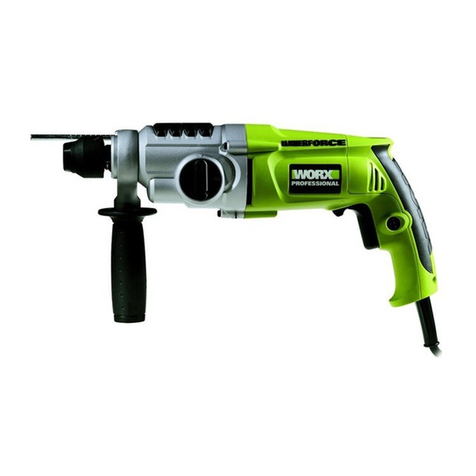
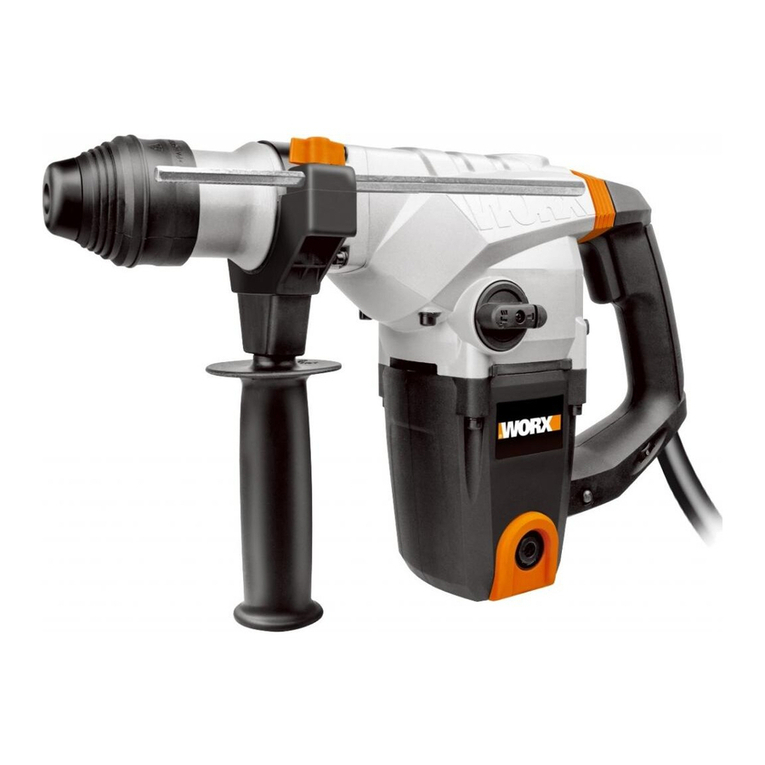
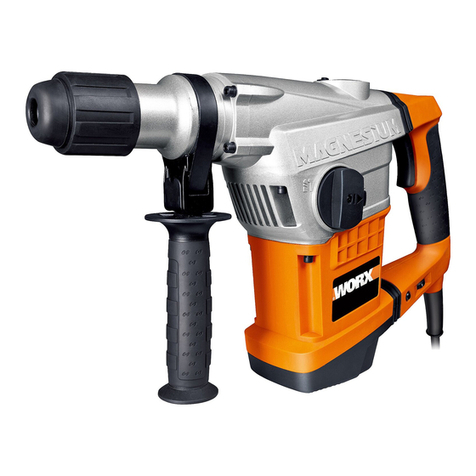
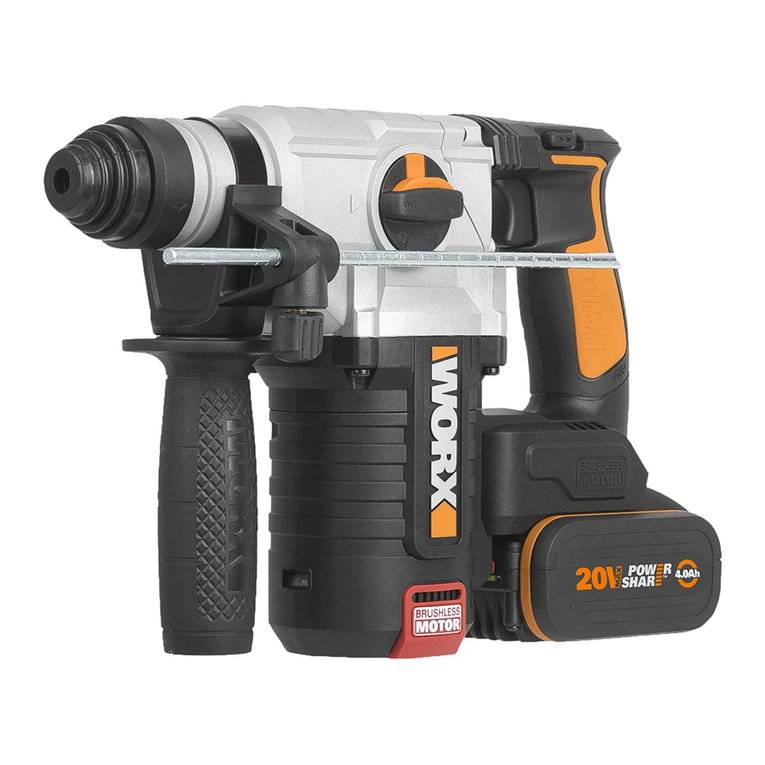
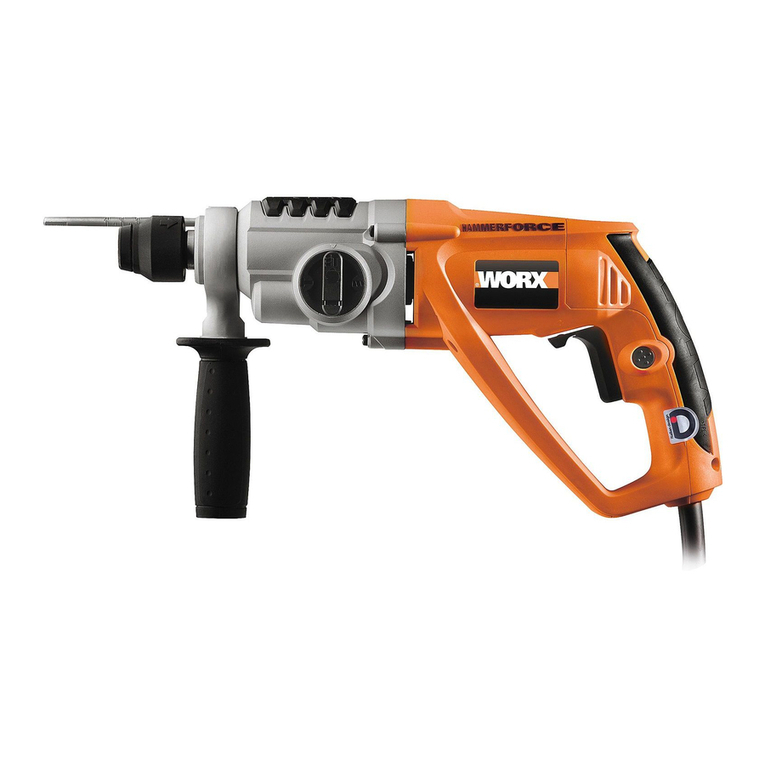
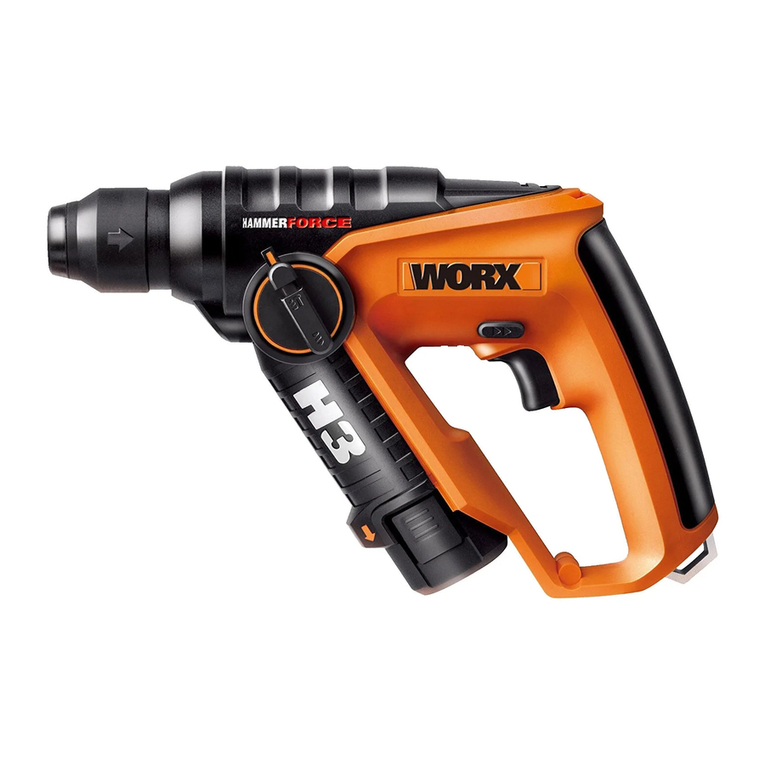
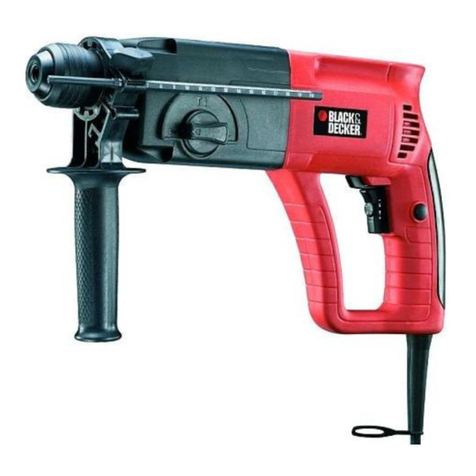
Worx WX333 User manual

Rotary hammer
Bohrhammer
Marteau Perforateur
Martello rotante
Martillo rotatorio
Boorhamer
Młot obrotowy
Pneumatikus fúrókalapács
Ciocan articulat
Rotační kladivo
Otočné kladivo
Martelo rotativo
Rotorhammare
Rotacijski vrtalnik
WX333
P07
P14
P21
P28
P35
P42
P49
P55
P63
P70
P77
P84
P91
P98
EN
D
F
I
ES
NL
PL
HU
RO
CZ
SK
PT
SV
SL

Original instructions EN
Originalbetriebsanleitung D
Notice originale F
Istruzioni originali I
Manual original ES
Oorspronkelijke gebruiksaanwijzing NL
Tłumaczenie oryginalnych instrukcji PL
Eredeti használati utasítás HU
Traducerea instrucţiunilor iniţiale RO
Překlad původních pokynů CZ
Preklad pôvodných pokynov SK
Manual original PT
Bruksanvisning i original SV
Izvorna navodila SL

123
4
5
6
7
8
9
101112
13
14

A
A
A
AB1
B2 C
DE
F
H
G
I
JK
LM
N

A
A
A
AB1
B2 C
DE
F
H
G
I
JK
LM
N

7
6
A
A
A
AB1
B2 C
DE
F
H
G
I
JK
LM
N

Rotary hammer EN
7
6
1. LOCKING SLEEVE
2. DEPTH GAUGE
3. GREASE BOX COVER
4. ON/OFF SWITCH
5. HAMMER OR DRILLING ACTION SELECTOR SWITCH
6. HAMMER OR CHISEL ACTION SELECTOR SWITCH
7. VARIABLE SPEED CONTROL
8. SDS DRILL BITS*
9. SPANNER
10. KEY CHUCK WITH ADAPTOR, CHUCK KEY*
11. PLASTIC CONTAINER GREASE*
12. DUST COVER*
13. CHISELS (POINT & FLAT)*
14. AUXILIARY HANDLE
TECHNICAL DATA
Type WX333 (330~359-designation of machinery, representative of Rotary hammer)
Voltage 220-240V~50/60Hz
Power input 1250W
No load speed 0-750/min
Impact rate 0-3700/min
Impact energy 5.0J
Chuck type SDS-plus
Max drilling capacity Steel 13mm
Masonry 32mm
Wood 40mm
Protection class /II
Machine weight 6.1kg
*Not all the accessories illustrated or described are included in standard delivery.

Rotary hammer EN
9
8
NOISE INFORMATION
A weighted sound pressure LpA: 90dB(A)
A weighted sound power LwA: 101dB(A)
KpA&KwA 3.0dB(A)
Wear ear protection when sound pressure is over 80dB(A)
VIBRATION INFORMATION
Vibration total values (triax vector sum) determined according to EN 60745:
Hammer drilling into concrete Vibration emission value ah,HD= 17.4m/s2
Uncertainty K=1.5m/s2
Chiselling Vibration emission value ah,Cheq= 14.3m/s2
Uncertainty K=1.5m/s2
The declared vibration total value may be used for comparing one tool with another, and may
also be used in a preliminary assessment of exposure.
WARNING: The vibration emission value during actual use of the power tool can differ
from the declared value depending on the ways in which the tool is used dependant on
the following examples and other variations on how the tool is used:
How the tool is used and the materials being cut or drilled.
The tool being in good condition and well maintained.
The use the correct accessory for the tool and ensuring it is sharp and in good condition.
The tightness of the grip on the handles and if any anti vibration accessories are used.
And the tool is being used as intended by its design and these instructions.
This tool may cause hand-arm vibration syndrome if its use is not adequately
managed.
WARNING: To be accurate, an estimation of exposure level in the actual conditions of
use should also take account of all parts of the operating cycle such as the times when
the tool is switched off and when it is running idle but not actually doing the job. This may
significantly reduce the exposure level over the total working period.
Helping to minimise your vibration exposure risk.
ALWAYS use sharp chisels, drills and blades.
Maintain this tool in accordance with these instructions and keep well lubricated (where
appropriate).
If the tool is to be used regularly then invest in anti vibration accessories.
Avoid using tools in temperatures of 100C or less.
Plan your work schedule to spread any high vibration tool use across a number of days.

Rotary hammer EN
9
8
ACCESSORIES
Auxiliary handle 1
Depth gauge 1
SDS drill bits (8 10 12x150mm) 3
SDS chisel (point & flat 250mm) 2
Dust cover 1
Spanner 1
keyed chuck with key and adaptor 1
Plastic container grease 1
We recommend that you purchase your accessories listed in the above list from the same store
that sold you the tool. Refer to the accessory packaging for further details. Store personnel can
assist you and offer advice.

Rotary hammer EN
11
10
HAMMER SAFETY
WARNINGS
1. Wear ear protectors. Exposure to noise
can cause hearing loss.
2. Use auxiliary handle(s), if supplied
with the tool. Loss of control can cause
personal injury.
3. Hold power tool by insulated
gripping surfaces, when performing
an operation where the cutting
accessory may contact hidden wiring
or its own cord. Cutting accessory
contacting a “live” wire may make
exposed metal parts of the power tool
“live” and could give the operator an
electric shock.
ADDITIONAL SAFETY
RULES FOR HAMMER
1. Always wear a dust mask.
SYMBOLS
OPERATING
INSTRUCTIONS
NOTE: Before using the tool, read the
instruction book carefully.
INTENDED USE
The machine is intended for hammer drilling
in concrete, brick and stone as well as for light
chiseling work. It is also suitable for drilling without
impact in wood, metal, ceramic and plastic.
1. ADJUSTING THE AUXILIARY HANDLE
(See Fig. A )
For your personal safety we recommend using
the auxiliary handle at all times.
To adjust the handle, rotate the bottom of the
handle anti-clockwise and rotate the handle
around the hammer collar until the handle is
in the desired position.Tighten fully.
2. USING THE DEPTH GAUGE (See Fig. A)
The depth gauge can be used to set a constant
depth to the drill.
Rotate the locking screw on the top of the
handle anti-clockwise to loosen, insert the
depth stop into the handle. Adjust it to the
desired depth. Rotate the locking screw
clockwise to tighten.
3. FITTING BITS OR CHUCK (See Fig. B1)
Clean the bit shank and apply grease before
installing the bit. Hold the rotary grip, pull
back the lock sleeve and insert the bits or
chuck into the bit holder.Turn the bit and push
it in until a resistance is felt.The shaft drops
completely into the bit holder. Once you are
satisfied that it has been seated, release the
black lock sleeve.This would lock the bits or
chuck into position.
After installing, always make sure that the tool
or chuck is securely held in the bit holder by
trying to pull it out.
If the bits or chuck is not located well, repeat
the operation again.
4. REMOVE BITS OR KEY CHUCK
(See Fig. B1)
To remove the tool or chuck, pull back the lock
sleeve, hold and pull the tool or chuck out.
To reduce the risk of injury, user
must read instruction manual
Double insulation
Warning
Wear ear protection
Wear eye protection
Wear dust mask
Waste electrical products must not
be disposed of with household
waste. Please recycle where
facilities exist. Check with your local
authorities or retailer for recycling
advice.

Rotary hammer EN
11
10
NOTE: The bits or chuck are gripped firmly
by the shank and can not be removed once
locked in position.
5. USING THE CHUCK
For added convenience, your rotary hammer
drill now comes with a 3-jaw chuck. It enables
you to work with non-SDS drill bits/tools.
W
ARNING! The 3-jaw chuck is
designed for wood and metal
DRILLING work only. NEVER use this
chuck with rotary hammer or chisel. THIS
CHUCK CAN BE DAMAGED IF YOU DO SO.
Inserting a drill bit into chuck. (See Fig. B2)
Before installing drill bit, remove mains plug
from mains supply.
Place chuck key into chuck, turn key anti-
clockwise to undo/loosen chuck, insert drill/
tool and firmly tighten chuck by turning key
clockwise. Remove key and replace in Blow
Mould Case.
6. OPERATING THE ON/OFF SWITCH
(See Fig. C)
Depress the switch to start the tool and release
it to stop your tool.
7. USING THE VARIABLE SPEED
CONTROL (See Fig. D)
The speed increases as you turn the switch
towards the higher number and decreases on
the lower number.
8. HAMMER DRILL FUNCTION (See Fig.
E, F)
1)For drilling concrete, masonry etc, press the
lock button (A) and rotate the selector switch
to make sign “ “ point to the triangle.
(See Fig. E)
NOTE:You must press the selector switch lock
button before adjusting the selector switch. If
the selector switch cannot go into the required
position, switch on your hammer a little, then
adjust the selector switch again.
2)Turn the hammer or drilling action selector
switch pointing to the hammer action “ “
position. (See Fig. F)
3)You are now set up for hammer drilling into
masonry.
9. DRILLING FUNCTION (See Fig. G, H)
1)Press the lock button (A) and rotate the
selector switch to make sign “ “ point to
the triangle. (See Fig. G)
2)Turn the hammer or drilling action selector
switch pointing to the drilling action “ “
position. (See Fig. H)
3)You are now set up for drilling function.
10. CHISEL FUNCTION (See I, J)
1)For chipping, grooving or demolition
operation, press the lock button (A) and then
rotate the selector switch make sign “ “
pointing to the triangle. (See Fig. I)
2)Turn the hammer or drilling action selector
switch pointing to the hammer action “ “
position. (See Fig. J)
3)You are now set up for chisel work using
Chisel action.
WARNING: You must make
sure that the selector switch
is positively locked in chisel mode
position. If not, it could cause a hazard.
11. DUST COVER (See Fig. K)
Use the dust cover to prevent dust from
falling over the tool and on your self when
performing overhead drilling operations.
Attach the dust cover to the bit as shown in
the K.
12. LUBRICATION MACHINE (See Fig. L)
The machine is grease-lubricated. A grease
refill is only required during hammer work
efficiency is low. Open the grease box lid
at the top of the hammer using the pin
spanner provided.Then refill approx 30g
grease provided with your tool.The grease
specification is general purpose lithium based.
Use only Worx genuine hammer grease
(optional accessory).
CAUTION: Keep the container of grease
away from children.
13. TO REPLACE THE BRUSHES
(See Fig. M, N)
Disconnect the plug from the power supply.
Unscrew the carbon brush cap with
screwdriver.
Remove the carbon brush. Check the length

Rotary hammer EN
13
12
of the brush and replace if under 6mm. When
brushes need replacement always renew both
brushes, even if one is still more than 6mm
long.
Completely screw down the carbon brush cap.
Check that the tool is working. Before use,
allow it run for a few minutes to enable the
brushes to settle.
WORKING HINTS FOR
YOUR TOOL
1. Reduce the pressure on the drill bit when it
is about to break through. This will prevent
the drill from jamming.
2. When drilling a large hole, first drill a pilot
hole using a smaller drill bit.
3. Always apply pressure to your drill bit in a
straight line, and if possible at right angles
to the workpiece.
4. Never change the operating mode whilst
the drill is running.
5. Do not apply excessive pressure to the tool
when chiseling. Expressive force does not
speed up the work.
MAINTENANCE
Remove the plug from the socket before
carrying out any adjustment, servicing or
maintenance.
There are no user serviceable parts in your
power tool. Never use water or chemical
cleaners to clean your power tool. Wipe clean
with a dry cloth. Always store your power tool
in a dry place. Keep the motor ventilation slots
clean. Keep all working controls free of dust.
Occasionally you may see sparks through the
ventilation slots. This is normal and will not
damage your power tool.
If the supply cord is damaged, it must be
replaced by the manufacturer, its service
agent or similarly qualified persons in order to
avoid a hazard.
TROUBLESHOOTING
1. If your power tool does not start, check the
plug on the power supply first.
2. If your hammer becomes too hot in use,
set the hammer switch to the drill mode
and allow your drill to operate at maximum
speed without load for 2 minutes.
3. If your hammer work efficiency is too low,
please add sufficient grease in the grease
box.
4. If your hammer use in low efficiency,
please check whether the tool is blunt.
5. If a fault can not be rectified, return the tool
to an authorized dealer for repair.
ENVIRONMENTAL
PROTECTION
Waste electrical products should not
be disposed of with household waste.
Please recycle where facilities exist.
Check with your Local Authority or retailer for
recycling advice.
Rotary hammer EN
13
12
PLUG REPLACEMENT
(UK & IRELAND ONLY)
If you need to replace the fitted plug then
follow the instructions below.
IMPORTANT
The wires in the mains lead are colored in
accordance with the following code:
BLUE = NEUTRAL
Brown = Live
As the colors of the wires in the mains lead of
this appliance may not correspond with the
colored markings identifying the terminals
in your plug, proceed as follows.The wire
which is colored blue must be connected to
the terminal which is marked with N.The wire
which is colored brown must be connected to
the terminal which is marked with L.
WARNING: Never connect live or
neutral wires to the earth terminal of the
plug. Only fit an approved 13ABS1363/A plug
and the correct rated fuse.
NOTE: If a moulded plug is fitted and has to
be removed take great care in disposing of the
plug and severed cable, it must be destroyed
to prevent engaging into a socket.
Connect
Blue to N
(neutral)
Outer sleeve
firmly clamped
Cable grip
Brown L (live)
13 Amp fuse approved
to BS1362
DECLARATION OF
CONFORMITY
We,
POSITEC Germany GmbH
Konrad-Adenauer-Ufer 37
50668 Köln
Declare that the product,
Description WORX Rotary Hammer
Type WX333 (330~359-designation of
machinery, representative of Rotary
hammer)
Function Hammering various materials
Complies with the following Directives,
2006/42/EC,
2011/65/EU,
2014/30/EU
Standards conform to
EN 60745-1,
EN 60745-2-6,
EN 55014-1,
EN 55014-2,
EN 61000-3-2,
EN 61000-3-3
The person authorized to compile the technical
file,
Name Russell Nicholson
Address Positec Power Tools (Europe)
Ltd, PO Box 6242 Newbury RG14 9LT UK
Suzhou 2016/03/17
Allen Ding
Deputy Chief Engineer,Testing & Certification

15
14
Bohrhammer D
1. ARRETIERHÜLSE
2. BOHRTIEFENANSCHLAG
3. SCHMIERMITTELBEHÄLTERDECKEL
4. EIN/AUS-SCHALTER
5. HÄMMERN/BOHREN-UMSCHALTER
6. HAMMER /MEISSEL-UMSCHALTER
7. VARIABLER GESCHWINDIGKEITSREGLER
8. SDS BOHRER*
9. SCHRAUBENSCHLÜSSEL
10. ZAHNKRANZBOHRFUTTERSATZ MIT ADAPTER, BOHRFUTTERSCHLÜSSEL*
11. SCHMIERFETTPLASTIKBEHÄLTER*
12. STAUBSCHUTZHAUBE*
13. SPITZMEISSEL & FLACHMEISSEL*
14. ZUSATZHANDGRIFF
TECHNISCHE DATEN
Typ WX333 (330~359-Bezeichnung der Maschine, Repräsentant Bohrhammer)
Spannung 220-240V~50/60Hz
Nennaufnahmeleistung 1250W
Leerlaufdrehzahl 0-750/min
Nennschlagzahl 0-3700/min
Nenn-Schlagenergie 5.0J
Bohrfutter-Typ SDS-plus
Max. Bohrleistung Stahl 13mm
Mauerwerk 32mm
Holz 40mm
Schutzisolation /II
Gewicht 6.1kg
*Abgebildetes oder beschriebenes Zubehör gehört teilweise nicht zum Lieferumfang.

15
14
Bohrhammer D
INFORMATIONEN ÜBER LÄRM
Gewichteter Schalldruck LpA: 90dB(A)
Gewichtete Schallleistung LwA: 101dB(A)
KpA&KwA 3.0dB(A)
Tragen Sie bei einem Schalldruck über einen Gehörschutz 80dB(A)
INFORMATIONEN ÜBER VIBRATIONEN
Vibrationsgesamtmesswertermittlung gemäß EN 60745
Schlagbohren in Beton Vibrationsemissionswert ah,HD= 17.4m/s2
Unsicherheit K=1.5m/s2
Meißeln Vibrationsemissionswert ah,Cheq= 14.3m/s²
Unsicherheit K=1.5m/s2
Der angegebene Gesamtvibrationswert kann zum Vergleich eines Werkzeugs mit einem anderen
und auch zur vorläufigen Expositionsbewertung verwendet werden.
WARNUNG: Der Vibrationsemissionswert während des tatsächlichen Gebrauchs
des Elektrowerkzeugs kann vom angegebenen Wert abweichen, je nachdem, wie
das Werkzeug gemäß folgender Beispiele und anderweitiger Verwendungsmöglichkeiten
eingesetzt wird:
Wie das Werkzeug verwendet wird und Materialen geschnitten oder angebohrt werden.
Das Werkzeug ist in gutem Zustand und gut gepflegt.
Verwendung des richtigen Zubehörs für das Werkzeug und Gewährleistung seiner Schärfe und
seines guten Zustands.
Die Festigkeit der Handgriffe und ob Antivibrationszubehör verwendet wird.
Und ob das verwendete Werkzeug dem Design und diesen Anweisungen entsprechend
verwendet wird.
Wird dieses Werkzeug nicht anemessen gehandhabt, kann es ein Hand-Arm-
Vibrationssyndrom erzeugen.
WARNUNG: Um genau zu sein, sollte ein Abschätzung des Belastungsgrades aller
Arbeitsabschnitte während tatsächlicher Verwendung berücksichtigt werden, z.B. die
Zeiten, wenn das Werkzeug ausgeschaltet ist, und wenn es sich im Leerlauf befindet und
eigentlich nicht eingesetzt wird. Auf diese Weise kann der Belastungsgrad während der
gesamten Arbeitszeit wesentlich gemindert werden.
Minimieren Sie Ihr Risiko, dem Sie bei Vibrationen ausgesetzt sind.
Verwenden Sie IMMER scharfe Meissel, Bohrer und Sägeblätter.
Pflegen Sie dieses Werkzeug diesen Anweisungen entsprechend und achten Sie auf eine gute

17
16
Bohrhammer D
Einfettung (wo erforderlich).
Bei regelmäßiger Verwendung dieses Werkzeugs sollten Sie in Antivibrationszubehör
investieren.
Vermeiden Sie den Einsatz von Werkzeugen bei Temperaturen von 10ºC oder darunter.
Machen Sie einen Arbeitsplan, um die Verwendung von hochvibrierenden Werkzeugen auf
mehrere Tage zu verteilen.
ZUBEHÖRTEILE
Zusatzhandgriff 1
Bohrtiefenanschlag 1
SDS Bohrer (8 10 12x150mm) 3
SDS Spitzmeißel & Flachmeißel (250mm) 2
Staubschutzhaube 1
Schraubenschlüssel 1
Zahnkranzbohrfuttersatz mit Adapter, Bohrfutterschlüssel 1
Schmierfettplastikbehälter 1
Wir empfehlen Ihnen, sämtliche Zubehörteile beim selben Fachhändler zu beziehen, bei dem Sie
auch Ihr Elektrowerkzeug gekauft haben. Weitere Informationen finden Sie auf der Verpackung
der Zubehörteile. Auch Ihr Fachhändler berät Sie gerne.

17
16
Bohrhammer D
SICHERHEITSHINWEISE
FÜR HÄMMER
1. Tragen Sie Gehörschutz, Wenn Sie
die Schlagbohrmaschine benutzen.
Lärmaussetzung kann Gehörverlust
verursachen.
2. Benutzen Sie den zusätzlichen
Handgriff, der mit dem Werkzeug
geliefert wird. Kontrollverlust kann
Personenschäden zufolge haben.
3. Halten Sie das Werkzeug nur an den
isolierten griffigen Oberflächen, wenn
Sie einen Einsatz durchführen, bei
dem Schneidwerkzeuge eventuell
versteckte Kabel berühren könnten.
Berührung mit einem unter Strom
stehenden Kabel kann auch die Metallteile
des Gerätes unter Strom setzen und
dem Bedienenden einen Stromschlag
versetzen.
ZUSÄTZLICHE
SICHERHEITSHINWEISE
FÜR BOHRHÄMMER
1.Tragen Sie eine Staubschutzmaske.
SYMBOLE
HINWEISE ZUM BETRIEB
HINWEIS: Lesen Sie das Handbuch
vor Inbetriebnahme des Werkzeuges
sorgfältig durch.
Bestimmungsgemäßer Gebrauch
Das Gerät ist bestimmt zum Hammerbohren
in Beton, Ziegel und Gestein sowie für leichte
Meißelarbeiten. Es ist ebenso geeignet zum
Bohren ohne Schlag in Holz, Metall, Keramik
und Kunststoff.
1. ZUSATZGRIFF EINSTELLEN (Siehe A )
Aus Sicherheitsgründen sollte der zusatzgriff
immer verwendet werden.
Zum Einstellen lösen Sie den Griff-
Arretierknopf durch Drehen gegen den
Uhrzeigersinn. Drehen Sie den Griff um seine
Achse oder das gesamte Griffstück um das
Werkzeug herum – siehe Abb. A. Ziehen Sie
den Arretierknopf wieder fest an.
2. TIEFENANSCHLAG VERWENDEN
(Siehe A)
Mit demTiefenanschlag können Sie eine
konstante Bohrtiefe vorgeben.
Drehen Sie die Arretierschraube am
Oberteil des Handgriffs zum Lösen gegen
den Uhrzeigersinn, schieben Sie den
Tiefenanschlag in den Griff ein. Stellen
Sie die gewünschteTiefe ein. Drehen Sie
die Arretierschraube zum Fixieren im
Uhrzeigersinn.
3. BITS ODER BOHRFUTTER ANBRINGEN
(Siehe B1)
Reinigen Sie den Meißelschaft und tragen Sie
etwas Schmiermittel auf, ehe Sie den Meißel
einsetzen. Fassen Sie den drehbaren Griff,
ziehen Sie die Arretierhülse zurück, setzen Sie
Zur Reduzierung der
Verletzungsgefahr bitte die
Bedienungsanleitung durchlesen
Schutzisolation
WARNUNG
Tragen Sie einen Gehörschutz
Tragen Sie eine Schutzbrille
Tragen Sie eine Staubschutzmaske
Elektroprodukte dürfen nicht mit
dem normalen Haushaltsmüll
entsorgt werden, sondern
sollten nach Möglichkeit zu einer
Recyclingstelle gebracht werden.
Ihre zuständigen Behörden oder Ihr
Fachhändler geben Ihnen hierzu
gerne Auskunft.

19
18
Bohrhammer D
ein Bit oder das Bohrfutter in den Bithalter
ein. Schieben Sie den Meißel drehend
ein, bis Sie einen Widerstand spüren – der
Schaft sitzt komplett in der Meißelhalterung.
Wenn der Meißel richtig sitzt, lassen Sie die
Arretierhülse los. Dadurch werden Bit oder
Bohrfutter fixiert.
Nach der Installation vergewissern Sie sich
grundsätzlich, dass das Werkzeug oder das
Bohrfutter absolut fest im Bithalter sitzt - dazu
versuchen Sie es herauszuziehen; es darf sich
nicht herausziehen lassen.
Falls das Bit oder das Bohrfutter nicht richtig
fixiert sein sollte, beginnen Sie von vorne.
4. BITS ODER BOHRFUTTER
HERAUSNEHMEN (Siehe B1)
Zum Herausnehmen des Werkzeugs oder
Bohrfutters ziehen Sie die Arretierhülse
zurück, halten sie in dieser Position und
nehmen das Werkzeug oder Bohrfutter
heraus.
HINWEIS: Bit oder Bohrfutter werden am
Schaft gehalten und können im fixierten
Zustand nicht herausgenommen werden.
5. BOHRFUTTER VERWENDEN
Zur vielseitigen Anwendung wird Ihr
Bohrhammer mit einem 3-Backen-Bohrfutter
geliefert. Dadurch können Sie auch mit
anderen als mit SDS-Werkzeugen/-Bits
arbeiten.
WARNUNG! Das 3-Backen-
Bohrfutter ist ausschließlich zum
BOHREN in Holz und Metall geeignet.
Benutzen Sie dieses Bohrfutter
NIEMALS zum Schlagbohren oder
Meißeln. IN DIESEM FALL KANN DAS
BOHRFUTTER BESCHÄDIGT WERDEN.
Bohrerbits in das Bohrfutter einsetzen.
(Siehe B2)
Trennen Sie das Gerät von der
Stromversorgung, bevor Sie Bohrerbits
einsetzen.
Stecken Sie den Spannschlüssel in das
Bohrfutter und drehen Sie ihn entgegen
dem Uhrzeigersinn, um das Bohrfutter
loszuschrauben, fügen Sie den Bohrer/das
Werkzeug ein und ziehen Sie das Bohrfutter
fest an, in dem Sie den Spannschlüssel im
Uhrzeigersinn drehen. Entfernen Sie den
Spannschlüssel und legen Sie ihn in den
Blasformkoffer zurück.
6. BEDIENUNG DES EIN-/
AUSSCHALTERS (Siehe C)
Drücken Sie, um das Werkzeug zu starten und
lassen Sie los, um es abzuschalten.
7. SCHALTER FÜR VARIABLE
DREHZAHLSTEUERUNG (Siehe D)
Bei höheren Einstellungszahlen steigt die
Drehzahl, bei niedrigeren Einstellungszahlen
sinkt die Drehzahl entsprechend.
8. BOHRHAMMERFUNKTION (Siehe E,F)
1)Zum Bohren in Beton, Mauerwerk und
ähnliche Materialien drücken Sie die
Freigabetaste (A) und drehen den Umschalter,
bis das Dreieck auf das Symbol “ “ zeigt.
(Siehe E)
HINWEIS: Vor dem Drehen des Umschalters
muss die Freigabetaste gedrückt werden. Falls
sich der Umschalter nicht in die gewünschte
Position bringen lassen sollte, lassen Sie den
Bohrhammer kurz anlaufen und drehen den
Umschalter danach erneut.
2)Drehen Sie den Hämmern/Bohren-
Umschalter in die Hämmern-Position “ “ .
(Siehe F)
3)Ihr Bohrhammer ist nun auf Bohren in
Mauerwerk eingestellt.
9. BOHREN (Siehe G,H)
1)Drücken Sie die Freigabetaste (A) und
drehen Sie den Umschalter, bis das Dreieck
auf das Symbol “ “ zeigt. (Siehe G)
2)Drehen Sie den Hämmern/Bohren-
Umschalter in die Bohren-Position “ “ .
(Siehe H)
3)Ihr Bohrhammer ist nun auf Bohren
eingestellt.
10. MEIßELN (Siehe I,J)
1)Zum Zerspanen, Auskehlen oder
Zertrümmern drücken Sie die Freigabetaste
(A) und drehen den Umschalter, bis das
Dreieck am Schmiermittelbehälterdeckel auf
das Symbol “ “ zeigt. (Siehe I)

19
18
Bohrhammer D
2)Drehen Sie den Hämmern/Bohren-
Umschalter in die Hämmern-Position “ “ .
(Siehe J)
3)Ihr Werkzeug ist nun auf Meißeln eingestellt.
WARNUNG: Achten Sie in jedem
Fall darauf, dass der Umschalter
in der Meißeln-Position einrastet.
Ansonsten besteht Unfallgefahr!
11. STAUBSAMMLER (Siehe K)
Der Staubsammler verhindert, dass Staub bei
Überkopfarbeiten auf das Werkzeug oder auf
Sie rieselt. Bringen Sie den Staubsammler wie
in Abb. K gezeigt am Meißel an.
12. SCHMIERUNG (Siehe L)
Das Gerät ist ölgeschmiert. Schmiermittel
muss nur nachgefüllt werden, wenn die
Arbeitseffizienz des Hammers nachläßt.
Öffnen Sie dazu die Schmierkappe an
der Oberseite des Hammers mithilfe des
beiliegenden Schlüssels. Dann füllen Sie ca.
30g des beiliegenden Schmiermittels ein.
Die Spezifikationen des Schmiermittels sind
Universalschmiermittel auf Lithium-Basis.
Dabei ist unbedingt das vorgesehene Worx Öl
zu verwenden.
ACHTUNG: Schmiermittel und
-behälter von Kindern fernhalten!
13. DIE KOHLEBÜRSTEN ERSETZEN
(Siehe M,N)
Ziehen Sie den Netzstecker.
Lösen Sie die Kohlebürstenkappe mit einem
Schraubendreher.
Entnehmen Sie die Kohlebürste. Prüfen Sie
die Länge der Bürste; tauschen Sie sie aus,
wenn die Länge weniger als 6 mm beträgt.
Beim Austausch wechseln Sie immer beide
Bürsten auf einmal aus; auch dann, wenn
die Länge einer Bürste noch mehr als 6 mm
beträgt.
Schrauben Sie die Kohlebürstenkappe wieder
vollständig auf. Überzeugen Sie sich davon,
dass das Werkzeug arbeitet. Ehe Sie mit der
Arbeit beginnen, lassen Sie das Werkzeug ein
paar Minuten laufen, damit sich die Bürsten
etwas einschleifen können.
TIPPS ZUR ARBEIT MIT
IHREM WERKZEUG
1. Vermindern Sie den Druck auf das Bit,
wenn es kurz vor dem Durchbruch steht.
Dadurch vermeiden Sie ein Verklemmen
des Bohrers.
2. Bei größeren Löchern bohren Sie zuerst ein
Führungsloch mit einem kleineren Bohrer.
3. Üben Sie immer nur senkrechten Druck auf
den Bohrer aus; idealerweise rechtwinklig
zum Werkstück.
4. Schalten Sie niemals den Betriebsmodus
um, während das Gerät läuft.
5. Üben Sie beim Meißeln keinen
übermäßigen Druck aus. Mehr Druck
beschleunigt das Arbeiten nicht.
WARTUNG
Ziehen Sie grundsätzlich den
Netzstecker, bevor Sie Einstell-,
Reparatur- oder Wartungstätigkeiten
ausführen.
Es enthält keine Teile, die Sie warten müssen.
Reinigen Sie Ihr Werkzeug niemals mit Wasser
oder chemischen Loesungsmitteln. Wischen
Sie es mit einem trockenen Tuch sauber.
Lagern Sie Ihr Werkzeug immer an einem
trockenen Platz. Sorgen Sie dafür, dass bei
staubigen Arbeiten die Lüftungsöffnungen
frei sind. Falls es erforderlich sein sollte, den
Staub zu entfernen, trennen Sie zuerst das
Elektrowerkzeug vom Stromversorgungsnetz.
Verwenden Sie nichtmetallische Objekte zum
Entfernen von Staub und vermeiden Sie das
Beschädigen innerer Teile. Gelegentlich sind
durch die Lüftungsschlitze hindurch Funken zu
sehen. Dies ist normal und wird Ihr Werkzeug
nicht beschädigen.
Falls das Netzkabel beschädigt sein sollte,
muss es vom Hersteller, einem seiner Service-
Beauftragten oder einer ähnlich qualifizierten
Person instandgesetzt werden, damit es nicht
zu Gefährdungen kommt.

21
20
21
20
Bohrhammer D
FEHLERBEHEBUNG
1. Falls Ihr Elektrowerkzeug nicht anlaufen
sollte, überprüfen Sie zuerst, ob der Stecker
richtig in die Steckdose eingesteckt ist.
2. Falls sich Ihr Werkzeug bei der Arbeit stark
erwärmen sollte, halten Sie es an, schalten
auf Bohren um und lassen das Werkzeug 2
Minuten ohne Belastung laufen.
3. Sollte das Werkzeug mit geringerer Leistung
arbeiten, füllen Sie Schmiermittel nach.
4. Bei schlechteren Ergebnissen prüfen Sie
nach, ob das Werkzeug stumpf geworden ist.
5. Falls sich Fehler nicht beheben lassen
sollten, lassen Sie das Werkzeug bei einem
autorisierten Händler reparieren.
UMWELTSCHUTZ
Elektroprodukte dürfen nicht mit dem
normalen Haushaltsmüll entsorgt
werden, sondern sollten nach
Möglichkeit zu einer Recyclingstelle gebracht
werden. Ihre zuständigen Behörden oder
Ihr Fachhändler geben Ihnen hierzu gerne
Auskunft.
KONFORMITÄTSERKLÄRUNG
Wir,
POSITEC Germany GmbH
Konrad-Adenauer-Ufer 37
50668 Köln
Erklären hiermit, dass unser Produkt
Beschreibung WORX Bohrhammer
Typ WX333 (330~359-Bezeichnung der
Maschine, Repräsentant Bohrhammer)
Funktion Hämmern verschiedener
Materialien
Den Bestimmungen der folgenden Richtlinien
entspricht:
2006/42/EC,
2011/65/EU,
2014/30/EU
Normen
EN 60745-1,
EN 60745-2-6,
EN 55014-1,
EN 55014-2,
EN 61000-3-2,
EN 61000-3-3
Zur Kompilierung der technischen Datei
ermächtigte Person,
Name Russell Nicholson
Anschrift Positec Power Tools (Europe)
Ltd, PO Box 6242 Newbury RG14 9LT UK
Suzhou 2016/03/17
Allen Ding
Stellvertretender Chefingenieur, Prüfung und
Zertifizierung
Other manuals for WX333
5
Table of contents
Languages:
Other Worx Rotary Hammer manuals
Popular Rotary Hammer manuals by other brands

Hitachi
Hitachi DH24PE Instruction manual and safety instructions

Gude
Gude BH 20 E Translation of the original instructions

Makita
Makita HR5201C instruction manual

Chicago Electric
Chicago Electric 97743 Set up and operating instructions

Hilti
Hilti GPB 6X-22 manual

Rockwell
Rockwell Rockwell 601 instruction manual