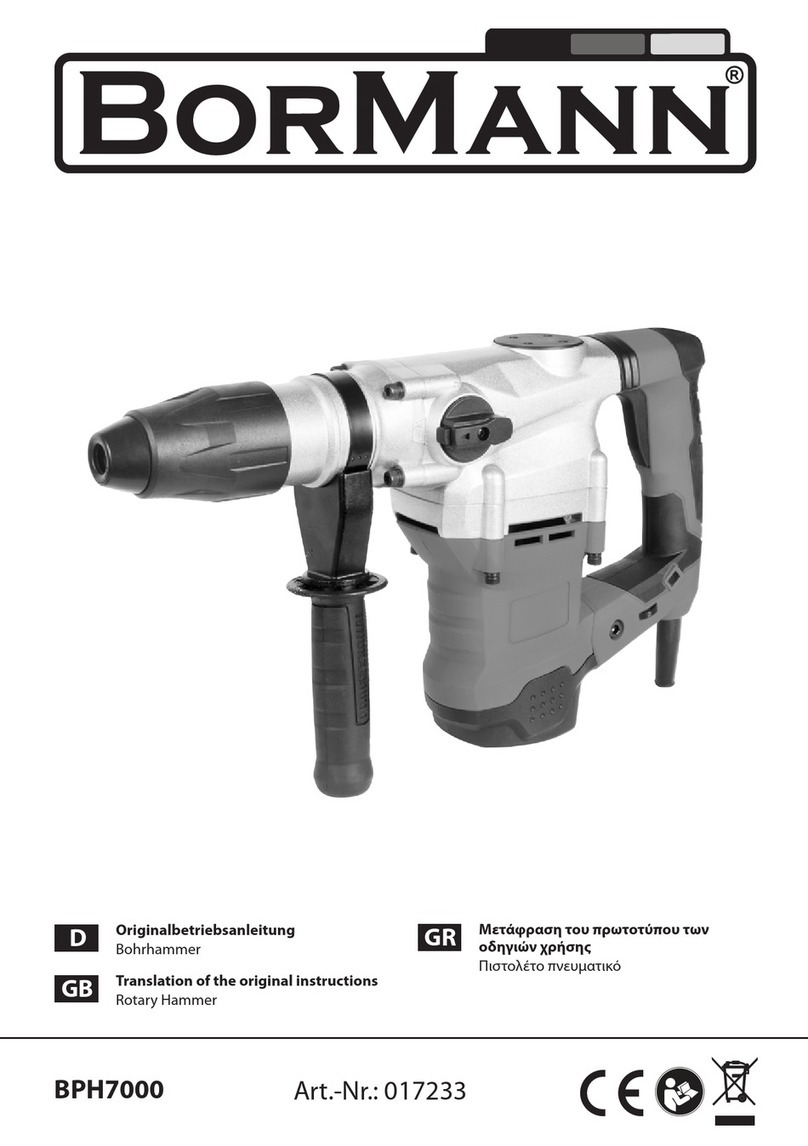
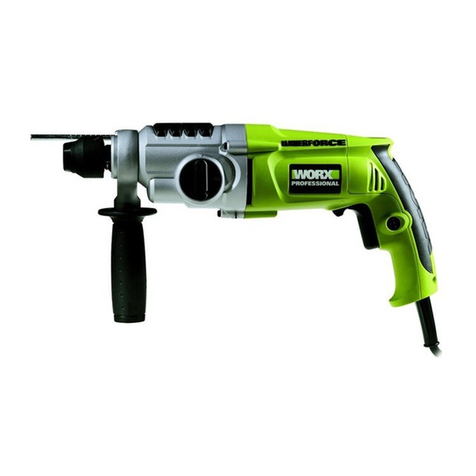
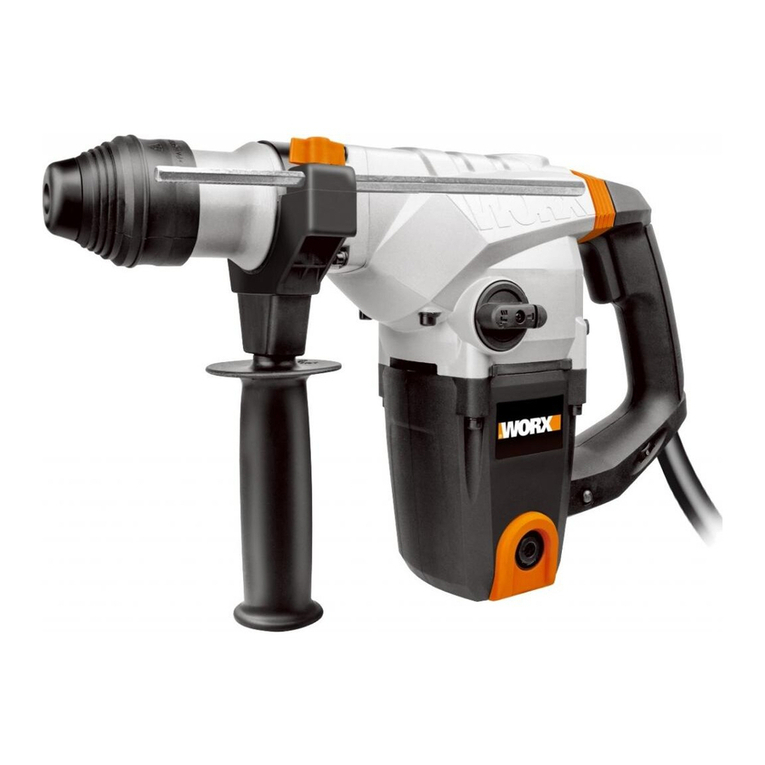
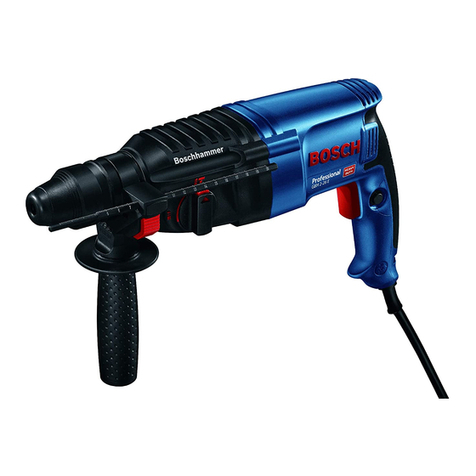
Worx WX333 User manual

WX333 WX333.X WT344
Rotary hammer
Bohrhammer
Marteau Perforateur
Martello rotante
Martillo rotatorio
Martelo rotativo
Boorhamer
Rotationshammer
Roterende hammer
Rotorhammare
Młot obrotowy
Περιστροφικό σφυρί
Pneumatikus fúrókalapács
Ciocan articulat
Rotační kladivo
Otočné kladivo
Rotacijski vrtalnik
Перфоратор
EN
D
F
I
ES
PT
NL
DK
NOR
SV
PL
GR
HU
RO
CZ
SK
SL
RU
P07
P12
P18
P24
P30
P37
P41
P47
P52
P57
P63
P70
P77
P83
P89
P94
P100
P106

Original Instruction
Originalbetriebsanleitung
Notice originale
Istruzioni originali
Manual original
Manual original
Oorspronkelijke gebruiksaanwijzing
Original brugsanvisning
Original driftsinstruks
Bruksanvisning i original
Instrukcja oryginalna
ΜΕΤΑΦΡΑΣΗ ΤΩΝ ΠΡΩΤΟΤΥΠΩΝ ΟΔΗΓΙΩΝ
Eredeti használati utasítás
Instrucţiuni originale
Původní návod k používání
Pôvodný návod na použitie
Izvirna navodila
Оригинальная инструкция
EN
D
F
I
ES
PT
NL
DK
NOR
SV
PL
GR
HU
RO
CZ
SK
SL
RU

123
4
5
6
7
8
9
101112
13
14

A
A
A
AB1
B2 C
DE
F
H
G
I
JK
LM
N

A
A
A
AB1
B2 C
DE
F
H
G
I
JK
LM
N

A
A
A
AB1
B2 C
DE
F
H
G
I
JK
LM
N

7
Rotary hammer EN
GENERAL POWER TOOL
SAFETY WARNINGS
WARNING Read all safety warnings,
instructions, illustrations and specications
provided with this power tool. Failure to follow all
instructions listed below may result in electric shock,
Save all warnings and instructions for future
reference.
The term “power tool” in the warnings refers to your
mains-operated (corded) power tool or battery-
1. WORK AREA SAFETY
a) Keep work area clean and well lit. Cluttered or dark
b) Do not operate power tools in explosive
atmospheres, such as in the presence of
ammable liquids, gases or dust. Power tools
c) Keep children and bystanders away while
operating a power tool. Distractions can cause you
2. ELECTRICAL SAFETY
a) Power tool plugs must match the outlet. Never
modify the plug in any way. Do not use any adapter
plugs with earthed (grounded) power tools.
b) Avoid body contact with earthed or grounded
surfaces, such as pipes, radiators, ranges and
refrigerators. There is an increased risk of electric
c) Do not expose power tools to rain or wet
conditions. Water entering a power tool will
d) Do not abuse the cord. Never use the cord for
carrying, pulling or unplugging the power tool.
Keep cord away from heat, oil, sharp edges
or moving parts. Damaged or entangled cords
e) When operating a power tool outdoors, use an
extension cord suitable for outdoor use. Use of a
cord suitable for outdoor use reduces the risk of
f) If operating a power tool in a damp location is
unavoidable, use a residual current device (RCD)
protected supply. Use of an RCD reduces the risk of
3. PERSONAL SAFETY
a) Stay alert, watch what you are doing and use
common sense when operating a power tool. Do
not use a power tool while you are tired or under
the inuence of drugs, alcohol or medication. A
moment of inattention while operating power tools
b) Use personal protective equipment. Always
wear eye protection. Protective equipment
such as dust mask, non-skid safety shoes, hard
hat, or hearing protection used for appropriate
c) Prevent unintentional starting. Ensure the
switch is in the off-position before connecting to
power source and/or battery pack, picking up or
carrying the tool. Carrying power tools with your
d) Remove any adjusting key or wrench before
turning the power tool on. A wrench or a key left
attached to a rotating part of the power tool may
e) Do not overreach. Keep proper footing and
balance at all times. This enables better control
f) Dress properly. Do not wear loose clothing or
jewellery. Keep your hair and clothing away from
moving parts.
g) If devices are provided for the connection of
dust extraction and collection facilities, ensure
these are connected and properly used. Use of
h) Do not let familiarity gained from frequent use
of tools allow you to become complacent and
ignore tool safety principles. A careless action
4. POWER TOOL USE AND CARE
a) Do not force the power tool. Use the correct
power tool for your application. The correct
b) Do not use the power tool if the switch does not
turn it on and off. Any power tool that cannot be
controlled with the switch is dangerous and must
c) Disconnect the plug from the power source and/
or the battery pack from the power tool before
making any adjustments, changing accessories,
or storing power tools. Such preventive safety
measures reduce the risk of starting the power
d) Store idle power tools out of the reach of
children and do not allow persons unfamiliar
with the power tool or these instructions
to operate the power tool. Power tools are
e) Maintain power tools and accessories. Check
for misalignment or binding of moving parts,
breakage of parts and any other condition
that may affect the power tool’s operation. If
damaged, have the power tool repaired before

8
Rotary hammer EN
use. Many accidents are caused by poorly
f) Keep cutting tools sharp and clean. Properly
maintained cutting tools with sharp cutting edges
g) Use the power tool, accessories and tool bits
etc. in accordance with these instructions,
taking into account the working conditions and
the work to be performed. Use of the power
tool for operations different from those intended
h) Keep handles and grasping surfaces dry, clean
and free from oil and grease. Slippery handles
and grasping surfaces do not allow for safe
handling and control of the tool in unexpected
5. SERVICE
a) Have your power tool serviced by a qualied
repair person using only identical replacement
parts. This will ensure that the safety of the
HAMMER SAFETY
WARNINGS
1) Safety instructions for all operations
a. Wear ear protectors. Exposure to noise can
b. Use auxiliary handle(s), if supplied with the tool.
c. Hold power tool by insulated gripping surfaces,
when performing an operation where the cutting
accessory may contact hidden wiring or its own
cord. Cutting accessory contacting a “live” wire
may make exposed metal parts of the power
tool “live” and could give the operator an electric
2) Safety instructions when using long drill bits with
rotary hammers
a) Always start drilling at low speed and with the
bit tip in contact with the workpiece. At higher
speeds, the bit is likely to bend if allowed to rotate
freely without contacting the workpiece, resulting
b) Apply pressure only in direct line with the bit and
do not apply excessive pressure. Bits can bend,
causing breakage or loss of control, resulting in
ADDITIONAL SAFETY
RULES FOR HAMMER
1. Always wear a dust mask.
SYMBOLS
must read instruction manual
Double insulation
Warning
Wear ear protection
Wear eye protection
Wear dust mask
Waste electrical products must
not be disposed of with household
authorities or retailer for recycling
COMPONENT LIST
1. LOCKING SLEEVE
2. DEPTH GAUGE
3. GREASE BOX COVER
4. ON/OFF SWITCH
5. HAMMER OR DRILLING ACTION SELEC-
TOR SWITCH
6. HAMMER OR CHISEL ACTION SELECTOR
SWITCH
7. VARIABLE SPEED CONTROL
8. SDS DRILL BITS*
9. SPANNER
10. KEY CHUCK WITH ADAPTOR, CHUCK
KEY*

9
Rotary hammer EN
11. PLASTIC CONTAINER GREASE*
12. DUST COVER*
13. CHISELS (POINT & FLAT)*
14. AUXILIARY HANDLE
* Not all the accessories illustrated or described are
included in standard delivery.
TECHNICAL DATA
Type WX333 WX333.X WT344(330~359-
designation of machinery, representative of Rotary
hammer)
WX333 WX333.X **
WT344
Voltage
Power input 1250W
No load speed
Impact rate
Impact energy
Chuck type SDS-plus
capacity
Steel 13mm
Wood 32mm
Concrete 40mm
Protection class
Machine weight
** X=1-999, A-Z, M1-M9 there are only used for
different customers, there are no safe relevant
We recommend that you purchase your accessories
NOISE INFORMATION
A weighted sound pressure LpA= 90 dB(A)
A weighted sound power LwA= 101 dB(A)
KpA& KwA
Wear ear protection
VIBRATION INFORMATION
Vibration total values (triax vector sum)
into concrete
Vibration emission value
a2
2
Chiseling
Vibration emission value
a2
2
The declared vibration total value and the declared
noise emission value have been measured in
accordance with a standard test method and may be
The declared vibration total value and the declared
noise emission value may also be used in a
WARNING: The vibration and noise emissions
during actual use of the power tool can differ
from the declared value depending on the ways in
which the tool is used especially what kind of
workpiece is processed dependant on the following
examples and other variations on how the tool is
used:
The tool being in good condition and well
The use of the correct accessory for the tool and
The tightness of the grip on the handles and if any
And the tool is being used as intended by its design
This tool may cause hand-arm vibration syndrome
if its use is not adequately managed.
WARNING: To be accurate, an estimation of
exposure level in the actual conditions of use
should also take account of all parts of the operating
cycle such as the times when the tool is switched off
and when it is running idle but not actually doing the
Maintain this tool in accordance with these
instructions and keep well lubricated (where

10
Rotary hammer EN
If the tool is to be used regularly then invest in anti
Plan your work schedule to spread any high vibration
OPERATING INSTRUCTIONS
NOTE: Before using the tool, read the
INTENDED USE
The machine is intended for hammer drilling
in concrete, brick and stone as well as for light
1. ADJUSTING THE AUXILIARY HANDLE (See Fig.
A )
For your personal safety we recommend using the
anti-clockwise and rotate the handle around the
hammer collar until the handle is in the desired
2. USING THE DEPTH GAUGE (See Fig. A)
The depth gauge can be used to set a constant depth
Rotate the locking screw on the top of the handle
anti-clockwise to loosen, insert the depth stop into
3. FITTING BITS OR CHUCK (See Fig. B1)
Clean the bit shank and apply grease before

lock sleeve and insert the bits or chuck into the bit
After installing, always make sure that the tool or
chuck is securely held in the bit holder by trying to
If the bits or chuck is not located well, repeat the
4. REMOVE BITS OR KEY CHUCK (See Fig. B1)
To remove the tool or chuck, pull back the lock
NOTE:
shank and can not be removed once locked in
5. USING THE CHUCK
For added convenience, your rotary hammer drill now
WARNING! The 3-jaw chuck is designed for
wood and metal DRILLING work only. NEVER
use this chuck with rotary hammer or chisel. THIS
CHUCK CAN BE DAMAGED IF YOU DO SO.
Inserting a drill bit into chuck. (See Fig. B2)
Before installing drill bit, remove mains plug from
Place chuck key into chuck, turn key anti-clockwise
6. OPERATING THE ON/OFF SWITCH (See Fig. C)
Depress the switch to start the tool and release it to
7. USING THE VARIABLE SPEED CONTROL (See
Fig. D)
The speed increases as you turn the switch towards
the higher number and decreases on the lower
8. HAMMER DRILL FUNCTION (See Fig. E, F)
1)For drilling concrete, masonry etc, press the lock
button (A) and rotate the selector switch to make
sign “
NOTE: You must press the selector switch lock
selector switch cannot go into the required position,
2)Turn the hammer or drilling action selector switch
pointing to the hammer action “
3)You are now set up for hammer drilling into
9. DRILLING FUNCTION (See Fig. G, H)
1)Press the lock button (A) and rotate the selector
switch to make sign “
2)Turn the hammer or drilling action selector switch
pointing to the drilling action “
10. CHISEL FUNCTION (See I, J)
1)For chipping, grooving or demolition operation,
press the lock button (A) and then rotate the selector
switch make sign “
2)Turn the hammer or drilling action selector switch
pointing to the hammer action “
3)You are now set up for chisel work using Chisel

11
Rotary hammer EN
WARNING: You must make sure that the
selector switch is positively locked in chisel
mode position. If not, it could cause a hazard.
11. DUST COVER (See Fig. K)
Use the dust cover to prevent dust from falling over
the tool and on your self when performing overhead
12. LUBRICATION MACHINE (See Fig. L)
Open the grease box lid at the top of the hammer
Use only Worx genuine hammer grease (optional
CAUTION: Keep the container of grease away
13. TO REPLACE THE BRUSHES (See Fig. M, N)
replacement always renew both brushes, even if one
WORKING HINTS FOR YOUR
TOOL
straight line, and if possible at right angles to the
MAINTENANCE
Remove the plug from the socket before carrying
out any adjustment, servicing or maintenance.
There are no user serviceable parts in your power
If the supply cord is damaged, it must be replaced
by the manufacturer, its service agent or similarly
TROUBLESHOOTING
hammer switch to the drill mode and allow your
drill to operate at maximum speed without load
ENVIRONMENTAL
PROTECTION
Waste electrical products should not be

1312
Bohrhammer D
DECLARATION OF
CONFORMITY
We,
On behalf of Positec declare that the product,
Description Worx Rotary Hammer
Type WX333 WX333.X WT344(330~359-
designation of machinery, representative of Rotary
hammer)
Function Hammering various materials
Complies with the following Directives,
2006/42/EC,
2011/65/EU&(EU)2015/863
2014/30/EU
Standards conform to
EN 62841-1, EN IEC 62841-2-6, EN IEC 55014-1, EN IEC
55014-2, EN IEC 61000-3-2, EN 61000-3-3
Name Marcel Filz
Address Positec Germany GmbH
Postfach 32 02 16, 50796 Cologne, Germany
Allen Ding
ALLGEMEINE
SICHERHEITSHINWEISE
FÜR ELEKTROWERKZEUGE
WARNUNG! Machen Sie sich mit allen
Sicherheitswarnungen, Anweisungen,
Abbildungen und Spezikationen vertraut, die mit
diesem Elektrowerkzeug geliefert werden. Die
Nichtbeachtung der unten aufgeführten Anweisungen
Bewahren Sie alle Sicherheitshinweise und
Anweisungen für die Zukunft auf.
Der in den Sicherheitshinweisen verwendete Begriff
„Elektrowerkzeug“ bezieht sich auf akkubetriebene
1. ARBEITSPLATZSICHERHEIT
a) Halten Sie Ihren Arbeitsbereich sauber und
gut beleuchtet. Unordnung oder unbeleuchtete
b) Arbeiten Sie mit dem Elektrowerkzeug nicht in
explosionsgefährdeter Umgebung, in der sich
brennbare Flüssigkeiten, Gase oder Stäube
benden. Elektrowerkzeuge erzeugen Funken, die
c) Halten Sie Kinder und andere Personen während
der Benutzung des Elektrowerkzeugs fern. Bei
2. ELEKTRISCHE SICHERHEIT
a) Der Anschlussstecker des Elektrowerkzeuges
muss in die Steckdose passen. Der Stecker
darf in keiner Weise verändert werden.
Verwenden Sie keine Adapterstecker gemeinsam
mit schutzgeerdeten Elektrowerkzeugen.
Unveränderte Stecker und passende Steckdosen
b) Vermeiden Sie Körperkontakt mit geerdeten
Oberächen wie von Rohren, Heizungen, Herden
und Kühlschränken. Es besteht ein erhöhtes
Risiko durch elektrischen Schlag, wenn Ihr Körper
c) Halten Sie Elektrowerkzeuge von Regen oder
Nässe fern. Das Eindringen von Wasser in
ein Elektrowerkzeug erhöht das Risiko eines
d) Zweckentfremden Sie das Kabel nicht, um das
Elektrowerkzeug zu tragen, aufzuhängen oder um
den Stecker aus der Steckdose zu ziehen. Halten
Sie das Kabel fern von Hitze, Öl, scharfen Kanten
oder sich bewegenden Geräteteilen. Beschädigte
oder verwickelte Kabel erhöhen das Risiko eines
e) Wenn Sie mit einem Elektrowerkzeug im Freien
arbeiten, verwenden Sie nur Verlängerungskabel,

1312
Bohrhammer D
die auch für den Außenbereich geeignet sind.
Die Anwendung eines für den Außenbereich
geeigneten Verlängerungskabels verringert das
f) Wenn der Betrieb des Elektrowerkzeuges in
feuchter Umgebung nicht vermeidbar ist,
verwenden Sie einen Fehlerstromschutzschalter.
Der Einsatz eines Fehlerstromschutzschalters
vermindert das Risiko eines elektrischen
3. SICHERHEIT VON PERSONEN
a) Seien Sie aufmerksam, achten Sie darauf, was
Sie tun, und gehen Sie mit Vernunft an die
Arbeit mit einem Elektrowerkzeug. Benutzen
Sie kein Elektrowerkzeug, wenn Sie müde
sind oder unter dem Einuss von Drogen,
Alkohol oder Medikamenten stehen. Ein
des Elektrowerkzeuges kann zu ernsthaften
b) Tragen Sie persönliche Schutzausrüstung und
immer eine Schutzbrille. Das Tragen persönlicher
Schutzausrüstung, wie Staubmaske, rutschfeste
c) Vermeiden Sie eine unbeabsichtigte
Inbetriebnahme. Vergewissern Sie sich,
dass das Elektrowerkzeug ausgeschaltet ist,
bevor Sie es an den Akku anschließen, es
aufnehmen oder tragen. Wenn Sie beim Tragen
des Elektrowerkzeuges den Finger am Schalter
Stromversorgung anschließen, kann dies zu
d) Entfernen Sie Einstellwerkzeuge oder
Schraubenschlüssel, bevor Sie das
Elektrowerkzeug einschalten. Ein Werkzeug oder
e) Vermeiden Sie eine abnormale Körperhaltung.
Sorgen Sie für einen sicheren Stand und halten
Sie jederzeit das Gleichgewicht. Dadurch
können Sie das Elektrowerkzeug in unerwarteten
f) Tragen Sie geeignete Kleidung. Tragen Sie keine
weite Kleidung oder Schmuck. Halten Sie Haare
und Kleidung fern von sich bewegenden Teilen.
können von sich bewegenden Teilen erfasst
g) Wenn Staubabsaug- und -auffangeinrichtungen
montiert werden können, vergewissern Sie
sich, dass diese angeschlossen sind und
richtig verwendet werden. Verwendung einer
h) Vermeiden Sie, durch die häuge Nutzung
des Werkzeugs in einen Trott zu verfallen
und Prinzipien für die Werkzeugsicherheit
zu ignorieren. Eine unachtsame Aktion kann
im Bruchteil einer Sekunde zu schweren
4. VERWENDUNG UND BEHANDLUNG DES
ELEKTROWERKZEUGES
a) Überlasten Sie das Gerät nicht. Verwenden
Sie für Ihre Arbeit das dafür bestimmte
Elektrowerkzeug. Mit dem passenden
Elektrowerkzeug arbeiten Sie besser und sicherer
b) Benutzen Sie kein Elektrowerkzeug, dessen
Schalter defekt ist. Ein Elektrowerkzeug, das
sich nicht mehr ein- oder ausschalten lässt, ist
c) Entfernen Sie den Akku, bevor Sie
Geräteeinstellungen vornehmen, Zubehörteile
wechseln oder das Gerät weglegen.
Diese Vorsichtsmaßnahme verhindert den
d) Bewahren Sie unbenutzte Elektrowerkzeuge
außerhalb der Reichweite von Kindern
auf. Lassen Sie Personen das Gerät nicht
benutzen, die mit diesem nicht vertraut sind
oder diese Anweisungen nicht gelesen haben.
Elektrowerkzeuge sind gefährlich, wenn Sie von
e) Warten Sie die Elektrowerkzeuge und Zubehör.
Kontrollieren Sie, ob bewegliche Teile einwandfrei
funktionieren und nicht klemmen, ob Teile
gebrochen oder so beschädigt sind, dass die
Funktion des Elektrowerkzeuges beeinträchtigt
ist. Lassen Sie beschädigte Teile vor dem
Einsatz des Gerätes reparieren. Viele Unfälle
haben ihre Ursache in schlecht gewarteten
f) Halten Sie Schneidwerkzeuge scharf und sauber.
Sorgfältig gepegte Schneidwerkzeuge mit
scharfen Schneidkanten verklemmen sich weniger
g) Verwenden Sie Elektrowerkzeug, Zubehör,
Einsatzwerkzeuge usw. entsprechend diesen
Anweisungen. Berücksichtigen Sie dabei die
Arbeitsbedingungen und die auszuführende
Tätigkeit.
andere als die vorgesehenen Anwendungen kann
h) Halten Sie die Griffe trocken, sauber und frei von
Öl und Fett.
unterbinden die sichere Bedienbarkeit und
Kontrolle über das Werkzeug in unerwarteten
5. SERVICE
a) Lassen Sie Ihr Elektrowerkzeug nur von
qualiziertem Fachpersonal und nur mit Original-

1514
Bohrhammer D
Ersatzteilen reparieren. Damit wird sichergestellt,
SICHERHEITSHINWEISE FÜR HÄMMER
1) Sicherheitsanweisungen für alle Arbeiten
a. Tragen Sie Gehörschutz, Wenn Sie die
Schlagbohrmaschine benutzen. Lärmaussetzung
b. Benutzen Sie mit dem Gerät gelieferte
Zusatzhandgriffe. Der Verlust der Kontrolle kann
c. Halten Sie das Werkzeug nur an den isolierten
grigen Oberächen, wenn Sie einen Einsatz
durchführen, bei dem Schneidwerkzeuge
eventuell versteckte Kabel berühren könnten.
Berührung mit einem unter Strom stehenden
unter Strom setzen und dem Bedienenden einen
2) Sicherheitsanweisungen für den Einsatz von
Langbohrern mit Bohrhämmern
a) Starten Sie das Bohren immer mit niedriger
Drehzahl und wenn die Bohrerspitze in Kontakt
mit dem Werkstück ist. Bei höheren Drehzahlen
kann sich die Spitze verbiegen, wenn sie sich frei
drehen kann, ohne das Werkstück zu berühren,
b) Drücken Sie nur in direkter Linie zum Bohrer
und üben Sie keinen übermäßigen Druck aus.
Bohrerspitzen können sich verbiegen, was zu
Brüchen oder Verlust der Kontrolle und damit zu
ZUSÄTZLICHE
SICHERHEITSHINWEISE FÜR
BOHRHÄMMER
1.Tragen Sie eine Staubschutzmaske.
SYMBOLE
Zur Reduzierung der Verletzungsgefahr
bitte die Bedienungsanleitung
durchlesen
Schutzisolation
Tragen Sie eine Schutzbrille
Elektroprodukte dürfen nicht mit dem
werden, sondern sollten nach
Möglichkeit zu einer Recyclingstelle
Behörden oder Ihr Fachhändler geben
KOMPONENTEN
1. ARRETIERHÜLSE
2. BOHRTIEFENANSCHLAG
3. SCHMIERMITTELBEHÄLTERDECKEL
4. EIN/AUS-SCHALTER
5. HÄMMERN/BOHREN-UMSCHALTER
6. HAMMER /MEISSEL-UMSCHALTER
7. VARIABLER GESCHWINDIGKEITSREGLER
8. SDS BOHRER*
9. SCHRAUBENSCHLÜSSEL
10. ZAHNKRANZBOHRFUTTERSATZ MIT
ADAPTER, BOHRFUTTERSCHLÜSSEL*
11. SCHMIERFETTPLASTIKBEHÄLTER*
12. STAUBSCHUTZHAUBE*
13. SPITZMEISSEL & FLACHMEISSEL*
14. ZUSATZHANDGRIFF
* Abgebildetes oder beschriebenes Zubehör gehört
teilweise nicht zum Lieferumfang.

1514
Bohrhammer D
TECHNISCHE DATEN
Typ WX333 WX333.X WT344(330~359-
Bezeichnung der Maschine, Repräsentant
Bohrhammer)
WX333 WX333.X **
WT344
Spannung
Nennaufnahmeleistung 1250W
Leerlaufdrehzahl
Nennschlagzahl
Nenn-Schlagenergie
Bohrfutter-Typ SDS-plus
Bohrleistung
Stahl 13mm
Mauerwerk 32mm
40mm
Schutzisolation
** X=1-999, A-Z, M1-M9 werden nur für verschiedene
Kunden verwendet, es gibt keine sicherheitsrelevanten
Wir empfehlen, dass Sie Ihr Zubehör in dem
INFORMATIONEN ÜBER
LÄRM
LpA= 90 dB(A)
LwA= 101 dB(A)
KpA&KwA
Tragen Sie Gehörschutz.
INFORMATIONEN ÜBER
VIBRATIONEN
Schlagbohren in
Beton
Vibrationsemissionswert
a2
2
Meißeln
Vibrationsemissionswert
a2
2
Der angegebene Vibrationsgesamtwert und der
angegebene Vibrationsemissionswert wurden gemäß
Standardprüfverfahren gemessen und können
zum Vergleich eines Werkzeug mit einem anderen
Der angegebene Vibrationsgesamtwert und der
Vibrationsemissionswert können auch für eine
WARNUNG: Die Vibrations- und
Lärmemissionen bei der eigentlichen Nutzung
des Elektrowerkzeugs können vom angegebenen
verwendet wird und insbesondere abhängig davon,
welcher Werkstücktyp verarbeitet wird, und abhängig
von folgenden Beispielen und verschiedenen
Einsatzmöglichkeiten des Werkzeugs:
Wie das Werkzeug verwendet wird und Materialien
Verwendung des richtigen Zubehörs für das
und, falls Antivibrations- und Lärmschutzzubehör
Und ob das verwendete Werkzeug dem Design und
Wird dieses Werkzeug nicht angemessen
gehandhabt, kann es ein Hand-Arm-
Vibrationssyndrom erzeugen.
WARNUNG: Um auf die Nummer sicher zu
gehen, sollte eine Abschätzung des
Belastungsgrades während tatsächlicher
Verwendung berücksichtigt werden, inklusive der
Zeiten, wenn das Werkzeug ausgeschaltet ist, und
kann der Belastungsgrad während der gesamten
wird das Risiko der Vibrations- und Lärmbelastung

1716
Bohrhammer D
Verwenden Sie IMMER scharfe Meissel, Bohrer und
entsprechend nach und achten Sie auf eine gute
Falls das Werkzeug regelmäßig verwendet
werden soll, investieren Sie in Antivibrations- und
Machen Sie einen Arbeitsplan, um die Verwendung
von hochvibrierenden Werkzeugen auf mehrere Tage
HINWEISE ZUM BETRIEB
HINWEIS:
Inbetriebnahme des Werkzeuges sorgfältig
Bestimmungsgemäßer Gebrauch
Es ist ebenso geeignet zum Bohren ohne Schlag in
1. ZUSATZGRIFF EINSTELLEN (Siehe A )
Aus Sicherheitsgründen sollte der zusatzgriff immer
2. TIEFENANSCHLAG VERWENDEN (Siehe A)
Mit dem Tiefenanschlag können Sie eine konstante
Drehen Sie die Arretierschraube am Oberteil des
3. BITS ODER BOHRFUTTER ANBRINGEN (Siehe B1)
Reinigen Sie den Meißelschaft und tragen Sie etwas
Arretierhülse zurück, setzen Sie ein Bit oder das
Meißel drehend ein, bis Sie einen Widerstand spüren
Wenn der Meißel richtig sitzt, lassen Sie die
Nach der Installation vergewissern Sie sich
grundsätzlich, dass das Werkzeug oder das
Bohrfutter absolut fest im Bithalter sitzt - dazu
versuchen Sie es herauszuziehen; es darf sich nicht
4. BITS ODER BOHRFUTTER HERAUSNEHMEN
(Siehe B1)
ziehen Sie die Arretierhülse zurück, halten sie in
dieser Position und nehmen das Werkzeug oder
HINWEIS: Bit oder Bohrfutter werden am Schaft
5. BOHRFUTTER VERWENDEN
Zur vielseitigen Anwendung wird Ihr Bohrhammer mit
WARNUNG! Das 3-Backen-Bohrfutter ist
ausschließlich zum BOHREN in Holz und
Metall geeignet. Benutzen Sie dieses Bohrfutter
NIEMALS zum Schlagbohren oder Meißeln.
IN DIESEM FALL KANN DAS BOHRFUTTER
BESCHÄDIGT WERDEN.
Bohrerbits in das Bohrfutter einsetzen. (Siehe B2)
Stecken Sie den Spannschlüssel in das Bohrfutter
und drehen Sie ihn entgegen dem Uhrzeigersinn, um
das Werkzeug ein und ziehen Sie das Bohrfutter fest
an, in dem Sie den Spannschlüssel im Uhrzeigersinn
6. BEDIENUNG DES EIN-/AUSSCHALTERS (Siehe C)
Drücken Sie, um das Werkzeug zu starten und lassen
7. SCHALTER FÜR VARIABLE
DREHZAHLSTEUERUNG (Siehe D)
Bei höheren Einstellungszahlen steigt die Drehzahl,
bei niedrigeren Einstellungszahlen sinkt die Drehzahl
8. BOHRHAMMERFUNKTION (Siehe E,F)
1)Zum Bohren in Beton, Mauerwerk und ähnliche
Materialien drücken Sie die Freigabetaste (A) und
drehen den Umschalter, bis das Dreieck auf das
Symbol “
HINWEIS: Vor dem Drehen des Umschalters muss
Umschalter nicht in die gewünschte Position bringen
lassen sollte, lassen Sie den Bohrhammer kurz
3)Ihr Bohrhammer ist nun auf Bohren in Mauerwerk

1716
Bohrhammer D
9. BOHREN (Siehe G,H)
1)Drücken Sie die Freigabetaste (A) und drehen Sie
den Umschalter, bis das Dreieck auf das Symbol “
die Bohren-Position “
10. MEIßELN (Siehe I,J)
1)Zum Zerspanen, Auskehlen oder Zertrümmern
drücken Sie die Freigabetaste (A) und
drehen den Umschalter, bis das Dreieck am
Schmiermittelbehälterdeckel auf das Symbol “ “
WARNUNG: Achten Sie in jedem Fall darauf,
dass der Umschalter in der Meißeln-Position
einrastet. Ansonsten besteht Unfallgefahr!
11. STAUBSAMMLER (Siehe K)
Der Staubsammler verhindert, dass Staub bei
Überkopfarbeiten auf das Werkzeug oder auf Sie
12. SCHMIERUNG (Siehe L)
ACHTUNG: Schmiermittel und -behälter von
13. DIE KOHLEBÜRSTEN ERSETZEN
(Siehe M,N)
Lösen Sie die Kohlebürstenkappe mit einem
der Bürste; tauschen Sie sie aus, wenn die Länge
Sie immer beide Bürsten auf einmal aus; auch dann,
Schrauben Sie die Kohlebürstenkappe wieder
lassen Sie das Werkzeug ein paar Minuten laufen,
TIPPS ZUR ARBEIT MIT
IHREM WERKZEUG
den Bohrer aus; idealerweise rechtwinklig zum
WARTUNG
Ziehen Sie grundsätzlich den Netzstecker, bevor
Sie Einstell-, Reparatur- oder Wartungstätigkeiten
ausführen.
Reinigen Sie Ihr Werkzeug niemals mit Wasser
Sorgen Sie dafür, dass bei staubigen Arbeiten die
sein sollte, den Staub zu entfernen, trennen Sie zuerst
Entfernen von Staub und vermeiden Sie das
Falls das Netzkabel beschädigt sein sollte,
Person instandgesetzt werden, damit es nicht zu
FEHLERBEHEBUNG
überprüfen Sie zuerst, ob der Stecker richtig in die
erwärmen sollte, halten Sie es an, schalten auf
Bohren um und lassen das Werkzeug 2 Minuten
lassen Sie das Werkzeug bei einem autorisierten

1918
Marteau Perforateur F
UMWELTSCHUTZ
Elektroprodukte dürfen nicht mit dem
sondern sollten nach Möglichkeit zu einer
Behörden oder Ihr Fachhändler geben Ihnen hierzu
KONFORMITÄTSERKLÄRUNG
Wir,
Erklären im Namen von Positec, dass das Produkt
Beschreibung Worx Bohrhammer
Typ WX333 WX333.X WT344(330~359-
Bezeichnung der Maschine, Repräsentant
Bohrhammer)
Funktion Hämmern verschiedener Materialien
Den Bestimmungen der folgenden Richtlinien
entspricht:
2006/42/EC,
2011/65/EU&(EU)2015/863
2014/30/EU
Normen
EN 62841-1, EN IEC 62841-2-6, EN IEC 55014-1, EN
IEC 55014-2, EN IEC 61000-3-2, EN 61000-3-3
Zur Kompilierung der technischen Datei ermächtigte
Person,
Name Marcel Filz
Anschrift Positec Germany GmbH
Postfach 32 02 16, 50796 Cologne, Germany
Allen Ding
AVERTISSEMENTS DE
SÉCURITÉ GÉNÉRAUX
POUR L’OUTIL
AVERTISSEMENT Lire l’ensemble des
mises en garde, instructions, illustrations
et spécications fourni avec cet outil électrique.
Ne pas suivre toutes les instructions énumérées
ci-dessous peut conduire à une électrocution, un
Conserver tous les avertissements et toutes
les instructions pour pouvoir s’y reporter
ultérieurement.
Le terme «outil» dans les avertissements fait
référence à votre outil électrique alimenté par le
secteur (avec cordon d’alimentation) ou votre
outil fonctionnant sur batterie (sans cordon
1. SÉCURITÉ DE LA ZONE DE TRAVAIL
a) Conserver la zone de travail propre et bien
éclairée. Les zones en désordre ousombres sont
b) Ne pas faire fonctionner les outils électriques
en atmosphère explosive, par exemple en
présence de liquides inammables, de gaz ou de
poussières. Les outils électriques produisent des
c) Maintenir les enfants et les personnes présentes
à l’écart pendant l’utilisation de l’outil. Les
distractions peuvent vous faire perdre le contrôle
2. SÉCURITÉ ÉLECTRIQUE
a) Il faut que les ches de l’outil électrique soient
adaptées au socle. Ne jamais modier la che
de quelque façon que ce soit. Ne pas utiliser
d’adaptateurs avec des outils à branchement
de terre.
b) Eviter tout contact du corps avec des surfaces
reliées à la terre telles que les tuyaux, les
radiateurs, les cuisinières et les réfrigérateurs. Il
existe un risque accru de choc électrique si votre
c) Ne pas exposer les outils à la pluie ou à des
conditions humides. La pénétration d‘eau à
l’intérieur d’un outil augmentera le risque de choc
d) Ne pas maltraiter le cordon. Ne jamais utiliser
le cordon pour porter, tirer ou débrancher
l’outil. Maintenir le cordon à l’écart de la
chaleur, du lubriant, des arêtes ou des parties
en mouvement. Des cordons endommagés
ou emmêlés augmentent le risque de choc

1918
Marteau Perforateur F
e) Lorsqu’on utilise un outil à l’extérieur, utiliser un
prolongateur adapté à l’utilisation extérieure.
L’utilisation d’un cordon adapté à l’utilisation
f) Si l’usage d’un outil dans un emplacement
humide est inévitable, utiliser une alimentation
protégée par un dispositif à courant différentiel
résiduel (DDR). L’usage d’un DDR réduit le risque
3. SÉCURITÉ DES PERSONNES
a) Restez vigilant, regardez ce que vous êtes en
train de faire et faites preuve de bon sens dans
votre utilisation de l’outil. Ne pas utiliser un outil
lorsque vous êtes fatigué ou sous l’emprise
de drogues, d’alcool ou de médicaments. Un
moment d’inattention en cours d’utilisation d’un
outil peut entraîner des blessures graves des
b) Utiliser un équipement de sécurité. Toujours
porter une protection pour les yeux. Les
équipements de sécurité tels que les masques
antidérapantes, les casques ou les protections
acoustiques utilisés pour les conditions
c) Éviter tout démarrage intempestif. S’assurer
que l’interrupteur est en position arrêt avant
de brancher l’outil au secteur et/ou au bloc de
batteries, de le ramasser ou de le porter. Porter
les outils en ayant le doigt sur l’interrupteur ou
brancher des outils dont l’interrupteur est en
d) Retirer toute clé de réglage avant de mettre
l’outil en marche.
partie tournante de l’outil peut donner lieu à des
e) Ne pas se précipiter. Garder une position et un
équilibre adaptés à tout moment. Cela permet
un meilleur contrôle de l’outil dans des situations
f) S’habiller de manière adaptée. Ne pas porter
de vêtements amples ou de bijoux. Garder les
cheveux et les vêtements à distance des parties
en mouvement. Des vêtements amples, des
g) Si des dispositifs sont fournis pour le
raccordement d’équipements pour l’extraction et
la récupération des poussières, s’assurer qu’ils
sont connectés et correctement utilisés. Utiliser
h) Ne pas laisser les habitudes acquises au cours
d’une utilisation fréquente des outils nous rendre
complaisants et ignorer les principes de sécurité
de l’outil. Une action imprudente peut entraîner
4. UTILISATION ET ENTRETIEN DE L’OUTIL
a) Ne pas forcer l’outil. Utiliser l’outil adapté à votre
application. L’outil adapté réalisera mieux le travail
b) Ne pas utiliser l’outil si l’interrupteur ne permet
pas de passer de l’état de marche à arrêt et vice
versa. Tout outil qui ne peut pas être commandé
c) Débrancher la che de la source d’alimentation
en courant et/ou le bloc de batteries de l’outil
avant tout réglage, changement d’accessoires
ou avant de ranger l’outil. De telles mesures
de sécurité préventives réduisent le risque de
d) Conserver les outils à l’arrêt hors de la portée
des enfants et ne pas permettre à des personnes
ne connaissant pas l’outil ou les présentes
instructions de le faire fonctionner. Les outils
sont dangereux entre les mains d’utilisateurs
e) Entretenir les outils et accessoires électriques.
Vérier qu’il n’y a pas de mauvais alignement
ou de blocage des parties mobiles, des pièces
cassées ou toute autre condition pouvant
affecter le fonctionnement de l’outil. En cas de
dommages, faire réparer l’outil avant de l’utiliser.
De nombreux accidents sont dus à des outils mal
f) Garder affûtés et propres les outils permettant
de couper. Des outils destinés à couper
coupantes tranchantes sont moins susceptibles
g) Utiliser l’outil, les accessoires et les lames etc.,
conformément à ces instructions, en tenant
compte des conditions de travail et du travail à
réaliser. L’utilisation de l’outil pour des opérations
différentes de celles prévues pourrait donner lieu
h) Maintenir les poignées et les surfaces de
préhension sèches, propres et exemptes d’huile
et de graisse. Des poignées et surfaces de
préhension glissantes ne permettent pas une
manipulation et un contrôle de l’outil en toute
5. MAINTENANCE ET ENTRETIEN
a) Faire entretenir l’outil par un réparateur qualié
utilisant uniquement des pièces de rechange
identiques. Cela assurera le maintien de la

2120
Marteau Perforateur F
AVERTISSEMENTS DE
SÉCURITÉ POUR LES
MARTEAUX
1) Consignes de sécurité pour toutes les
opérations
1. Porter une protection pour les oreilles.
L’exposition au bruit peut causer une perte
2. Utiliser la(les) poignée(s) auxiliaire(s)
fournie(s) avec l’outil. Toute perte de contrôle
3. Tenir l’outil par ses surfaces antidérapantes
et isolées si l’outil de coupe risque d’entrer en
contact avec des câbles cachés. L’entrée en
contact avec un câble sous tension rendra les
parties en métal de l’outil également sous tension
et l’utilisateur pourrait recevoir une décharge
2) Consignes de sécurité pour l’utilisation de forets
longs avec les perceuses à percussion rotatives
a) Commencez toujours à percer à basse vitesse
avec la pointe du foret en contact avec la pièce
sur laquelle vous opérez. À plus haute vitesse,
le foret est susceptible de se tordre en cas de
b) N’appliquez une pression que dans l’axe du
foret et n’exercez pas de pression excessive.
Les forets peuvent se tordre entraînant leur
rupture ou une perte de contrôle, ce qui peut créer
CONSIGNES DE SECURITE
SUPPLEMENTAIRES POUR
VOTRE MARTEAU
1. Porter un masque contre la poussière.
SYMBOLES
Pour réduire le risque de blessure,
l’utilisateur doit lire le mode
Classe de protection
Avertissement
Porter une protection pour les
oreilles
Porter une protection pour les yeux
Porter un masque contre la
Les déchets d’équipements
électriques et électroniques ne
doivent pas être déposés avec les
être collectés pour être recyclés
Consultez les autorités locales ou
votre revendeur pour obtenir des
renseignements sur l’organisation
LISTE DES COMPOSANTS
1. VERROU DE FERMETURE
2. BUTÉE DE PROFONDEUR
3. COUVERCLE DU RÉSERVOIR À GRAISSE
4. COMMUTATEUR MARCHE/ARRÊT
5. COMMANDE DE MARTEAU OU DE
PERCEUSE
6. COMMUTATEUR DE MODE MARTEAU OU
BURIN
7. BOUTON DE VARIATION DE VITESSE
8. MÈCHES SDS*
9. CLÉ
10. MANDRIN À CLÉ AVEC ADAPTATEUR,
CLÉ DE MANDRIN*
11. BOÎTIER À ENDUIS EN PLASTIQUE*
12. COUVERCLE À POUSSIÈRE*
13. BURINS (À POINTE ET PLAT)*
14. POIGNÉE AUXILIAIRE
* Les accessoires reproduits ou décrits ne sont pas
tous compris avec le modèle standard livré.
Other manuals for WX333
5
This manual suits for next models
2
Table of contents
Languages:
Other Worx Rotary Hammer manuals