1
2
3
4
Table of Contents
Overview
Installing
the
Terminal
Getting Ready . . . . . . . . . . . . . . . . . . . . . . . . . . . . . . . . . . .
..
1-1
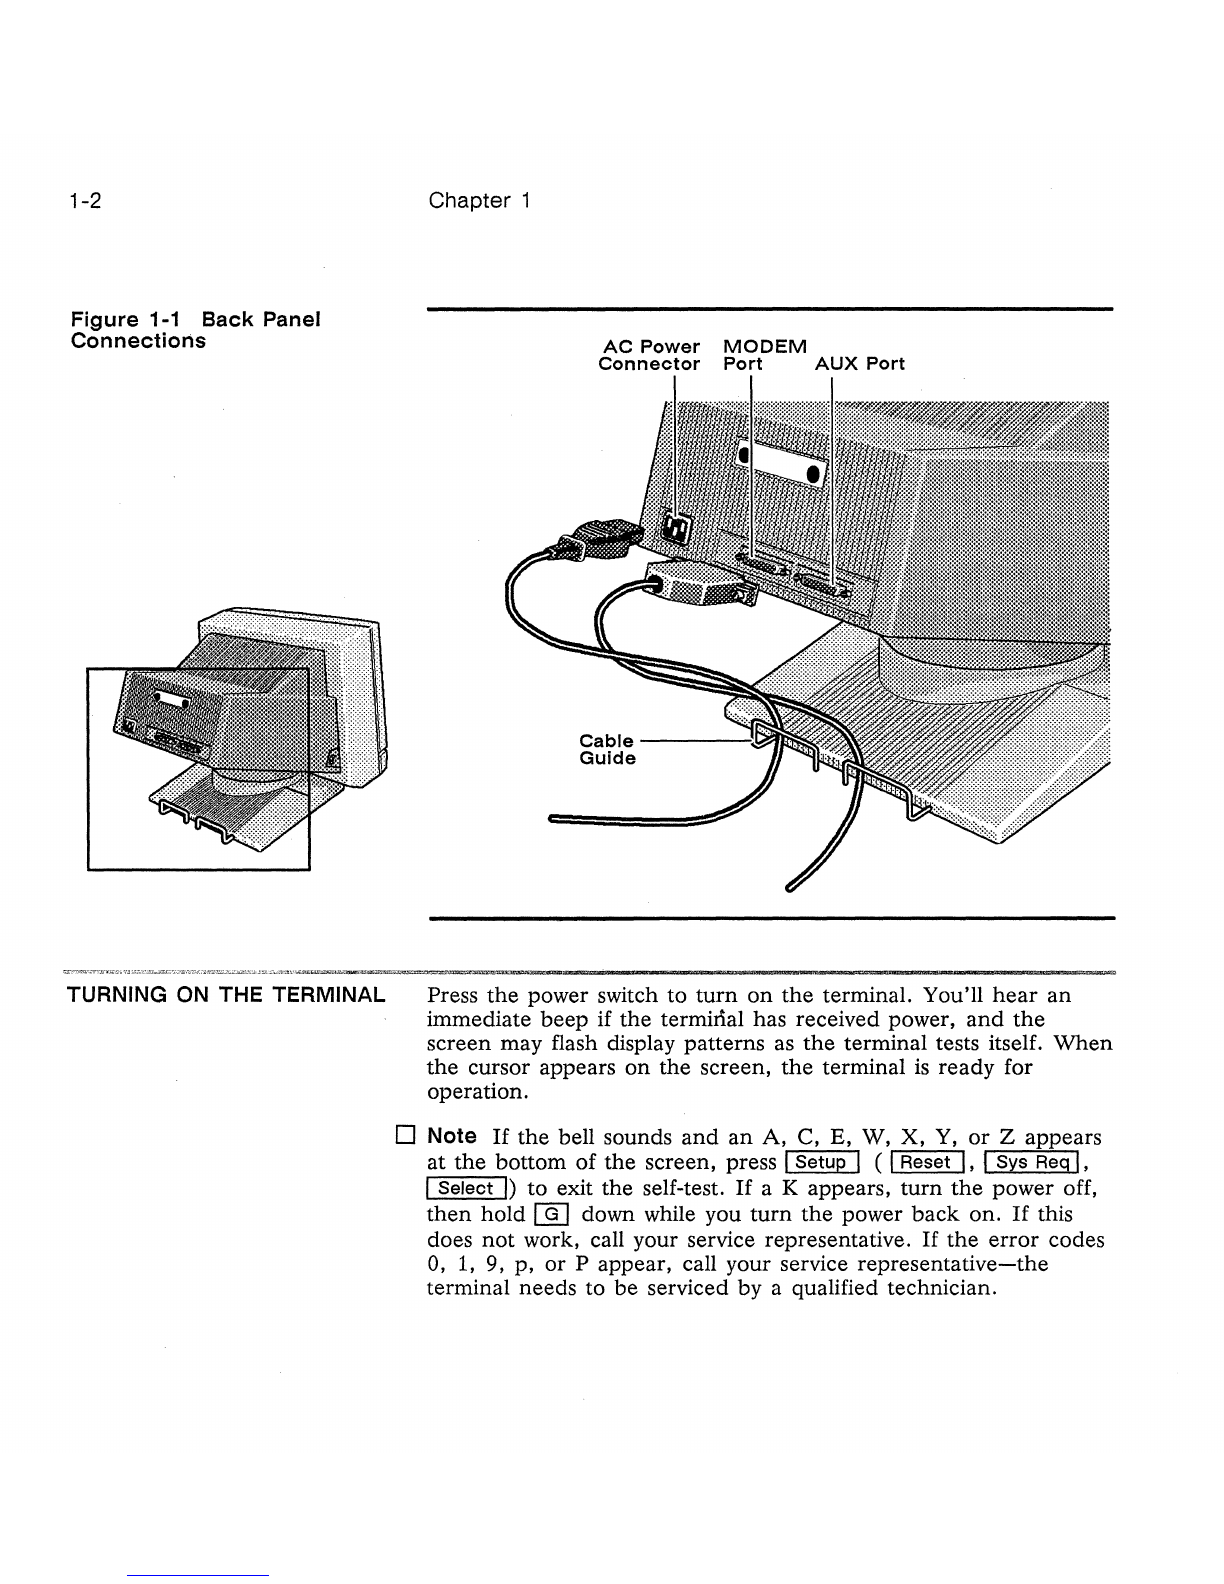
Connecting
the
Terminal . . . . . . . . . . . . . . . . . . . . . . . . . .
..
1-1
Turning
On
the
Terminal
............................
1-2
Adjusting
the
Terminal.
. . . . . . . . . . . . . . . . . . . . . . . . . . .
..
1-3
Configuring
the
Terminal
Entering and Leaving Setup
Mode
. . . . . . . . . . . . . . . . . .
..
2-1
Changing
the
Operating Parameters
..................
2-2
Defining Tab Stops
................................
2-12
Defining an Answerback
Message
....................
2-12
Redefining
the
Keys . . . . . . . . . . . . . . . . . . . . . . . . . . . . . .
..
2-13
Defining
the
Function Key Labels . . . . . . . . . . . . . . . . . . .
..
2-14
Operating
the
Terminal
Keyboard Functions . . . . . . . . . . . . . . . . . . . . . . . . . . . . . .
..
3-1
Screen
Areas
. . . . . . . . . . . . . . . . . . . . . . . . . . . . . . . . . . .
..
3-1
Communication
Modes
.............................
3-2
Printing
..........................................
3-3
WyseWorks
Introducing WyseWorks . . . . . . . . . . . . . . . . . . . . . . . . . . .
..
4-1
Basic WyseWorks Controls
..
. . . . . . . . . . . . . . . . . . . . . .
..
4-1
Calculator
...........................
. . . . . . . . . . .
..
4-2
Alarm
Clock
......................................
4-5
Calendar . . . . . . . . . . . . . . . . . . . . . . . . . . . . . . . . . . . . . . .
..
4-6
ASCII
Table.
. . . . . . . . . . . . . . . . . . . . . . . . . . . . . . . . . . . .
..
4-6