X-pole A-FRAME User manual

X-Pole's new Aerial 'A' Frame is perfect for Aerial Fitness, Yoga, Aerial Hoop and Low Silks.
The A- frame can be used from 2235mm (7.6ft) up to 3350 (11ft) with dierent multiple heights being
selectable in-between.
The A-FRAME comes with 2 adapters which can be moved around so you can use the A-FRAME for
multiple disciplines.
The A-FRAME will come in 7 Pieces, 4 x telescopic legs with feet attached, 2 connectors and a 1.4m
Top Bar. Pins, straps and carry bags (1x Frames tubes, 1x Connectors and accessories) are also
supplied. Additional weight bags that can be used with the A-FRAME may be purchased separately.
Adjustable/Multiple Heights using the telescopic legs – allowing you to use indoors or outdoors.
Quick Assembly – all pieces can be stored safely in multi-piece bag.
Multi-discipline – swap between silks, trapeze (static) hammock and hoop!
Portability – Light-weight frame allows the user to take it anywhere with them!
INSTRUCTION MANUAL
Aerial Apparatus
Hoop | Hammock | Silks
A-FRAME
Copyright © Vertical Leisure LTD 2014 | All rights reserved. Version: 1.01
1
®

Copyright © Vertical Leisure LTD 2014 | All rights reserved. Version: 1.01
2
LEADERS IN POLE & AERIAL FITNESS
®
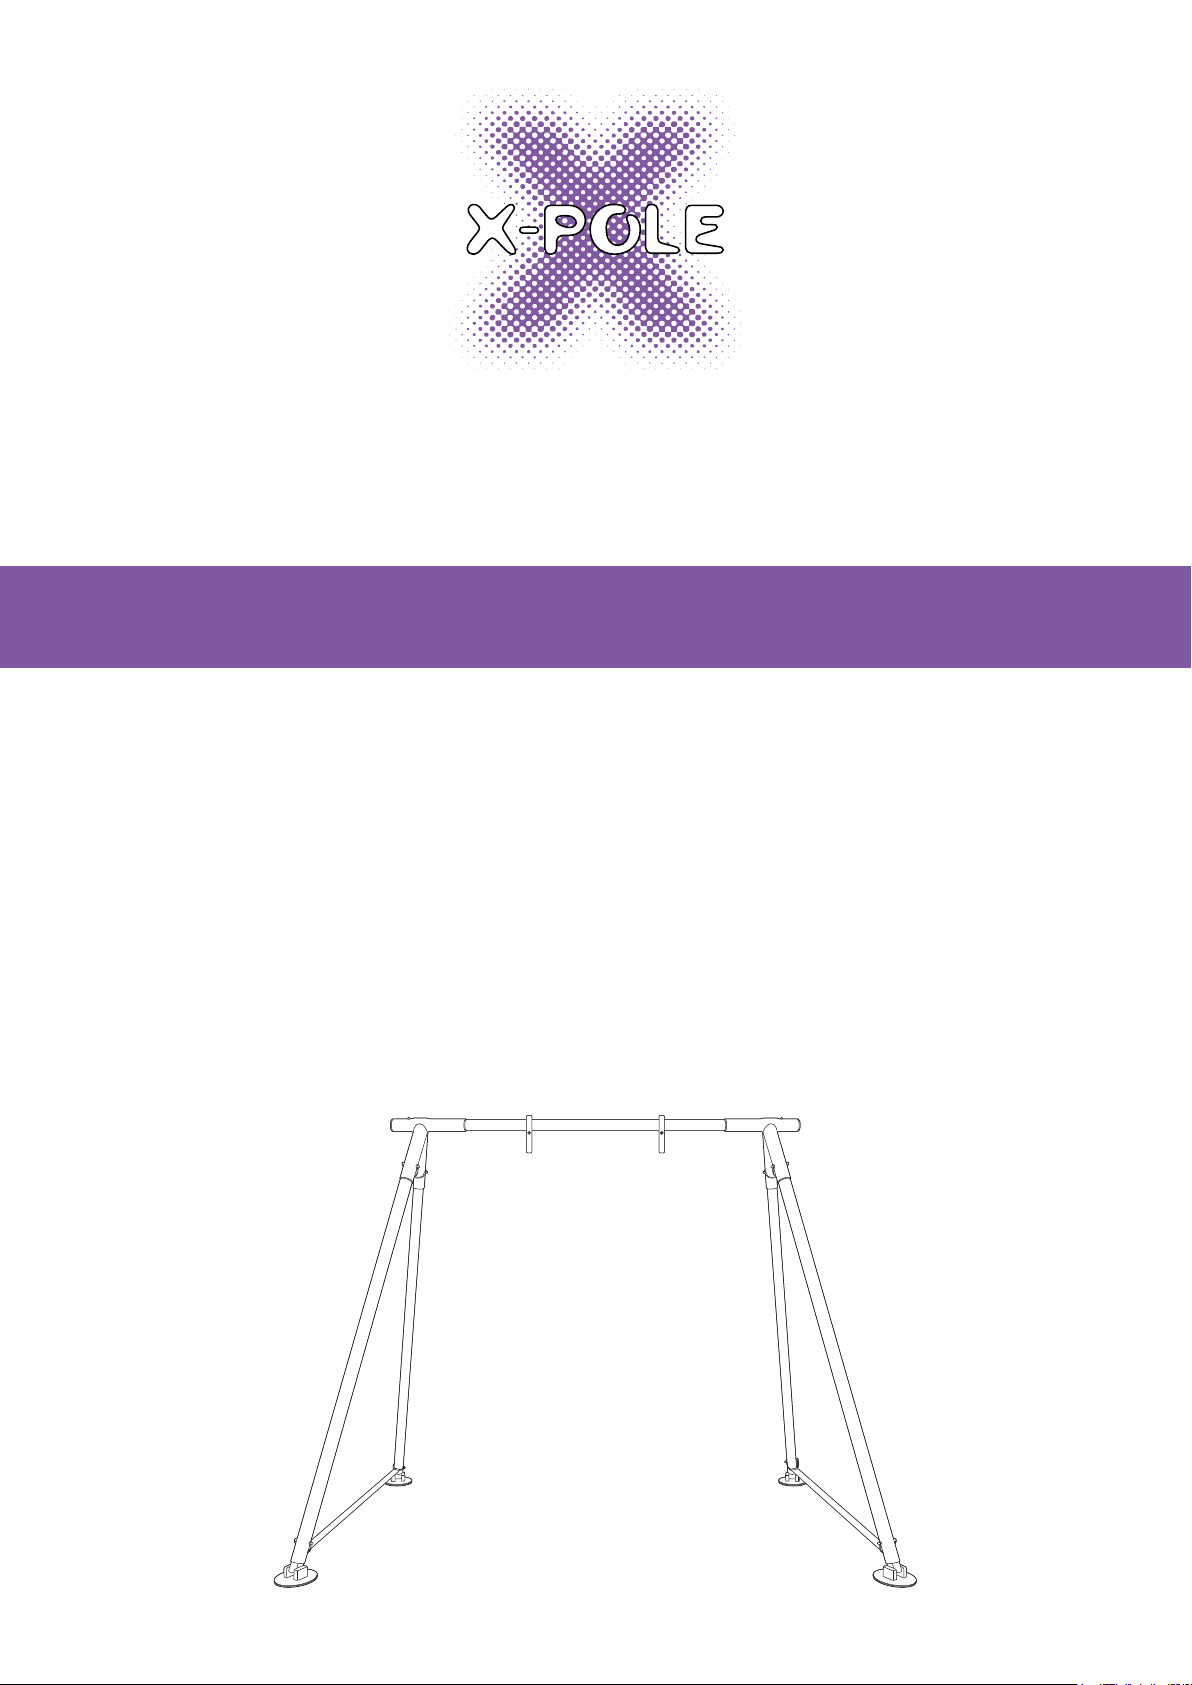
Thank you for buying an A-FRAME. The team at X-POLE have spent a significant amount of time
researching, designing and developing the A-FRAME. We want the A-FRAME to be the world’s leading
Aerial Apparatus, if it’s not; we want to understand why not! At X-POLE we thrive on positive criticism
and suggestions! So contact us (details on the back cover) if you have any comments or suggestions
on how to improve the product.
BEFORE USING YOUR A-FRAME
Mis-using the aerial apparatus can be dangerous, not only to the user but also to anyone close to the
A-FRAME. The use of an A-FRAME is always at the user’s discretion, and it is the user’s responsibility
to check the A-FRAME is installed correctly & safely before use.
Aerial exercise is extremely physical and uses muscles that you will not have used before and therefore
if you are not warmed up; muscle damage, strains and injury can occur. Before using the A-FRAME it is
mandatory to warm up and, after use, cool down.
It is highly recommended that before you use you’re a-FRAME you purchase a suitable DVD/attend
classes to learn the basic moves. Never try moves beyond your ability without an instructor. If at any
time whilst using your A-FRAME you feel uncomfortable, your muscles hurt, or you are short of breath
– take a break. Always rest between moves & exercise sensibly, if you experience any health issues,
seek medical advice.
Have fun with your A-FRAME!
The X-POLE Team.
WHAT TO WEAR
When it comes to clothing - try to avoid loose fitting clothing. It is important to wear clothing that
covers the backs of your knees and under your arms when attempting Aerial Hoop. Cotton fabrics are
more compatible with silks than shiny lycra. Long hair should be tied back. Aerial fitness is generally
done in bare feet as this gives you the best grip. (Thin ballet pump type shoes can also be worn). You
will want a top that can be tucked in to give your back protection. Long stretch pants such as leggings
and a tight-fitting top are suggested. Shorts or vest tops are not recommended, and loose clothing
may get in the way. Jewellery and watches should not be worn.

Copyright © Vertical Leisure LTD 2014 | All rights reserved. Version: 1.01
3
CRITICAL INFORMATION - PLEASE READ
THIS BEFORE OPENING YOUR PACKAGE
To get the best from you’re A-FRAME – with SAFETY being the utmost priority – it is extremely
important that you READ & FOLLOW the Instruction Manual from beginning to end and most
importantly, understand it!
Follow the simple but explicit instructions in this manual to get the best results from your A-FRAME.
Safety is a priority at all times.
If you have ANY questions – before you assemble, install or use your A-FRAME – contact your point of
purchase or see the A-FRAME section on the website (www.xpole.com – first select your region, then
search for the A-FRAME).
VERTICAL LEISURE LTD, X-POLE INTERNATIONAL, X-POLE US INC, THEIR DISTRIBUTORS, SALES
PERSONS OR ANY OTHER PERSONS OR ASSOCIATED COMPANIES CANNOT BE HELD
RESPONSIBLE FOR ANY DAMAGE TO PROPERTY OR INJURY TO PERSONS OR THIRD PARTIES
DURING THE USE OF THIS PRODUCT.
BY REMOVING THE A-FRAME FROM ITS PACKAGING AND/OR ANY USE OF THE PRODUCT
CONFIRMS ACCEPTANCE OF THE ABOVE WARNINGS AND THE USER’S RESPONSIBILITY IN USING
THE PRODUCT.
IF YOU DO NOT ACCEPT THE TERMS SET OUT ABOVE THEN:
DO NOT REMOVE THE A-FRAME FROM ITS PACKAGING OR ATTEMPT TO ASSEMBLE, INSTALL OR
USE THE PRODUCT.
Contact your point of purchase to arrange a return & refund (shipping costs may still apply).
The product must be returned unused & in its fully packaged state.
CAUTION: Take note that carpet, wooden or sprung floors can aect the stability of this product.
CAUTION: Never undo any of the screws unless you are explicitly told to do so in the instruction
manual.

Copyright © Vertical Leisure LTD 2014 | All rights reserved. Version: 1.01
4
REMOVING THE PACKAGING
The A-FRAME is packaged in a special way to protect all the parts from any damage
during transit. It is very important to remove all the packaging prior to commencing
installation. Whilst unpacking the items, please make sure you follow the Contents
Diagram.
WHAT YOU NEED BEFORE YOU START: 1 X Ladder
CHECKING THE PARTS
Please check the contents of you’re A-FRAME with the contents diagram (Fig 1.1). If
anything is missing or damaged, please contact your point of purchase or call your
local X-POLE oce immediately (contact details on the back page).
Please study the contents and the part descriptions in the diagram [Fig 1.1] as these
are used throughout the instruction manual and are important for installation. Please
also try using the parts before assembling, it is important that you understand how
they work.
www.xpole.com
www.xpole.com
www.xpole.com www.xpole.com
Top Bar
Link FixingLeg Insert Leg Insert
Telescopic LegsAdjustable feets
Telescopic Legs
Telescopic Legs
Adjustable feets
Adjustable feets
Telescopic Legs Adjustable feets
Sand Bags x4 Inner Sand Bags x8 Carry Case
Carry Case
Tool Kit
Brace Strap
x2
Pin Clips
(L) x10
Pin Clips
(S) x10
Hex Key
(5mm)

Copyright © Vertical Leisure LTD 2014 | All rights reserved. Version: 1.01
5
When the A-FRAME is at its lowest height, it will
require a floor area of sqm2 and when fully
retracted will require an area of sqm2.
The A-FRAME could be extended from its lowest
height of xxxx mm to a height of xxxx mm when
fully retracted.
Key:
Height - To the top of the bar.
Depth - Measuring between the triangle (Side Profile)
Width - Measuring between the front/back legs (Front/Back Profile)
A-Frame Footprint/Build Dimensions
Height (mm) Depth (mm) Width (mm) Sq. M
2450
2530
2610
2755
2900
3045
3190
3335
3480
1955
2019
2083
2198
2314
2430
2545
2661
2777
2245
2318
2392
2524
2647
2790
2923
3056
3189
4.4
4.7
5
5.5
6.1
6.8
7.4
8.1
8.9

Copyright © Vertical Leisure LTD 2014 | All rights reserved. Version: 1.01
6
ATTACHMENT OF LEGS
Insert the leg starting with the hole at the bottom in the triangular bar. Place the leg into the Triangular
Insert and line up the holes on the legs with the holes in the Triangular Insert. There will be a ‘guide’
line on the legs to help with this process.
Once the leg has been fully fastened, secure it using the pin (Fig. )
Once the first leg is secure, now repeat the process in the order illustrated in the diagram – following
number 1 to 4. Fig.
1
2
3
4

Copyright © Vertical Leisure LTD 2014 | All rights reserved. Version: 1.01
7
LIFTING THE A-FRAME
As the A-FRAME will be assembled on the floor and then lifted into position, it is importamt to allow
enough space to do so.

Copyright © Vertical Leisure LTD 2014 | All rights reserved. Version: 1.01
8
ATTACHMENT OF LEGS
When the A-Frame is delivered, it will be set at minimum height (easy for transportation).
Remove both pin on the left side of your view, as illustrated. With one person lifting – the legs can then
be extended and pinned back into position (please ensure that the pins are positioned in the inside of
the A-Frame & the legs are pinned back into position using the adjustment line to align).
Repeat this process on the right side of your view. Please ensure both sides are level and extended
evenly.
To raise higher/lower the procedure must be repeated exactly the same on all four legs.
Final clip needs to be placed just above the feet on all four legs – this will later be used for further
stabilisation using the sandbags.
Other manuals for A-FRAME
1
Table of contents
Other X-pole Fitness Equipment manuals
Popular Fitness Equipment manuals by other brands

Vision Fitness
Vision Fitness ST740 owner's guide

Align-Pilates
Align-Pilates M2-Pro Reformer Assembly instructions & user manual

Perlecare
Perlecare PCPUB01 instruction manual

Hoist Fitness
Hoist Fitness Club Series owner's manual

Sunny
Sunny ROW-N-RIDE PLUS user manual

Finishing Fitness
Finishing Fitness The Finisher user manual

Sports Authority
Sports Authority BODYFIT BF-1200 owner's manual

Tunturi
Tunturi Pure Olympic Bench owner's manual

Matrix
Matrix Retail E30 manual

PRx Performance
PRx Performance Profile ONE Squat Rack with Kipping Bar Install instructions

TKO
TKO 7045-G2 owner's manual

Adidas
Adidas SPORTS RIG Assembly manual