manuals.online logo
Brands
  1. Home
  2. •
  3. Brands
  4. •
  5. X10
  6. •
  7. Remote Control
  8. •
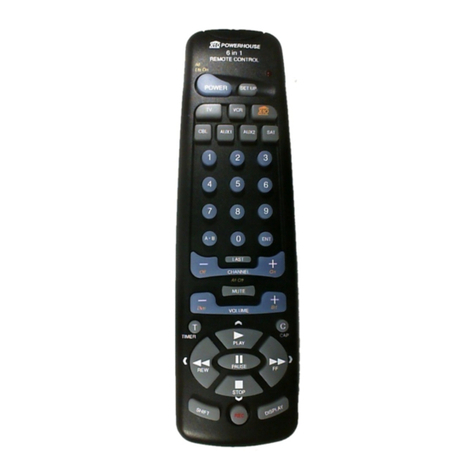
  9. X10 SuperRemote UR47A User manual

X10 SuperRemote UR47A User manual

OO
OO
OWNERWNER
WNERWNER
WNER’’
’’
’SS
SS
SMM
MM
MANUALANUAL
ANUALANUAL
ANUAL
UR47AUR47A
UR47AUR47A
UR47A
X10 DVDX10 DVD
X10 DVDX10 DVD
X10 DVD
SS
SS
SUPERUPER
UPERUPER
UPERRR
RR
REMOTEEMOTE
EMOTEEMOTE
EMOTE
33
33
3
22
22
2
FCC CFCC C
FCC CFCC C
FCC C
AUTIONAUTION
AUTIONAUTION
AUTION
THIS DEVICE COMPLIES WITH PART 15
OF THE FCC RULES.
OPERATION IS SUBJECT TO THE
FOLLOWING TWO CONDITIONS:
(1) THIS DEVICE MAY NOT CAUSE
HARMFUL INTERFERENCE, AND
(2) THIS DEVICE MUST ACCEPT ANY
INTERFERENCE RECEIVED,
INCLUDING INTERFERENCE THAT
MAY CAUSE UNDESIRED
OPERATION.
Thisequipmentgeneratesandusesradio
frequency energy, and if not installed and
used properly, that is, in strict accordance
withthemanufacturersinstructions,itmay
cause interference to radio and television
reception. It has been type tested and
foundtocomplywiththelimits for remote
control devices in accordance with the
specificationsinSub-PartsB and C of Part
15 of FCC Rules, which are designed to
providereasonableprotectionagainst
suchinterference in a residential
installation. However, there is no
guaranteethat interference will not occur
inaparticularinstallation.Ifthis
equipmentdoescause interference to
radio or television reception, which can
bedeterminedbyunpluggingthe
equipment, try to correct the interference
by one or more of the following
measures.
• Reorient the antenna of the radio/TV
experiencing the interference.
• Relocate the product with respect to
the radio/TV.
• Move the product away from the
radio/TV.
• Plug the product into an outlet on a
different electrical circuit from the
radio/TV experiencing the
interference.
• If necessary, consult your local
Dealer for additional suggestions.
NOTE: Modifications to this product will
voidtheuser’s authority to operate this
product.
RR
RR
READEAD
EADEAD
EAD TT
TT
T
HISHIS
HISHIS
HIS FF
FF
F
IRSTIRST
IRSTIRST
IRST!!
!!
!
SS
SS
S
AFETYAFETY
AFETYAFETY
AFETY
CC
CC
C
ONSIDERAONSIDERA
ONSIDERAONSIDERA
ONSIDERATIONSTIONS
TIONSTIONS
TIONS
Remembertoexercisegoodcommon
sensewhenusingtheHome
Automationfeaturesofyour
SuperRemote-especiallywhen
controllingunattendeddevices.There
canbesomeunexpectedconsequences
ifnotusedwithcare.Forexample, an
emptycoffeepotcanberemotely
turnedon.Ifthatshouldhappen,your
coffeepotcouldbedamagedfrom
overheating.Ifanelectricheateris
turnedonbyremotecontrolwhile
clothingisdrapedoverit,afirecould
result.DONOTUSEtheremoteforthe
controlofhighpowerheating
appliancessuchasportableheaters.
Caution: To reduce theriskof electric
shock, do not disassemble any part of the
HomeAutomation System’splug-in
Modules or Controllers. No user-
serviceable parts are inside. If you spill
liquid on a unit, disconnect the unit from
the AC outlet to prevent possible fire or
shock hazard and consult authorized
service personnel.
Powerline operated equipment or
accessories connected to any of these
units should bear the UL listing or CSA
certificationmark and should not have
been modified in any way that might
defeat their safety features.
Warning:Topreventelectric shock
hazard, do not expose any part of the
Home Automation System to rain or
moisture
55
55
5
44
44
4
II
II
INTRODUCTIONNTRODUCTION
NTRODUCTIONNTRODUCTION
NTRODUCTION
Congratulations on your purchase of the
X10 DVD SuperRemote.
Makeyourlightsandappliancesgoto
workfor you....
The X10 DVD SuperRemote controls most
or all of your video and audio
equipment. But what really sets it apart
from other remotes is that you can also
control almost any light or appliance in
your home - even in another room! And
it’s easy to set up. Within minutes, you
can be using your X10 DVD
SuperRemote to dim the lights, start
brewing a fresh pot of coffee and play
your favorite movie!*
Herearejustsomeofthethingsyou
candowithyourX10SuperRemote...
• Control your audio/video and
lighting setup for the ultimate Home
Theater experience.
• Turn on lights at night to scare away
intruders if you hear a noise.
• Start the coffee from your bedroom
when you wake up.
• Turn on your electric blanket before
the movie ends, so you it’s nice and
warm when you go to bed.
Usethismanualtobecomefamiliarwith
yourSuperRemote....
First this manual shows you how to set up
an X10 Transceiver Module and Lamp
Module (sold separately) so you can use
the SuperRemote to operate lights and
appliances in your home.
Next it explains how to set up your
SuperRemote to use it with your existing
Audio/Video equipment.
Finally, the manual shows you how you
can expand your system with some of the
many additional X10 products you can
purchase.
* Requires X10 Modules, sold
separately.
CC
CC
CONTENTSONTENTS
ONTENTSONTENTS
ONTENTS
II
II
INTRODUCTIONNTRODUCTION
NTRODUCTIONNTRODUCTION
NTRODUCTION
..........................................................................
..........................................................................
..................................... 55
55
5
GG
GG
GETTINGETTING
ETTINGETTING
ETTING SS
SS
S
TT
TT
TARAR
ARAR
ARTEDTED
TEDTED
TED
................................................................
................................................................
................................ 66
66
6
CONTROLLERS AND MODULES ............6
HOUSE CODES AND UNIT CODES......7
II
II
INSTNST
NSTNST
NSTALLINGALLING
ALLINGALLING
ALLING
THETHE
THETHE
THE CC
CC
COMPONENTSOMPONENTS
OMPONENTSOMPONENTS
OMPONENTS ................................
................................
................ 88
88
8
TRANSCEIVER MODULE ......................8
LAMP MODULE ................................8
X10/DVD SUPERREMOTE ................9
SS
SS
SETTINGETTING
ETTINGETTING
ETTING UU
UU
UPP
PP
P
YOURYOUR
YOURYOUR
YOUR SS
SS
SUPERUPER
UPERUPER
UPERRR
RR
REMOTEEMOTE
EMOTEEMOTE
EMOTE ..................
..................
.........1010
1010
10
BUTTON DESCRIPTIONS ................... 10
SETTING UP FOR TV, VCR, CABLE,
SATELLITE/DSS, AND DVD............ 11
USING AUX TO CONTROL
ASECOND TV, VCR, CABLE BOX,
SATELLITE RECEIVER, OR DVD ......... 13
SEARCHING FOR CODES ................ 14
IDENTIFYING CODES FOUND USING
THE SEARCH PROCEDURE ................ 15
CC
CC
CONTROLLINGONTROLLING
ONTROLLINGONTROLLING
ONTROLLING X10 MX10 M
X10 MX10 M
X10 MODULESODULES
ODULESODULES
ODULES ..........................
..........................
.............1616
1616
16
CHANGING THE X10 SLIDE SWITCH 17
CONTROLLING ALL 16 UNIT CODES 18
CHANGING THE X10 HOUSE CODE 19
EE
EE
EXPXP
XPXP
XPANDINGANDING
ANDINGANDING
ANDING
YOURYOUR
YOURYOUR
YOUR SS
SS
SYSTEMYSTEM
YSTEMYSTEM
YSTEM
..............................
..............................
...............2020
2020
20
TT
TT
TROUBLESHOOTINGROUBLESHOOTING
ROUBLESHOOTINGROUBLESHOOTING
ROUBLESHOOTING
..........................................................
..........................................................
.............................2222
2222
22
WW
WW
WARRANTYARRANTY
ARRANTYARRANTY
ARRANTY
..............................................................................
..............................................................................
.......................................2323
2323
23
77
77
7
66
66
6
HH
HH
H
OUSEOUSE
OUSEOUSE
OUSE
CC
CC
C
ODESODES
ODESODES
ODES
ANDAND
ANDAND
AND
UU
UU
U
NITNIT
NITNIT
NIT
CC
CC
C
ODESODES
ODESODES
ODES
Each Module has a specific address
made up of a House Code (red dial on
the face of the Module) and a Unit Code
(black dial on the face of the Module).
The Controller first sends an address and
then a command on the AC power lines.
Only the Module with a matching address
willexecute the command. If more than
one Module has the same address, both
Modules will execute the command.
Addresses are set on the Module by
turningthe two dials on the front of the
Module to the desired letter and number
(using a small screwdriver or a coin). The
House Code is selected from the letters A
through P, and the Unit Code is selected
fromthe numbers 1 through 16.
UNIT CODE
DIAL
HOUSE CODE
DIAL
GG
GG
GETTINGETTING
ETTINGETTING
ETTING SS
SS
S
TT
TT
TARAR
ARAR
ARTEDTED
TEDTED
TED
Because we know that you are eager to
get started, we’ve kept this introduction
as short as possible, but it contains very
valuable information, so you should read
through it very carefully.
CC
CC
C
ONTROLLERSONTROLLERS
ONTROLLERS
ANDAND
ANDAND
AND
MM
MM
M
ODULESODULES
ODULESODULES
ODULES
The first thing you need to understand is
that there are two different devices you
need to control your house;
Controllers and Modules.
Any light or appliance that
you want to control is
plugged into a Module and
that Module is then plugged
into a standard AC outlet.
Modules receive commands
fromControllers.Examples
include the Lamp Module
(sold separately). The
Transceiver Module (also
sold separately) is another
example (although it also
doubles as a controller as
described later).
Controllersarealso
plugged into standard
wall outlets and send
commands to Modules over
your existing electrical wiring in
your house without affecting
your electricity in any way.
The Transceiver Module works
as a controller when it is used
with a remote control such as
the SuperRemote. When the
Transceiver Module receives
a command from a remote
it sends digital signals over
your existing house wiring
to a Module which
receives the signals and
executes the command.
The remote uses radio frequency (RF)
signals to send commands to the
Transceiver module. RF signals can go
right through walls, so you can use the
remotes to control lights or appliances
from anywhere in your home.
99
99
9
88
88
8
1.1.
1.1.
1. Set the House Code
to ‘A’ and the Unit
Code to ‘2.’
2.2.
2.2.
2. Plug a lamp into
the Lamp Module.
3.3.
3.3.
3. Plug the Lamp
Module into a
convenient AC
outlet.
X10 DVD SX10 DVD S
X10 DVD SX10 DVD S
X10 DVD S
UPERUPER
UPERUPER
UPER
RR
RR
R
EMOTEEMOTE
EMOTEEMOTE
EMOTE
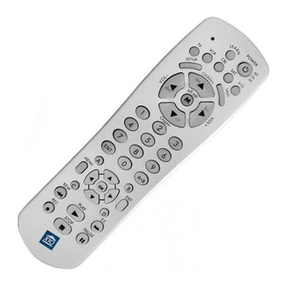
The X10 DVD SuperRemote allows you to
control practically everything electrical in
your home. It has IR technology that lets
you control all your TV, VCR, Cable Box,
Satellite equipment, DVD Player; and
X10 RF technology that lets you control
lamps and appliances anywhere in your
home.
To find out more about configuring the
SuperRemote to work with your audio/
video equipment, see the section titled
“Setting Up your SuperRemote.”
1.1.
1.1.
1. Push the tab and lift
off the battery
cover.
2.2.
2.2.
2. Fit four AAA
batteries, taking
care to match the +
and - marks in the
battery
compartment.
II
II
INSTNST
NSTNST
NSTALLINGALLING
ALLINGALLING
ALLING
THETHE
THETHE
THE
CC
CC
COMPONENTSOMPONENTS
OMPONENTSOMPONENTS
OMPONENTS
TT
TT
T
RANSCEIVERRANSCEIVER
RANSCEIVER
MM
MM
M
ODULEODULE
ODULEODULE
ODULE
The Transceiver Module (sold separately)
receives radio frequency (RF) commands
from the SuperRemote to operate a lamp
or appliance plugged into it. The
Transceiver Module also passes on
commands over your house wiring to
control other X10 modules (also sold
separately). Note that unlike the Lamp
Module you cannot dim or brighten a
lamp connected to the Transceiver
Module.
You should locate the Transceiver Module
centrally in the home for maximum range
when controlled by the SuperRemote.
2.2.
2.2.
2. Plug a lamp or
appliance into the
Transceiver
Module.
3.3.
3.3.
3. Plug the Transceiver
Module into a
convenient AC
outlet. Fully extend
the antenna.
LL
LL
L
AMPAMP
AMPAMP
AMP
MM
MM
M
ODULEODULE
ODULEODULE
ODULE
The Lamp Module (sold separately) can
be used to control any incandescent
lamp rated up to 300W. It is not suitable
for other types of lamp such as
fluorescent or energy saving lamps, or
lamps which include a dimmer control.
Caution: Donot connect an appliance
such as a coffee pot or heater to the Lamp
Module.Itmaydamagethe module and
the appliance and could cause a fire
hazard.
1.1.
1.1.
1. Set the House Code
to ‘A.’
1111
1111
11
1010
1010
10
SET UPSET UP
SET UPSET UP
SET UP
Usedfor programming the remote.
0-90-9
0-90-9
0-9
Used as your original remote and to
enter device codes for X10 Modules.
A-BA-B
A-BA-B
A-B
DVD Setup.
ENTENT
ENTENT
ENT
Enter, same as your original remote.
CHANNEL, VOLUME, MUTECHANNEL, VOLUME, MUTE
CHANNEL, VOLUME, MUTE
Works like your original remote.
X10 ON/OFF KEYSX10 ON/OFF KEYS
X10 ON/OFF KEYS
Lets you control X10 modules to operate
lamps and appliances around the home.
1.1.
1.1.
1. Turn on the device
you want to control
(TV, VCR, cable
box, satellite
receiver, DVD,
etc.).
2.2.
2.2.
2. Press and hold
SETUP until the LED
indicator lights
steadily. Release
the SETUP button.
3.3.
3.3.
3. Press and release
the mode button
that matches the
device you want to
control. The LED
blinks once. Use
AUX for CD
equipment.
4.4.
4.4.
4. Enter the 3 digit
Code from the
Library Code
Tables. The LED
turns off after the
last digit entered.
SS
SS
S
ETTINGETTING
ETTINGETTING
ETTING
UPUP
UPUP
UP
FORFOR
FORFOR
FOR
TVTV
TVTV
TV, VCR,, VCR,
, VCR,, VCR,
, VCR,
CC
CC
C
ABLEABLE
ABLEABLE
ABLE
, S, S
, S, S
, S
AA
AA
ATELLITETELLITE
TELLITETELLITE
TELLITE
/DSS,/DSS,
/DSS,/DSS,
/DSS,
ANDAND
ANDAND
AND
DVDDVD
DVDDVD
DVD
SS
SS
SETTINGETTING
ETTINGETTING
ETTING UU
UU
U
PP
PP
P
YOURYOUR
YOURYOUR
YOUR SS
SS
SUPERUPER
UPERUPER
UPERRR
RR
REMOTEEMOTE
EMOTEEMOTE
EMOTE
BB
BB
B
UTTONUTTON
UTTONUTTON
UTTON
DD
DD
D
ESCRIPTIONSESCRIPTIONS
ESCRIPTIONS
Since this remote is primarily an X10 and
DVDremote,the button description
below refer to the operation when in
DVD mode. In other modes, some buttons
haveother functions.
INDICAINDICA
INDICAINDICA
INDICATOR LIGHTTOR LIGHT
TOR LIGHTTOR LIGHT
TOR LIGHT
The indicator light flashes when you
press a button.
POWERPOWER
POWERPOWER
POWER
Works in the same way as your original
remote.
TVTV
TVTV
TV, VCR, CBL, AUX, SA, VCR, CBL, AUX, SA
, VCR, CBL, AUX, SA, VCR, CBL, AUX, SA
, VCR, CBL, AUX, SATT
TT
T, DVD, DVD
, DVD, DVD
, DVD
Used to select the device to control. SAT
includes DSS receivers.
TITLETITLE
TITLETITLE
TITLE
If there are 2 or more titles on the DVD
this button lets you to select another title.
SUBTITLESUBTITLE
SUBTITLESUBTITLE
SUBTITLE
Toggles any Subtitle selection On/Off.
DISPLADISPLA
DISPLADISPLA
DISPLAYY
YY
Y
Toggles track/time/audio/subtitle/title
information on and off the screen.
RETURNRETURN
RETURNRETURN
RETURN
Returnsto a previous menu.
UP/DOWN/LEFT/RIGHT DVD KEYSUP/DOWN/LEFT/RIGHT DVD KEYS
UP/DOWN/LEFT/RIGHT DVD KEYS
Menu navigation.
OKOK
OKOK
OK
Menu Select/OK/Enter button.
MENUMENU
MENUMENU
MENU
Toggles DVD Menu on/off.
EXITEXIT
EXITEXIT
EXIT
Clear/Exit function.
SKIP BACKSKIP BACK
SKIP BACKSKIP BACK
SKIP BACK
Skip back to previous Chapter/Title.
SKIP FORSKIP FOR
SKIP FORSKIP FOR
SKIP FORWW
WW
WARDARD
ARDARD
ARD
Skip forward to next Chapter/Title.
REW, PLAREW, PLA
REW, PLAREW, PLA
REW, PLAYY
YY
Y, FF, FF
, FF, FF
, FF, REC, STOP, REC, STOP
, REC, STOP, REC, STOP
, REC, STOP, P, P
, P, P
, PAUSEAUSE
AUSEAUSE
AUSE
Works the same as on your original VCR
andDVDremote.
RECALLRECALL
RECALLRECALL
RECALL
Last play/repeat.
1313
1313
13
1212
1212
12
6.6.
6.6.
6. Point the remote at
your A/V
component and
press the POWER
button. Your A/V
component should
turn off.
UU
UU
U
SINGSING
SINGSING
SING
AUXAUX
AUXAUX
AUX
TOTO
TOTO
TO
CONTROLCONTROL
CONTROLCONTROL
CONTROL
AA
AA
A
SS
SS
S
ECONDECOND
ECONDECOND
ECOND
TVTV
TVTV
TV, VCR, C, VCR, C
, VCR, C, VCR, C
, VCR, C
ABLEABLE
ABLEABLE
ABLE
BB
BB
B
OXOX
OXOX
OX
,,
,,
,
SS
SS
S
AA
AA
ATELLITETELLITE
TELLITETELLITE
TELLITE
RR
RR
R
ECEIVERECEIVER
ECEIVERECEIVER
ECEIVER
,,
,,
,
OROR
OROR
OR
DVDDVD
DVDDVD
DVD
The AUX button is normally used to
control an audio component, but it can
also be configured to control a second
TV, VCR, cable box or satellite receiver.
4.4.
4.4.
4. Press and release
the mode button
that matches the
A/V equipment
you want to
control. The LED
blinks once.
1.1.
1.1.
1. Turn on the
equipment you
want to control.
2.2.
2.2.
2. Press and hold
SETUP until the LED
indicator lights
steadily. Release
the SETUP button.
3.3.
3.3.
3. Press the AUX
button.
5.5.
5.5.
5. Point the remote at
the device and
press the POWER
button. Your device
should turn off.
6.6.
6.6.
6. Turn your device on
and press
CHANNEL+. If the
device responds,
setup is complete.
Notes:
For CD playersusetheAUXbuttons.
IfyourTV/VCR/CableBox/Satellite
Receiver/DVDPlayerdoesnot
respond, trytheother codes for your
brand. If it still doesn’t respond, try the
Code Search method on page 14.
IftheLEDblinkedrapidlywhenyou
entered the code,youmayhaveentered
an invalid code. Recheck the code in the
code list and try again.
Ifsomebuttonsdo notoperateyour
equipment,tryoneof the othercodesfor
your brand.
5.5.
5.5.
5. Enter the 3 digit
Code from the
Library Code
Tables. The LED
turns off after the
last digit entered.
7.7.
7.7.
7. Turn your A/V
component on and
press CHANNEL +.
If it responds, setup
is complete.
1515
1515
15
1414
1414
14
Notes: * When searching for, or
identifying codes stored under AUX,
press AUX before pressing the mode key.
** You might have to press CHANNEL
+manytimes(50+).Ifthedevicedoes
not have a Channel Up function, use the
PLAY button (VCR and DVD only) or the
POWER button.
1.1.
1.1.
1. Press and hold
SETUP until the LED
indicator lights
steadily. Release
the SETUP button.
2.2.
2.2.
2. Press the mode
button* that
matches the
equipment you
want to identify.
The LED blinks
once.
3.3.
3.3.
3. Press and release
SETUP. The LED
blinks once.
4.4.
4.4.
4. To find the first
digit, press each
number button from
0 to 9 until the LED
blinks. The number
that blinked is the
first digit of the
code.
5.5.
5.5.
5. Press each number
button from 0 to 9
again as above to
find the second
digit.
6.6.
6.6.
6. Press each number
button in turn to
find the third digit.
When the third
digit has been
found, the LED will
turn off.
Notes:
Ifyouraudio/videocomponentdoes
not respond, trythe other codesforyour
brand. If it still doesn’t respond, try the
Code Search method below.
IftheLEDblinkedrapidlywhenyou
entered the code,you mayhaveentered
an invalid code. Recheck the code in the
code list and try again.
1.1.
1.1.
1. Turn on the device
you want to control.
2.2.
2.2.
2. Press and hold
SETUP until the LED
indicator lights
steadily. Release
the SETUP button.
3.3.
3.3.
3. Press the mode
button* that
matches the
equipment you
want to control.
The LED blinks
once.
4.4.
4.4.
4. Press CHANNEL +
repeatedly** until
the device to be
controlled changes
channel.
If you go past the
code accidentally,
just press
CHANNEL -
repeatedly until the
channel changes
again.
5.5.
5.5.
5. Press and release
the ENTER button to
complete the setup.
SS
SS
S
EARCHINGEARCHING
EARCHINGEARCHING
EARCHING
FF
FF
F
OROR
OROR
OR
CC
CC
C
ODESODES
ODESODES
ODES
II
II
I
DENTIFYINGDENTIFYING
DENTIFYING
CC
CC
C
ODESODES
ODESODES
ODES
FOUNDFOUND
FOUNDFOUND
FOUND
USINGUSING
USINGUSING
USING
THETHE
THETHE
THE
SS
SS
S
EARCHEARCH
EARCHEARCH
EARCH
PP
PP
P
ROCEDUREROCEDURE
ROCEDUREROCEDURE
ROCEDURE
1717
1717
17
1616
1616
16
You can change 1-4/5-8 slide switch to
allow you to control X10 Modules set to
9-12/13-16:
CC
CC
C
HANGINGHANGING
HANGINGHANGING
HANGING
THETHE
THETHE
THE
X10 SX10 S
X10 SX10 S
X10 S
LIDELIDE
LIDELIDE
LIDE
SWITCHSWITCH
SWITCHSWITCH
SWITCH
SETTINGSETTING
SETTINGSETTING
SETTING
::
::
:
1.1.
1.1.
1. Press and hold
SETUP until the LED
indicator lights
steadily. Release
the SETUP button.
2.2.
2.2.
2. Press and hold ALL
OFF (LED blinks off)
for about 8 seconds
until the LED
indicator turns off.
The above procedure changes the switch
on the side of the remote to control X10
Modules set to 9-12 or 13-16. To
change it back to 1-4/5-8, repeat the
above procedure, pressing LIGHTS ON
instead of ALL OFF.
CC
CC
CONTROLLINGONTROLLING
ONTROLLINGONTROLLING
ONTROLLING
X10 MX10 M
X10 MX10 M
X10 MODULESODULES
ODULESODULES
ODULES
If you have purchased and installed a
Transceiver Module, you can control it
and other X10 modules as follows:
The 4 rocker keys at the bottom of the
remote will control X10 Modules set to
1, 2, 3, and 4, from left to right. Press
the top of the rocker key to turn the
Module ON. Press the bottom of the
rocker to turn the Module OFF. Press and
hold the top rocker to brighten, and the
bottom rocker to dim lights connected to
Lamp Modules and Wall Switch
Modules (does not dim or brighten
Appliance Modules, but turns them on if
they were off).
Use the slide switch on the side of the
remote to select control of X10 Modules
set to 1-4 or 5-8.
TheLightsOnbuttonturnson ALL lights
connected to Lamp Modules and Wall
Switch Modules (set to the same
Housecode as the remote). This button
does not affect Appliance Modules.
The All Off button turns off ALL X10
Modules set to the same Housecode as
the remote, including Appliance
Modules.
These 4 rocker keys give instant control
of 4 X-10 Modules set to Unit Codes 1-4
or 5-8 no matter what mode you are in
(TV, VCR, etc.).
1919
1919
19
1818
1818
18
CC
CC
C
HANGINGHANGING
HANGINGHANGING
HANGING
THETHE
THETHE
THE
X10 HX10 H
X10 HX10 H
X10 H
OUSEOUSE
OUSEOUSE
OUSE
CC
CC
C
ODEODE
ODEODE
ODE
::
::
:
TheSuperRemotedefaults to House
Code A, and in most cases you will not
need to change this unless you are
experiencing interference from a
neighboring X10 system.
1.1.
1.1.
1. Press and hold
SETUP until the LED
indicator lights
steadily. Release
the SETUP button.
2.2.
2.2.
2. Use the number
buttons to enter the
number equivalent
to the desired
House Code
(1=A, 2=B ..16=P).
3.3.
3.3.
3. Press ENTER to
confirm the House
Code. The LED
turns off.
Note:TheHouseCode you choose must
match the House Code on the
Transceiver and Modules you are using it
with.
1.1.
1.1.
1. Press and hold
SETUP until the LED
indicator lights
steadily. Release
the SETUP button.
2.2.
2.2.
2. Press and release
any mode button
(except TV), e.g.
AUX.
3.3.
3.3.
3. Press 999.*
You can also set any mode key (except
TV) to become an “X10” key. You could
for example make AUX an X10 key.
Pressing this key then puts you in X10
mode and lets you control all 16 X10
Modules (set to the same Housecode as
the remote), as follows.
Once in X10 mode you can control any
X10 Module by pressing the number
button corresponding to its Unit Code,
followed by the appropriate function key
as follows:
X10FUNCTIONS:
On: CHANNEL +
Off: CHANNEL –
Bright: VOLUME +
Dim: VOLUME –
All Lights On: POWER
All Units Off: MUTE
Notes: Youcannotdimorbrightenan
Appliance Module. If the module was off
and you press Bright or Dim (VOLUME +
or VOLUME -) this will simply turn the
moduleon.
* The above procedure sets the remote
to transmit X10 RF codes to any X10
Transceiver. If you want it to transmit X10
IR codes to an IR543 Console press 998
in step 3 above instead of 999.
2121
2121
21
2020
2020
20
A
I
EM
OC
GK
•
•
•
•
••
•
•
1
9
513
153
711
•
•
•
••
•
•
UNIT
Remote Chime
HOUSE
1
9
513
A
I
EM
AB 12 3
INPUTMODE
POWERFLASHINTERFACE
TESTALLUNITSOFF
1
9
513
A
I
EM
CONTINUOUS
MOMENTARY
UNIVERSALMODULE
ONOFF
SOUNDER & RELAY
RELAY ONLY
SOUNDER ONLY
A
I
EM
••
••
1
9
513
••
••
Heavy Duty
Appliance Module
UNIT
HOUSE
EE
EE
EXPXP
XPXP
XPANDINGANDING
ANDINGANDING
ANDING
YOURYOUR
YOURYOUR
YOUR SS
SS
SYSTEMYSTEM
YSTEMYSTEM
YSTEM
The modules illustrated below represent
just a few of the wide range of X10
compatible modules you can choose
from to expand your Home Automation
system. They are available from electrical
outlets, department stores and mail order
catalogs.
X10HomeAutomation products also
integrate with X10 security systems, so
you can use the security remotes that
come with them to control macros and
flash lights when the security system is
tripped.
Check out our Web Site at:
http://wwwhttp://www
http://www.x10.com.x10.com
.x10.com.x10.com
.x10.com
formore information on these and many
otherX10products.
Power
Adapter
OFF
T
h
e
r
m
o
s
t
a
t
S
e
t
-
B
a
c
k
C
o
n
t
r
o
l
l
e
r
LO M HI
1
9
513
A
I
EM
A
I
EM
••
••
1
9
513
••
••
CONTROLLED
Use the Mini TMini T
Mini TMini T
Mini Timer MT10Aimer MT10A
imer MT10Aimer MT10A
imer MT10A to
programupto 4 X-10Modules
to go on and off up to twice a
day.
The Dual Floodlight
Motion Detector PR511
turns on at dusk and/or
when it detects movement,
and sends X10 signals to
control other modules, or
trigger ActiveHome macros.
Fit aWireless Wall Switch SS13A/
SS15Aanywhereyou need anextra
switch - with no wires. Sends
commands to the Transceiver
Module just like a remote.
The PowerFlash Module PF284
connects to dry contact or low voltage
alarm terminals on your burglar alarm
systemand flashesX10controlledlights
when it is triggered.
Switch entrance or garage lights on
from your car with the convenient
KeychainRemoteKR21A.
Replace your existing wall switches with
theWallSwitchModuleWS467.Installs
like a regular dimmer. On/Off and
Bright/Dim functions. Other models
available for 3-way and fluorescent
lighting.
Control a ceiling light, closet light,
etc. with the convenient Screw-in
LampModuleLM15A.
Replace existing AC wall outlets with
theReceptacle Module SR227.Has
one 15A/1800W controlled outlet
and one outlet which is always on.
UseacontrollertotriggertheRemote
Chime Module SC546 to call Dad
up for dinner, or warn people you’re
about to turn on the sprinklers.
Use the isolated contacts on the
Universal Module UM506tocontrol
pool pumps, sprinklers, drapes and
otherlowvoltageequipment.Includes
built in warning beeper.
The Thermostat
Setback Controller
TH2807 mounts below
your thermostat to
reduce the room
temperature at night or at
the times you set to save
energy. No wiring needed
to your existing thermostat.
Plug in a Heavy Duty Module
HD245 to control 220V appliances
such as air conditioners and water
heaters.
Also, see http://Also, see http://
Also, see http://
wwwwww
wwwwww
www.x10.com for details on X10’s.x10.com for details on X10’s
.x10.com for details on X10’s.x10.com for details on X10’s
.x10.com for details on X10’s
full range of wireless cameras.full range of wireless cameras.
full range of wireless cameras.
2323
2323
23
2222
2222
22
WW
WW
W
ARRANTYARRANTY
ARRANTYARRANTY
ARRANTY
12 MONTH LIMITED W12 MONTH LIMITED W
12 MONTH LIMITED WARRANTYARRANTY
ARRANTYARRANTY
ARRANTY
X10.com, a division of X10 Wireless
Technology,Inc.(X10)warrantsX10products
to be free from defective material and
workmanship for a period of one (1) year
fromtheoriginaldateofpurchaseatretail.
X10 agrees to repair or replace, at its sole
discretion,adefectiveX10productifreturned
toX10 within the warrantyperiodand with
proof of purchase. If service is required
underthiswarranty:
Call1-800-442-5065,visitwww.x10.com,
ore-mail[email protected].
For help or more information on
setup, please visit:
http://www.x10.com/support
TT
TT
TROUBLESHOOTINGROUBLESHOOTING
ROUBLESHOOTINGROUBLESHOOTING
ROUBLESHOOTING
TheTransceiverModuledoesn’t
respondtotheremote:
• Check the House Code on the
Transceiver Module is set to ‘A.’ If
you have changed the House Code
on the remote (see p. 17), check that
it matches the House Code on the
Transceiver Module.
• Make sure the X10 button is set to
code 999, see page 18.
• Press the ON/OFF button on the
front of the Transceiver to confirm it
operates the item connected to it.
The Transceiver Module works, but
otherModulesdon’trespond:
• Check that the Module has the same
House Code as the Transceiver
Module.
• Try plugging the Module into a
different outlet.
Note: if you use an RF Transceiver (such
as the RR501 or TM751) to control X10
Modules, you will be able to control up
to 16 Modules. When using a
Transceiver, when you press 1-6-ON you
turn on Module number 16. However, if
you use an IR543, when you press 1-6-
ON you turn on Modules 1 AND 6. The
IR543 can only control 10 Modules (1-9
plus0=10).
TheRemotewon’tcontrolyourA/V
equipment,ordoesn’tworkatall:
• Use manual controls or the original
remote control to confirm the
equipment is working properly.
• Be sure you pressed the device key
for the device you want to control.
• Re-enter the code for your A/V
product from the code listings.
• Try searching for codes as described
on page 14.
• Replace the Remote’s batteries.
Printed in China
UR47A (64K) -10/02
X10.com, a Division of
X10 Wireless Technology, Inc.
3824 North 5th St., Suite C,
North Las Vegas, NV 89032
Web Site:
http://www.x10.com

Other manuals for SuperRemote UR47A

2

Other X10 Remote Control manuals

X10 SUPERREMOTE UR19A User manual

X10

X10 SUPERREMOTE UR19A User manual

X10 MK19A User manual

X10

X10 MK19A User manual

X10 KR19A SlimFire User manual

X10

X10 KR19A SlimFire User manual

X10 KC674 User manual

X10

X10 KC674 User manual

X10 SH624 User manual

X10

X10 SH624 User manual

X10 KR21A DigiPad User manual

X10

X10 KR21A DigiPad User manual

X10 VK47A User manual

X10

X10 VK47A User manual

X10 SUPERREMOTE UR19A Installation and operating instructions

X10

X10 SUPERREMOTE UR19A Installation and operating instructions

X10 VK62A User manual

X10

X10 VK62A User manual

X10 SH624 User manual

X10

X10 SH624 User manual

X10 KR15A User manual

X10

X10 KR15A User manual

X10 KR32A User manual

X10

X10 KR32A User manual

X10 SENTINEL CR15A User manual

X10

X10 SENTINEL CR15A User manual

X10 KR10A User manual

X10

X10 KR10A User manual

X10 PalmPad HR12A Manual

X10

X10 PalmPad HR12A Manual

X10 RT504 User manual

X10

X10 RT504 User manual

X10 CK11A Administrator guide

X10

X10 CK11A Administrator guide

X10 CR13A User manual

X10

X10 CR13A User manual

X10 ShowTime UR85A User manual

X10

X10 ShowTime UR85A User manual

X10 SUPERREMOTE UR24A User manual

X10

X10 SUPERREMOTE UR24A User manual

X10 RC6500 User manual

X10

X10 RC6500 User manual

X10 IconRemote IR27A User manual

X10

X10 IconRemote IR27A User manual

X10 MK19A User manual

X10

X10 MK19A User manual

X10 PA5900 User manual

X10

X10 PA5900 User manual

Popular Remote Control manuals by other brands

WTCtv ADB Potenza instruction manual

WTCtv

WTCtv ADB Potenza instruction manual

PairGain HiGain Solitaire H2TU-R-402 Quick installation guide

PairGain

PairGain HiGain Solitaire H2TU-R-402 Quick installation guide

GRAUPNER mz-24 PRO Programming manual

GRAUPNER

GRAUPNER mz-24 PRO Programming manual

Kohler K-7420 Homeowner's guide

Kohler

Kohler K-7420 Homeowner's guide

HPC Acumen Max 101 operating instructions

HPC

HPC Acumen Max 101 operating instructions

The Singing Machine mic-remote user guide

The Singing Machine

The Singing Machine mic-remote user guide

marinco SPLR-2 instructions

marinco

marinco SPLR-2 instructions

Universal Electronics ATLAS OCAP 5 user guide

Universal Electronics

Universal Electronics ATLAS OCAP 5 user guide

Hayward OmniLogic How-to guide

Hayward

Hayward OmniLogic How-to guide

WAC Lighting Modern Forms F-RC-WT Operation instructions

WAC Lighting

WAC Lighting Modern Forms F-RC-WT Operation instructions

SkyLink G6KR user manual

SkyLink

SkyLink G6KR user manual

Mitsubishi Heavy Industries SC-SL4-AE user manual

Mitsubishi Heavy Industries

Mitsubishi Heavy Industries SC-SL4-AE user manual

System air SRC Installation and user manual

System air

System air SRC Installation and user manual

One Forall KAMELEON 4 user guide

One Forall

One Forall KAMELEON 4 user guide

JR XP9303 instruction manual

JR

JR XP9303 instruction manual

Leviton ZLS0R-RC1 installation instructions

Leviton

Leviton ZLS0R-RC1 installation instructions

Velux INTEGRA KLR 200 quick guide

Velux

Velux INTEGRA KLR 200 quick guide

Marantz RC5200 user guide

Marantz

Marantz RC5200 user guide

manuals.online logo
manuals.online logoBrands
  • About & Mission
  • Contact us
  • Privacy Policy
  • Terms and Conditions

Copyright 2025 Manuals.Online. All Rights Reserved.