Xenarc 700TSU User manual

!
M
700TSU INSTALLATION MANUAL

|
2Table of Contents
Features..................................................................03
Specifications.........................................................04
Quick-Start..............................................................05
Remote Control......................................................07
Hardware Installation.............................................10
Software Installation..............................................14
Touch Screen Driver Installation
Additional Info........................................................22
Owner’s Record......................................................23

3
|
Features
Input Signals
USB input: 1 channel
VIDEO (RCA) input: 2 channels
AUDIO (RCA) input: 2 channels
Features
o Connect computer video signal with a simple USB cable
o Capable of connect six USB Monitor simultaneously
o 5 wires for the touch panel
o 2 audio input
o NTSC/PAL
o 16:9/ 4:3
o LED backlight
o Automatic and manual backlight adjust
o Build in USB video card which allow the video signal to transfer through USB port
o Build in USB sound card which allow the sound signal to transfer through USB port
o Monitor is powered by USB port. External DC power is not required. However,
the brightness and volume is only running at 70% efficient at USB powered mode.
When DC plugged in, the brightness and volume will be increased.

|Specification
4
Specification
Last input memory
USB2.0
Last power setting memory
Auto display adjustment
Mirror image flip
VESA 50mm mounting holes
26 pin heavy-duty connector with connector locking
Supports 10V DC~ 35V DC
E-Mark certified for automotive use
Display Specifications
Screen Size: Diagonal 7" (16:9)
Physical Resolution: 800(H) x 480(V)
Pixel Pitch: 0.0025(H) x 0.0075(V) (in)
Dot Resolution: 2400 x 480=1.152.000 (dots)
Supported Resolution: 640 x 480 -1920 x 1080
Supported Refresh Rate: 60-75Hz
LCD Panel Brightness: 500 cd/m2
Contrast Ratio: 400:1
Response Time: 5 – 11ms
Viewing Angle: Vertical: 70 / Horizontal: 70
Colors: 18-bit (262.144 colors)
Physical Specifications
Video Source Input
USB x1
RCA composite video female connector x2
Audio Source Input
RCA audio female connector x2
DC 3.5 mini stereo plug x1
Touch Panel/O
USB connector x1
Power Source Input
Single 12V DC_IN (Supports 10V-35V)
External Input Buttons
OSD buttons for Power / Select / Menu / Increase / Decrease
PWR button for Power switch
Dimension (In): 7.72(W) x 4.88(H) x 1.42(D)
Weight (lb): 1.54
Electrical Specifications
Operating Voltage Range: DC 10V-35V
Power Supply: DC 12V
Power Consumption<10W
@ Audio input<150MV
Other Specifications
Operating Temperature: -4 °F - 158°F
Storage Temperature: -22 °F – 176 °F
FCC. CE. E13. ROHS Certification
18 Month Warranty

Attach the 26-Pin connector at the back of the monitor
Attach the USB plug to the computer's USB receptacle
connector. Plug in the second USB cable is optional.
It is included as backup power source
Attach your “video source 1” (e.g. VCR, Video Game
Console) to the Yellow RCA connector marked Video1
Attach your “Video Source2” (e.g. Rear view Camera)
to the Yellow RCA connector marked as Video2
Attach your “Audio Sources” to the white/ red RCA
connectors marked as Audio1 and Audio2. The sound
5
|
Quick Start

Quick-Start|6
!
Install the Touch screen driver from the included CD disk
Please follow the installation on page 14
Video 1
Slide Monitor into optional mounting stand
!
!
Secure #Height#position by adjusting knob
Secure #Tilt#position!!!!!
by adjusting!!!!!knob
Insert the power adapter as shown. (Optional)
Monitor is powered by USB port. External DC power
is not required. However, the brightness and volume
is only running at 70% efficient at USB powered
mode. When DC plugged in, the brightness and
volume will be increased.

01. Power Button: Turn the monitor ON or OFF.
02. Mirror Button: Enable or Disable the mirroring of the display. Continue to press it and
choose the mirroring you want.
03. Dimmer Button: Dim the brightness of the display by pressing this key continually to
set the brightness level of the display. (Only available when auto sensor is disabled.)
04. Mute Button: Mute the speaker. Press again to restore the voice of speaker.
05. Display Button: Display the message of the current input signal on the screen.
06. Sleep Button: Enable or disable to the sleep timer. Press this button to select and set
the time to turn off the monitor automatically.
07. Picture Button: Enable to select the picture mode you prefer. Press this button and
then you can select standard, user, bright or soft.
08. PC auto button: Enable to adjust the picture automatically, only available in VGA mode
09. Menu Button: Enable the OSD menu. Press this button again to exit.
10. Source Button: Enable to switch to different source input. (VGA, HDMI, AV, CCD)
11. Vol+ / Vol- Button: Increase or Decrease the Volume.
12. Up / Down Button( / ): Navigate Up or Down in OSD menu.
13. Left / Right Button( / ): Navigate Left or Right in OSD menu, as well as decreasing
or increasing the value of setting in OSD.
14. Enter Button: confirm the setting or selection.
MENU
DISPLAY
SOURCE
SLEEP
VOL-
PICTURE
VOL+
PC AUTO
MIRRORPOWER DIMMER MUTE
Remote Control 7
|
Instructions for remote controller shortcuts
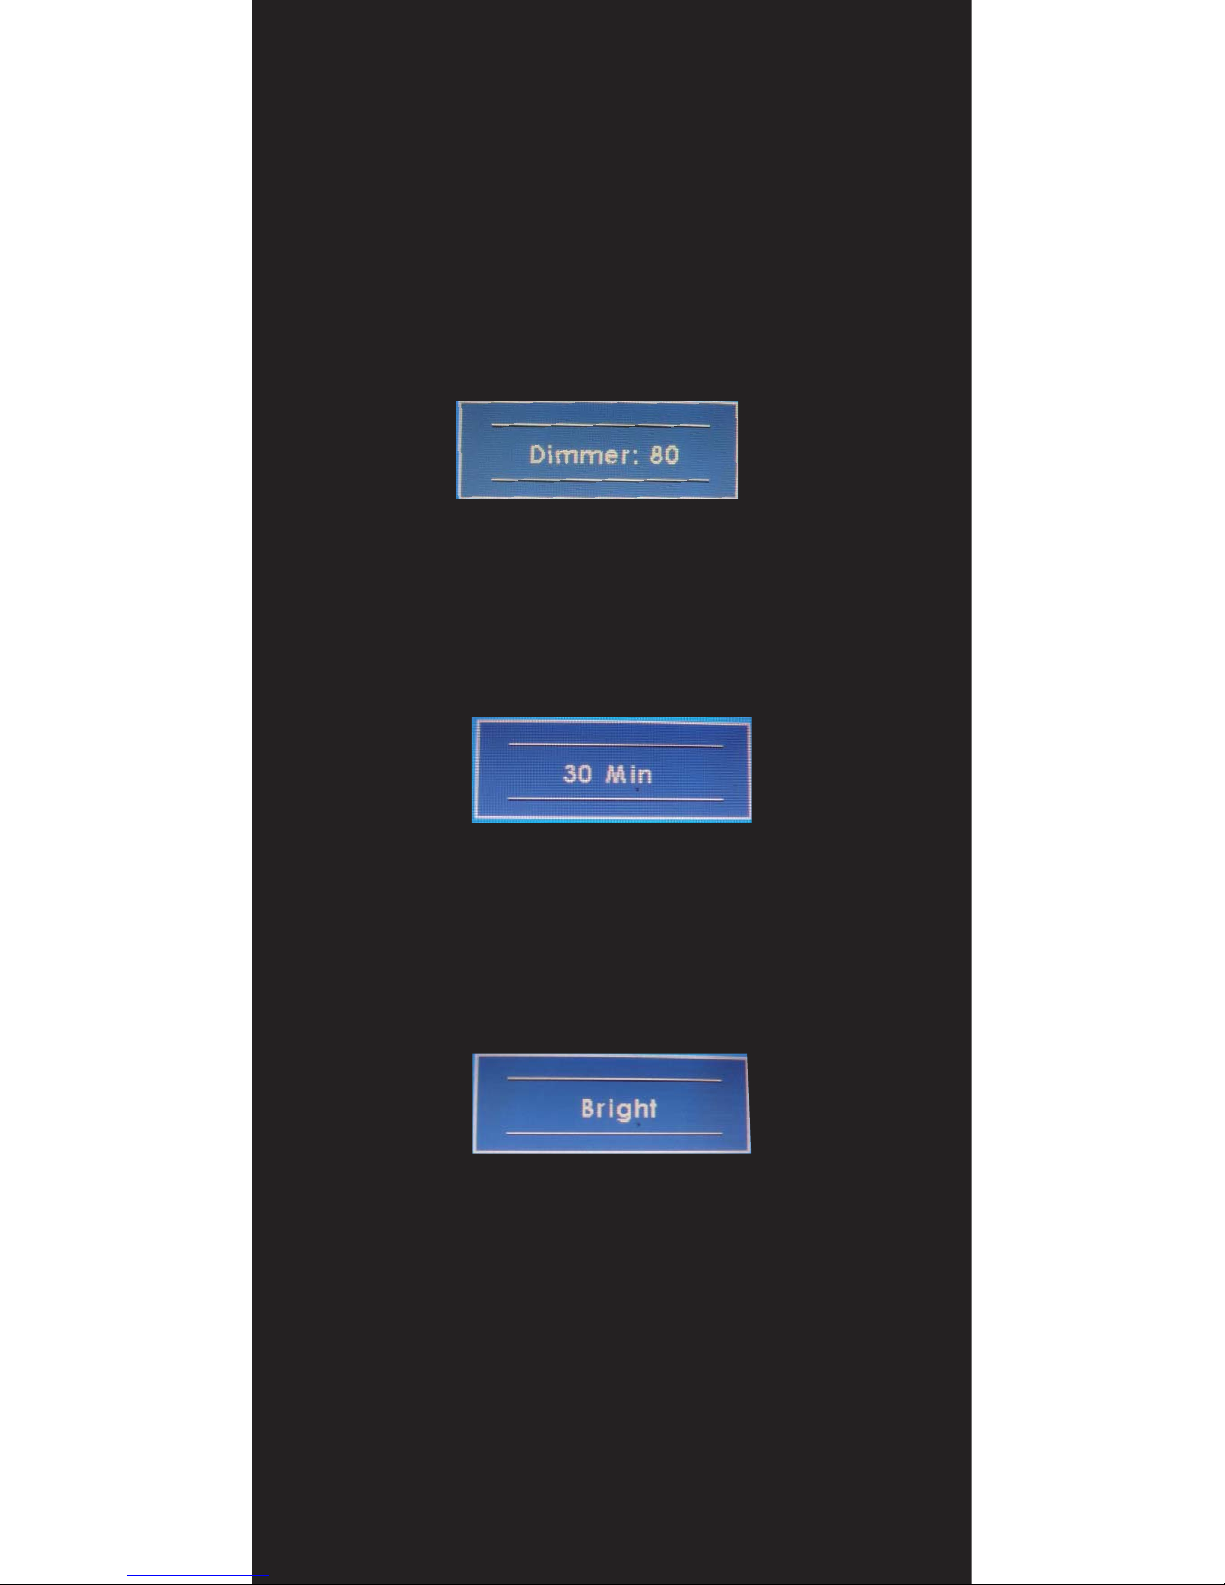
1. Dimmer (adjust the brightness)
By pressing the Dimmer button, it will adjust the brightness level from 0, 20, 40, 60, 80
and 100. Default is 100 (Only available when auto sensor is disabled)
2. Sleep (set the sleep time out)
Select the time to automatically turn off the monitor.
The minimum is 15 minutes and the maximum is 120 minutes
3. PICTURE (set the mode of the picture)
Enable to select the picture mode you prefer. Press this button and then you can
select standard, user, bright or soft
4. PC AUTO (auto adjust, only on USB Video)
By pressing PC AUTO, it will auto adjust the image.
5. SOURCE (select the source)
Press this button to select the input signal to display (USB Video, AV1, AV2).
If one of these mode is disabled in OSD menu, please setup under
(Function --> Source Enable)
|
8Remote Control

|
.
!uif!mfgu!)!!!*!
uif!nfov!cvuupo
Boe!uifo
!
qsftt!uif
!#Select#!button to go
!ps!uif!wbmvf!pg!tfuujoht
ps!uif!wbmvf!pg!tfuujoht
!#/! Xifo! Bvup! Tfotps! jt!
6. MIRROR (image mirror)
Enable or Disable the mirroring of the display. Continue to press it and choose
the mirroring mode you wish to display
7. Mute
Mute the speaker. Press again to restore the voice of speaker
8. DISPLAY (display mode)
Display the message of the current input signal on the screen
9. VOL-/ VOL+
Volume adjustment
Remote Control 9
|

Buttons description:
!
1. Power button: press to turn on or off the monitor
2. Select button: Press to select the input signal to display. Press
!
or right ( ) to highlight the input source desired and then press
to make the selection.
3. Menu button: Press the button to show the OSD menu.
!
left ( ) or right ( ) to navigate through the menu. Press
through a list of settings and options. Press the left ( ) or right ( ) buttons to
change the values of settings. Press Menu button again to leave the OSD menu.
4. Right
!
button: Press this button to increase volume
inside the OSD menu.
5. Left button: Press this button to decrease volume
inside the OSD menu.
!
!
!
Ambient Light Sensor Description
Ambient Light sensor can be enabled or disabled in the OSD by going into the “MISC”
category, and select the option “Auto Sensor”. When Auto Sensor is enabled, the LCD
backlight brightness will be adjusted automatically according to the ambient lighting
condition.
Note:
The brightness cannot be adjusted manually through the dimmer button or through the
OSD menu when the Auto Sensor function is enabled
OSD (On-screen display) Menu
Press MENU to display the OSD on the screen, then press UP/DOWN (or LEFT/RIGHT
from the front control panel) to select different category in highlight. Press ENTER (or
SOURCE) to adjust the selected highlighted category. Under the selected item page,
press UP/DOWN (or SOURCE) to select the item from the list, use LEFT/RIGHT to
adjust. To select the sub-menu, please press LEFT to enter to the sub-menu.
|Hardware Installation
10
Table of contents
Other Xenarc Touchscreen manuals


Popular Touchscreen manuals by other brands

Elecro Engineering
Elecro Engineering Poolsmart Plus Installation & operating manual

Johnson Controls
Johnson Controls IQ4 HUB installation manual

Elo TouchSystems
Elo TouchSystems ET2270L user manual

Elo TouchSystems
Elo TouchSystems ET1002L user manual

Elo TouchSystems
Elo TouchSystems 3201L user manual

Duratec
Duratec S15 user manual


