Xerox 1186 User manual

- -. . -. .
.:~"..
' ,
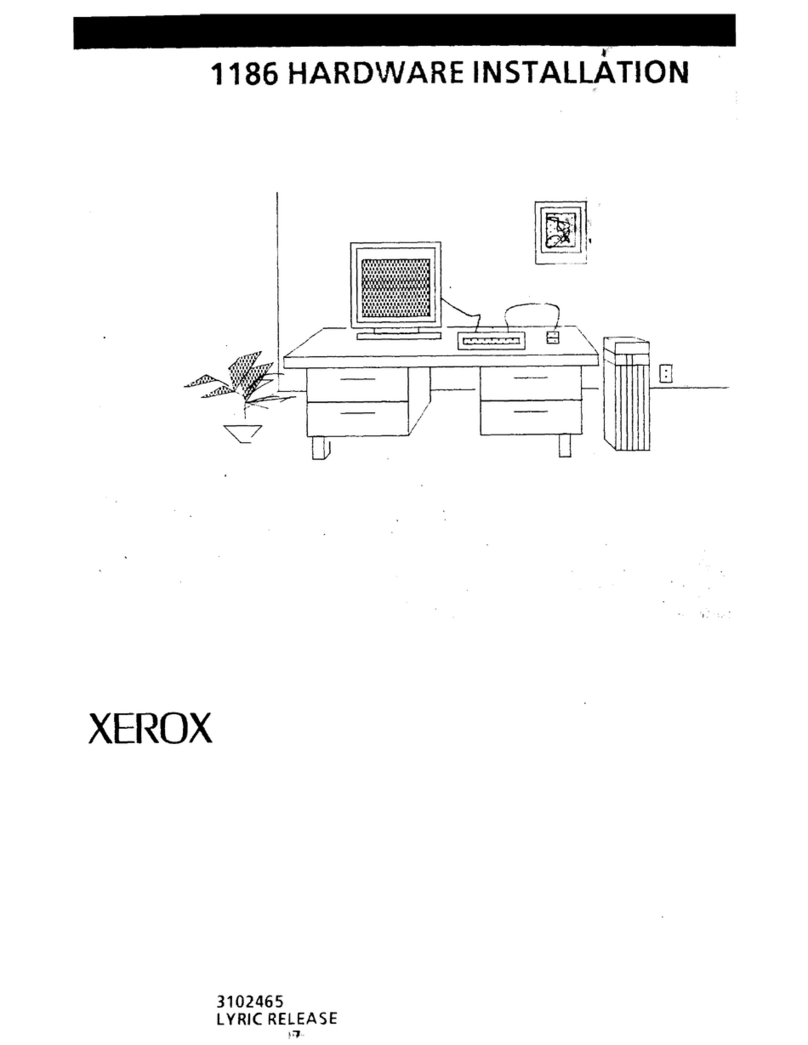
XEROX
1186
USER'S
GUIDE
3101893
Februa
ry
1986
;.
~
.-

Copyright
(C) 1986byXerox Corporation
All
rights reserved.
DEC, VAX, VMS, and VT100 are trademarks
of
Digital Equipment
Corporation.
IBM
is
a registered trademark
of
International Business Machines.

Table
of
Contents
1.
Introduction
The 1186
Workstation
Getting
Started 3
Software
5
The
Lisp
Sysout 5
Starting Lisp 6
Installing a Sysout 7
Loading Interlisp-D Packages 7
Copying Floppies
to
a File Server 8
Cu
rsor Codes 9
Booting
the
Xerox 1186
10
The
Ethernet
11
Copying Files Between Machines
12
Advice For
the
Standalone User
12
References
13
2.
Equipment
15
Environmental
Requirements
15
Electrical Requirements
16
Standard
Equipment
16
Processor
16
Display
19
XEROX 1186
USER'S
GUIDE

TABLE
OF
CONTENTS
Keyboard
20
Mouse
22
Optional
Equipment
23
Floppy Disk Drive 23
Ethernet
Transceiver and
Controller
24
Ethernet
Interface 24
Peripheral
Equipment
24
Cables 24
Power
Supply 25
3. Using
the
1186
27
Turning
the
1186 On
27
Booti
ng
the
1186 28
Booting
Sequence
for
Interlisp-D 28
Turning
the
1186
Off
29
Routine
Maintenance
29
Keyboard 29
Mouse
29
DisplayScreen 30
Floppy Disk Drive 30
FloppyDisks 30
Troubleshooting
31
Reporting
Problems 32
4.
Software
Installation 33
Installing Lisp
on
the
1186
Workstation
33
ii
XEROX
1186
USER'S
GUIDE

TABLE
OF
CONTENTS
Floppy
Disks
Needed
33
FactoryConfiguration 34
Partitioning 34
Steps
for
Partitioning 34
Microcode and System Tool Installation
35
Steps
for
Microcode and
System
Tool
InstallatIon 36
Installing
the
Lisp
Sysout from Floppies
38
Steps
for
Ins~alling
the
Lisp
Sysout from
Floppies 38
Installing
the
Lisp
Sysout from the
Network
39
Steps
for
Installing a
Lisp
Sysout from
the
Network
40
To Re-Install a Lisp Sysout from
the
Rigid Disk
43
Steps
for
Re-Installing a
Lisp
Sysout
43
Initializing
Lisp
44
Steps
for
Initializing
Lisp
45
Loading Interlisp-D Packages 46
Logging
Out
of
Lisp
48
Steps
for
Logging
Out
of
Lisp
48
Troubleshooting
for
Lisp
Installation 48
Rigid DiskFile
System
49
Disk
Partitions 49
File
System
Utility
Functions
50
File
Name Conventions
52
Disk
Scavenging
53
XEROX.1186
USER'S
GUIDE
iii

TABLE
OF
CONTENTS
5.
System Tools
57
Introduction
57
The Profile Tool
58
Parameter Items
61
Command Items
62
The
lisp
System Tool
63
Parameter Items
65
Command Items
68
The
On-line
DiagnosticTool 74
Parameter Items
76
Command Items 76
6.
Input/Output
77
FloppyDisk Support
77
Naming, Erasing and Formatting Floppies 78
Copying Floppies
79
Loading Sysouts and
Other
Large
Files
onto
Floppies 79
Measuring Unused Floppy
Space
81
Testing
Whether
a Floppy
is
in
the
Drive
81
Scavenging Floppies
82
R5232
Support 82
Cable Configurations
for
RS232C
Port and
TTY
Ports
83
iv
XEROX
1186
USER'S
GUIDE

TABLE
OF
CONTENTS
7. Diagnostics
Glossary
Index
Boot
Options
for
Running
Diagnostics
Preboot
Diagnostics
Boot
Diagnostics
Cursor Codes
Pilot
Operating
System Codes
Lisp Codes
Appendix A - Setting the Time
Setting
Date and Time
on
Standalone
.
Workstations
Appendix B- The Floppy Copy Utility
Copying
FloppyDisks
Appendix C- Library Guide
How
to
Load
from
the
Library Floppies
Library
Floppy
Index
HelpSys
Floppy
Index
XEROX 1186
USER'S
GUIDE
87
87
87
88
91
92
92
99
107
v

TABLE
OF
CONTENTS
[This page
intentionally
left
blank.]
vi
XEROX
1186
USER'S
GUIDE

1.
INTRODUCTION
The 1186
is
an artificial intelligence development
workstation
that
combines Xerox hardware and
software
to
provide a
wide
variety
of
user
applications.
This
chapter provides a
brief
overview
of
the
1186
workstation
and its software
environment.
The 1186 Workstation
Your workstation consists
of
the
components
described below.
Display Screen: When
the
power
is
turned on,
the
screen should display
the
boot
icons, on-screen
representations
of
the
10
function
keys
at
the
top
of
your keyboard.
Processor Unit: The central processor
(CP)
is
in
a
brown,
rectangular box
about
two
feet
tall
that
usually
sits
on
the
floor
dose
to
the screen and
keyboard.
The
power switch
is
on
the
front
of
the
processor
unit
(often
called the
front
panel) near
the
top,
just under
the
word
"Xerox". The switch
is
fabeled
with
a 0 and a
1;
0
is
off,
1
is
on. Also near
the
power
switch are
the
boot
button
(labeled B
Reset), a green
"power
on"
light,
and three red
lights which are
used
for
diagnostic purposes
(see
chapter
7,
Diagnostics).
XEROX
1186
USER'S
GU
IDE

INTRODUCTION
2
If
your 1186 isn't
on,
you can
turn
it
on by pushing
the
power
switch
to
1.
The screen should flash and
after
a
minute
or
two
the
boot
icons should appear.
Contained in
the
processor
unit
is
the
Rigid Disk.
If
you purchased a Floppy Disk Drive,
it
will
probably
be sitting on
top
of
the
processor
unit
(for
complete
details on
the
rigid disk and
the
floppy
disk drive
see
chapter
2,
Equipment and chapter
3,
Using
the
1186).
Keyboard: The keyboard
is
attached
to
the display
by a cable and
is
the
way you interact
with
the
processor
(see
chapter
2,
Equipment).
Three-button Optical Mouse: The mouse
is
attached
to
the
keyboard
with
a
thin
insulated wire.
It
guides a
pointer
(called
the
mouse cursor) across
the
screen
(see
chapter
2,
Equipment). The mouse
comes
with
an optical mouse pad, and must be
on
the
pad when you move it.
Sometimes
the
mouse cursor
will
change shape and
display a series
of
four
numbers.
These
are cursor
codes and
the
numbers represent
both
progress and
error
conditions
(see
chapter 7, Diagnostics).
Together these components comprise
the
standard
1186 configuration. You should read chapter
2,
Equipment and chapter
3,
Using
the
1186,
to
familarize yourself
with
the
care and
use
of
your
Xerox 1186 workstation'sequipment.
XEROX
1186
USER'S
GU
IDE
INTRODUCTION
Getting Started
Xerox 1186 workstations come
with
some software
(a
Lisp
sysout and
System
Tools) already installed
on
the
rigid disk.
If
you discover
that
software isn't installed,
that
you
cannot load
it
due
to
some mishap
during
either
installation
or
shipping,
or
you decide
to
repartition
(i.e., erase and restructure) your disk, you
will
need
to
follow
the
procedures
found
in chapter 4,
Software Installation.
Your workstation should be turned on and
the
boot
icons displayed.
Press
the
F1
key on your keyboard.
If
a
boot
icon
other
than
the one representing
the
F1
key
is
already darkened you must
press
the
boot
button
(B
Reset)
first.
Pressing the
F1
key begins
the
loading process
of
your Interlisp-D environment, called a sysout. (This
is
described in a subsequent section called The Lisp
Sysout.) In
the
upper
left
hand corner
of
your
screen you
will
see
a small square containing
four
numbers.
These
numbers are called cursor codes
and are
used
to
inform
you
of
the
progress
of
the
operation you are running. The sysout
loading
process
takes one
to
two
minutes.
If
Interlisp-D loads successfully your screen
will
display three windows:
the
Interlisp-D Executive
window
(figure
1)
the
prompt
window
(figure
2)
and the Interlisp-D
logo
window
(figure 4).
XEROX
1186
USER'SGUIDE
3

INTRODUCTION
4
nterllsp-O
Execl.!lIve
Figure
1.
The Interlisp-D Executive
window
The executive
window
is
the
window
where
you
interact
with
the
system by
typing
in
commands and
Lisp expressions
to
be evaluated.
You
will
also
see
the
prompt
window
(figure 2),
Figure
2.
The
prompt
window
The
prompt
window
is
where
system messages are
printed. For example,
if
you are
not
connected
to
a
network
that
has
a
time
server,
or
the
1186 cannot
get
the
time
for
any
other
reason,
the
prompt
window
will
print
a message (figure
3).
You should
always
work
in
an
environment
with
the
correct
time
set.
If
the
time
is
not
set on your
workstation
see
Appendix
A-Setting
the
Time.
Prom
t
..,.Vin(Jow
Time
not
set]
Figure
3.
Prompt
window
with
message
indicating
that
time
is
not
set
XEROX
1186
USER'S
GU!DE

Software
INTRODUCTION
Figure
4.
The Interlisp-D
logo
window
Xerox supplies several software systems
with
the
1186.
Each
system
is
recorded on one
or
more
floppy
disks. The major system
is
the
Interlisp-D
sysout.
Other
systems provided are a software
installation
utility,
Lisp
Library packages, and
machinediagnostics.
Two examples
of
Library packages are
the
text
editing
package called TEdit and
the
drawing
program called Sketch.
The
Lisp
Sysout
A sysout
is
a snapshot
of
an Interlisp-D
environment. The sysout contains all
the
information
needed
to
start
the
initial
state
of
the
Interlisp-D
system-a
sysout
is
the
initial
contents
of
virtual memory.
As
you run
Lisp,
its virtual
memory
grows
to
accommodate newly allocated data
structures, compiled code and
the
like.
If
you
want
to
stop
working
in
the
sysout and
want
to
save
the
state
of
your virtual
memory
(e.g.,
the
entire
environment
plus
the
software modules you
have loaded) you must
log
out
of
Interlisp-D. You
do
this by
typing
(LOGOUT).
XEROX
1186
USER'S
GUIDE
5

INTRODUCTION
Starting
Lisp
6
Interlisp-D
Executive
94~
(LOGOUT)
Figure
5.
The Interlisp-D executive
window
during
execution
of
a
logout
After
you type
the
closing parenthesis, Interlisp-D
automatically begins saving
the
current state
of
your virtual memory. The state
of
the
virtual
memory
will
be stored in
the
logical volume
in
which
you were running. You
can
resume
your
Interlisp-D session
from
the
place where you logged
out
with
an Fl boot.
You can produce sysouts
of
your own,
which
capture
the
state
of
your
own
custom environment,
by using
the
function
SYSOUT
(See
chapter
6,
Input/Output
and the Interlisp-D Reference
Manual).
If
you
want
to
resume running from
the
point
of
the
most recent
LOGOUT,
simply
press
F1
while
the
boot
icons are displayed.
When
Interlisp-D
is
started
for
the
first time,
it
may
ask
you
to
supply
the
name
of
an
Init
file.
An
Init
file contains
information
that
configures Interlisp-D
for
your
installation.
For example,
the
file INIT.NONET configures
Interlisp-D
for
an 1186
that
is
not
connected
to
a
network
with
a file server. To
use
it,
put
the
Lisp
Library
floppy
containing INIT.NONET
into
the
floppy
drive and
type
{FLOPPY}I
NIT.
NON
ET
XEROX
1186
USER'S
GU
IDE
INTRODUCTION
in response
to
the
prompt
for
an
Init
file.
If
you
prefer
not
to
specify an
Init
file,
press
the carriage
return.
You may also be prompted
for
a
PUP
host
10.
For an
expianation
of
this request,
see
the
section
of
this
chapter entitled The Ethernet.
After
you have run Interlisp-D once, you
will
probably
want
to
store
the
In
it
file
of
your choosing
on
the local disk,
so
that
it
is
loaded automatically
when
you starta fresh sysout.
After
the
initialization finishes, a caret
will
start
blinking
in
the
Interlisp-D Executive
window,
indicating you
can
now
enter expressions and
commands.
Installing a Sysout
Fresh
sysouts may be installed in logical volumes
Lisp, Lisp2, etc. by running
System
Tools
(see
chapter
5,
System
Tools).
Sysout.s
also
can
be installed from
floppy
disks
or
from a file server. You may also copy
a sysout
from
one logical volume
to
another
if
the
sysout on
the
source volume
has
never been started
(see
chapter 4, Software Installation).
Loading Interlisp-D Packages
Xerox supplies
two
sets
of
floppies containing
Interlisp-D software modules:
the
lisp
library,
which contains software supported by Xerox; and
lisp
Users,
which contains user-written software
not
supported byXerox.
Please
consult Appendix C-library Guide, before
attempting
to
load a specific Library package
into
your virtual memory. Appendix C lists those·
packages
that
require you
to
load files from more
than one
floppy
disk, provides
the
sequence
of
XEROX
1186
USER'SGUIDE
7

INTRODUCTION
loading, and contains an index indicating which
modules reside
on
which floppies
Each
module consists
of
one
or
more compiled files.
There are also floppies containing fonts and
the
on-line documentation (HelpSys).
To load a module from these floppies
into
a
running Interlisp-D environment, insert
the
floppy
containing
the
module you need
into
the
floppy
disk drive, and
use
the
LOAD
function
to
read
it
into
virtual memory.
For
instance,
to
load
the
Grapher module, type
(LOAD '{FLOPPY}GRAPHER.DCOM)
to
the
Interlisp-D Executive.
If
you are
loading
many modules, you may find
it
convenient instead
to
first connect
to
the floppydevice by
typing
CONN
{FLOPPY}
after
which you could type simply
(LOAD
'GRAP~ER.DCOM).
When a module
such
as
Grapher
is
loaded,
the
system attempts
to
automatically load all
the
files
on which
the
module depends
that
have
not
yet
been loaded.
If
the
required files are stored on a
floppy
disk
other
than
the
one currently loaded
in
the
floppy
disk drive,
the
system
will
fail
to
find
them.
Copying
Floppies
to
a
File
Server
8
Another
solution, which most
users
with
a
file
server
or
a large disk are likely
to
prefer,
is
to
copy
the
contents
of
the
floppies
to
the
file server
or
disk.
Then
the
system
can
load all
the
necessary files
directly
from
the
server
or
disk
with
no
further
intervention. You
can
either copy everything
on
the
floppies
or
just
the
modules you need. The
Library module Copyfiles
is
useful
for
loading
the
XEROX
1186
USER'S
GUIDE

INTRODU
CTION
contents
of
the
floppies
to
a file server
or
a rigid
disk.
load
COPYFllES.DCOM from
the
library
and then,
for
each
floppy
you wish
to
copy type
(i
n the
executive
window),
(COPYFllES '{FLOPPY}
'{host}
<
directory»
where
{host}
<
directory>
specifies a directoryon a
file server where you have set aside
space
for
library
files,
or
is
{DSK}<
lISPFllES>
if
you are
copying
the
files
to
your machine's rigid disk.
If
you only wish
to
copy selected files from the
floppies, you
can
copy them one at a time
with
the
function
COPYFllE,
or
more conveniently
use
the
library
module File Browser
to
browse
each
floppy
and copy
the
files you desire.
See
the
lisp
Library
documentation
for
the
CopyFiles and File Browser
modules
for
more details.
Note: The
HelpSys
file IRM.HASHFllE
is
an
exception:
it
spans three floppies and must be
copied in
"huge"
mode
(see
chapter 6,
Input/Output).
Cursor
Codes
Two types
of
codes are displayed in
the
four-digit
cursor code: progress codes and error codes.
These
codes are called cursor
codes
because
the
mouse
cursor changes shape
to
display a
four-digit
number.
Progress codes are displayed
at
various stages
of
booting
and initialization.
These
codes vanish
when
initialization
is
finished,
or
halt
in some error
code.
XEROX
1186
USER'S
GUIDE
9

INTRODUCTION
10
Error codes are indications
of
problems
in
the
program you are
attempting
to
run.
Codes
less
than 9000 are displayed by non-Lisp systems (e.g.,
the
booting
programs),
while
codes in
the
range
9000-9999 an? displayed while Lisp
is
running. Error
codes usually indicate serious errors,
as
most
minor
errors
during
Lisp
operation are handled
within
the
Interlisp-D Break Package. Thus an error code
generally indicates a software
error
in
a
part
of
the
system where
it
would
be dangerous
to
signal a
normal
Lisp
error.
When
Lisp
encounters such an error,
it
halts,
displays a cursor code indicating
the
type
of
error,
and waits
for
you
to
take some action. You have a
choice
of
two
actions: (1) you
can
press
the
UNDO
key, which calls a debugging program called
TeleRaid
(a
Ubrary Module); from which
it
is
possible
to
inspect the halted machine's state
from
another
(network
connected)
workstation;
or
(2)
you
can
press
the
STOP
key, inwhich
case
the
system
attempts a "Hard Reset", which dears
the
state
of
any active computation and restarts all processes
from
the
top.
If
the
failure persists, please
note
the
cursor code
and
notify
Xerox AISupport.
It
is
also
helpful
to
gather
additional
information
by
running
TeleRaid.
Occasionally there are fundamental problems
during
booting
signaled by a combination
of
red
lightsabove
the
boot
button.
Refer
to
chapter
7,
Diagnostics
for
more
information
about
errorcodes and
boot
lights.
XEROX
1186
USER'S
GUIDE

INTRODUCTION
Booting the Xerox 1186
Booting
Lisp
or
other
software on
the
Xerox 1186
is
a two-stage
process"
First,
press
the
boot
button
(labeled B
Reset)
on the
front
of
the
processor. The
screen will display
the
boot
icons (The
boot
icons
are also displayed when you first
power
up
the
Xerox 1186,
or
after
performing
a (LOGOUT)
in
Lisp). Then
press
one
of
the
10
keyboard
function
keys, labeled
F1
through
F10.
Each
key specifies a
different
mode
of
booting.
Some ways
of
booting
are:
F1
Resumes
running Interlisp-D
from
the
most
recent
session.
When you
press
Fl
the
display
will
darken and
the
cursor
will
cycle numbers
in
the
upper left-hand corner
while
the
system
initializes memory.
If
you have aborted
the
previous Interlisp-D
session
without
logging
out,
an
Fl-boot
may fail; a typical cursor code
in
this
case
is0217.
F1
0 Invokes the
System
Tools which
allow
you
to
install a newenvironment on a volume,
or
run
the
saved
environment
from
a
different
volume
than
the
most recent one used. To
do
this,
press
Fl,
then
immediately
press
and
release tbe zero key.
F2
Boots software
from
an
appropriately
configured
floppy
disk. The Installation
Utility,
supplied
with
the Xerox 1186,
is
such
a
floppy;
the
Lisp
Library Packages floppies are
not.
F6
Boots
the
Boot Diagnostics floppy, which runs
a comprehensive set
of
machine diagnostics
(See
chapter
7,
Diagnostics).
XEROX
1186
USER'S
GUIDE
11

INTRODUCTION
The Ethernet
The Xerox 1186
is
equipped
with
a
controller
for
a
10MHz Ethernet. This permits
the
Xerox 1186
to
utilize
the
services
of
file serverst
print
servers, and
other
equipment
that
speak
the
Xerox
Network
Services
(NS)
protocols.
The
Ethernetalso allows
the
Xerox 1186
to
communicate
with
other
Xerox 1100
series workstations
on
the
network.
Each
Xerox processor
is
uniquely
identified
with
a
48-bit host number. This number
is
used
to
identify
the
Xerox 1186
in
every
NS
network
transaction.
Interlisp-D can also
use
PUP
protocols
to
communicate
with
certain servers. The
PUP
protocols
use
8-bit
host numbers
unique
only
within
one
network.
These
numbers are
not
hard-wired
in
the
processor itself,
but
are usually assigned
to
each
machine by a system administrator.
If
you
find
that
you need a
PUP
number
please consult your system
administrator.
Occasionally devices on
the
Ethernet may fail
to
communicate,
either
due
to
a
hardware
problem
with
the
network,
or
the
network
software on some
server.
If
you should experience
trouble
consult
your system administrator.
Copying Files Between Machines
12
On a
network
that
lacks a file server,
it
is
sometimes
convenient
to
be able
to
transfer files directly
between
two
Xerox 1186 workstations. The Library
module
FTPServer
provides
such
a capability. Please
consult
the
documentation
of
the
module
FTPServer
in
the
Lisp
library
Packages manual.
XEROX
1186
USER'S
GUIDE
Other manuals for 1186
2
Table of contents
Other Xerox Desktop manuals

Xerox
Xerox 820-II User manual

Xerox
Xerox 530 User manual

Xerox
Xerox 6085 PCS User manual

Xerox
Xerox 820-II User manual

Xerox
Xerox 8010 Application guide

Xerox
Xerox CX PRINT SERVER 560 User manual

Xerox
Xerox CX PRINT SERVER 550 User manual

Xerox
Xerox 530 User manual

Xerox
Xerox Alto Instruction Manual

Xerox
Xerox 1186 Manual