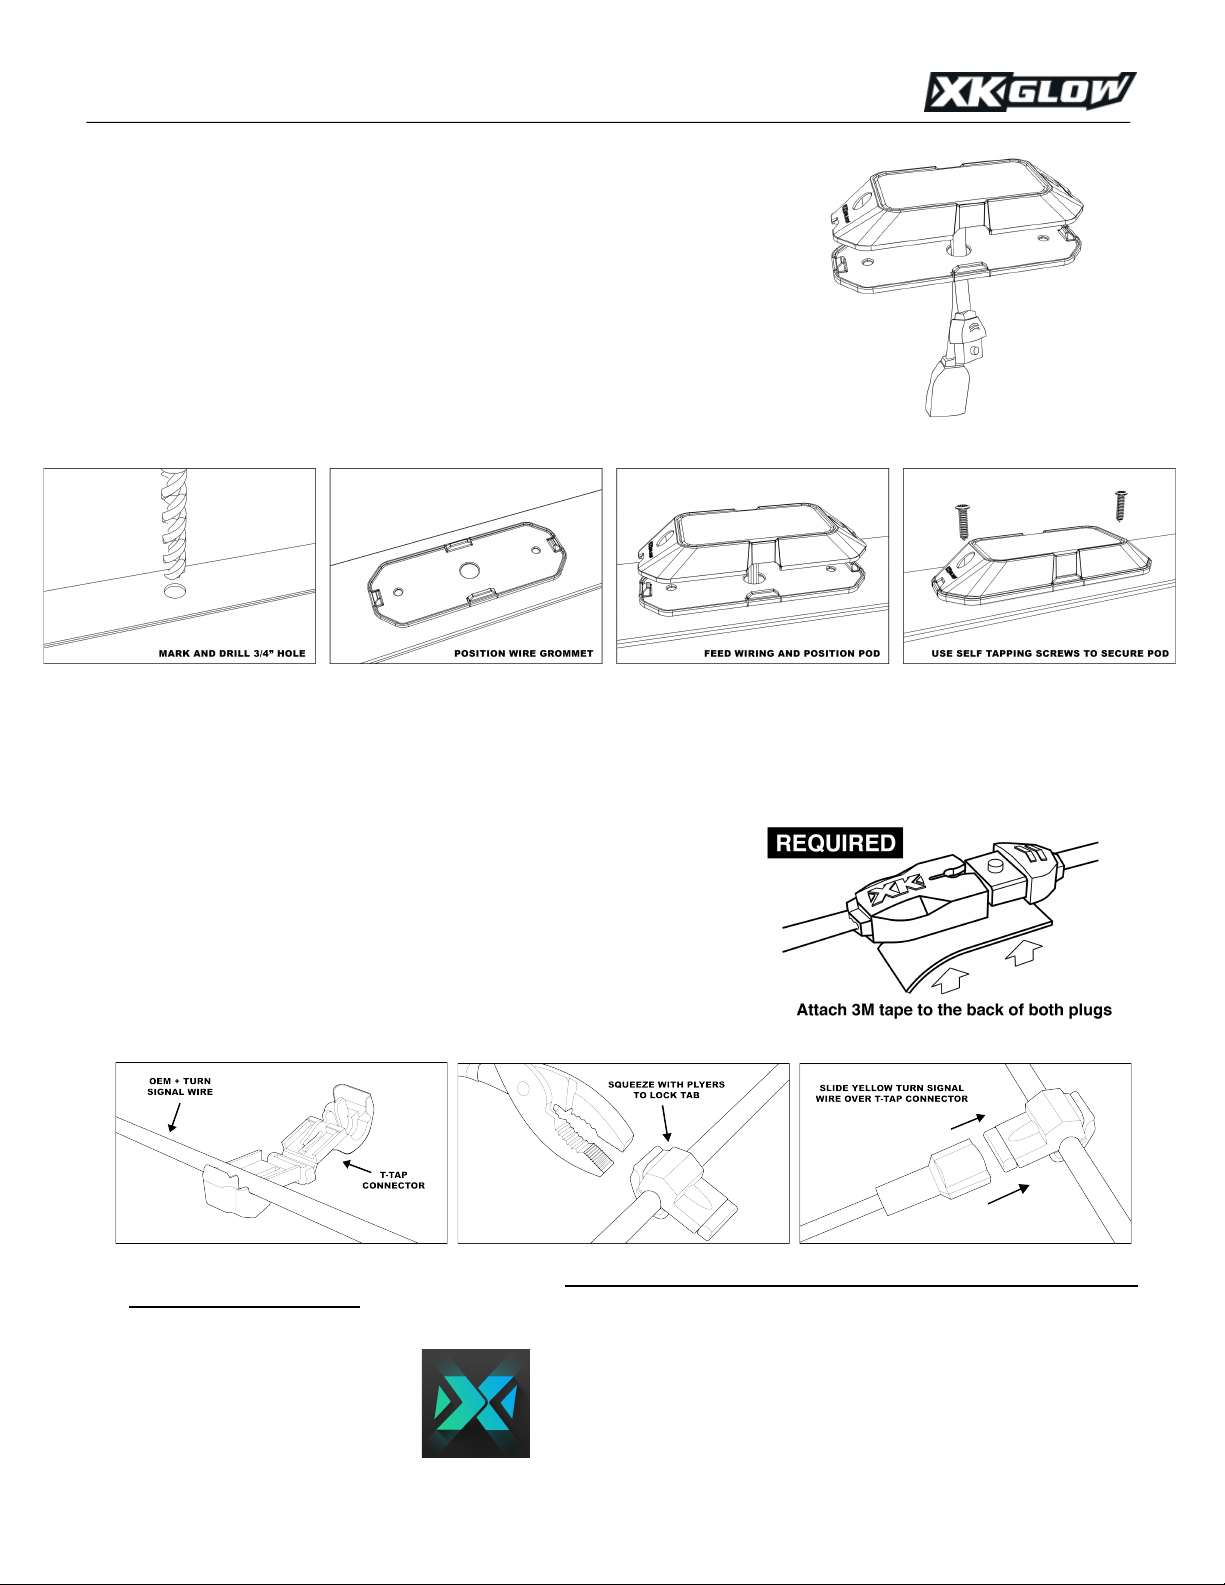
!"#$%&"#'()*!"#$%&"#)+,-.-!"/01234-$2/5-627-89:0;-"9;--------------------------------------------------------------- -
-
Within THREE years after the purchase date, the original buyer may return any XKchrome controller that
has failed due to a defect in materials or workmanship. LED Pods that have one or more LEDs fail to illuminate
due to a defect in materials or workmanship are covered with a THREE year warranty for the original buyer.
Installation of this product must be performed by a licensed professional. Should the failure of the product be
the result of damage occurring as a result of improper installation, alteration of the product or an act or omission
on the part of the consumer, this warranty is void. XKGLOW Lighting shall not be responsible for any
consequential damages which arise from the use and/or installation of the product. If the kit is installed in any
manner other than specified, XKGLOW Lighting reserves the right to deny any warranty claims at the discretion
of the technical support department. Any product return must include the original packaging, invoice number and
a statement of the alleged defect. Upon receipt of the returned product, the company will test the product for
defect. If the results of the testing do not support the warranty claim, do not reveal any defect or indicate
consumer negligence in the installation and handling of the product, then the product will be returned to you and
you will be charged a reshipping fee. If the product is returned from an address within the continental United
States, within the first 30 days after purchase, and is found to be defective, XKGLOW Lighting will exchange or
refund the original purchase expense. This offer does not extend to the cost for shipping charges on any
Additional Disclaimer Terms
Please check your local and state laws for the proper use of this product.
• Improper installation of electrical products such as lighting may cause damage to any vehicle or device to
which the improperly handled or installed lighting is attached.
• Improperly installed product may cause electrical injury to persons.
• It is recommended that the kit should be installed by a licensed professional.
• XKGLOW assumes no liability for the installation of the product.
• Warranty or liability will not exceed the product purchase price, which shall be buyer’s sole and exclusive
Return/Exchange Procedure
1. Email [xk@xkglow.com] to notify us of the product issue as well as the item number and name of customer
2. We will send you the trouble-shooting guide to fix the issue, or to narrow down which of the component(s)
need to be replaced. If the issue still exists, we will ask you to send back the defective items to be replaced.
3. Please send the returned item as instructed, along with claims and a telephone number where you can be
4. After the returned item(s) have been accepted and inspected, we will issue a refund or replace the items
ASAP. For refunds, item(s) must be sent to XKGLOW within 14 days from date of purchase. Original shipping
charges are not refundable.
We always stand behind our products and are committed to our customers! For questions you may have,
please contact xk@xkglow.com. We normally respond within 24 hours. (Monday-Friday).