Xpand Amblyz User manual

Electronic Eye Occluder


— 2 —
Amblyz™ Glasses Overview
(1) (2) Reduced / Normal vision shutter
(3) Electronic control assembly which includes a small
rechargeable battery
(4) Nosepiece
(5) Prescription lens frame if installed
(6) Charging port
(7) Orange light (LED)
(8) Switch Hole (certified personnel only)
(9) Button Hole (certified personnel only)
(10) Strap Holes
Once set-up is complete, the glasses are in a functioning
state all the time, apart from when connected to the
charger or in case the battery is drained or the device
malfunctions. The glasses operate in recurring cycles;
therefore activity may not be visible upon immediate
observation.
10
1
6
2
3
3
9
4
5
8
7

— 3 —
Safety Warnings:
t Do not use near open fire.
t Your device is not waterproof. Keep it dry. Avoid using
the glasses in the pouring rain.
t The device contains glass parts - lenses. This glass can
break if the device is dropped on a hard surface or receives
a substantial impact. If the glass breaks, do not touch the
glass parts or attempt to remove the broken glass from the
device. Stop using the device until it is serviced by qualified
personnel.
t Only qualified personnel may install or repair this
product. Do not tamper.
t Periodic occlusion of part of the visual field is expected
during normal operation. Avoid riding bicycles or other acti-
vities where such occlusions might result in injury or harm.
Before First Use
Important: Make sure the glasses were properly confi-
gured specifically for your child.
Important: Frequent regular blinking of BOTH lenses
indicates the glasses have not yet been configured for use.
Using The Glasses
Normal Use
The Amblyz™ glasses should be worn as normal
prescription glasses. It is recommended to use the glasses
all day long, however your health care provider may advise
you differently to better suit your individual needs. Unless
recommended otherwise, wear the glasses for at least nine
hours a day.
Charging
In case of low battery power, the LED on the glasses will
be blinking. Once LED blinking is observed glasses should

— 4 —
be recharged. Even with the LED blinking, glasses will
continue to deliver treatment for approximately twelve
hours. If the battery is not recharged, treatment will eventu-
ally stop and the LED will turn off.
The Amblyz™ glasses have an internal, non-removable,
rechargeable battery. Do not attempt to remove the battery
from the device. To charge the glasses follow these simple
steps:
t Connect the glasses to the USB of a computer or an
external USB charger (like a smartphone wall USB charger
for example) using the included cable. If using the charger,
plug it into the wall outlet first and only then connect the
glasses.
t The charging port is located at the bottom side of
the glasses next to right lens (see Amblyz™ Glasses
Overview).
t After a successful connection of the USB jack the
shutters and LED will blink several times. After that the LED
will turn off and the shutters will become transparent. If the
battery is low, the LED will turn back on, indicating that the
battery is charging.
t When charging is complete the LED will turn off.
t Glasses will fully recharge in three hours of charging.
t Once the glasses finish charging, if USB charger is used,
first unplug the glasses and only then unplug the charger
from the wall outlet.
Warnings
t To avoid breaking the charging connector, be careful
when connecting or disconnecting the charger cable.
t If left unused, a fully charged battery will lose its charge
over time.
t Always keep the battery between 15°C and 25°C (59°F
and 77°F). Extreme temperatures reduce the capacity
and lifetime of the battery, and possibly affect the proper
function of the device.

— 5 —
User Maintenance And Cleaning
Use with care
To help ensure a long life of your glasses make sure to
follow below suggestions:
t Keep the device dry. Precipitation, humidity, and all
types of liquids or moisture can contain minerals that
corrode electronic circuits. If your device gets wet, allow
the device to dry.
t Do not use or store the device in dusty or dirty areas.
Moving parts and electronic components can be damaged.
t Do not store the device at high temperatures. High
temperatures can shorten the life of the device, damage
the battery and/or shorten operating time on one charge,
and warp or melt plastics.
t Do not store the device at cold temperatures. When the
device warms to its normal temperature, moisture can form
inside the device and damage electronic circuits.
t Do not open the device.
t Do not drop, knock, or shake the device. Rough handling
can break internal circuit boards and mechanics.
t Keep your device away from magnets or magnetic fields.
t Do not forcefully bend the frame or handles. They may
break.
Cleaning
Lenses should be cleaned using lint free, soft drying cloth.
Paper based towels should not be used, as they can
scratch the lenses. The cloth may be dampened with mild
cleaning agents which must not be ammonia based and
must not contain more than 10% alcohol.
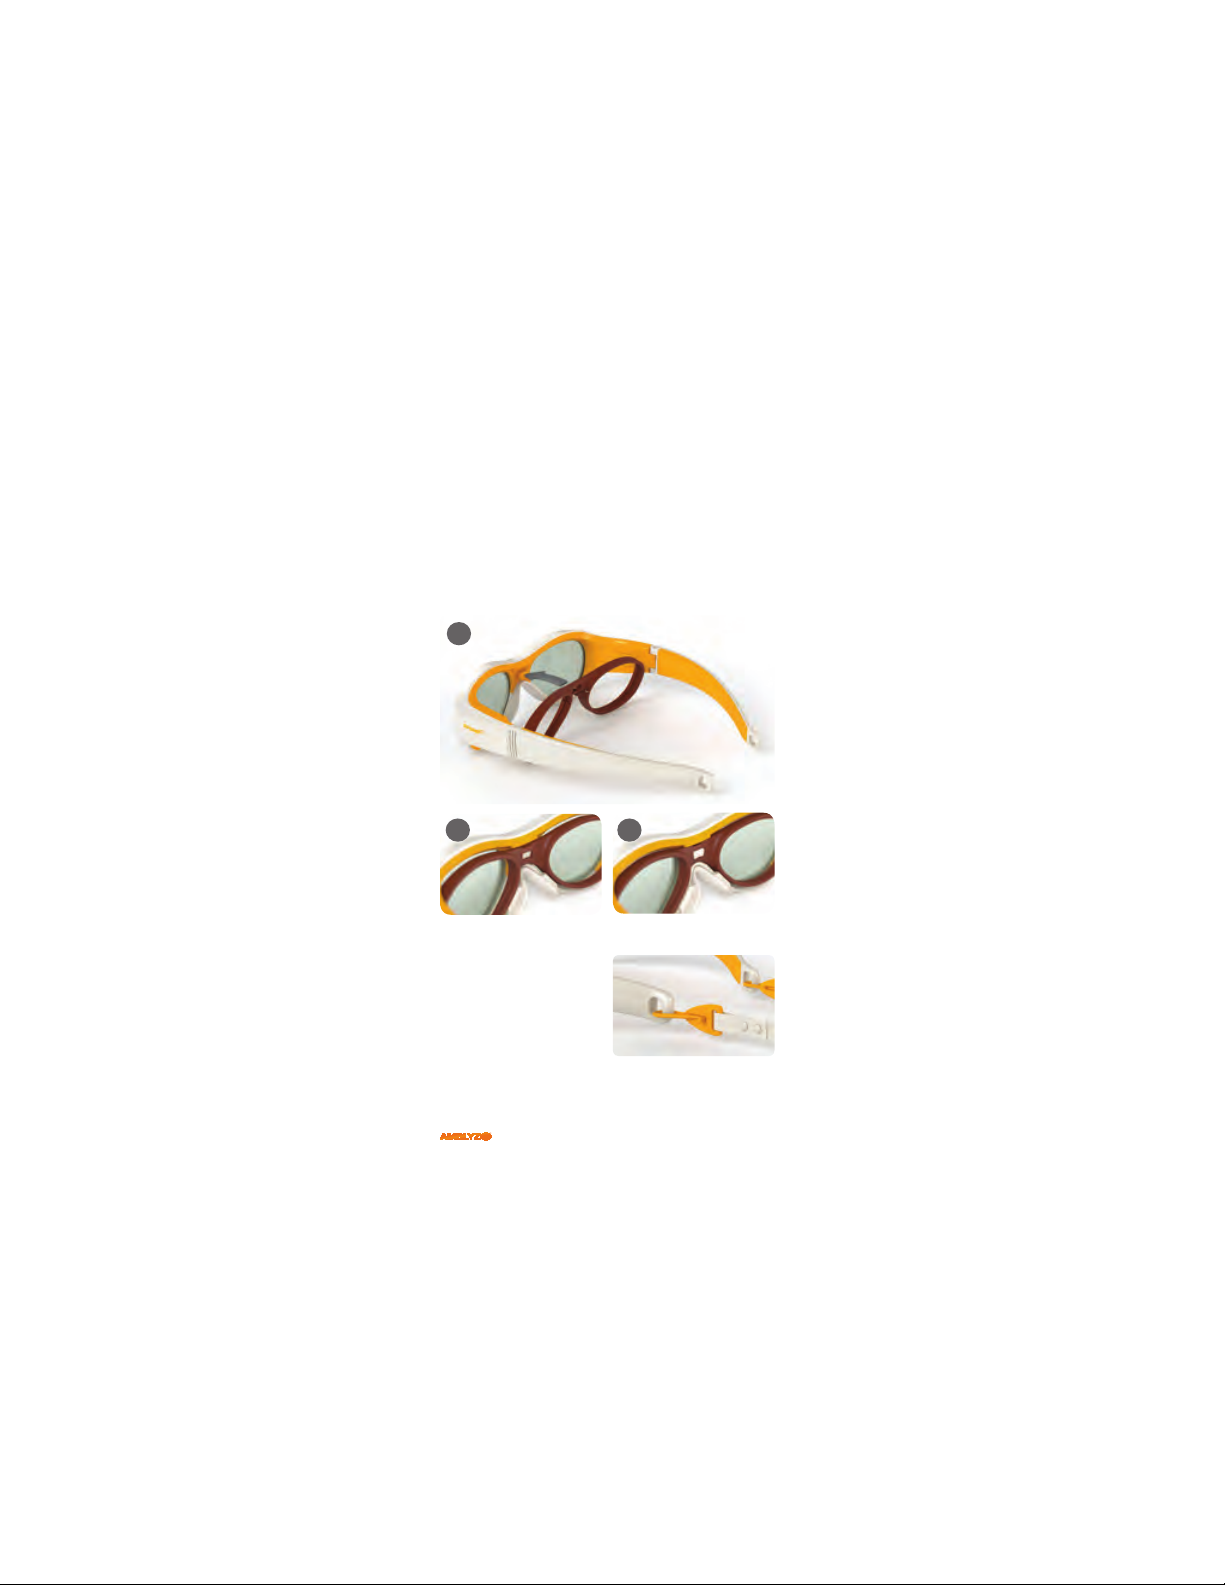
Cleaning the inner frame lenses: If necessary, you can
dismantle the inner frame to clean the lenses as seen in
the Optical Correction section of this guide. You can also
gently clean the lens without dismantling the inner frame.

— 6 —
Recycle
Return your used electronic products, batteries, and packa-
ging materials to dedicated collection points. This way you
help prevent uncontrolled waste disposal and promote the
recycling of materials.
Before First Use
To Be Performed By a Trained Healthcare
Professional Only!
Initial Setup
1. Glasses will arrive from the factory turned off. To turn
them on use a fine flat head screwdriver and insert it in the
larger hole on inner right side of the glasses (switch hole,
marked 8 in Amblyz™ Glasses Overview). Gently rotate
the screwdriver in the clockwise direction until you will feel
a click (both lenses will continuously go from transparent to
occluded, at two second intervals).
2. Connect the glasses to a USB charger or port. Both the
LED and both lenses should flash at an accelerating rate,
eventually stop flashing and stay transparent.
3. Press the button located in the small hole (button hole,
marked 9 in Amblyz™ Glasses Overview) on inner right
side of the glasses using a pin with a blunt tip. Hold the
button pressed for ten seconds or until the LED and left
lens start flashing.
4. At this stage you must choose the lens that will be
occluded. Take special care when setting the correct eye
to be occluded. Once set, reversing your choice will be
impossible.
5. If you need to occlude the left eye – press the
button for ten more seconds otherwise proceed to the next
step. The left lens and the LED should now blink faster.

— 7 —
If you are sure this is the lens you wish to occlude,
press the button again for ten seconds to permanently set
this lens to be the occluded lens. The left lens will now blink
three more times and your choice will become permanent.
If you wish to change your mind, disconnect the USB cable.
6. If you need to occlude the right eye – press the
button shortly. Now, the lens over the right eye should be
blinking. Press the button for ten seconds. The right lens
should now blink faster. If you are sure this is the lens
you need to occlude, confirm your choice by pressing the
button again for ten seconds - the right lens will now blink
three times and your choice will become permanent. If you
wish to change your mind, disconnect the USB cable.
After the eye was set, use the enclosed sticker to protect
the two holes.
Customizing Glasses
Important: When first using the glasses, it is necessary to
customize them to match your child. This is to be done by
trained healthcare providers only!
Nosepiece Sizing
t Try the glasses with the nosepiece and without it.
Choose the option with which the glasses feel more
comfortable. The lenses should have sufficient distance
from the eye to avoid contact with eyelashes.
t When glasses are optimally matched, the center of the
lenses should be in front of the pupil.

— 8 —
Optical Correction
If an optical correction is necessary, have a qualified
optician fit and attach prescription lenses to the inner
frame. After adjusting it, the inner lenses frame must be
connected to the outer frame.
Place the inner frame in place and press it into the
prepared attachment located above the nosepiece on the
side of the glasses facing the head.
If there is no need for optical correction, there is no need to
use the inner prescription lens frame.
Strap Match
To help keep the glasses in
place, a flexible strap can
be attached to the frame
handles. Choose a strap
which maintains a comfor-
table, steady fit around
the head. Most straps on the market have an option of
adjusting their length in order to make wearing the glasses
more comfortable.
3
1
2

— 9 —
Charging Before First Use
Before using the glasses for the first time they should be
fully recharged. See section Charging of this guide for
more details.
Indicators
LED
Amblyz™ glasses are equipped with an orange LED. The
LED should be OFF when in normal operation and ON when
properly connected to the USB charger and charging. Once
the battery is fully charged, the LED indicator will turn OFF,
even if Amblyz™ glasses are still connected to the USB
charger.
A flashing LED light indicates that the battery is low, and
charging is needed.
LCD Shutters
The LCD shutters incorporated into Amblyz™ glasses
can be observed to go from transparent to dark in several
different patterns.
One lens only periodically switching from transparent to
opaque and back again, when a full cycle (from opaque
to transparent and back again) takes 1 minute —this
indicates normal operation. Take notice that if lenses are
viewed only for a short time, these transitions may be
missed.
Both lenses continuously “flashing” at a high rate,
completing a cycle within seconds, indicates the glasses
were not properly configured and are not ready for use.
Setting before first use is needed (see Before First Use
section of this guide).
Both lenses flash at an accelerated rate for a few seconds
and then become transparent – indicates the glasses have
been properly connected to the USB charger.

— 10 —
None of the lenses changes from opaque to black – unless
the glasses are connected to a USB charger, this indicates
a technical error. First charge the glasses, if this does not
solve the problem, glasses should be replaced. Please
make sure you have observed the glasses for a full minute
before concluding no transitions are taking place.

Technical Specifications
Dimensions: L129 x W129 x H40 mm
Weight of Amblyz™ glasses (incl. prescription frame
and nosepiece): 36,4 g (1.284 oz)
Weight of prescription frame: 2,2 g (0.077 oz)
Weight of nosepiece: 1,7 g (0.060 oz)
Lens Type: LCD (if needed, glass prescription lenses can
be mounted)
Max Voltage of Device: 10V for lens driving
Battery Type: Li-ion Polymer 3,7V 60mAh rechargeable
battery (max voltage: 4,2V)
Minimum Time of Continuous Operation Without
Recharging: 48 hours.
USB Connector Type: USB Micro-B
Charging Time: 3 hours or more
Temperature Range: 15°C to 25°C (59°F to 77°F) -
operating outside of this range will reduce capacity and
lifetime of the battery.

Table of contents
Other Xpand 3D Glasses manuals

Xpand
Xpand X103 User manual

Xpand
Xpand X105-RF-X1 User manual

Xpand
Xpand Xpandvision X106 Evolution X106-IR-C1 User manual

Xpand
Xpand Edux 3 User manual

Xpand
Xpand DLP-Link X105-DLP-X1 User manual

Xpand
Xpand Edux User manual

Xpand
Xpand X103 User manual

Xpand
Xpand XPAND 3D User manual

Xpand
Xpand DLP LINK X102 User manual

Xpand
Xpand AE125H User manual

Xpand
Xpand Universal User manual

Xpand
Xpand X105-IR-X1 User manual

Xpand
Xpand X103-CP User manual

Xpand
Xpand DLP LINK X102 User manual

Xpand
Xpand X105-IR-C2 User manual

Xpand
Xpand X105-RF-X1 User manual

Xpand
Xpand X103-CP User manual

Xpand
Xpand YOUniversal Instructions for use

Xpand
Xpand XPAND 3D User manual

Xpand
Xpand ONE ADE1512H User manual