XtendLan XL-ICA-H662 User manual

XL-ICA-H662
IP camera with lens rotation and tilt control
User’s Guide for Web management

i
Table of Contents
1Network Connection ...................................................................................................................1
1.1 Preparation.....................................................................................................................1
1.2 Log in ..............................................................................................................................1
1.3 Live Interface .................................................................................................................3
1.4 Encode Setup ................................................................................................................3
1.5 Video Window Setup ....................................................................................................4
1.6 System Menu.................................................................................................................5
1.7 Video Window Function Option ..................................................................................5
1.8 PTZ Control....................................................................................................................6
1.9 PTZ Setup/Menu ...........................................................................................................7
2Setup...........................................................................................................................................10
2.1 Camera .........................................................................................................................10
2.1.1 Video......................................................................................................................10
2.1.2 Audio......................................................................................................................15
2.2 Network.........................................................................................................................16
2.2.1 TCP/IP...................................................................................................................16
2.2.2 Connection............................................................................................................18
2.2.3 PPPoE...................................................................................................................20
2.2.4 DDNS.....................................................................................................................20
2.2.5 IP filter....................................................................................................................21
2.2.6 SMTP (e-mail).................................................................................................22
2.2.7 UPnP......................................................................................................................23
2.2.8 SNMP.....................................................................................................................24
2.2.9 Bonjour ..................................................................................................................26

ii
2.2.10 Multicast .........................................................................................................27
2.2.11 IEEE802 .........................................................................................................27
2.2.12 Qos..................................................................................................................28
2.3 Event .............................................................................................................................29
2.3.1 Video detect..........................................................................................................29
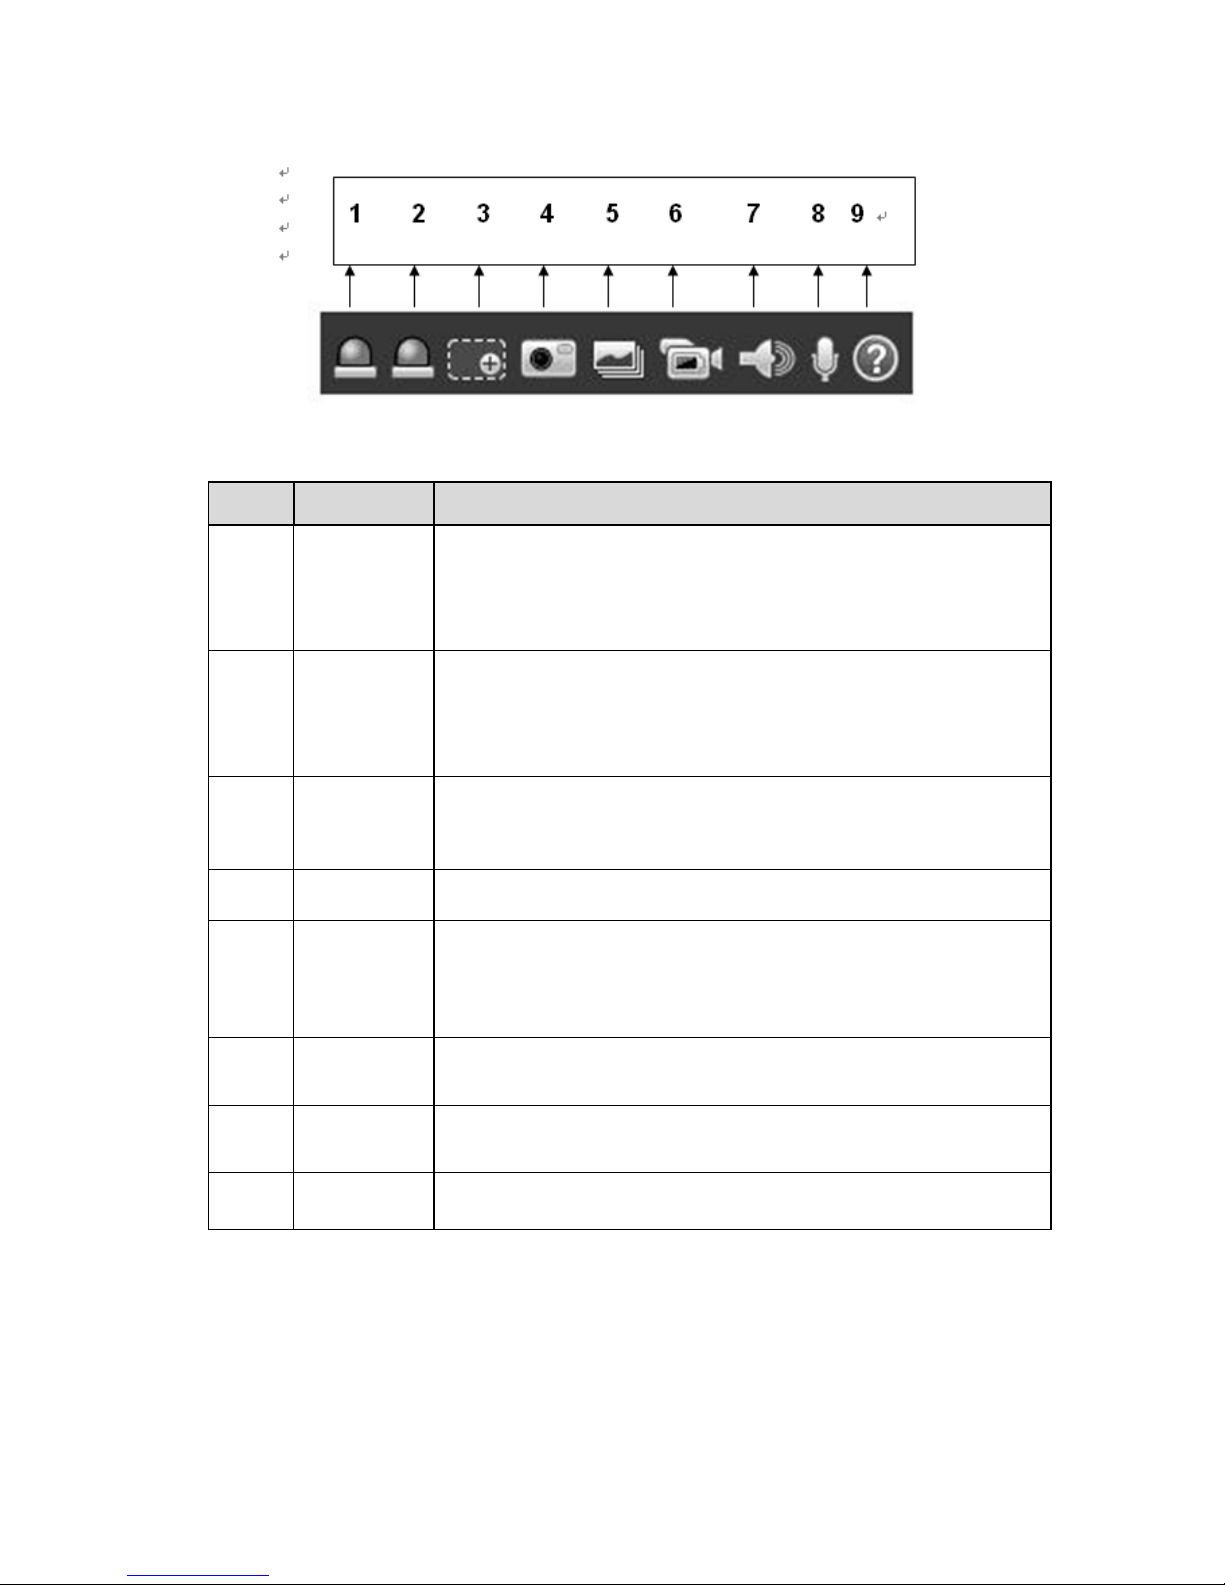
2.3.2 Alarm......................................................................................................................33
2.3.3 Abnormity..............................................................................................................36
2.4 Storage .........................................................................................................................38
2.4.1 Record schedule and snapshot schedule........................................................38
2.4.2 Destination............................................................................................................38
2.4.3 Record control......................................................................................................40
2.5 System..........................................................................................................................41
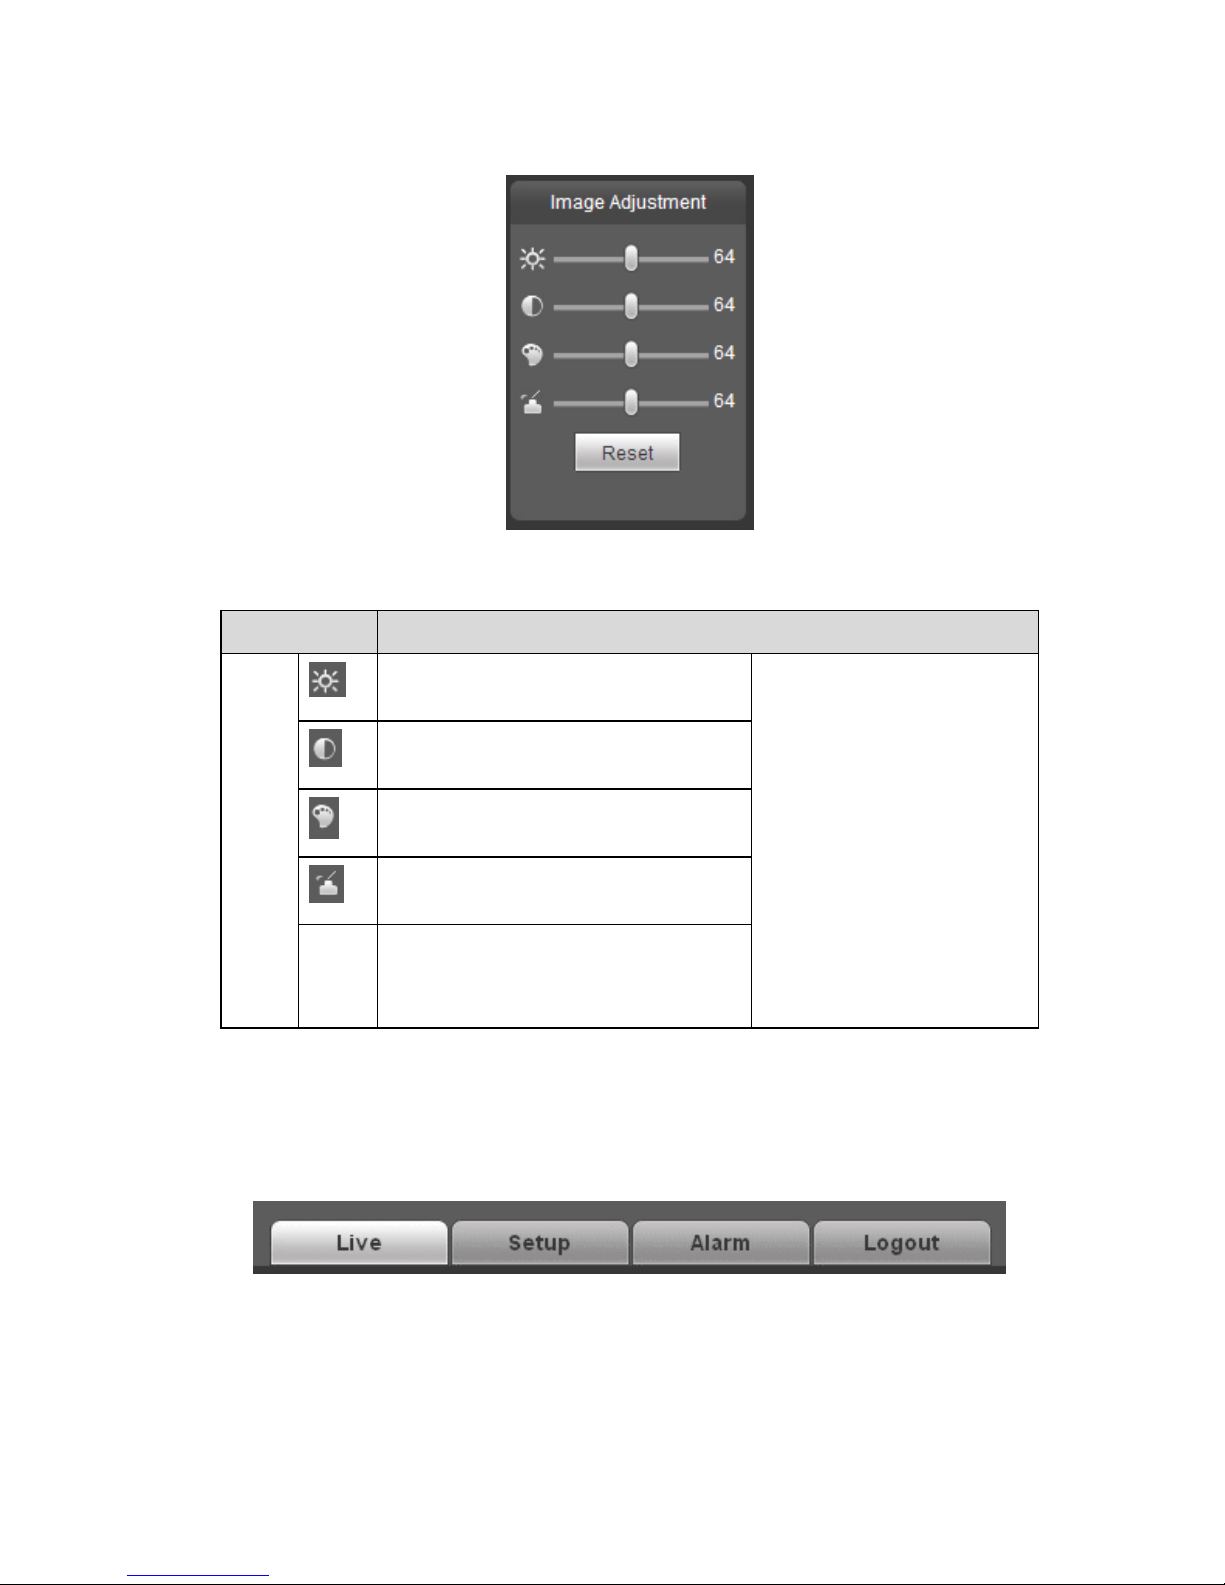
2.5.1 General..................................................................................................................41
2.5.2 Account..................................................................................................................43
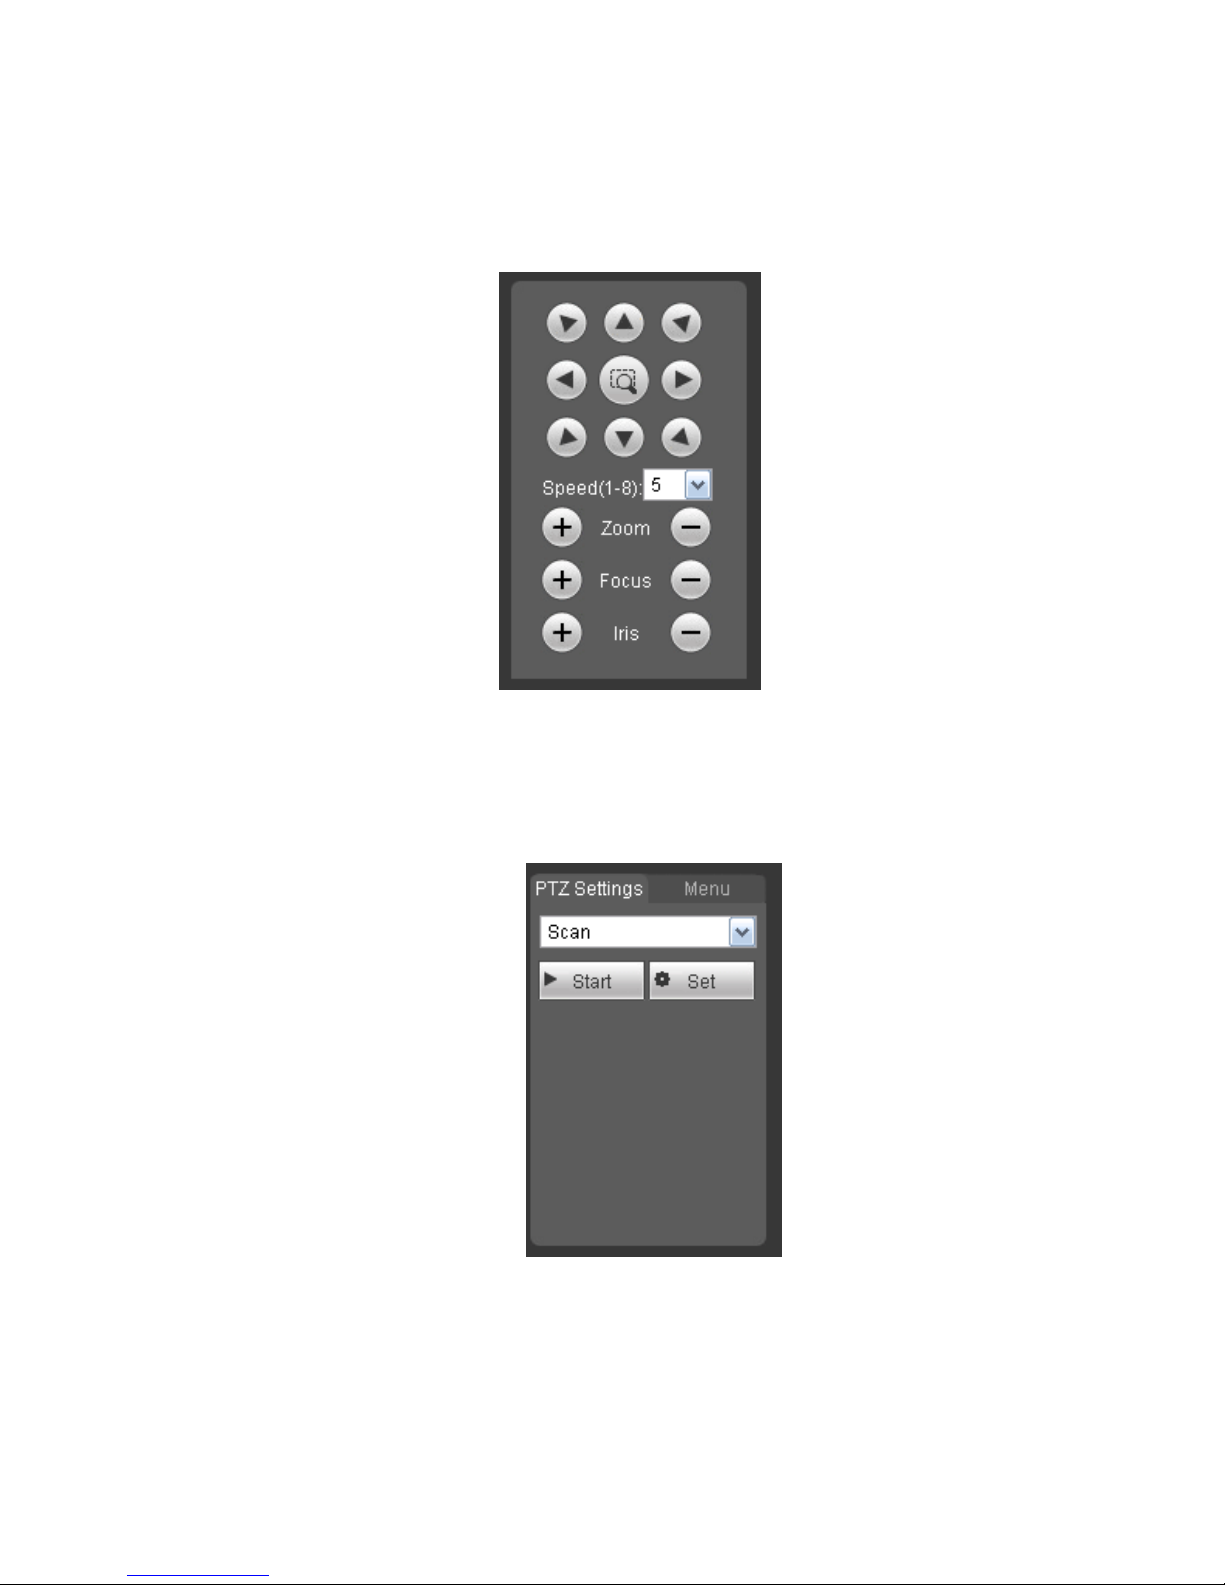
2.5.3 PTZ.........................................................................................................................46
2.5.4 Default....................................................................................................................47
2.5.5 Import/Export........................................................................................................48
2.5.6 Auto maintenance................................................................................................48
2.5.7 Firmware update..................................................................................................49
2.6 Information ...................................................................................................................49
2.6.1 Version...................................................................................................................49
2.6.2 Log..........................................................................................................................49
2.6.3 Online User...........................................................................................................50
3Alarm...........................................................................................................................................52
4Log out........................................................................................................................................53
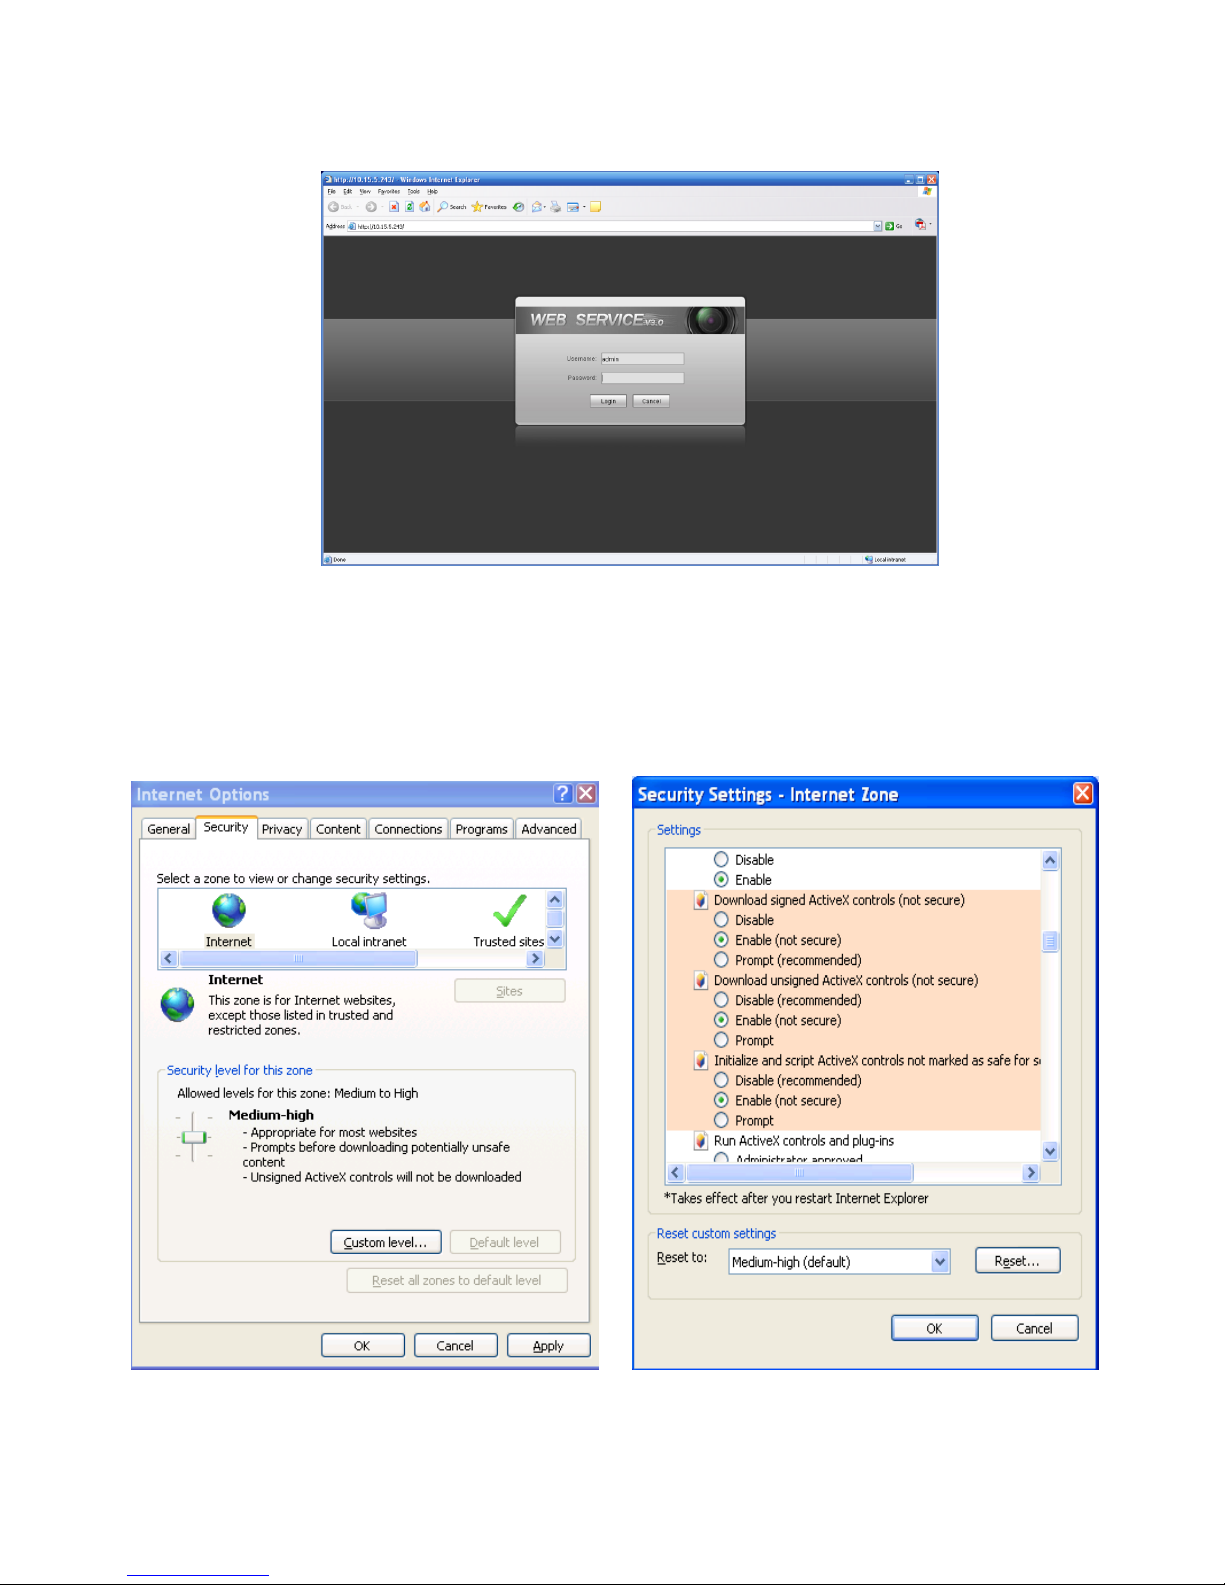
Important
The following functions are for reference only. Some series products may not
support all the functions listed below.
Usually we recommend IE 7 or higher version. For those versions below IE 7, it
may not support the operation of some functions.

1
1Network Connection
1.1 Preparation
This series speed dome product supports the Web access and management via PC.
Web includes several modules: monitor channel preview, PTZ control, system configuration, alarm and
etc.
Please follow the steps listed below for network connection.
Make sure the speed dome has connected to the network properly.
Speed dome IP address and PC IP address shall be in the same network segment. If there is router,
please set the corresponding gateway and subnet mask.
Use order ping ***.***.***.***(* speed dome address) to check connection is OK or not.
1.2 Log in
Open IE and input speed dome address in the address bar.
For example, if your device IP is 192.168.1.108, then please input http:// 192.168.1.108 in IE address
bar. See Figure 1-1.
Figure 1-1
The login interface is shown as below. See Figure 1-2.
Please input your user name and password.
Default factory name is admin and password is admin.
Note: For security reasons, please modify your password after you first login.
Input your IP
address here

2
Figure 1-2
If it is your first time to login in, system pops up warning information to ask you whether install control
webrec.cab or not. Please click OK button, system can automatically install the control. When system is
upgrading, it can overwrite the previous Web too.
If you can’t download the ActiveX file, please check whether you have installed the plug-in to disable the
control download. Or you can lower the IE security level. See Figure 1-3.
Figure 1-3

3
1.3 Live Interface
After you logged in, you can see the live monitor window. Now you can operate the speed dome via the
WEB. See Figure 1-4.
Figure 1-4
There are six sections:
Section 1: Encode setup bar
Section 2: Window adjust bar
Section 3: System menu bar
Section 4: Window function option bar
Section 5: PTZ control
Section 6:PTZ setup/menu
1.4 Encode Setup
The encode setup interface is shown as in Figure 1-5.
Figure 1-5
Please refer to the following sheet for detailed information.
Parameter
Function
Main stream
In normal network width environment, main stream can record
audio/video file and realize network monitor.

4
Sub (Extra)
stream
If network width is not sufficient, you can use sub stream to
realize network monitor. It is to reduce network bandwidth
usage.
Protocol
You can select video monitor protocol from the dropdown list.
There are three options: TCP/UDP/Multicast.
1.5 Video Window Setup
The interface is shown as in Figure 1-6.
Figure 1-6
Please refer to the following sheet for detailed information.
SN
Parameter
Function
1
Image
control
Click it to open picture setup interface. See Figure 1-7. This
interface is on the top right pane.
2
Original
size
Click this button to go to original size. It is to display the actual
size of the video. It depends on the resolution of the video.
3
Full screen
Click it to go to full-screen mode. Double click the mouse or
click the Esc button to exit the full screen.
4
Width and
height ratio
Click it to restore original ratio or suitable window.
5
Open/close
PTZ
Left click it to display or hide the PTZ control interface.
The picture setup interface is shown as in Figure 1-7.
1 2 3 4 5
6

5
Figure 1-7
Please refer to the following sheet for detailed information.
Parameter
Function
Video
setup
Brightness setup icon. It is to adjust
monitor video brightness.
Note:
All the operations here
apply to WEB end
only.
Please go to Setup-
>Camera->Conditions
to adjust brightness,
contrast, hue and
saturation setup.
Contrast setup icon. It is to adjust
monitor video contrast ness.
Saturation setup icon. It is to adjust
monitor video saturation.
Hue setup icon. It is to adjust
monitor video hue.
Reset
Restore brightness, contrastness
saturation and hue to system default
setup.
1.6 System Menu
System menu is shown as in Figure 1-8.
Please refer to chapter 1.3 Live, chapter 2 Setup, chapter 3 Alarm, chapter 5 Log out for detailed
information.
Figure 1-8
1.7 Video Window Function Option
The interface is shown as below. See Figure 1-9.

6
Figure 1-9
Please refer to the following sheet for detailed information.
SN
Parameter
Function
1/2
Alarm
output
Click it to generate an alarm output.
There are two alarm output icons since this series product
supports two relay output.
Please note the alarm output interface may vary due to
different series products.
3
Digital
zoom
When video is in original status, click this button you can
select any zone to zoom in. After zoom in ,you can drag the
zoom in area in the specified area. Right click mouse system
restores original status. You can use the wheel to zoom out
the video.
4
Snapshot
You can snapshoot important video.
You can go to Setup->Camera->Video->Path to modify the
local record save path.
5
Triple snap
Click it, system can snap at 1f/s for three times. All images
are memorized in system storage folder.
6
Record
When you click local record button, the system begins
recording.
You can go to Setup->Camera->Video->Path to modify the
local record save path.
7
Audio
output
Turn on or off audio when you are monitoring.
You can go to Setup->Camera->Audio to set.
8
Bidirectional
talk
Click it to begin audio talk. You can go to Setup->Camera-
>Audio to set bidirectional talk mode.
9
Help
Click it to open help file.
1.8 PTZ Control
Before PTZ operation, please make sure you have properly set PTZ protocol. (Please go to Setup-
>System->PTZ to set.).
Here you can view direction keys, speed, zoom, focus, iris button. See Figure 1-10.

7
PTZ direction: PTZ supports eight directions: left/right/up/down/upper left/upper right/bottom
left/bottom right/ fast positioning.
Speed: The step 8 speed is faster than step 1.
Figure 1-10
1.9 PTZ Setup/Menu
The PTZ setup/Menu interface is shown as in Figure 1-11.
Figure 1-11
Click PTZ set button, the interface is shown as in Figure 1-12.Here you can set scan, preset, tour
pattern, assistant function and etc.

8
Figure 1-12
Please refer to the following sheet for PTZ setup information.
Parameter
Function
Scan
Click Setup button, you can set scan left and right limit.
Use direction buttons to move the camera to you desired
location and then click left limit button. Then move the camera
again and then click right limit button to set a right limit.
Preset
Input the preset value and then click Preset button, the camera
turns to the corresponding position of the preset.
Click the Set preset button, you can set a preset. Use direction
keys to move the camera to your desired location and then input
preset value. Click add button, you have set one preset.
The preset value varies due to different protocols.
Tour
Click the Setup button, you can begin set tour.
Input tour value and then click the Set button. The tour value
ranges from 1 to 255. (It may vary due to different protocols.)
Input preset value in the column. Click Add preset button, you
have added one preset in the tour.
Note:
Repeat the above procedures you can add more presets in one tour.
Or you can click delete preset button to remove one preset from the
tour.
Pattern
You can input pattern value and then click start button to begin PTZ
movement. Please go back to Figure 1-10 to implement camera
operation. Then you can click stop button in Figure 1-12. Now you
have set one pattern.
Assistant
Please input the corresponding aux value here.
You can select one option and then click AUX on or AUX off button.

9
Parameter
Function
Light and
wiper
You can turn on or turn off the light/wiper.
Goto
It is the accurate positioning function. Please input corresponding
horizontal angle, tilt angle, and speed dome zoom speed and then
click Go to button to go to a specified position. One unit of the
horizontal angle or tile angle stands for 0.1 degree.
Rotation
Begin or stop speed dome rotation movement.
The Menu button can control the OSD for detailed speed dome or PTZ setup. See Figure 1-13.
Figure 1-13

10
2Setup
2.1 Camera
2.1.1 Video
2.1.1.1 Video bit stream
The video bit stream interface is shown as below. See Figure 2-1.
Figure 2-1
Please refer to the following sheet for detailed information.
Parameter
Function
Main
stream
Bit stream type
It includes general stream, motion stream and alarm
stream. You can select different encode frame rates for
different recorded events.
The frame rates of the motion detect and alarm is
customized.
Encode mode
There are four options: H.264, H.264B, H.264H, and
MJPEG encode mode.
H.264 : Main Profile encode mode.
H.264B :Baseline Profile encode mode.
H.264H: High Profile encode mode.
MJPEG: In this encode mode, the video needs
general large bit stream to guarantee the video
definition. You can use the max bit stream value in
the recommend bit to get the better video output
effect.

11
Parameter
Function
Resolution
There are multiple resolutions. You can select from the
dropdown list.
For each resolution, the recommended bit stream value
is different.
Frame Rate
(FPS)
PAL: 1~25f/s,NTSC: 1~30f/s..
The frame rate may vary due to different resolutions.
Bit Rate Type
There are two options: VBR and CBR.
Please note, you can set video quality in VBR mode.
In MJPEG mode, the bit stream control mode can only
be CBR.
Recommended
Bit
Recommended bit rate value according to the resolution
and frame rate you have set.
Bit Rate
In CBR, the bit rate here is a fixed value.
It is the max value in VBR mode.
I Frame
Here you can set the P frame amount between two I
frames. The value ranges from 1 to 150. Default value
is 50.
Recommended value is frame rate *2.
Important
I frame interval setup is null if it is the MJPEG
encode mode.
Watermark
This function allows you to verify the video is tampered
or not.
The max length is 128-digit. The character can only
include number, character, underline and hyphen.
Sub
stream
Enable
Please check the box here to enable extra stream
function.
This function is enabled by default.
Bit stream type
General bit stream.

12
Parameter
Function
Encode mode
There are four options: H.264, H.264B, H.264H, and
MJPEG encode mode.
H.264 : Main Profile encode mode.
H.264B :Baseline Profile encode mode. H.264B is
mainly for Blackberry cell phone to realize the
monitor. You need to enable the sub stream
function in your camera and set the resolution as
CIF. Then you can monitor via the Blackberry cell
phone.
H.264H: High Profile encode mode.
MJPEG: In this encode mode, the video needs
general large bit stream to guarantee the video
definition. You can use the max bit stream value in
the recommend bit to get the better video output
effect.
Resolution
There are multiple resolutions. You can select from the
dropdown list.
For each resolution, the recommended bit stream value
is different.
Frame Rate
(FPS)
PAL: 1~25f/s,NTSC: 1~30f/s..
The frame rate may vary due to different resolutions.
Bit Rate Type
There are two options: VBR and CBR.
Please note, you can set video quality in VBR mode.
Recommended
Bit
Recommended bit rate value according to the resolution
and frame rate you have set.
Bit Rate
In CBR, the bit rate here is a max value. In dynamic
video, system needs to lower frame rate or video
quality to guarantee the value.
It is null in VBR mode.
Please refer to recommended bit rate for the detailed
information.
I Frame
Here you can set the P frame amount between two I
frames. The value ranges from 1 to 150. Default value
is 50.
Recommended value is frame rate *2.
Important
I frame interval setup is null if it is the MJPEG
encode mode.
2.1.1.2 Snapshot

13
The snapshot interface is shown as in Figure 2-2.
Figure 2-2
Please refer to the following sheet for detailed information.
Parameter
Function
Snapshot type
There are two modes: general (schedule) and Event
(activation).
General (schedule) snapshot is to snap in the specified period.
Event (Activation) snapshot Is to snap when the motion detect,
camera masking, local alarm event occurrence.
If you want to use this function, please make sure:
The event occurred during the specified period.
Motion detect, video masking, local alarm and
corresponding snap function are all enable.
Image size
It has relationship with the resolution of the main stream.
Quality
It is to set the image quality. There are six levels.
Interval
It is to set snapshot frequency. The value ranges from 1s to 7s.
2.1.1.3 Video Overlay
The video overlay interface is shown as in Figure 2-3.

14
Figure 2-3
Please refer to the following sheet for detailed information.
Parameter
Function
Privacy mask
Here you can privacy mask the specified video in the monitor
video.
System max supports 4 privacy mask zones.
Time Title
You can enable this function so that system overlays time
information in video window.
There is no time title if you do not enable this function here.
You can use the mouse to drag the time tile position.
Channel Title
You can enable this function so that system overlays channel
information in video window.
There is no channel title if you do not enable this function
here.
You can use the mouse to drag the channel tile position.
Refresh
After you successfully set privacy mask zone, channel title,
time title, you can click Refresh button to video the effect.
2.1.1.4 Path
The storage path interface is shown as in Figure 2-4.

15
Here you can set snap image saved path ( in the preview interface) and the record storage path
( in the preview interface).The snap picture default setup is C:\PictureDownload and record file
default setup is C:\RecordDownload.
Please click the Save button to save current setup.
Figure 2-4
2.1.2 Audio
The audio interface is shown as below. See Figure 2-5.
Important
Please make sure you have enabled the video function, otherwise you can not enable the audio
function.
Figure 2-5
Please refer to the following sheet for detailed information.

16
Parameter
Function
Audio enable
Main stream: Recorded file only contains video by default.
You need to check the audio box here to enable audio
function so that the main stream the network transmitted is
audio/video composite stream.
Sub (Extra) stream: Recorded file only contains video by
default. You need to check the audio box here to enable
audio function so that the extra stream the network
transmitted is audio/video composite stream.
Encode mode
The encode mode of the main stream and extra stream include
PCM, G.711A and G.711Mu.
The setup here is for audio encode mode and the bidirectional
talk encode both.
2.2 Network
2.2.1 TCP/IP
The TCP/IP interface is shown as in Figure 2-6.
Figure 2-6
Please refer to the following sheet for detailed information.
Parameter
Function
Host Name
It is to set current host device name.
Ethernet Card
Please select the Ethernet port if the device has several
network cards.

17
Mode
There are two modes: static mode and the DHCP mode.
The IP/subnet mask/gateway are null when you select the
DHCP mode to auto search the IP.
If you select the static mode, you need to set the IP/subnet
mask/gateway manually.
Besides, IP/subnet mask/gateway and DHCP are read-
only when the PPPoE dial is OK.
Mac Address
It is to display host Mac address. It is read-only.
IP Version
It is to select IP version. IPV4 or IPV6.
You can access the IP address of these two versions.
Please note system needs to check the validity of all
IPv6 addresses. The IP address and the default gateway
shall be in the same IP section. That is to say, the
specified length of the subnet prefix shall have the same
string.
When PPPoE function is enabled, the IP/subnet
mask/default gateway is read-only. You can not set or
restore default setup.
IP Address
Please use the keyboard to input the corresponding number to
modify the IP address and then set the corresponding subnet
mask and the default gateway.
Default Gateway
It is the similar gateway of the IPv4. It shall not be left in blank.
Preferred DNS
DNS IP address. It is the similar DNS of the IPv4. It shall not be
left in blank.
Alternate DNS
Alternate DNS IP address. It is the similar DNS of the IPv4. It
shall not be left in blank.
Table of contents
Other XtendLan IP Camera manuals

XtendLan
XtendLan XL-ICA-370M2 User manual

XtendLan
XtendLan XL-ICA-301 User manual

XtendLan
XtendLan XL-ICA100U User manual

XtendLan
XtendLan XL-ICA-206M3 User manual

XtendLan
XtendLan XL-ICA-105M2 User manual

XtendLan
XtendLan XL-ICA-311 User manual

XtendLan
XtendLan XL-ICA-220 User manual

XtendLan
XtendLan XL-ICA-106M2 User manual

XtendLan
XtendLan XL-ICA-106M3 User manual

XtendLan
XtendLan XL series User manual