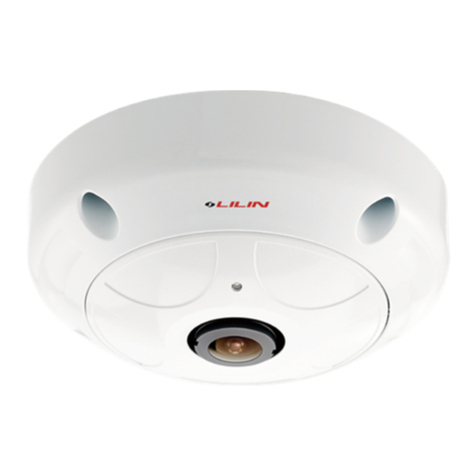
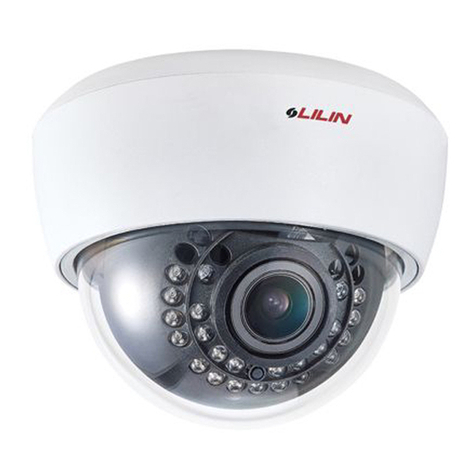
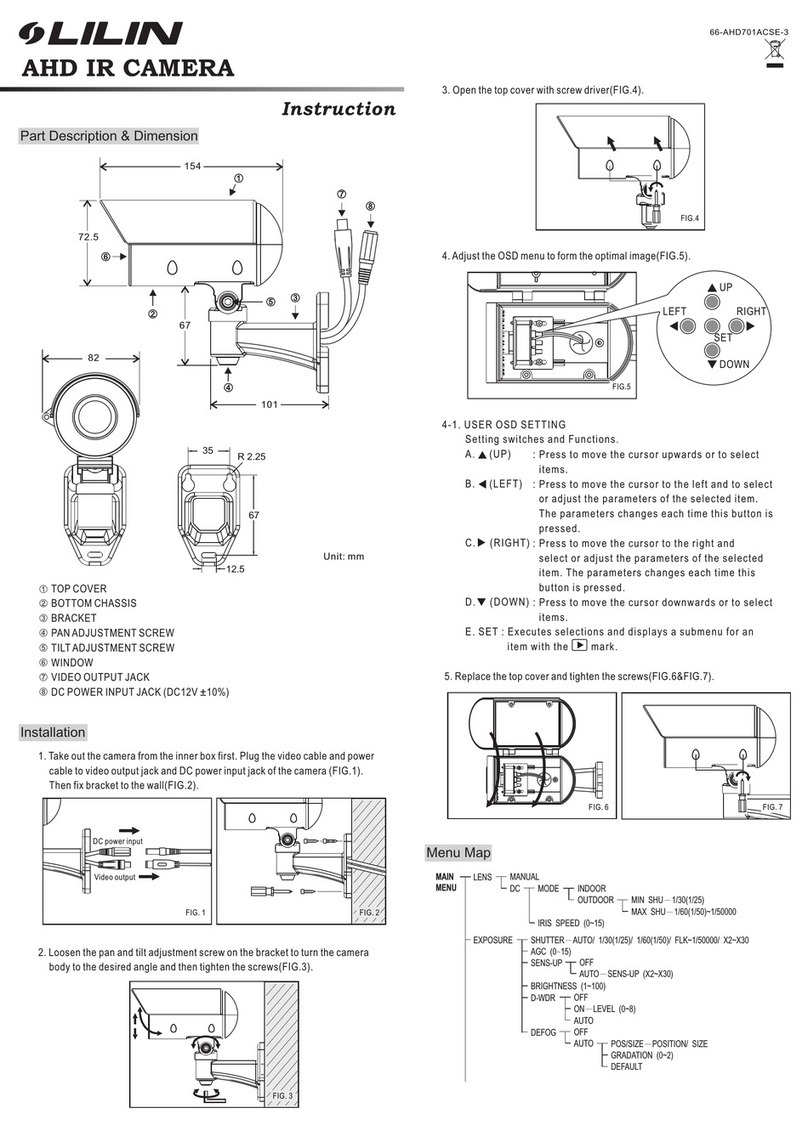
Lilin IPS7224M User manual

66-IPS7228CSE
MERIT LILIN ENT. CO., LTD
http://www.meritlilin.com
D/N WDR MP HD Fast Dome IP Camera
IPS7224M/8M, IPS5204S/8S, IPS5184S/8S
Instruction Manual

IMPORTANT SAFEGUARDS
GRAPHIC SYMBOL EXPLANATION
The lightning flash with arrowhead symbol, within an equilateral
triangle, is intended to alert the user to the presence of
uninsulated "dangerous voltage" within the product's enclosure
that may be of sufficient magnitude to constitute a risk of electric
The exclamation point within an equilateral triangle is intended
to alert the user to the presence of important operating and
maintenance (servicing) instructions in the literature
shock to persons.
accompanying the unit.
CAUTION
RISK OF ELECTRIC SHOCK
DO NOT OPEN
CAUTION:
TO REDUCE THE RISK OF ELECTRIC SHOCK,
DO NOT REMOVE COVER (OR BACK)
NO USER SERVICEABLE PARTS INSIDE.
REFER SERVICING TO QUALIFIED
SERVICE PERSONNEL.
CAUTION
RISK OF EXPLOSION IF BATTERY IS REPLACED
BY AN INCORRECT TYPE.
DISPOSE OF USED BATTERIES ACCORDING
TO THE INSTRUCTIONS

PREFACE
IPS7224M/7228M, IPS5204S/5208S, IPS5184S/5188S with High resolution of HD/Full HD offer
significant enhancement and refinements to bring you the most innovative surveillance solutions.
IPS7224M/7228M, IPS5204S/5208S, IPS5184S/5188S are the leading product in the industry
offering the most advanced features such as 22X/20X/18X optical zoom lens, Digital Zoom, Wide
Dynamic Range, Digital Noise Reduction, High Light Compensation and Digital Image Stabilizer.
IPS7224M/7228M, IPS5204S/5208S, IPS5184S/5188S measure only 145mm in diameter and is
capable of making 360 degrees continuous rotation with a speed range of 0.15 to 360 degrees
per second, ensures direct and accurate target positioning. When required the dome can be
quickly spun through 180 degrees, an important feature when something passes directly under
the camera.
Up to 128 preset positions can be programmed and recalled with an accuracy of 0.25 degrees.
Each Fast Dome has 6 alarm inputs can drive the dome to any position in under second.
IPS7224M/7228M, IPS5204S/5208S, IPS5184S/5188S
Can be set to auto-sequence mode, perform automatic monitoring presets.
H.264 AVC (Advanced Video Coding)
video compression engine provides high video quality, SXGA/1080P resolution, bandwidth
efficiency, and real-time streaming. The cutting edge of H.264 AVC main profile encoding
technology can provide better compression rate and superior video quality at 56 Kbps to 3 Mbps
bit rate. Dual streaming design, JPEG and H.264 AVC allow to stream video at low bandwidth
(Internet) and high bandwidth (LAN) for optimizing video quality. Low latency design for both
Intranet and Internet is a key factor of operating PTZ.
Four PTZ web interfaces including lens absolute positioning are designed for easy-to-use
purpose.

FEATURES
Auto Focus Lens
Build-in 22X optical zoom lens with focal length 4.7~103.4mm [22X Model]
1280x1024(SXGA)[22X Model] / 1920x1080(1080P)[20X/18X Model] Horizontal TV lines
Automatic Iris Control
Privacy Mask
360° continuous rotation
Up to 128 programmable preset positions
Preset positions auto scanning
High speed rotation and tilt, speed range varies from 0.15 /sec ~ 360 /sec
180° Horizontal Instant Flip
6 alarm inputs, 1 alarm output for each Fast Dome IP Camera
Build in high resolution DSP color camera:
1. Color / Mono Switch (IR Cut Filter)
In Color
Out Mono
Auto Switch from color to mono when light drops below 3 lux
Schedule Switch from color to mono by time setup
2. 0.07Lux at F1.6(Color) ; 0.03Lux at F1.6(Mono) [22X Model]
3. White Balance Control : Auto Correction , Auto Tracking , Manual
4. Wide Dynamic Range : On(60dB)/Off
5. Back Light Compensation : On/Off
6
Build-in 20X optical zoom lens with focal length 4.7~94mm [20X Model]
Build-in 18X optical zoom lens with focal length 4.7~84.6mm [18X Model]
° °
0.5Lux/1.7Lux (1/30sec, 50%, High Sensitivity mode ON/OFF),
. Auto Gain Control : 0dB ~ 36dB
7. Brightness Adjustment
8. Flickerless : On/Off
Power supply options : 100 ~ 240VAC or 24VAC
True H.264 AVC/MPEG-4 part 10 real-time video compression
In live monitoring: SXGA(1280x1024), D1(720x480), CIF(352x240) [22X Model],
1080P(1920x1080), 720P(1280x720), D1(720x480), CIF(352x240) [20X/18X Model]
Full duplex H.264 AVC and JPEG streaming
→
→
→
→

WARNINGS & CAUTIONS
Please read the manual before attempting installation or operation
1. Please be aware to the warnings and cautions notice.
2. Don't use any chemical detergent to clean the machine surface, use a damp cotton cloth
only. Regularly clean the dome cover to assure proper focus ability.
3. Please install the Fast Dome in a dry area, water and high humidity may cause damage on
internal parts. External housing should be used for outdoor installation.
4. Please use parts supplied by the manufacturer only, any unqualified part using in the
equipment may violate the warranty.
5. Avoid installing the equipment in an unstable area. Make sure the area is firm and stable.
Falling equipment may injure personnel and damage the equipment.
6. Do not install the equipment near any flammable gas. Violation may cause fire or injury.
7. Avoid running video cable and signal cable through or passing interference sources such
as video waves, broadcast station, power generator, elevator motor or high voltage area
..... etc. Violation may cause interference.
8. Make sure the power cable is properly fixed. Un-suitably fixed cable may cause serious
short circuit or fire.
9. Correct cable connection is important. Do not place any object on the connection cable
and change the cable if there is damage on cable. Violation may cause short circuit, fire
and injury.
10. Make sure ground is well connected to avoid damage caused by lightning.
11. Do not put any foreign objects inside the equipment and do not spray any liquid on
equipment. This will avoid short circuit damage.
12. Do not touch power connection with wet hands to avoid short circuit or electricity shock.
13. Do not apply smash-force on the equipment. Violation may cause damage.
14. Do not install the equipment in a location that may expose the equipment directly to
sunlight. Violation may cause colour fading or damage.
15. Do not install the equipment in high temperature or low temperature environment to
avoid damage. The normal operational temperature is between -10°C ~ +50°C.
16. Fast Dome contains high sensitive electric parts inside. Do not try to repair them without
qualified personnel.
17. Turn off the power immediately and contact the technician when the following occurs:
A. Damage on power cable or plug.
B. Water leak into the equipment.
C. Fast Dome can not be operated normally.
D. Equipment falling on ground or damage on external case.
E. Unusual occurrence.
18. Warning: Do not try to repair the equipment. Only a qualified technician may disassemble
and repair the equipment. Shut off the power before disassemble the equipment and don't
put power on unless the case is completely assembled.
Dome Cover
Camera Case
Bottom Chassis
Power In Jack (AC100 ~ 240V)
Power In Jack (AC24V)
Video Out Jack
Alarm In/Out connector
RJ45 Network Connector
Reset
STRUCTURAL ELEMENT

1. AC100 ~ 240V Power Cable
2. AC24V Power Cable
Recommended Cable:
Fast Dome Connection Jack and Cable Requirement
Copper Wire (AWG)
Length of Cable
(approx.)
(m)
(ft)
#24
(0.22mm )
2
20
65
#22
(0.33mm )
2
30
100
#20
(0.52mm )
2
45
160
#18
(0.83mm )
2
75
260
Accessory Connector Information
PIN
1
2
3
4
Power
AC24V Live (Black)
AC24V Neutral (White)
Earth (Green)
NA
12
34
Assemble the Cable with the Accessory Connector
a. Strip back the cable jacket approx. 3mm and separate the individual conductors.
3mm
Insert
Contact
UP Electrical Wire
AC100~240V Power Cable
AC24V Power Cable
Video Signal Cable
Alarm In/Out Cable
To Monitor
To PIR
CAT5 Network Cable

b. Prepare the individual conductors for clamping. After clamping the contacts, push them
into the proper holes in the accessory connector of this camera until they snap in place.
CAUTIONS : CONNECT THIS TO 24V AC CLASS 2 POWER SUPPLY ONLY.
Contact
UP
3. Video Out BNC Jack
Video Signal Output CVBS 1.0Vp-p 75 BNC
Recommended Data Cable: 5C2V
4. Alarm In/Out Connector
Each fast dome contains 6 alarm inputs and 1 alarm output.
Alarm Input Voltage: 5.6V max.
Alarm Output: 1A 24VDC
Recommended Data Cable: UL26 AWG 80° 300V
C
UL24 AWG 80°C 300V
6. Network Connector RJ45
LAN : 10/100Mbps
Recommended Data Cable : CAT5
Ω
NO
COM.
GND
IN6
IN5
IN4
IN3
IN2
IN1
Alarm Out:
Alarm In:
(Gray)
(White)
(Black)
(Red)
(Green)
(Orange)
(Blue)
(Yellow)
(Violet)

Indoor Installation Structural Drawing
Embedded Mounting Attached Mounting
INSTALLATION
Micro SD/SDHC
Socket

120 204mm
93mm
120
120
Embedded Mounting (False Ceiling)
Step 1 Ceiling Preparation
Drill a 3/32" (2.4mm) hole at the center of the
chosen area.
Use a pencil and a compasses to mark a circle 6.7"
(170mm) in diameter and cut the circle.
Step 2 The Ceiling Ring
Attach the ring to
ceiling
Ring size and screw
location
Tighten the three
tapping screws into the
ceiling or three
machine screws with
three screw nuts
Step 3 The Fix Ring
Put on the three L shape
screw nuts
Tighten the three black
screws into the screw
nuts
Attach fix ring with
screw nuts
Turn the dome cover
counter clockwise
Separate the dome
cover from camera

NO
COM.
GND
IN6
IN5
IN4
IN3
IN2
IN1
Alarm Out:
Alarm In:
(Gray)
(White)
(Black)
(Red)
(Green)
(Orange)
(Blue)
(Yellow)
(Violet)
VIDEO OUT LAN
Step 4 Connection
Connect alarm cableConnect video signal
cable
Connect Network cable
Step 5 Install Camera Body and Decoration Ring and Dome Cover
Put camera body and
the fix ring into the
hole
Tighten three black
screws
Turn the camera body
clockwise to tight
position
Put on decoration ring
Turn the ring clockwise
to tight position
Attach dome cover to
camera body
Turn the dome cover
clockwise to tight
position
Note : After dome cover is attached, use glass-cleaning cloth to clean dome cover.
Unclean dome cover may affect camera performance.

Turn the dome cover
counter clockwise
Separate the dome
cover from camera
Separate the camera
body to the base
Attach base to ceiling
Set all of control cable on middle position and
through the hole of ceiling.
Install rubber cover on the cable outlet of base,
base, or set control cable on the cable outlet of
base.
Attached Mounting (Fixed Ceiling)
Step 1 Fix The Base
Untighten the two
screws from base
Turn the camera cover
clockwise
47.0
47 47
27.75
8.93
120?
120?
18
6.5
Tighten the three
tapping screws into the
ceiling
Base size and screw
location
Step 2 Attach the Camera Body and Base
Tighten the two screws
to fix the camera body
Attach camera body to
base
position connector is
correct or not.
Notice:
Turn camera body
counter clockwise to
tight position

Turn the dome cover
counter clockwise
Separate the dome
cover from camera
NO/NC
COM.
GND
IN6
IN5
IN4
IN3
IN2
IN1
Alarm Out:
Alarm In:
(Gray)
(White)
(Black)
(Red)
(Green)
(Orange)
(Blue)
(Yellow)
(Violet)
VIDEO OUT LAN
Step 3 Connection
Connect alarm cableConnect video signal
cable
Connect Network cable
Step 4 Install Dome Cover
Put on dome cover to
camera body
Turn dome cover
clockwise to tight
position
Note : After dome cover is attached, use glass-cleaning cloth to clean dome cover.
Unclean dome cover may affect camera performance.
Wall Mounting (Fixed Bracket)
Step 1 Fix The Bracket
Untighten the two
screws from base
Fix bracket first, and
pull control cable and
power cable from
bracket cable outlet.

NO/NC
COM.
GND
IN6
IN5
IN4
IN3
IN2
IN1
Alarm Out:
Alarm In:
(Gray)
(White)
(Black)
(Red)
(Green)
(Orange)
(Blue)
(Yellow)
(Violet)
VIDEO OUT LAN
Separate the camera
body to the base
Turn the camera cover
clockwise
Set all of control
cables on the middle
position, and install
rubber cover on the
cable outlet of base
Step 2 Connection
Connect alarm cableConnect video signal
cable
Connect Network cable
Step 3 Fix The Base
Set base on the
installation position of
bracket, and arrange
all of control cables in
the inside bracket
Tighten the three
tapping screws into the
bracket

Put on dome cover to
camera body
Turn dome cover
clockwise to tight
position
Step 5 Install Dome Cover
Note : After dome cover is attached, use glass-cleaning cloth to clean dome cover.
Unclean dome cover may affect camera performance.
Step 4 Attach the Camera Body and Base
Tighten the two screws
to fix the camera body
Attach camera body to
base
position connector is
correct or not.
Notice:
Turn camera body
counter clockwise to
tight position

1. Push the cover of Micro SD/SDHC socket right for unlocking.
2. Pull the cover of the Micro SD/SDHC socket up.
3. Place Micro SD card on the socket. Make sure to face the card down.
4. Lock the cover of the Micro SD card by flip the cover. Press the cover down and push left for locking.
Micro
SD
Installation Micro SD/SDHC card, please follow instruction as below:

SPECIFICATION
Model
Power Supply
General
Pan & Tilt
Lens
Main Function
Minimum illumination
Image Pick-up Device
Power Consumption
Total number of pixel
effective Pixels
Scanning System
Video Output
Ambient Operation Temperature
Operating Humidity
Color: 0.07Lux at F1.6, Mono: 0.03Lux at F1.6
Panasonic 1/3" Mega-Pixel MOS Sensor
1280(H) x 1024(V) = 1,310,720(pixel)
1376(H) x 1070(V) = 1,472,320(pixel)
Progressive Scan
CVBS 1.0Vp-p/ 75 BNC
Ω
-10 C ~ +50 C° ° ° °(-41 F ~ 122 F)
0% ~ 90%
22X D/N WDR HD FAST DOME IP CAME RA
Dimensions
Weight
Panning Range
Zoom Ratio
Control Function
Digital Zoom Ratio
Zoom Speed
Focus Speed
Auto Focus
Iris
Day & Night
Electronic Image Stabilizer
Sense Up (Slow Shutter)
Electronic Shutter Speed
Exposure Mode
Back Light Compensation
Digital Wide Dynamaic Range
Sharpness
White Balance
Auto Gain Control
3D Digital Noise Reduce
Auto Mode
Privacy Function
Digital Effect
Alarm Input/ Output
Focal Length
Minimum Aperture Ratio
Minimum Object Distance
Iris Range
Angle Field of View
Tilting Range
Panning Mode
Tilting Mode
Panning Speed
Tilting Speed
245mm(H) x 155mm(V)
2300g
360°Endless
22X Optical Zoom
Pan and Tilt/ Zoom and Focus/ Iris and ICR/ 128 Preset Position/ Home Position
x10
Slow/ MID./ Fast Selectable [Fast: Approx. 4.0 Second (Tele to Wide) in Manual Mode]
Auto/ One Push Focus
ALC (Adjustable Output Target Level)/ Manual
Day/ Night/ Auto/ Schedule
Off/ On
x1 ~ x255
1/30 ~ 1/120,000
ALC/ ELC
BLC/ HSBLC
Off/ Low/ Middle/ High
Adjustable
ATW/ AWC/ Manual(1700K~11000K)
Off/ Low/ Middle/ High
Off/ AUTO/ SEQ/ TOUR
Off/ On (Up to 24 area)
OFF/ V-Flip/ Mirror/ Rotate
6 input(TTL 5Vdc), 1 Output(0.5A 120Vac, 1A 24Vac)
4.7mm ~ 103.4mm
1 : 1.6 (Wide) ~ 3.1(Tele)
1.5m (Tele)
F1.6 ~ 360, Close
Wide: 54.6 (H) 42.3 (V) / Tele: 2.70° ° ° °(H) 2.10 (V)
Manual, Auto, Manual Position, Sequential Position
Manual Approx. 0.15 /s ~ 120° ° ° ° °/s 8Steps, 16Steps/ Preset Approx. 1 /s ~ 255 /s, Alarm Trigger Speed 360 /s
-6 ~ +96° °
Design and specification are subject to change without notice.
AC24V
IPS7224M
15W
AC100~240V
IPS7228M
Manual Approx. 0.15 /s ~ 120° ° ° ° °/s 8Steps, 16Steps/ Preset Approx. 1 /s ~ 255 /s, Alarm Trigger Speed 360 /s
Slow/ MID./ Fast Selectable [Fast: Approx. 4.0 Second (Far to Near) in Manual Mode]

Ne tw o r k F u n c t i o n
Video compression
Resolution
Frame rate
Video streaming
Alarm Function
OSD
Users
CPU, memory
Security
Video bitrate
Network protocols
Mobile phone and PDA
Client PC requirement
Mintenance
PTZ preset scheduling
Web PTZ control
Network Interface
System integration
CMX
Video display
OS
Two-way Audio
H.264, Motion JPEG
SXGA(1280x1024), D1(720x480), CIF(352x240)
H.264: up to 30FPS at SXGA(1280x1024)
Motion JPEG: up to 30FPS at D1(720x480)
RTP/HTTP, RTP/TCP, RTP/UDP, Multicast
Image upload over FTP and E mail by alarm/ motion detection-
Text overlay for date, time, and camera name
8 simultaneous users
OS : Windows 2000, Windows XP, Windows Vista, Windows 7
Browser : Windows Internet Explorer 6, 7, 8
CPU : Intel Pentium 4 1.8GHz or above
RAM : 1GB or above, Independent Display Card
Embedded SoC ARM11, 528MHz, 256MB DDR2, 256MB flash memory
Base64 HTTP encryption
128Kbps ~ 5Mbps
Multiple user access levels with password protection
Frame rate and bitrate controllable on-the-fly
10 user accounts available
VBR/ CBR/ GOP supported
IP, TCP, UDP, HTTP, SMTP, NTP, DDNS, UPnP, FTP, ARP,
DHCP, PPPoE, DNS, RTSP, RTCP, Telnet, ONVIF, ICMP, IGMP
iPhone, iPad and Android support
Firmware available at web site
Firmware update via HTTP
Yes, via web interface
Pan, tilt, zoom in/ out, absolute position, and video-click-n-move
10Mbps / 100Mbps, RJ-45
ONVIF & LILIN HTTP API
CMX HD3.6 support
LILIN Universal ActiveX & LILIN Java Applet
Embedded Linux 2.6.32
G.711
Design and specification are subject to change without notice.

Model
Power Supply
General
Pan & Tilt
Lens
Main Function
Minimum illumination
Image Pick-up Device
Power Consumption
Total number of pixel
effective Pixels
Scanning System
Video Output
Ambient Operation Temperature
Operating Humidity
0.5Lux (1/30sec, 50%, High Sensitivity mode ON)
ICR-ON Mode 0.095Lux (1/30sec, 50%, High Sensitivity mode ON)
1.7Lux (1/30sec, 50%, High Sensitivity mode OFF)
ICR-ON Mode 0.3Lux (1/30sec, 50%, High Sensitivity mode OFF)
1/2.8" Type Exmor CMOS Sensor
2096(H) x 1561(V) = 3,269,760(pixel)
2144(H) x 1588(V) = 3,404,672(pixel)
Progressive Scan
CVBS 1.0Vp-p/ 75 BNC
Ω
-10 C ~ +50 C° ° ° °(-41 F ~ 122 F)
0% ~ 90%
20X D/N WDR HD FAST DOME IP CAMERA
Dimensions
Weight
Panning Range
Zoom Ratio
Control Function
Digital Zoom Ratio
Zoom Speed
Focus Speed
Auto Focus
Iris
Day & Night
Electronic Image Stabilizer
Sense Up (Slow Shutter)
Electronic Shutter Speed
Exposure Mode
Back Light Compensation
Sharpness
White Balance
Auto Gain Control
Digital Noise Reduce
Auto Mode
Privacy Function
Digital Effect
Alarm Input/ Output
Schedule Setting
Focal Length
Minimum Aperture Ratio
Minimum Object Distance
Iris Range
Angle Field of View
Tilting Range
Panning Mode
Tilting Mode
Panning Speed
Tilting Speed
245mm(H) x 155mm(V)
2300g
360°Endless
20X Optical Zoom
Pan and Tilt/ Zoom and Focus/ Iris and ICR/ 128 Preset Position/ Home Position
x12
Slow/ MID./ Fast Selectable [Fast: Approx. 5.0 Second (Tele to Wide) in Manual Mode]
Auto/ One Push Focus
ALC (Adjustable Output Target Level)/ Manual
Day/ Night/ Auto/ Schedule
Off/ On
Off/ On (4X)
1/1 ~ 1/10,000
Auto/ Manual
Off/ On
Adjustable
ATW/ AWC/ Manual(1700K~11000K)
0~28dB (12 Step)
(2D) Off/ On (Level= 1~5)
Off/ AUTO/ SEQ/ TOUR
Off/ On (Up to 24 area)
OFF/ Mirror
6 input(TTL 5Vdc), 1 Output(0.5A 120Vac, 1A 24Vac)
Off/ Auto Mode/ Preset Position
4.7mm ~ 94.0mm
1 : 1.6 (Wide) ~ 3.5(Tele)
10mm(WIDE end) ~ 0.8m(TELE end)
F1.6 ~ 360, Close
Approx. 55.4 (WIDE end), approx. 2.9 (TELE end), 1080p mode° °
Approx. 37.6 (WIDE end), approx. 2.0 (TELE end), 720p mode° °
Manual, Auto, Manual Position, Sequential Position
Manual Approx. 0.15 /s ~ 120° ° ° ° °/s 8Steps, 16Steps/ Preset Approx. 1 /s ~ 255 /s, Alarm Trigger Speed 360 /s
-6 ~ +96° °
Design and specification are subject to change without notice.
AC24V
IPS5204S
15W
AC100~240V
IPS5208S
Manual Approx. 0.15 /s ~ 120° ° ° ° °/s 8Steps, 16Steps/ Preset Approx. 1 /s ~ 255 /s, Alarm Trigger Speed 360 /s
Slow/ MID./ Fast Selectable [Fast: Approx. 5.0 Second (Far to Near) in Manual Mode]

Ne tw o r k F u n c t i o n
Video compression
Resolution
Frame rate
Video streaming
Alarm Function
OSD
Users
CPU, memory
Security
Video bitrate
Network protocols
Mobile phone and PDA
Client PC requirement
Mintenance
PTZ preset scheduling
Web PTZ control
Network Interface
System integration
CMX
Video display
OS
Two-way Audio
SD Card Recording
H.264, Motion JPEG
1080P(1920x1080), 720P(1280x720), D1(720x480), CIF(352x240)
H.264: up to 30FPS at 1080P(1920x1080)
Motion JPEG: up to 30FPS at D1(720x480)
RTP/HTTP, RTP/TCP, RTP/UDP, Multicast
Image upload over FTP and E mail by alarm/ motion detection-
Text overlay for date, time, and camera name
8 simultaneous users
OS : Windows 2000, Windows XP, Windows Vista, Windows 7
Browser : Windows Internet Explorer 6, 7, 8
CPU : Intel Pentium 4 1.8GHz or above
RAM : 1GB or above, Independent Display Card
Embedded SoC ARM11, 528MHz, 256MB DDR2, 256MB flash memory
Base64 HTTP encryption
128Kbps ~ 5Mbps
Multiple user access levels with password protection
Frame rate and bitrate controllable on-the-fly
10 user accounts available
VBR/ CBR/ GOP supported
IP, TCP, UDP, HTTP, SMTP, NTP, DDNS, UPnP, FTP, ARP,
DHCP, PPPoE, DNS, RTSP, RTCP, Telnet, ONVIF, ICMP, IGMP
iPhone, iPad and Android support
Firmware available at web site
Firmware update via HTTP
Yes, via web interface
Pan, tilt, zoom in/ out, absolute position, and video-click-n-move
10Mbps / 100Mbps, RJ-45
ONVIF & LILIN HTTP API
CMX HD3.6 support
LILIN Universal ActiveX & LILIN Java Applet
Embedded Linux 2.6.32
G.711
Support Micro SD/SDHC card for circular recording(card is not included)
Design and specification are subject to change without notice.
This manual suits for next models
16
Table of contents
Other Lilin IP Camera manuals

Lilin
Lilin L Series Guide

Lilin
Lilin IPG1022ESX3 User manual

Lilin
Lilin D/N HD AF IR IP CAMERA User manual

Lilin
Lilin IPD2122S4.3 User manual

Lilin
Lilin iMEGAPRO IPD2122ES User manual

Lilin
Lilin 6122 Manual

Lilin
Lilin FD2452E User manual

Lilin
Lilin IPR7424 User manual

Lilin
Lilin iMEGAPRO IPD2220ES User manual

Lilin
Lilin IPG1022ELS User manual

Lilin
Lilin iMEGAPRO IPR722ES User manual

Lilin
Lilin UHG1182E User manual

Lilin
Lilin IRS1308 User manual

Lilin
Lilin ZG1232E User manual

Lilin
Lilin IPS2102E User manual

Lilin
Lilin IPS4184E User manual

Lilin
Lilin IPS622M User manual

Lilin
Lilin IPR414/418ESX3 User manual

Lilin
Lilin ipg1022esx User manual

Lilin
Lilin PIH-0364X WN IP User manual