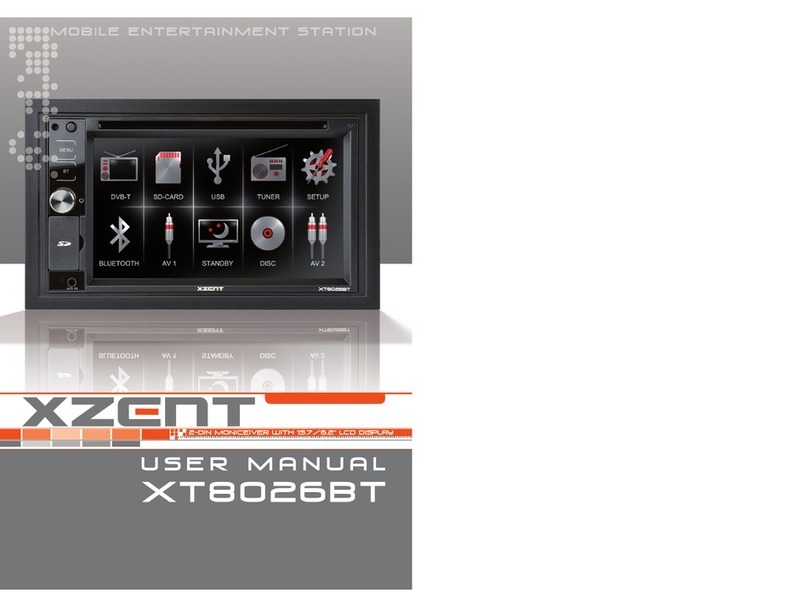
XZENT X-302MH User manual

gera
..
teanleitung
2-DIN Naviceiver X-302MH
XZENT · Bohrturmweg 1 · Bad Zurzach · Switzerland
www.xzent.com
DEVICE MANUAL
for Motor home

2
ABOUT THIS MANUAL
This manual contains important information and warnings about the operation of this XZENT unit.
Please store it in a place where you have access later on.
CONTENT
SAFETY INFORMATION .....................................................................................3
FRONT PANEL HARD KEYS .....................................................................................4
REMOTE CONTROL .....................................................................................6
SOURCE MENU .....................................................................................8
TUNER MODE ...................................................................................10
PLAYBACK USB/SD/DISC MODE ...................................................................................12
BLUETOOTH MODE ...................................................................................14
SETUP ...................................................................................18
NAVIGATION MODE ...................................................................................26
TECHNICAL FEATURES ...................................................................................28
Note 1. The descriptions and other content shown in this manual may deviate from the real
device.
2. Pictures shown in this manual and some HMI screenshots may deviate from the real
unit.
3. Specifications and technical design of this device model are necessarily subject
to change without notice.
3
SAFETY INFORMATION
■Read the instructions entirely. Heed all warnings. Follow the instructions.
■Retain this manual. Whoever will use the unit should have access to this manual.
■This unit is designed to be functional in vehicles with 12 V DC battery and negative ground.
■Do not operate the unit in any other way than described in this manual. Failure to follow the in-
structions as provided may void your warranty.
■Do not disassemble or alter the unit in any way because this will void your warranty. Do not
attempt to repair or to service the unit yourself, but contact an authorized XZENT dealer instead.
■Use only original accessories which are designed and manufactured for the unit, otherwise you
will risk damage. Install the unit according to the mounting instructions by using the supplied
mounting accessories. Acceleration forces during accidents can be huge. Incorrectly mounted
devices pose a serious risk for the driver and passengers during an accident.
■Protect the unit from water and other liquids that could enter the housing. A short circuit or even
a fire could result.
■To prevent a short circuit, never insert any metallic object (such as coins or metal tools) into the
unit.
■Before you replace a defective fuse try to find the cause for the short circuit. Pay attention to the
cables of the power supply! If the short circuit does not result from a failure of the power supply
or wiring, you can replace the defective fuse with a new one (of identical value). If the short-
circuit persists, contact an authorized XZENT dealer.
■When connecting to any other device, read the user‘s guide for compatibility and notes on
electrical connections. Do not try to connect incompatible products.
■Be careful not to drain the car battery while using the unit when the car engine is turned off.
Because the unit consumes a considerable amount of energy and the battery will be charged
only while the engine is running, it might happen that the battery will discharge to a point
where it is not possible to start the engine anymore.
■According to the law in different European countries, driving with monitors showing movies
in the viewing range of the driver is not allowed, because the driver might get distracted from
traffic. Please respect the traffic regulations of your country or you may face legal penalties in
case of accidents or even lose your insurance coverage. Pay attention to the playback volume
inside your vehicle since you are required to notice exterior warning sounds like police sirens etc..
■Don‘t expose the unit to hard impacts. A mechanical or electrical malfunction of the unit could
be the result.
■This unit utilizes a laser of class 1 category. Performance of procedures other than those
specified herein may result in hazardous exposure to coherent light. Do not open covers and
do not attempt to repair anything by yourself. Refer servicing to qualified personnel.
■Should any problems or questions occur during the installation, please consult your XZENT
dealer/importer.
4 5
X-302MH
Operation buttons
1. EJECT Press to eject Disc
2. MENU Press to enter the MENU SOURCE
Press + hold to directly enter NAVIGATION mode.
3. BT Press to enter the BLUETOOTH SOURCE
Press + hold to accept a call
Press + hold to hung up an active call
4. ROTARY ENCODER Rotate to increase/decrease volume
Press to turn ON, press + hold to turn OFF device
Various
5. LOADER STATUS No disc indicator lights
6. POWER RESET Press to perform a reset
7. SD CARD SLOT SD/SDHC card slot
8. NAV CARD SLOT Micro SDHC slot for navigation use
* Set is based on X-302BT device hardware, with Motor Home (MH) software.
1
2
3
4
5
6
7
8
*

6 7
REMOTE CONTROL
Operation buttons
1. POWER Device ON/OFF
2. EJECT Eject disc
3. MUTE Mute/Un-mute audio output
4. SRC Change sources
5. KEYPAD DVD input track/chapter/title
6. VOL+ Increase volume
7. VOL – Decrease volume
8. INFO Show DVD info
9. SRCH DVD input track/chapter/title
10. STOP/BAND Stop DVD/change radio band
11. SEL Open EQ
12. ESC Close DVD menu
13. MENU Open main menu
14. PIC No function
15. REPEAT A-B No function
16. OK Play/Pause; confirm in DVD menu
17. DIRECTION BUTTONS Move cursor in DVD menu
18. TITLE Open DVD menu
19. ROOT Open DVD menu
20. REPEAT DVD repeat track/chapter/title
21. SKIP NEXT Media player: jump to next track/chapter/title
Tuner: jump to next preset station
22. SKIP PREVIOUS Media player jump to previous track/chapter/title
Tuner: jump to previous preset station
23. FAST REVERSE DVD fast reverse
24. FAST FORWARD DVD fast forward
25. AUDIO Change DVD audio language
26. ZOOM No function
27. ANGLE Change DVD viewing angle
28. SUB-T Change DVD subtitle

8
SOURCE MENU
Enter Source Menu
There are two possibilities to enter the Menu Source:
1. Touchscreen Tap on upper left corner of touchscreen to return from any mode except Navigation
mode
2. Front panel key Press on the MENU button
Operation buttons main area
Slide left or right on touchscreen to change the displayed page
Press on the page indicators to change the displayed page
■Tuner Tap to enter Tuner mode
■USB Tap to enter USB source
■NAVIGATION Tap to enter Navigation mode
■DISC Tap to enter Disc mode
■CAMERA Tap to enter Camera mode (optional accessory)
■SD Tap to enter SD source
■AV Tap to enter AV mode
■BT Tap to enter BT mode
■DVB-T/DAB+ Tap to enter DVB-T mode (optional accessory)
Operation buttons lower area
■TFT Standby Tap to activate TFT standby
■Day/Night Tap to toggle TFT brightness Day / Night / Auto
■Mute Music Tap to mute audio playback (except BT-ringing, except navigation voice
guidance)
■Call Favorites Tap to enter Bluetooth Favorite mode
■Settings Tap to enter main system SETUP
Rearranging of icons in main and lower area
1. Tap + hold an Icon until it begins to wiggle
2. Select a new page or tap on the new icon position in main or lower area.
The icons will swap their positions upon touching
3. To cancel this mode tap on the icon that wiggles
9

10
TUNER MODE
Operation buttons Tuner Mode
1. Source Tap to jump to Main Menu
2. Clock Time Shows clock time
3. Preset Tap to select Preset
Tap & hold to save current frequency as Preset
4. Played Station Shows station name and radio text, if available
5. AS Tap to perform automatic station memory
6. PREV Tap to jump to the previous station
7. Adjust down Tap to adjust frequency 100 kHz down
8. Adjust up Tap to adjust frequency 100 kHz up
9. NEXT Tap to jump to the next station
10. More Tap to open pop up menu for tuner settings
Information fields
11. Left info field ST = stereo
LOC = Find strong stations only
Band = Shows active Band
12. Right info field Shows if Traffic Announcement is set to ON
Program type info
Frequency information
13. Active TA On active TA broadcast in other sources, tap to cancel
11
More Menu (PopUp)
1. AF Tap to turn off/on AF function
2. TA Tap to turn on/off TA function
3. LOC Tap to turn on/off LOC
4. BAND Tap to switch through radio band (FM1 > FM2 > FM3 > AM1 > AM2)
5. SPre Turn on/off Smart Preset
Note
■Selected and active items are highlighted in orange.
■This unit features an RDS tuner. The RDS system encodes and transmits data inside the FM radio
carrier signal. Availability and content of the RDS data depend on the respective broad cast
station and its signal strength. RDS does, for example, transmit alternative frequencies which
allow for frequency changes without user interaction. AM band does not support any RDS
function.
■You need to have the AF function activated in order to use the RDS functionality and its features.
12
3
4
33
11
13
3 3 3
12
5 6 7 8 9
10
1
2
3
4
5

12
USB/SD/DISC
Operation buttons Playback Mode
1. Source Tap to jump to Main Menu
2. Clock time Shows clock time
3. PREV Tap to jump to previous track.
4. PLAY/PAUSE Tap to pause/continue playback (whole area except 5, 6, 7)
5. REPEAT Tap to toggle repeat (single > folder > off)
6. SHUFFLE Tap to turn on/off shuffle function.
7. Progress bar Tap to jump to playtime (left shows current playtime, right shows total
playtime)
8. NEXT Tap to jump to next track
9. LIST Tap to show simplified folder list mode
9.1 Slide Ctr. Wipe left/right for next/previous track
Wipe down/up for next/previous folder
Information fields
10. Last song Shows the last played song in sequence
11. Next song Shows the next played song in sequence
12. Info field Shows if USB/SD/DISC media is present, shows if MUTE is active
13
Operation buttons Playback Mode (list)
1. Source Tap to jump to Main Menu
2. Clock time Shows clock time
3. List Tap to hide list
4. +Folder Tap line to open folder
-Folder Tap line to close folder
5. File Tap first half of line to start track (audio or video)
6. List up Tap to scroll page up
Slide right half of list down
7. Played track Tap to jump back to currently played folder and track
8. Index Tap to select index (file or page)
9. Video/Audio Tap to switch media file (Video > Audio)
10. List down Tap to scroll page down
Slide right half of list up
Video Playback
You can operate your videos directly using the playback menu and touchscreen operation. If no special
onscreen menu is available, tap on centre area of screen to show the control bar. Functions like subtitle
and audio channel selection can be accessed via remote control.
Operation buttons Video Playback
1. Progress bar Tap to jump to playtime
2. PREV Tap to jump to previous track.
3. PLAY/PAUSE Tap to pause/continue playback
4. STOP Tap to stop and return to list mode
5. NEXT Tap to jump to next track
6. Audio CH Tap to change available audio channels
7. Title Tap to return to DVD title menu
2
34
5
6
7
8
9
10 11
12
1
12
3
4
56
78
9
10
1
2
3 54 6 7
9.1

14
FAVORITE MODE
Operation buttons Favorite Mode
1. Source Tap to jump to Main Menu
2. Clock Time Shows clock time
3. Favorites Tap to show favourite mode if not active already
4. Call Favorite Tap contact field to place a call
5. Delete Tap to delete contact
6. Add Tap empty field to add a contact from downloaded phonebook (7)
7. Phonebook Tap to enter phonebook mode
8. Keypad Tap to open keyboard to dial a number
9. Settings+ Tap to enter Bluetooth setting mode (Pair/Connect/A2DP)
Information fields
10. Info field Shows if a mobile BT device is connected
15
Operation buttons Phonebook Mode
1. Source Tap to jump to Main Menu
2. Clock Time Shows clock time
3. Favorite Tap to show favourite mode if not active already
4. Contact name +Contact name: tap to show details
– Contact name: tap to return to contact list
5. Phone Num. Tap line to place a call
6. List up Tap to scroll page up
7. Phonebook Tap to enter phonebook mode if not already active
8. ABC Tap to select first letter of contact
9. Keypad Tap to open keyboard to dial a number
10. List down Tap to scroll page down
11. Settings+ Tap to enter Bluetooth setting mode (Pair/Connect/A2DP)
12. Contacts Tap to show the contacts of your phonebook if not already active
13. Call log Tap to show call log (missed/outgoing/incoming)
14. Re-Sync Tap to re-download your phonebook if contacts added since first
pair + connect
15. Add Favorite Tap to activate and select a contact phone number to be added
to a free favorite slot
Information fields
16. Info field Shows if a mobile phone is connected
PHONEBOOK MODE
1
3
7
8
9
4
5
6
2
10
1
3
7
9
11
4
56
2
16
8
10
12 13 14 15
Note
To use phonebook functionalities which access the phonebook, data download by XZENT device
may require to activate required permissions on the mobile phone.

16
KEYPAD MODE
Operation buttons Keypad Mode
1. Source Tap to jump to Main Menu
2. Clock Time Shows clock time
3. Favorite Tap to show favourite mode if not already active
4. Number keys Tap to input (0~9) or *, +, # (star, plus, hash)
5. Discrete Tap to switch audio of call from car speaker to mobile
6. Delete Tap to delete last input
7. Accept call Tap to accept/make call
8. End call Tap to end call
9. Phonebook Tap to enter phonebook mode
10. Keypad Tap to open keyboard to dial a number if not active
11. Settings+ Tap to enter Bluetooth setting mode (Pair/Connect/A2DP)
Information fields
12. Info field Shows if a mobile phone is connected
13. Call info Shows call status, number or contact name if available
17
SETTING+ MODE
Operation Setting + Mode buttons
1. Source Tap to jump to Main Menu
2. Clock Time Shows clock time
3. Favourite Tap to show favorite mode if not already active
4. Phone name Tap line to connect/disconnect*
5. Delete Tap to delete (remove from pair list)
6. Media Ctr. Tap to play to start A2DP playback*
7. Phonebook Tap to enter phonebook mode
8. Keypad Tap to open keyboard to dial a number
9. Settings+ Tap to enter Bluetooth setting mode (Pair/Connect/A2DP)
Information fields
10. Info field Shows if a mobile phone is connected
11. Connect status Indicates by icon & colour font (orange=connected/white=disconnected)
*Note: For pairing
Your XZENT device is only visible for pairing if “Settings+” is selected.
To pair a new mobile phone, you need to start from your phone a Bluetooth search and a
pairing request.
Some phones need to send a PIN Code on a pairing request. For XZENT devices this PIN is
“0000”.
Some phones may ask to allow phonebook download. Confirm the permission on your phone.
*Note on A2DP playback
Some phones need to start/open a music player app before you can start any playback on the
XZENT device.
1
3
9
10
11
13
5
4
2
12
6
7 8
1
3
7
8
9
11
5
4
2
10
6

18
SETUP GENERAL
Operation buttons Setup General
1. Source Tap to jump to Main Menu
2. Clock Time Shows clock time
3. Language Tap to show and select available languages on right side
4. Backlight Tap to change colour (RED>GREEN>BLUE), or alternatively on right side.
5. Beep Tap to disable/enable acoustic “beep” feedback on device interaction
6. Wallpaper Tap to change background wallpaper
7. Antenna Pwr. Tap to enable/disable antenna phantom supply
8. Load Factory Tap to load factory defaults
9. General Tap to enter general mode, if not already active
10. Safety Tap to enter safety mode
11. Display Tap to enter display mode
12. Audio Tap to enter audio mode
13. Software Tap to enter software mode
14. Misc Tap to enter misc mode
19
SETUP SAFETY
Operation buttons Safety
1. Source Tap to jump to Main Menu
2. Clock Time Shows Clock time
3. Password Tap to enable/disable password function*
4. Camera Mute Tap to enable/disable audio mute on reverse view camera
5. Camera Inverse. Tap to enable/disable camera inverse function
9. General Tap to enter general mode,
10. Safety Tap to enter safety mode, if not already active
11. Display Tap to enter display mode
12. Audio Tap to enter audio mode
13. Software Tap to enter software mode
14. Misc Tap to enter misc mode
*Note: Password function
Switching off the password function does not require a password itself. Yet it is required to set
a password if the function is turned on. If your current password is lost, turn off / on password
function to assign a new password. The password is requested only, when device is disconnected
from the car battery with password function set to ON.
1
3
9
10 11 13
5
4
2
6
7
8
1
3
11
5
4
2
12 14
9
10 11 1312 14

20
SETUP DISPLAY
Operation buttons Setup Display
1. Source Tap to jump to Main Menu
2. Clock Time Shows clock time
3. Color Tap to set color (for video playback only)
4. Contrast Tap to set contrast (for video playback only)
5. Brightness Tap to set brightness*
6. Day/Night Tap to change modus (DAY > NIGHT > Auto)*
7. Calibration HMI Tap to calibrate XZENT TFT screen
8. Calibration Navigation Tap to calibrate NAV
9. General Tap to enter general mode
10. Safety Tap to enter safety mode
11. Display Tap to enter display mode, if not already active
12. Audio Tap to enter audio mode
13. Software Tap to enter software mode
14. Misc Tap to enter misc mode
*Note on Brightness
Brightness values between 10 and 20 are used for DAY mode. Brightness values between 0 to 9
are used for NIGHT mode. The system will correctly assign values to each mode automatically.
*Note on selection of DAY/NIGHT mode
If set to AUTO, the DAY and NIGHT mode of the device is in sync with the cars headlights (ON
= Night-mode, OFF=Day-mode). If local traffic laws require daytime running lights for your car,
you can use the manual mode in setup or main menu to set this function.
21
SETUP AUDIO
Operation buttons Setup AUDIO
1. Source Tap to jump to Main Menu
2. Clock Time Shows clock time
3. Treble Tap to set treble value on right side
4. Bass Tap to set value for bass on right side
5. Subwoofer Tap to set value for subwoofer on right side
6. X-Over Sub Tap to change value of crossover for sub (80 Hz > 120 Hz > 160 Hz)
7. Mode Tap to change EQ preset (User>Jazz>Pop>Rock>Classical>Linear)
8. Loudness Tap to enable/disable loudness
9. General Tap to enter general mode
10. Safety Tap to enter safety mode
11. Display Tap to enter display mode
12. Audio Tap to enter audio mode, if not active already
13. Software Tap to enter software mode
14. Misc Tap to enter misc mode
15. Bal./Fad. While no other value (3 to 6) is adjusted, set the marker to control
balance and fader
1
3
9
10 11 13
5
4
2
6
7
8
1
3
15
5
4
2
12 14
9
10 11 1312 14
6
7
8

22
SOFTWARE
This screen informs you about installed Software versions.
Operation buttons Setup Software
1. Source Tap to jump to Main Menu
2. Clock Time Shows Clock time
3. General Tap to enter general mode
4. Safety Tap to enter safety mode
5. Display Tap to enter display mode
6. Audio Tap to enter audio mode,
7. Software Tap to enter software mode, if not already active
8. Misc Tap to enter misc mode
Information fields
9. Version Text Shows detailed software version information
23
SETUP MISC
Operation buttons Setup Misc
1. Source Tap to jump to Main Menu
2. Clock Time Shows Clock time
3. TFT Standby Tap to start TFT standby function
4. BT mic gain Tap to change microphone input gain
5. BT name order Tap to change the display sort order of the phonebook
6. Tuner Profile Tap to change tuner mode (stereo > mono)
7. General Tap to enter general mode
8. Safety Tap to enter safety mode
9. Display Tap to enter display mode
10. Audio Tap to enter audio mode
11. Software Tap to enter software mode
12. Misc Tap to enter misc mode, if not already active
13. Clock If no other setting is changed (3~6) you can tap the clock to set it manually*
*Note: setting the clock
XZENT has an integrated clock that will be automatically synchronized via RDS time signal. Sync is
performed only once on each device start and may require several minutes to show correct real time,
depending on the FM signal quality of the radio station you are listening to. This device uses a soft-
ware clock which is synchronized by GPS signal. The GPS sync’d time is used for route calculation.
3
4 5 76 8
7
8 9 1110 12
9
1 2 1 2
6
3
5
4
13

24
How to input a destination by using an address and start guidance
1. Tap on Find
2. Tap on Find Address
3. Input country, city and street name according
to your preferred detail level
4. The route calculating will start and you can
simply tap on Go! to start the route guidance
for the entered destination
Additional settings, adjustments and examples
are explained in the separate navigation
Quick Start Guide contained in the set.
25
NAVIGATION
■microSD card (8GB) based motor caravan 3D navigation system
■Detailed map coverage of 44 countries including Turkey
■Input option for vehicle specific data (height, width, length, weight, trailer, etc.)
■Premium POI bundle with over 6,5 million destinations
■ Voice guidance in 29 EU languages, UI menu guidance in 29 EU languages
■ Realistic 3D rendering of terrains and landmarks
■ Tunnel-View
■ 3D Auto-Zoom for crossings and roundabouts
■ Real Junction View
■ Eco and Smart Route Planning
■ Calculation of Real-Time Route Alternatives
■ Parking Around Algorithm
■ Detour Hint function etc.
■ TMC receiver for free TMC data services*1
■ 30 Days Latest Map Guarantee
*1Extendable functionality via separate TMC pay service providers (country specific).
BLUETOOTH
■ Bluetooth hands-free module
■ Synchronization of up to 1,000 phonebook entries with 5 numbers per entry
■ Phonebook memory on device for direct access of imported contacts
■ Quick access for 6 favorite contacts
■ Internal Bluetooth microphone
MULTIMEDIA/AUDIO
■ DVD loader – compatible media/formats: CDDA, CD-ROM, CD-R/RW, SCVD, DVD, DVD±R,
DVD-MP3, AVI, AC3, MPEG1/2/4, MP3, PCM, RM 720p, XVID 720p, FLV
■ Rear USB port for USB 2.0 data carriers (max. 32 GB)
■ Front SD/SDHC port for SD card data carriers (max. 32 GB)
■ USB / SDHC, supported audio file formats: AAC, FLAC, MP3, WMA/Pro
■ USB / SDHC, supported video file formats: AVI, H.264, MPG, MPEG1/2, MP4, MKV 1080p,
WMV, XVID
■ BT-music streaming via A2DP with AVRCP 1.0
■ Equalizer with 5 different sound-presets
■ 4 x 40 watts amplifier
GENERAL FEATURES
■ 6.2”/ 15.7 cm 16:9 TFT-LCD touchscreen display with 800*480 pixel resolution
■ HMI for 10 different languages
■ FM RDS tuner with DSP noise masking and 30 preset stations (18 FM/12 AM)
■ Internal 12V power supply for active antennas
■ Tricolor key illumination (red / green / blue)
■ IR remote control
CONNECTIVITY
■ 4.1 RCA preamp line outputs (3 V)
■ 2x composite RCA video outputs for DVD/DVB-T (CVBS; NTSC)
■ 1x RCA A/V input with NTSC/PAL auto switching (CVBS)
■ 1x RCA video input for rear view camera with auto switching function (CVBS)
1
2
4
3
3
3

26
ÜBER DIESE ANLEITUNG
Diese Bedienungsanleitung enthält wichtige Informationen und Warnungen für den Umgang mit
diesem Gerät.
Bewahren Sie dieses Dokument an einem geeigneten Ort für ein späteres Nachschlagen auf.
INHALT
SICHERHEITSHINWEISE ................................................................................ 27
TASTEN AN DER GERÄTEFRONT ................................................................................ 28
FERNBEDIENUNG ................................................................................ 30
HAUPTMENÜ ................................................................................ 32
RADIO MODUS ................................................................................ 34
WIEDERGABE USB/SD/DISK MODUS ................................................................................ 36
BLUETOOTH MODUS ................................................................................ 38
EINSTELLUNGEN ................................................................................ 42
NAVIGATIONS MODUS ................................................................................ 48
TECHNISCHE SPEZIFIKATIONEN ................................................................................ 49
HINWEIS 1. Die Angaben und Beschreibungen in dieser Bedienungsanleitung können unter
Umständen von der des Geräts abweichen.
2. Die Abbildungen in dieser Bedienungsanleitung können unter Umständen von
denen des Geräts abweichen.
3. Technische Änderungen am Gerät nach Druck dieser Bedienungsanleitung bleiben
vorbehalten.
27
SICHERHEITSHINWEISE
■Lesen Sie die Anleitung vollständig durch. Beachten Sie Warnungen und Anweisungen.
■Bewahren Sie die Anleitung sorgfältig auf. Sie sollte jedem Benutzer des Geräts frei zugänglich sein.
■Das Gerät ist für den Betrieb an einem +12 V Bordnetz mit Minus gegen Masse geeignet.
■Montieren und bedienen Sie das Gerät nur so, wie es in der Bedienungsanleitung beschrieben
wird. Alles andere kann zum Erlöschen Ihres Garantieanspruches führen.
■Zerlegen oder modifizieren Sie das Gerät nicht. Ihr Garantieanspruch erlischt dadurch. Versuchen
Sie nicht, das Gerät selbst zu reparieren oder zu warten, sondern wenden Sie sich an einen
autorisierten XZENT-Fachhändler.
■Benutzen Sie nur das Originalzubehör, um das Gerät zu installieren und zu betreiben, da an-
sonsten eine Beschädigung des Geräts riskiert wird. Befestigen Sie das Gerät gemäß der
Installationsanleitung, unter Verwendung des mitgelieferten Montagezubehörs. Die bei Un-
fällen auftretenden Beschleunigungskräfte sind teilweise enorm. Unsachgemäß montierte Ge-
räte stellen bei Unfällen ein großes Risiko für den Fahrer und die Insassen des Fahrzeuges dar.
■Schützen Sie das Gerät vor Wasser oder anderen Flüssigkeiten, die in das Innere des Gerätes
eindringen können. Sonst könnte ein Kurzschluss mit Brandfolge daraus resultieren.
■Zur Vermeidung eines Kurzschlusses achten Sie darauf, dass keine metallischen Gegenstände
in das Gerät gelangen.
■Bevor Sie eine defekte Sicherung austauschen, sollten Sie erst überprüfen, was der Grund für
den Kurzschluss war. Achten Sie dabei besonders auf die Kabel der Spannungsversorgung!
Wenn der Kurzschluss nicht durch einen Fehler in der Spannungsversorgung verursacht wurde,
können Sie die defekte Sicherung gegen ein neues Exemplar mit identischen Werten austauschen.
Sollte der Kurzschluss immer noch vorhanden sein, wenden Sie sich bitte an einen autorisierten
XZENT-Fachhändler.
■Lesen Sie die Bedienungsanleitung eines fremden Gerätes und versichern Sie sich, daß es
kompatibel ist, bevor Sie es anschließen. Schließen Sie keinesfalls inkompatible Geräte an.
■Achten Sie darauf, dass bei ausgeschaltetem Motor die Batterie des Fahrzeuges nicht entladen
wird. Da es sich bei dem Gerät um einen Verbraucher handelt und die Batterie nur bei laufendem
Motor aufgeladen wird, kann es passieren, dass die Batterie tief entladen wird und das Fahrzeug
sich nicht mehr starten lässt.
■Gemäß der in den verschiedenen Ländern der EU geltenden Verkehrsvorschriften, darf ein
Monitor, der in Sichtweite des Fahrers montiert ist, während der Fahrt, außer zu Navigati-
onszwecken, nicht mit bewegten Bildern oder Filmen betrieben werden, da er den Fahrer vom
Verkehrsgeschehen ablenkt. Beachten Sie unbedingt die geltenden Vorschriften in Ihrem Land,
da ansonsten bei einem Unfall Regressansprüche von der Kfz-Versicherung geltend gemacht
werden können. Achten Sie zusätzlich darauf, dass die Lautstärke in Ihrem Fahrzeug nur so
hoch ist, dass Sie Außengeräusche, wie z.B. eine Polizeisirene, noch klar wahrnehmen können.
■Setzen Sie das Gerät keinen harten Stößen aus. Eine mechanische und elektronische Beschä-
digung des Gerätes könnte daraus resultieren.
■Wenn Sie Fragen oder Probleme bei der Installation haben, wenden Sie sich bitte an einen
XZENT-Händler oder den jeweiligen Landesvertrieb.
■Das Gerät verwendet einen Laser Klasse 1. Benutzen Sie das Gerät ausschließlich wie in der
Anleitung beschrieben, um eine Gefährdung durch kohärentes Licht auszuschließen. Sie sollten
das Gerät weder Öffnen noch selbst reparieren. Reparaturen sollten ausschließlich von quali-
fiziertem Servicepersonal durchgeführt werden.
■Wenn Sie Fragen oder Probleme bei der Installation haben, wenden Sie sich bitte an einen
XZENT-Händler oder den jeweiligen Landesvertrieb.

28 29
X-302MH
Bedientasten/Felder
1. EJECT Disk auswerfen.
2. MENU Quellen Auswahl öffnen.
Drücken und halten, um in den Navigationsmodus zu
wechseln.
3. BT Drücken, um zur Bluetooth Quelle zu wechseln.
Drücken und halten, um ein Anruf anzunehmen
Drücken und halten während eines Gespräches um aufzulegen.
4. DREHKNOPF Drehen verändert die Lautstärke.
Einschalten durch drücken, ausschalten durch gedrückt halten.
Sonstiges
5. LAUFWERKSSTATUS Keine Disk-Lade-Statusanzeige
6. POWER RESET Drücken, um das Gerät zu resetten.
7. SD KARTENSLOT SD/SDHC-Kartenleser
8. MICRO SD KARTENSLOT Micro SDHC-Kartenleser für die Navigation
* Geräte Hardware entspricht dem „BT“ Modell. Die Bezeichnung „MH“ (Motor Home)
entstammt der im Lieferumfang enthaltenen Navigationssoftware.
1
2
3
4
5
6
7
8
*

30 31
FERNBEDIENUNG
Bedientasten
1. POWER Ein/Ausschalten
2. EJECT Disc auswerfen
3. MUTE Stummschaltung
4. SRC Quellenwechsel
5. TASTATUR Eingabe von DVD Track/Kapitel/Titel
6. VOL+ Lauter
7. VOL– Leiser
8. INFO Anzeige von DVD Informationen
9. SRCH Eingabe von DVD Track/Kapitel/Titel
10. STOP/BAND Stop DVD /Bandwechsel Radio
11. SEL EQ öffnen
12. ESC DVD Menü schließen
13. MENU Quellenauswahl öffnen
14. PIC Ohne Funktion
15. REPEAT A-B Ohne Funktion
16. OK Wiedergabe/Pause; DVD Menü bestätigen
17. RICHTUNGSTASTEN DVD Menü Cursor bewegen
18. TITLE DVD Menü öffnen
19. ROOT DVD Menü öffnen
20. REPEAT Wiederholungsmodi für DVD
21. SKIP NEXT Mediaplayer: Nächster Track/Kapitel/Titel
Radio: Nächster Stationsspeicher
22. SKIP PREVIOUS Mediaplayer: Vorheriger Track/Kapitel/Titel
Radio: Vorheriger Stationsspeicher
23. FAST REVERSE DVD: Schneller Vorlauf
24. FAST FORWARD DVD: Schneller Rücklauf
25. AUDIO DVD DVD: Audiospur (Sprache) wechseln
26. ZOOM Ohne Funktion
27. ANGLE DVD Betrachtungswinkel wechseln
28. SUB-T DVD Untertitel wechseln

32
HAUPTMENÜ
Quellen Auswahl öffnen
Es gibt zwei Möglichkeiten die Quellenauswahl zu öffnen:
1. Touchscreen Tippen Sie in die Ecke oben links, um ins Hauptmenü zurück-
zukehren (außer Navigation).
2. Bedientasten Gerätefront Gerätetaste MENU drücken.
Bedienfelder
Führen Sie eine links/rechts Wischbewegung auf Höhe der Haupt-Icons aus, um die Seite zu wechseln.
Drücken Sie auf die Seitenindikatoren um dorthin zu wechseln.
■Radio Auswahl Tuner Modus
■USB Auswahl USB Quelle
■NAVI Auswahl des Navigationsmodus
■DISC Auswahl des Disk Modus
■KAMERA Auswahl der Kamera (optionales Zubehör)
■SD Auswahl des SD Modus
■AV Auswahl AV Modus
■Bluetooth Auswahl des Bluetooth Modus
■DVB-T/DAB+ Auswahl des DVB-T oder DAB+ Modus (optionales Zubehör)
Schnellzugriffsfelder im unteren Bereich
■TFT Standby Auswahl TFT Standby
■Tag/Nacht Antippen, um den TFT Modus für TAG/NACHT/AUTO zu wählen
■Musik Stumm Antippen, um Audio stumm zu schalten, außer eingehende Anrufe und Navi-
gationsansagen
■Favoriten Antippen für den Bluetooth Favoriten Modus
■Einstellungen Antippen, um System Einstellungen vorzunehmen
Neuanordnen von Haupt- und Schnellzugriffs-Icons
1. Antippen und halten Sie das Icon bis es animiert wird.
2. Wählen Sie eine neue Seite oder neue Icon Position in der aktuellen Ansicht.
Die Icons tauschen nach Berührung ihren Platz.
3. Um abzubrechen, berühren Sie das animierte Icon erneut.
33

34
RADIO MODUS
Bedienfelder Radio Modus
1. Home Zurück zum Hauptmenü
2. Uhrzeit Anzeige der Uhrzeit
3. Preset Antippen, um Stations-Speicher anzuwählen
Antippen und halten, um Stations-Speicher abzuspeichern
4. Aktuelle Station Zeigt die aktuelle Station mit Namen und Radiotext (wenn verfügbar).
5. AS Automatischer Sendersuchlauf
6. PREV Nächster verfügbarer Sender
7. Anpassung hoch 100 kHz weiter
8. Anpassung runter 100 kHz zurück
9. NEXT Vorheriger verfügbarer Sender
10. More Antippen für erweiterte Einstellungen
Infofelder
11. Infofeld links ST=Stereo
LOC=Nur starke Sender
aktives BAND
12. Infofeld rechts Verkehrsfunkeinstellung (TA)
Allgemeiner Programminhalt des Senders
Frequenzinfo
13 Aktive TA Bei aktiver Verkehrsfunkdurchsage in anderen Quellen Antippen
um eine TA Durchsage abzubrechen.
35
Erweiterbare Einstellungen (PopUp)
1. AF Antippen, um AF ein/auszuschalten
2. TA Antippen, um Verkehrsfunkdurchsagen ein/auszuschalten
3. LOC Antippen, um LOC ein/auszuschalten
4. Band Antippen, um Band (FM1 > FM2 > FM3 > AM1 > AM2) durchzuschalten
5. SPre Antippen, um Smart Preset ein- /auszuschalten
Hinweis
■Aktive oder ausgewählte Funktionen werden orange hervorgehoben.
■Dieses Gerät ist mit einem RDS Tuner ausgestattet. Das RDS System codiert/überträgt zusätzlich
zu den Radiosendungen Daten. Die Verfügbarkeit von RDS Daten und deren Inhalt/Codierung
hängt vom jeweiligen Sender und der Empfangsqualität ab. Die RDS Funktionalität ist nur im
UKW Band gegeben.
■Schalten Sie die AF Funktion ein (Standartwert AN), um RDS nutzen zu können.
12
3
4
33
11
13
3 3 3
12
5 6 7 8 9
10
1
2
3
4
5

36
USB/SD/DISC
Bedienfelder Wiedergabe Modus
1. Home Zurück zum Hauptmenü
2. Uhrzeit Zeigt die Uhrzeit an
3. PREV Vorheriger Titel
4. PLAY/PAUSE Antippen des ID3 (Künstler/Song/Album)-Bereichs für Wiedergabe/Pausieren
5. REPEAT Antippen für Wiederholung (AUS > Einzel > Ordner)
6. SHUFFLE Antippen für Zufallsliste (AUS > AN)
7. Fortschrittsbalken Antippen für Direktsprung der Wiedergabe zur Position
8. NEXT Nächster Titel
9. Liste anz. Antippen, um vereinfachte Ordnerliste anzuzeigen
9.1 Slide Bedienung Sliden nach links/rechts für Nächsten/Vorhergehenden Titel
Sliden nach unten/oben für Nächsten/Vorhergehenden Ordner
Informationsfelder
10. Letzter Track Zeigt letzten Track an.
11. Nächster Track Zeigt nächsten Track an.
12. Infofelder Zeigt an, ob USB/SD/DISC Medien verfügbar sind, zeigt Stumm Modus an
37
Bedienfelder Wiedergabe Modus (Liste)
1. Home Zurück zum Hauptmenü
2. Uhrzeit Zeigt Uhrzeit an
3. List schl. Antippen, um vereinfachte Liste zu schließen
4. +Ordner Antippen, um Ordner zu öffnen
--Ordner Antippen, um Ordner zu schließen
5. Datei Antippen der vorderen Zeilenhälfte, um Datei abzuspielen (Audio oder Video)
6. Liste hoch Antippen, um hoch zu blättern
In der hinteren Zeilenhälfte nach unten wischen, um hoch zu blättern
7. Aktive Datei Antippen, um zur aktiven Datei zu springen
8. Index Antippen, um Zahl einzugeben (Seite oder Songindex)
9. Video/Audio Antippen, um Medientyp zu wählen (Video > Audio)
10. Liste runter Antippen, um herunter zu blättern
In der hinteren Zeilenhälfte nach oben wischen, um herunter zu blättern
Video Wiedergabe
Sie können Videos direkt über den Touchscreen bedienen. Die Kontrollleiste wird automatisch ausge-
blendet. Um die Kontrollleiste wieder anzuzeigen berühren Sie den Bildschirm mittig. Einige Sonder-
funktionen wie Untertitel oder Sprachkanal können auch direkt über die Fernbedienung benutzt werden.
Bedienfelder Video Wiedergabe
1. Fortschrittsbalken Antippen für einen Direktsprung der Wiedergabe zur Position
2. PREV Vorheriger Track/Kapitel/Titel
3. PLAY/PAUSE Wiedergabe/Pausieren
4. STOP Stoppen der Wiedergabe und Rückkehr in den Wiedergabe Hauptmodus
5. NEXT Nächster Track/Kapitel/Titel
6. Audio CH Antippen. um verfügbaren Sprachkanal zu wechseln
7. Titel Antippen für DVD Menu Titel
2
34
5
6
7
8
9
10 11
12
1
12
3
4
56
78
9
10
1
23 54 6 7
9.1

38
FAVORITEN MODUS
Bedienfelder Favoriten Modus
1. Home Zurück zum Hauptmenü
2. Uhrzeit Zeigt Uhrzeit an
3. Favoriten Antippen, um Favoriten Modus anzuzeigen, wenn nicht bereits sichtbar
4. Fav. Anrufen Kontaktkarte antippen, um anzurufen
5. Löschen Antippen, um Favoritenplatz freizugeben
6. Hinzufügen Leere Kontaktkarte antippen, um Favorit hinzuzufügen
7. Telefonbuch Antippen für Telefonbuch Modus
8. Keypad Antippen für Direkteingabe Wähltastatur Modus
9. Einstellungen+ Antippen für Bluetooth Einstellung + Modus (Koppeln/Verbinden/A2DP)
Informationsfelder
10. Infofeld Zeigt an, ob ein BT-Gerät verbunden ist.
39
Bedienfelder Telefonbuch Modus
1. Home Zurück zum Hauptmenü
2. Uhrzeit Zeigt Uhrzeit an
3. Favoriten modus Antippen, um in Favoriten Modus zu wechseln
4. +Kontaktname + Kontaktnamenzeile antippen, um Details anzuzeigen
– Kontaktnamenzeile antippen, um Details auszublenden
5. Rufnummer Antippen, um anzurufen
6. Liste hoch Antippen für Liste hoch
7. Telefonbuch Modus Antippen, um in den Telefonbuch Modus zu wechseln, wenn nicht bereits
angezeigt
8. ABC Antippen, um Anfangsbuchstaben in Kontaktliste zu wählen
9. Keypad Antippen für Direkteingabe Wähltastatur Modus
10. Liste runter Antippen für Liste runter
11. Einstellungen+ Antippen für Bluetooth Einstellung+ Modus (Koppeln/Verbinden/A2DP)
12. Kontaktliste Antippen für die Anzeige der Kontaktliste, wenn nicht bereits aktiv
13. Anrufliste Antippen für die Anzeige der Anrufliste (ausgehend/eingehend/verpasste)
14. Neu-Synchr. Antippen, um Daten neu zu synchronisieren, falls Kontaktdaten seit dem
ersten Koppeln geändert wurden
15. Fav. Hinzufügen Aktivieren und Kontaktnummer wählen für Favoritenzuweisung (max. 6)
Informationsfelder
16. Infofeld Zeigt an, ob ein BT-Gerät verbunden ist.
TELEFONBUCH MODUS
1
3
7
8
9
4
5
6
2
10
1
3
7
9
11
4
56
2
16
8
10
12 13 14 15
Hinweis
Das Laden Ihrer Kontakte vom Mobiltelefon durch das XZENT-Gerät muss teilweise explizit
bestätigt werden, um den Telefonbuch Modus nutzen zu können.
Table of contents
Languages:
Other XZENT Car Video System manuals

XZENT
XZENT X-422 User manual

XZENT
XZENT ARGO Series User guide

XZENT
XZENT ARGO X-F275 User guide

XZENT
XZENT X-522 User manual

XZENT
XZENT ARGO Series User guide

XZENT
XZENT X-107 User manual

XZENT
XZENT XT9026BT User manual

XZENT
XZENT X-527 User manual

XZENT
XZENT ARGO Series User manual

XZENT
XZENT ARGO X-F270 User manual
Popular Car Video System manuals by other brands

Boss Audio Systems
Boss Audio Systems BV9348B user manual

Clarion
Clarion VRX 765VD VRX765VD VRX765VD Mode d'emploi et manuel d'installation

Pioneer
Pioneer AVHP5700DVD - In-Dash 6.5 Monitor DVD Player Operation manual

Stinger
Stinger Heigh10 installation guide

Pyle
Pyle PLD52MU owner's manual

Sony
Sony XAV-72BT operating instructions