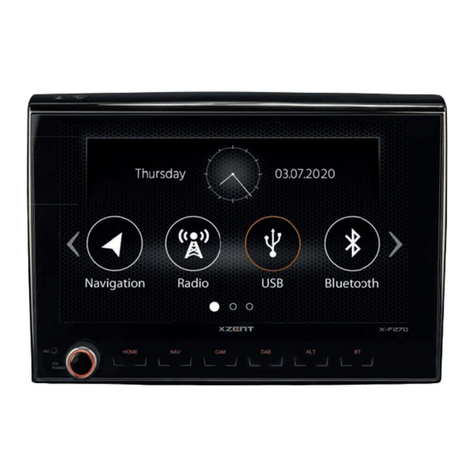
XZENT XT9026BT User manual


Contents
About these instructions:
The instruction manual contains important information and warnings about the operation of this par-
ticular unit. Please store it inside your vehicle to have access to it any time. The contents of this do-
cument are provided "as is", as required by applicable law. No warranties of any kind, either expressed
or implied, including, but not limited to, are made in relation to the accuracy, correctness, reliability
or contents of this document. XZENT reserves the right to revise or withdraw this document at any
time, without prior notice.
CONTENTS
Safety Instructions 3
Front Panel Hard Keys 4
Remote Control 6-7
Source Menu 8-9
Tuner Mode 10-11
Playback 12-13
Bluetooth Mode 14-17
Setup 18-29
EQ-Menu 30-31
Specifications 32
NOTE: 1. Certain descriptions in this book may differ from the actual unit.
2. Some pictures or icons in this book may differ from the actual display.
3. Specifications are subject to change without notice.
2 3
Safety instructions
nRead the instructions entirely. Heed all warnings. Follow all instructions.
nKeep these instructions. Whoever will use this unit should have access to this manual.
nThis unit is designed to be used in a vehicle with 12V DC battery and negative ground.
nDo not operate the unit in any other way than described in this manual. Failure to follow the
instructions as issued may void your warranty.
nDo not disassemble or alter the unit in any way, because it will void your warranty. Do not attempt
to repair or to service the unit yourself, but contact an authorized XZENT dealer instead.
nUse only original accessories which are designed and manufactured for the unit, otherwise you
will risk damage. Install the unit according to the mounting instructions by using the supplied mount
ing
accessories. The forces of acceleration for accidents are sometimes huge. Incorrectly mounted
units pose a risk for the driver and the car passengers during an accident.
nProtect the unit from water and other liquids which can enter the casing. A short circuit or even
a fire could result.
nTo prevent a short circuit, never insert or stick any metallic objects (such as coins or metal tools)
into the unit.
nBefore you replace a defective fuse, try to find the cause for the short circuit. Please pay attention
to the cables of the power supply! If the short circuit doesn't result from a failure of the power
supply or wiring, you can replace the defective fuse with a new one (of identical value). If the
short-circuit persists, contact an authorized XZENT dealer.
nWhen connecting to any other device, read its user's guide for detailed safety instructions. Do not
try to connect incompatible products.
nBe careful not to drain the car battery while using the unit when the car engine is turned off.
Because the unit consumes a considerable amount of energy and the battery will be charged only
while the engine is running, it might happen that the battery will discharge to a point where it's
not longer possible to start the engine.
nAccording to the law in different European countries, driving with monitors which are showing
movies in the viewing range of the driver is not allowed, because the driver might be distracted
from the traffic. Please respect the traffic regulations of your country, or you might face legal
penalties in case of an accident or even loose your insurance coverage. Please pay attention to
the volume inside your vehicle, because you are obliged to notice exterior sounds like police
sirens etc..
nDon't expose the unit to hard impacts. A mechanical or electrical malfunction of the unit could
be the result.
nShould any problems or questions occur during the installation, please consult your XZENT
dealer/importer.
nThis unit utilizes a laser of class 1 category. Performance of procedures other than those specified
herein may result in hazardous exposure to coherent light. Do not open covers and do not
attempt to repair anything by yourself. Refer servicing to qualified personnel.

Hard Keys
4 5
Operation buttons
1) EJECT: Press to eject Disc
2) MENU: Tap to enter SOURCE MENU
3) BT: Tap to enter BT mode with paired mobilephone connected
4) Rotary encoder: Rotate to increase/decrease volume
Press to turn ON, press & hold to turn OFF device
Various:
5) Loader status: RED: disc in loader
WHITE: no disc in loader
6) RESET: Press to perform a reset
7) SD card slot: SD/SDHC card slot
8) AUX IN: 3.5mm jack (only audio in)
87
Front panel hard keys:
1 2 3 4 65

Remote Control
6 7
Remote Control
Operation buttons
1) POWER Device ON/OFF
2) EJECT Eject disc
3) MUTE Mute/Un-mute audio output
4) SRC Change sources
5) KEYPAD Input track/chapter/title
6) VOL+ Increase volume
7) VOL- Decrease volume
8) INFO Show DVD info
9) OTO Open numeric onscreen keypad
10) STOP/BAND Stop DVD/change radio band
11) SEL Open EQ
12) ESC Close menu/EQ
13) MENU Open main menu
14) PIC No function
15) REPEAT A B Set start and end point at DVD to repeat
16) OK Play/Pause; Confirm
17) DIRECTION BUTTONS Select item; move cursor
18) TITLE Open DVD Title menu
19) ROOT Open DVD main menu
20) REPEAT Repeat track/chapter/title
21) SKIP NEXT Jump to next track/preset/chapter/title
22) SKIP PREVIOUS Jump to previous track/preset/chapter/title
23) FAST REVERSE Fast reverse; 50kHz down at tuner mode
24) FAST FORWARD Fast forward, 50kHz up at tuner mode
25) AUDIO Change DVD audio language
26) ZOOM Zoom in/out
27) AN LE Change DVD viewing angle
28) SUB-T Change DVD subtitle
28
24
20
15
14
11
8
7
6
1
23
4
5
9
12
17
18
22
26
10
13
19
23
27
16
21
25

SOURCE Menu
Source Menu
Enter Source Menu
There are two opportunities to enter Source Menu
1) Touch screen Tap on upper left corner of touchscreen to return from any mode
2) Front panel key Tap on MENU to enter Source Menu
Operation buttons
nDVB-T Tap to enter DVB-T mode
nSD-CARD Tap to enter SD card source
nUSB Tap to enter USB source
nTuner Tap to enter Tuner mode
nSETUP Tap to enter Setup
nBT Tap to enter BT mode with paired mobilephone connected
nAV 1 Tap to enter AV 1 mode (front AUX IN)
nStandby Tap to turn off TFT screen – tap on screen to reactivate
nDISC Tap to enter Disc mode
nAV 2 Tap to enter AV 2 mode (rear AV in)
8 9

Tuner
Tuner mode
Operation buttons
1) Source Tap to return to Main Menu
2) AF Tap to turn on/off AF function
3) TA To to turn on/off TA function
4) RE Tap to turn on/off regional function
5) NEXT Tap to jump to next available station
6) PREV Tap to jump to previous available station
7) AS Tap to perform automatic station memory
8) BAND Tap to switch radio band (FM1 →FM2 →FM3 →AM1 →AM2 )
9) SCAN Tap to have a peek of each preset. Tap again to turn off SCAN
10) Adjust up Tap to adjust frequency 50kHz up
11) Adjust down Tap to adjust frequency 50kHz down
12) Preset Tap to select Preset
Tap and hold to save current frequency as Preset
Information fields
13) BAND Indicates current BAND
14) Frequency Indicates current frequency
15) PS Program station – shows station name, if available
16) Radio text Shows radio text, if available
17) Clock time Shows clock time
10
Note:
nSelected and active items are highlighted in red.
nThis unit features an RDS tuner. RDS is a system which transmits data on top of the FM radio
signal. Availability and content of the RDS data depend on the respective broadcast station and
its signal strength. RDS does, for example, transmit alternative frequencies, which allow for
frequency changes without user interaction. AM band doesn´t support any RDS function.
nYou need to have the AF function activated in order to use the RDS functionality and features.
However, the AF function is deactivated ex factory. We recommend to activate AF directly after
first power up of this device.
11
1
2
3
4
5
6
7
8
9
10
11
12
14
15
16
17
13

Playback
12 13
USB/SD/DISC
Operation buttons
1) Source Tap to enter Main Menu
2) PREV Tap to jump to previous track. Tap and hold for fast rewind
3) PLAY/PAUSE Tap to pause/continue playback
4) NEXT Tap to jump to next track. Tap and hold for fast forward
5) REPEAT Tap to turn on/off repeat function (repeat single track)
6) SHUFFLE Tap to turn on/off shuffle function (shuffle folder)
7) Folder Up Tap to jump one folder directory up
8) ROOT Tap to jump to root directory
9) SCAN Tap to have a peek of each track in the folder. Tap again to turn off SCAN
10) EQ Tap to open EQ
11) SEARCH Tap to open keyboard allowing you to search by index
12) List Up Tap to scroll list up
13) Folder/track Tap on track to start playback / Tap on folder to enter folder
14) List Down Tap to scroll list down
Information fields
15) Index Indicates track index
16) Track time Indicates current playback time
17) File name Shows filename
18) ID3 info Shows available ID3 information (scrolling text)
19) Folder content Shows content of folder (either folders, tracks, videos or pictures)
Note:
nSelected or active items are highlighted in red.
Video playback
You can operate your DVDs directly using the playback menu and touchscreen operation.
If no special onscreen menu is available, tap on lower area of screen to open control bar.
Operation buttons
1) PLAY/PAUSE Tap to pause/continue playback
2) STOP Tap to stop playback
3) PREV Tap to jump to previous track/chapter/title
4) NEXT Tap to jump to next track/chapter/title
5) SUB-T Tap to sort through available subitles
6) AUDIO Tap to sort through available audio languages
7) ROOT Tap to go to ROOT menu
8) SEARCH Tap to open keyboard allowing you to search by index
9) EQ Tap to open EQ
11 2 3 4 5 6 7 8 9
2
3
4
5
6
7
8
9
10
11
13
16
17
18 19
12
15
14

Bluetooth
14 15
Bluetooth Mode
Operation buttons
1) Source Tap to enter Main Menu
2) Delete Delete last number entry (keypad mode)
3) Handsfree mode Tap for handsfree use
4) Music mode Tap for music mode
5) Handsfree Tap to use the handsfree in-car function
6) Private mode Switch call back to mobile (Privat mode)
7) Phonebook Tap to enter phonebook
Tap & hold to sync phonebook of mobile
8) Missed calls Tap to open missed calls list.
Tap and hold to refresh missed calls list
9) Outgoing calls Tap to open outgoing calls list.
Tap and hold to refresh outgoing calls list
10) Incoming calls Tap to open incoming calls list.
Tap and hold to refresh incoming calls list
11) Keypad Tap to open keyboard
12) Accept call Tap to accept/make call
13) End call Tap to hang up call
Information fields
14) Time Indicates call time
15) Number/name field Shows number of contact/callers name
Note:
nSelected or active items are highlighted in red.
nDuring an ongoing phonebook sync process, any other operation of the device is impossible.
1
2
3
4
5
6
7
8
9
10
11
13
15
12
14

16 17
Bluetooth
Phonebook
1. Tap on Phonebook icon to enter phonebook
2. Tap and hold Phonebook icon to download (sync) phonebook
3. Tap on a contact to start a call. If a contact has more than one number tied to it, system will
open details. Tapping on a number will start a call.
Note:
Phonebook is permanently saved on device memory until you delete the mobile from the pairing
list or pair another mobile. This allows quick access to your phonebook. Press and hold the phone-
book icon in case of changes applied to your mobile, to re-synchronize contacts.
Call lists
1. Tap on the corresponding icon (Missed/Outgoing/Incoming) to enter call logs
2. By tapping on a contact, you can start a call
Music mode
1) A2DP Tap to start Bluetooth music playback mode
2) PREV Tap to jump to previous track
3) PLAY/PAUSE Tap to pause/continue playback
4) NEXT Tap to jump to next track
connect and pair a mobile:
Pair a mobile:
1. Enter Setup > BT > Devices Menu
2. Press “Search” and make sure your mobile phones’ Bluetooth settings are set to visible
3. Once search function completes, your mobile should be listed in the center area
4. Select your mobile by tapping on it
5. This will open the onscreen keypad allowing you to input your PIN code
6. Type in the 4 digit PIN code and confirm with OK. System will ask for identical PIN code on
the mobile
7. Once you have entered identical PIN code at mobile, device will show “OK, successful”
8. Successful performance of the above steps will prompt the paired mobile in the left hand
section of the screen
Note:
It is only possible to pair one mobile at the same time.
Connect a mobile:
1. Select a mobile on the left hand screen side by tapping on it
2. Press “Connect”
Delete / un-pair a mobile
1. Select a mobile on the left hand screen side by tapping on it
2. Press “Delete”
1
2 3 4

Setup
18 19
SCREEn
Setup consists of six main sections.
By tapping on the corresponding icon, you can enter the respective section to perform settings.
Brightness Set screen brightness by tapping on up/down arrows
Contrast Set screen contrast by tapping on up/down arrows
Color Set screen color saturation by tapping on up/down arrows

Setup
20 21
TIME
Date Set date by tapping on number and arrows
Time Set time by tapping on number and arrows
Clock Mode Tap to select 12h or 24h mode

Setup
22 23
DVD
Aspect ratio Set DVD aspect ratio
Mode Set DVD scaling mode
Parental control Parental control adjustments, password protected

Setup
24 25
System
Device Beep Turn on/off beep
Camera Mirror Turn on/off camera mirror function
Reverse mute Mute audio when in reverse gear.
Antenna Power Turn on/off antenna phantom supply
Anti-Theft Turn on/off anti-theft function
Set Password Tap to enter anti-theft password.
Default value is 0000. Entering
0000 will set password to default.
Default code does not reset password
when devices gets locked on startup.
Load Factory Tap YES to load factory defaults
TS Calibration Tap YES to calibrate the Touchscreen

Setup
26 27
BT
eneral Turn on/off Bluetooth function
Device To connect and pair a mobile. See page 16/17
Setting Turn on/off auto connect function

Setup
28 29
Other
Soft Info Shows the software versions on device
Key Light Choose key backlight illumination color
Language Choose your preferred OSD language

EQ Menu
30 31
Enter EQ Menu Tap on the EQ button in USB/SD/DISC source menu.
There are three seetings to apply adjustments in the EQ menu.
Sound Effects
1) SW Touch and slide to adjust
subwoofer line-out level
2) BASS Touch and slide to decrease or
increase bass level
3) T EB Touch and slide to decrease or
increase treble level
4) MODE Touch left or right arrow to
select among the EQ presets
Pop, Rock, Jazz or User
Balance
1) BAL
Touch and slide to adjust output
volume of left and right speakers
2) FADE
Touch and slide to adjust output
volume of front and rear speakers
Loudness
1) ON/OFF Touch arrow to enable or
deactivate loudness function
Note:
nSelected or active items are highlighted in red.
nThe EQ seetings can be accessed on USB/SD/DISC source mode, but not from the Radio menu.
nAdjustments done in the EQ menu will apply to any source playback menu.
nSubwoofer line level and bass / treble tone control adjustments are saved under MODE “User”.
nSlider visual center position is 0 dB / neutral / zero.

Specifications/Spezifikationen
TECHNICAL FEATURES:
BLUETOOTH HANDS-F EE MODULE
nSynchronization of up to 250 contacts with max. 5 telephone numbers per contact
nInternal microphone
nUpgradable Bluetooth firmware
nA2DP with AVRCP
MULTIMEDIA PLAYE
nDVD loader
nRear USB 2.0 port
nSD/SDHC card reader (up to 32 B)
nPlayback DVD loader: CD, CD-R/RW, MP3, WMA, DVD, DVD±R/RW, DVD-MP3, AVI, Xvid and JPE
nPlayback SD/USB: MP3, WMA, AVI, Xvid, H.263 and JPE
GENE AL FEATU ES
nIntuitive, user friendly HMI in 10 different languages
n6.2"/15.7 cm 16:9 HD TFT-LCD display with 800x480 pixel resolution and touchscreen control
nRDS tuner with 30 preset stations (18 FM/12 AM)
n4 x 40 watts amplifier
n12dB/oct. low-pass filter for sub line-out
nMulticolor key illumination
nTouch sensor control buttons
n1 x IR-remote control
A/V-CONNECTIONS
n4.1-CH preamp line outputs
n2 x composite video output (NTSC)
n1 x 3.5 mm front A/V-input
n1 x rear A/V-input
n1 x video input for rear view camera with switching function
nConnectivity for compatible external DVB-T or DAB+ receivers
TECHNISCHE HAUPTMERKMALE:
BLUETOOTH F EISP ECHEIN ICHTUNG
nSynchronisation von bis zu 250 Kontakten mit max. 5 Rufnummern pro Kontakt
nInternes Mikrofon
nAktualisierbare Bluetooth Firmware
nA2DP mit AVRCP
MULTIMEDIA-PLAYE
nDVD-Laufwerk
nRear USB 2.0 Anschluss
nSD/SDHC Kartenleser (bis 32 B)
nWiedergabe DVD-Laufwerk: CD, CD-R/RW, MP3, WMA, DVD, DVD±R/RW, DVD-MP3, AVI, Xvid
und JPE
nWiedergabe SD/USB: MP3, WMA, AVI, Xvid, H.263 und JPE
GENE ELLE ME KMALE
nIntuitiv bedienbare Bedienoberfläche in 10 verschiedenen Sprachen
n6,2"/15,7 cm 16:9 HD TFT-LCD Display mit 800 x 480 Pixel Auflösung und Touchscreen-Steuerung
nRDS-Tuner mit 30 Stationsspeicherplätzen (18 UKW/12 MW)
n4 x 40 Watt Endstufe
n12 dB/Okt. Tiefpassfilter für Sub Line-Out
nMulticolor Tastenbeleuchtung
nTouch Sensor Bedientasten
n1 x IR-Fernbedienung
A/V-ANSCHLÜSSE
n4.1-CH Vorverstärkerausgänge
n2 x Videoausgang (NTSC)
n1 x 3.5 mm Front A/V-Eingang
n1 x Rear A/V-Eingang
nSeparater Videoeingang für Rückfahrkamera mit Umschaltfunktion
nAnschlussmöglichkeit für kompatible externe DVB-T oder DAB+ Empfänger
32 33

35
INHALT
34
ueber dieses Handbuch
Diese Bedienungsanleitung enthält wichtige Informationen und Warnungen für den Umgang mit die-
sem erät. Bewahren Sie dieses Dokument an einen geeigneten Ort für späteres Nachschlagen auf.
INHALT
Sicherheitshinweise 35
Bedienteil 36-37
Fernbedienung 38-39
Quellen Auswahl 40
Radio Modus 42-43
Wiedergabe 44-45
Bluetooth Modus 46-49
Setup 50-61
EQ Menü 62-63
Spezifikationen 33
HINWEIS: 1. Angaben und Beschreibungen in dieser Bedienungsanleitung können unter
Umständen vom erät abweichen.
2. Abbildungen in dieser Bedienungsanleitung können unter Umständen vom erät
abweichen.
3. Technische Änderungen am erät nach Druck dieser Bedienungsanleitung bleiben
vorbehalten.
Sicherheitshinweise
nLesen Sie die Anleitung vollständig durch. Beachten Sie sämtliche Warnungen und Anweisungen.
nBewahren Sie die Anleitung sorgfältig auf. Sie sollte jedem Benutzer dieses erätes frei zugänglich sein
nDieses erät ist nur für den Betrieb an einem Bordnetz mit +12V DC und Minus gegen Masse geeignet.
nMontieren und bedienen Sie das erät nur so, wie es in der Bedienungsanleitung beschrieben wird. Alles
andere kann zum Erlöschen Ihres arantieanspruches führen.
nZerlegen oder modifizieren Sie das erät nicht. Ihr arantieanspruch erlischt dadurch. Versuchen
Sie auch nicht das erät selbst zu reparieren oder zu warten, sondern wenden Sie sich an einen
autorisierten XZENT-Fachhändler.
nBenutzen Sie nur das Originalzubehör, um das erät zu installieren und zu betreiben, da ansonsten eine
Beschädigung des erätes riskiert wird. Befestigen Sie das erät gemäß der Installationsanleitung, unter
Verwendung des mitgelieferten Montagezubehörs. Die bei Unfällen auftretenden Beschleunigungskräfte
sind teilweise enorm. Unsachgemäß montierte eräte stellen bei Unfällen ein großes Risiko für den
Fahrer und die Insassen des Fahrzeuges dar.
nSchützen Sie das erät vor Wasser oder anderen Flüssigkeiten, die in das Innere des erätes eindringen
können. Sonst könnte ein Kurzschluss mit Brandfolge daraus resultieren.
nZur Vermeidung eines Kurzschlusses achten Sie darauf, daß keine metallischen egenstände in das erät
gelangen.
nBevor Sie eine defekte Sicherung austauschen, sollten Sie erst überprüfen was der rund für den
Kurzschluss war. Achten Sie dabei besonders auf die Kabel der Spannungsversorgung! Wenn der
Kurzschluss nicht durch einen Fehler in der Spannungsversorgung verursacht wurde, müssen Sie die
defekte Sicherung gegen ein neues Exemplar mit identischen Werten austauschen. Sollte der Kurzschluss
immer noch vorhanden sein, wenden Sie sich bitte an einen autorisierten XZENT-Fachhändler.
nLesen Sie die Bedienungsanleitung eines fremden erätes und versichern Sie sich, daß es kompatibel ist,
bevor Sie es anschliessen. Schliessen Sie keinesfalls inkompatible eräte an.
nAchten Sie darauf, dass bei ausgeschaltetem Motor die Batterie des Fahrzeuges nicht entladen wird. Da
es sich bei dem erät um einen Verbraucher handelt und die Batterie nur bei laufendem Motor
aufgeladen wird, kann es passieren, dass die Batterie tief entladen wird und das Fahrzeug sich nicht mehr
starten lässt.
nemäß den in den verschiedenen Ländern der EU geltenden Verkehrsvorschriften, darf ein Monitor, der
in Sichtweite des Fahrers montiert ist, während der Fahrt, ausser zu Navigationszwecken, nicht mit
bewegten Bildern oder Filmen betrieben werden, da er den Fahrer vom Verkehrsgeschehen ablenkt.
Beachten Sie unbedingt die geltenden Vorschriften in Ihrem Land, da ansonsten bei einem Unfall
Regressansprüche von der Kfz-Versicherung geltend gemacht werden können. Achten Sie zusätzlich
darauf, dass die Lautstärke in Ihrem Fahrzeug nur so hoch ist, dass Sie Außengeräusche, wie z.B. eine
Polizeisirene, noch klar wahrnehmen können.
nSetzen Sie das erät keinen harten Stößen aus. Eine mechanische und elektronische Beschädigung des
erätes könnte daraus resultieren.
nWenn Sie Fragen oder Probleme bei der Installation haben, wenden Sie sich bitte an einen
XZENT
-Händler
oder den jeweiligen Landesvertrieb.
nDas erät verwendet einen Laser Klasse 1. Benutzen Sie das erät ausschliesslich wie in der Anleitung
beschrieben, um eine efährdung durch koherentes Licht auszuschliessen. Sie sollten das erät weder
Öffnen noch selbst reparieren. Reparaturen sollten ausschliesslich von qualifizertem Servicepersonal
durchgeführt werden.

Bedienteil
36 37
Bedientasten/Felder:
1) EJECT: Disc auswerfen
2) MENU: Quellen Auswahl öffnen
3) BT: Zur Bluetooth Quelle wechseln wenn ein gekoppeltes Mobiltelefon vorhanden ist
4) Drehknopf: Drehen verändert die Lautstärke
Einschalten durch drücken, ausschalten durch gedrückt halten
Sonstiges:
5) Laufwerks-Status: ROT: Disk im Laufwerk
WEISS: Keine Disc im Laufwerk
6) RESET: Drücken um das erät zu resetten
7) SD Kartenslot: SD/SDHC Kartenleser
8) AUX IN: 3.5mm Klinkeneingang (nur AUDIO)
87
Tasten an der GerAtefront:
1 2 3 4 65

Fernbedienung
38 39
Fernbedienung
Bedientasten
1) POWER Ein/Ausschalten
2) EJECT Disc auswerfen
3) MUTE Stummschaltung
4) SRC Quellenwechsel
5) TASTATUR Eingabe von Track/Kapitel/Titel
6) VOL+ Lauter
7) VOL- Leiser
8) INFO Anzeige von DVD Informationen
9) OTO Eingabefeld öffenen
10) STOP/BAND Stop/Bandwechsel Radio
11) SEL EQ öffnen
12) ESC Schliessen von Menü/EQ
13) MENU Quellenauswahl öffnen
14) PIC Ohne Funktion
15) REPEAT A B Definiert Punkt A/B einer Wiedergabeschleife (DVD)
16) OK Wiedergabe/Pause; Bestätigen
17) RICHTUN STASTEN Auswahl und Cursor bewegen
18) TITLE Titel Menü von DVD öffnen
19) ROOT Hauptmenü von DVD öffnen
20) REPEAT Wiederholen von Track/Kapitel/Titel
21) SKIP NEXT Nächster Track/Kapitel/Titel
22) SKIP PREVIOUS Vorheriger Track/Kapitel/Titel
23) FAST REVERSE Schneller Vorlauf, + 50kHz (Radio)
24) FAST FORWARD Schneller Rücklauf, - 50kHz (Radio)
25) AUDIO DVD Audiospur (Sprache) wechseln
26) ZOOM Zoom
27) AN LE DVD Betrachtungswinkel wechseln
28) SUB-T DVD Untertitel wechseln
28
24
20
15
14
11
8
7
6
1
23
4
5
9
12
17
18
22
26
10
13
19
23
27
16
21
25
Table of contents
Languages:
Other XZENT Car Video System manuals

XZENT
XZENT ARGO Series User manual

XZENT
XZENT X-302MH User manual

XZENT
XZENT X-527 User manual

XZENT
XZENT X-422 User manual

XZENT
XZENT X-107 User manual

XZENT
XZENT ARGO Series User manual

XZENT
XZENT ARGO Series User manual

XZENT
XZENT ARGO X-F270 User manual

XZENT
XZENT ARGO X-F275 User guide

XZENT
XZENT ARGO Series User guide