4
PACKAGE CONTENTS
1. 1 x Karaoke Dash Cam
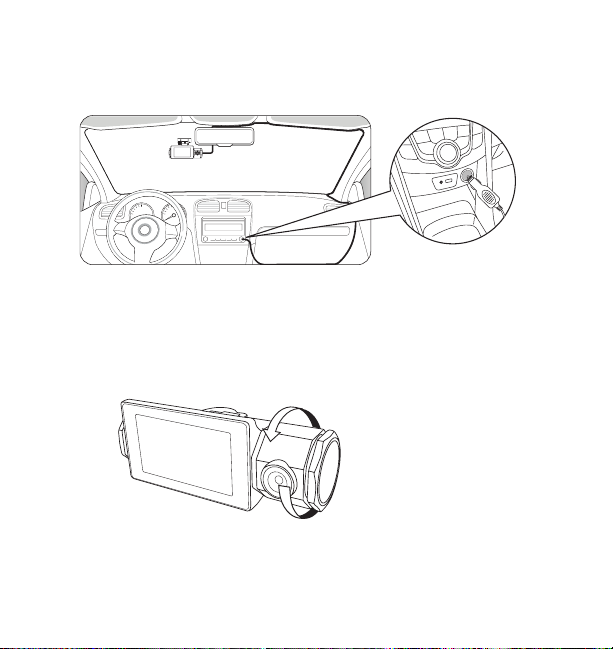
2. 1 x Mounting Bracket with 3M VHB™ Adhesive Tape
3. 1 x MiniUSB to USB Charging Cable
4. 1 x 12V/24V Cigarette Lighter Adapter (CLA)
5. 1 x 16GB MicroSD Card
6. 1 x Instruction Manual
7. 1 x Quick Install Guide
8. 1 x Warranty Card
3MVHB
TM
3
M
VHB
TM
3
M
VHB
TM
HB
TM
3
M
V
3
M
V
VHB
TM
3
MVH
3
M
VH
1 2 3
4 5 6
7 8
User Manual
Important, retain for future reference:
Read carefully
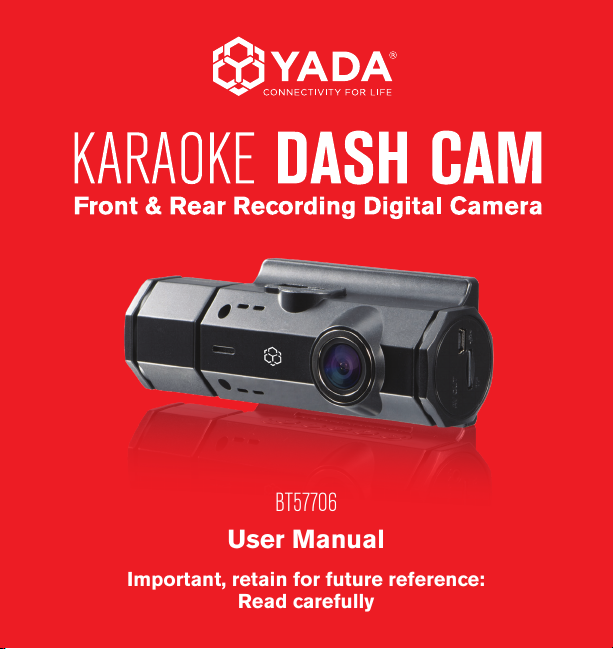
BT57706
s
r Manua
Important, retain
or
uture re
erence
Read care
ully
TF
STOP
ARRæT
DETƒNGASE
Mon-Fri, 8am-5pm PST / Lundi au vendredi, 8h ˆ 17h HNP /
Lun-vie, 8 a. m. a 5 p. m. Hora del Pac’fico
@letsyada
Register this product within 30 days of purchase to receive one (1) additional year of warranty coverage
(beyond the standard 1-year warranty), along with special product offers and announcements.
Registre este producto dentro de los 30 d’as siguientes a la compra para recibir un(1) a–o adicional de
cobertura de garant’a (m‡s all‡ de la garant’a est‡ndar de un a–o), junto con ofertas de productos y
anuncios especiales.
Enregistrez ce produit dans les 30 jours suivant l'achat pour recevoir une couverture supplŽmentaire de 1 AN
(au-delˆ de la garantie standard d'un an), ainsi que des offres et des annonces spŽciales.
Please contact our customer service before returning this product to
the store. Our friendly representatives are happy to help with any
questions or concerns you have.
P—ngase en contacto con nuestro servicio a clientes antes de regresar
este producto a la tienda. A nuestros amables representantes les dar‡
mucho gusto ayudarle con cualquier pregunta o inquietud que tenga.
Veuillez communiquer avec notre service ˆ la client le avant de
retourner le produit au magasin. Nos reprŽsentants se feront un plaisir
de vous assister pour toute question ou prŽoccupation.
ML-57706DNR_V1
Product code / Code de produit / C—digo del producto :BT57706
CONNECTIVITYF OR LIFE
www.letsyada. com /registe r
TF Card
10
16 GB