manuals.online logo
Brands
  1. Home
  2. •
  3. Brands
  4. •
  5. Yealink
  6. •
  7. Cordless Telephone
  8. •
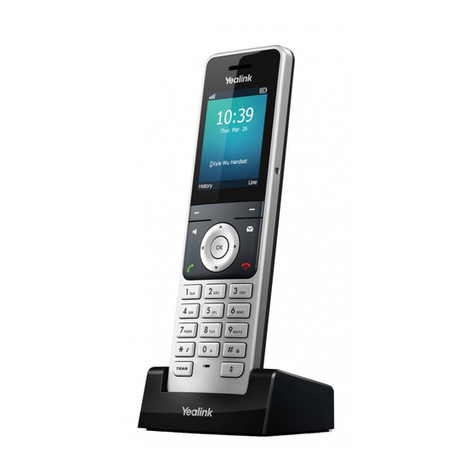
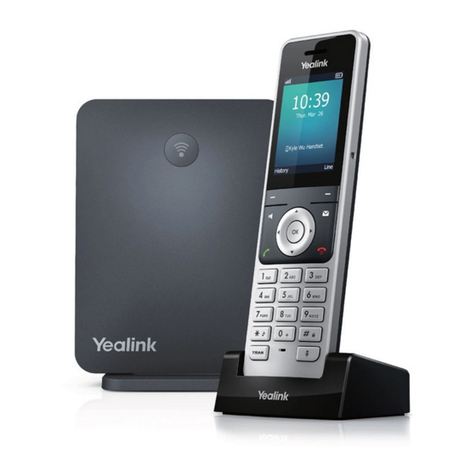
  9. Yealink W76P Manual

Yealink W76P Manual

Other manuals for W76P

7

Other Yealink Cordless Telephone manuals
Yealink Telkom W52P User manual

Yealink

Yealink Telkom W52P User manual

Yealink T54W User manual

Yealink

Yealink T54W User manual
Yealink W80 Service manual

Yealink

Yealink W80 Service manual

Yealink DECT IP Multi-Cell Deployment ToolKit User manual

Yealink

Yealink DECT IP Multi-Cell Deployment ToolKit User manual

Yealink Telkom W52P User manual

Yealink

Yealink Telkom W52P User manual

Yealink T53 User manual

Yealink

Yealink T53 User manual

Yealink W56P Telesystem User manual

Yealink

Yealink W56P Telesystem User manual

Yealink W90DM User manual

Yealink

Yealink W90DM User manual

Yealink Telkom W52P User manual

Yealink

Yealink Telkom W52P User manual

Yealink SIP-T54W Manual

Yealink

Yealink SIP-T54W Manual

Yealink W59R Instruction manual

Yealink

Yealink W59R Instruction manual

Yealink W56 User manual

Yealink

Yealink W56 User manual

Yealink W56P Telesystem User manual

Yealink

Yealink W56P Telesystem User manual

Yealink W80DM User manual

Yealink

Yealink W80DM User manual
Yealink T54W User manual

Yealink

Yealink T54W User manual

Yealink W56H User manual

Yealink

Yealink W56H User manual

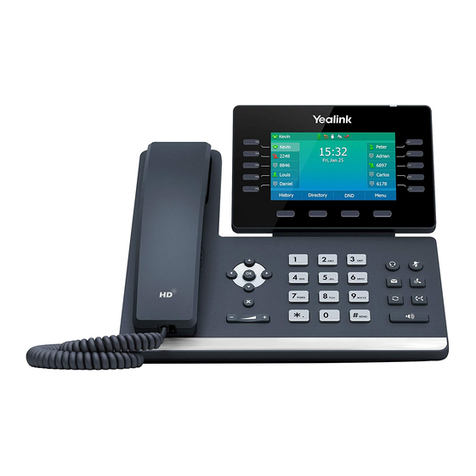
Yealink W76P User manual

Yealink

Yealink W76P User manual
Yealink W60P Telesystem User manual

Yealink

Yealink W60P Telesystem User manual

Yealink W56H Setup guide

Yealink

Yealink W56H Setup guide

Yealink W52 User manual

Yealink

Yealink W52 User manual

Yealink W56P Telesystem User manual

Yealink

Yealink W56P Telesystem User manual

Yealink T54W User manual

Yealink

Yealink T54W User manual

Yealink WH62 Mono User manual

Yealink

Yealink WH62 Mono User manual

Yealink W60P Telesystem User manual

Yealink

Yealink W60P Telesystem User manual
Popular Cordless Telephone manuals by other brands

Sony SPP-SS965 - Cordless Telephone operating instructions

Sony

Sony SPP-SS965 - Cordless Telephone operating instructions

Telstra Orb user guide

Telstra

Telstra Orb user guide

Mitel DT390 Quick reference guide

Mitel

Mitel DT390 Quick reference guide

GE 25830 user guide

GE

GE 25830 user guide

Uniden EXR2460 owner's manual

Uniden

Uniden EXR2460 owner's manual

BT DIVERSE 1010 user guide

BT

BT DIVERSE 1010 user guide

BT Graphite 1500 quick start guide

BT

BT Graphite 1500 quick start guide

3Com NBX Guide

3Com

3Com NBX Guide

Panasonic KX-TGK210HK operating instructions

Panasonic

Panasonic KX-TGK210HK operating instructions

Panasonic KX-TCA181EX installation manual

Panasonic

Panasonic KX-TCA181EX installation manual

BT FREESTYLE 3200 user guide

BT

BT FREESTYLE 3200 user guide

Panasonic KX-TG7301E operating instructions

Panasonic

Panasonic KX-TG7301E operating instructions

AUDIOLINE Splash 10x operating instructions

AUDIOLINE

AUDIOLINE Splash 10x operating instructions

Sanyo CLT-J70 instruction manual

Sanyo

Sanyo CLT-J70 instruction manual

Amplicomms BigTel 201 user manual

Amplicomms

Amplicomms BigTel 201 user manual

GE 26992 user guide

GE

GE 26992 user guide

AT&T E1812B user manual

AT&T

AT&T E1812B user manual

Sanyo CLT-670 instruction manual

Sanyo

Sanyo CLT-670 instruction manual

manuals.online logo
manuals.online logoBrands
  • About & Mission
  • Contact us
  • Privacy Policy
  • Terms and Conditions

Copyright 2025 Manuals.Online. All Rights Reserved.

Yealink DECT IP Phone (W76P)
– Set-up Instructions
1Assemble handset(s) and base.
Assemble your base & all handset(s) by following the ‘Yealink
Quick Start Guide’ included in the W76P box until you reach the
Getting Started section.
You are ready for the next step when all the LED lights on the base
are solid green.
2Retrieve device username and password from the
self-service portal.
a. Go to the self-service portal:
onenz.xport.co.nz/mydevice
or scan the QR code.
b. Log into the self-service portal using the login
details from your ‘One Business Online Portal
Login’ email.
c. The device username and password is required
for step 5.
Example format:
Device Username: 12000000_0001
Device Password: 123456
Note: Administrators may need to select the relevant User’s device from the Desk phone column ( ).
4Register device.*
Press OK (menu icons will appear),
then press 6 (Seings),
then 8 (System Seing).
Pause until the screen loads,
then press 6(Auto provision),
enter this PIN: 0000,
and select the Done so key.
This will bring you to the Auto Provision menu:
*Note: You only need to register one handset as the additional
handsets will automatically be provisioned. If you need to delete
a mistake while typing, press the Del so key.
5Enter device username and password into the phone.
Have your device username and password ready (from step 2).
Press #to change to number input (123) instead of (ABC).
a. Type in the digits prior to the underscore.
b. To enter the underscore ‘_’, press * on the keypad and the right arrow once.
Type in the remainder of the digits and select the OK so key.
c. At the password prompt, overwrite the default ****’s by entering in the
device password. Select the OK so key when completed.
If everything is entered in correctly, you will be prompted to ‘Update Now?’.
Select the Yes so key. This process may take up to 3 minutes to complete.
3Ready to provision.
The device is ready to provision
when you see the following
information displayed.
If the Setup screen is not displayed,
press .
Cancel
Auto Provision
Username:
OK
123
Cancel
Auto Provision
Password:
****
OK
123
No
Update Now?
Yes
Updating...
7Ready to use
Congratulations, your phone is now ready to use.
Provisioning successful.
a. The following screen indicates that the device has been
provisioned successfully.*
b. You will know provisioning has been successful if you can
see your username and menu options displayed on the screen
by pressing .
*Note: If you receive an error, the phone may still be provisioning – wait 2 minutes. If successful,
the phone will reboot, indicated by the Network and Phone LEDs on the base turning o.
If you enter your details incorrectly, you will be prompted to re-enter your details.
Provision Successful
6
Handset
Username
Menu Options
So Keys
Navigation Cluster
Red End Call Key
Keypad
Base
Phone LED
Network LED
Power LED
For more info, guides & FAQs visit
hps://one.nz/one-business-with-webex/help
or scan the QR code