°F/°C Temperature Display
This function complies with different user preferences for users in different regions.
1. Turn OFF the power switch, and connect the gun’s power cord to an electrical outlet. Press
and hold both the temperature increase and decrease buttons for 2 seconds, and the dis-
play will blink with ‘C’.
2. Press the temperature increase or decrease button to select the Fahrenheit or Celsius dis-
play mode.
3. Stop operating for approximately 4 seconds, the system will automatically save the setting
and exit the setting interface – setting complete.
Digital Temperature Calibration
Temperature discrepancies may occur due to the change in the environment's temperature,
or the replacement of the heating element and other components. You can correct the dis-
crepancies with this function. The temperature calibration function can improve work eff-
iciency and prolong the lifespan of the heating element.
1. Connect the gun’s power cord to an electrical outlet, and turn ON the power switch. The
hot air gun’s heating element will begin heating up as per normal. Once the temperature
has stabilized, measure the hot air temperature.
2. Press and hold both the temperature increase
and decrease buttons for approximately 2 se-
conds. The digit-dot at the bottom-right corner
of the screen will turn ON, and the displayed
temperature will blink as illustrated in the graph
below.
3. Press the temperature increase or decrease buttons to enter the measured temperature
value, then, press and hold both the temperature increase and decrease buttons for app-
roximately 2 seconds to confirm entry. The system will automatically save the setting and
exit the setting interface – setting complete.
Ⅳ. MAINTENANCE & PRECAUTIONS
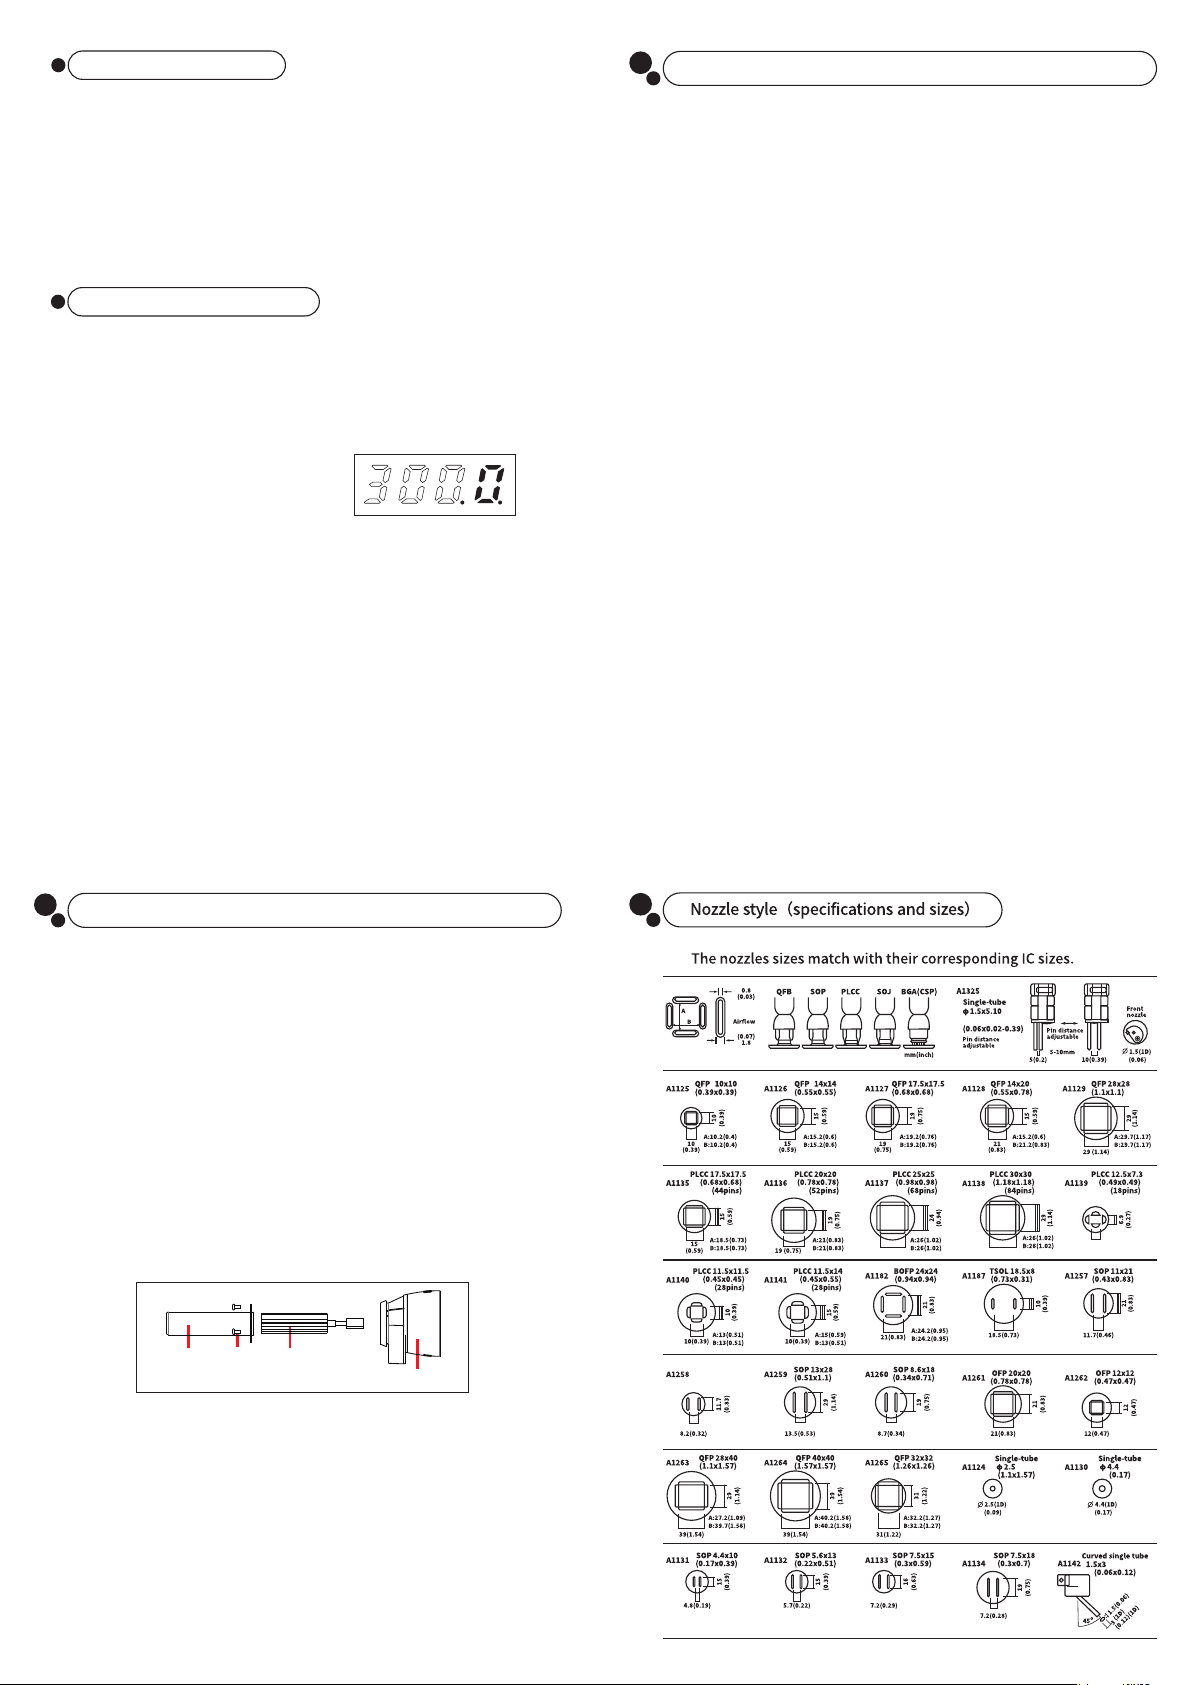
3. Select the appropriate nozzle based on your operation requirement (temperature may vary
when you use nozzles in different diameters). When using nozzles smaller than the stan-
dard machine nozzles, you MUST use the maximum air volume with a relatively lower tem-
perature setting. Complete this operation in the shortest possible duration to avoid dam-
aging the hot air gun.
4. Keep a minimum distance of 2mm between the subject and the hot air gun's air outlet.
5. DO NOT allow the hot air to come in direct contact with facial parts, and beware of the
danger of burn injuries. Upon the first use, the hot air gun may emit white fumes, and the
white fume will dissipate in a short while.
1. Keep the air outlet clear and free of blockages at all times.
2. The installation of the hot air gun nozzles MUST be carried out ONLY when the steel pipe
and nozzle have cooled. Install the nozzle correctly, DO NOT install the nozzle with brute
force, pull the edge of the nozzle with tweezers, or over-tighten the screws.
1. The display shows ONLY the digit-dot: This is an indication that the hot air gun is in the st-
andby mode, DISCONNECT the power cord when the gun is not in use for an extended period.
2. The display show ‘S-E’: This is an indication that the hot air gun is detecting a fault in the
sensor modules. To resolve this issue, you need to replace the heating element. (Heating
Element & Sensor Modules)
3. The displayed temperature is lower than 100°C/212°F, and the operation indicator is ON
but the hot air gun is not heating up: This is an indication that the heating element is faulty.
To resolve this issue, you need to replace the heating element.
4. To replace the heating element:
Ⅴ. TROUBLESHOOTING
1. Loosen the 3 screws securing the steel tube.
2. Remove the steel tube, then DISCONNECT the grounding wire from the steel tube.
3. Extract the heating element.
4. Replace it with a new heating element.
5. Wrap the heating element with the MICA paper.
6. Install the steel tube, then connect the grounding wire.
7. Tighten the screws.
Reference: Replacing the heating element
Steel Tube Screws Heating Element
Plastic Guard
NOTE:
The station's hot air gun uses high-strength stainless steel tubes. The station goes through 4
times or more testing, inspection, and calibration procedures before rolling off the assembly
line. The steel tube may exhibit light bronze color as a result of our quality control efforts. It
is normal to have a slightly bronzed steel tube when you use a brand-new station, rest assur-
ed for regular usage.


