manuals.online logo
Brands
  1. Home
  2. •
  3. Brands
  4. •
  5. YOODA
  6. •
  7. Engine
  8. •
  9. YOODA DVH55B User manual

YOODA DVH55B User manual

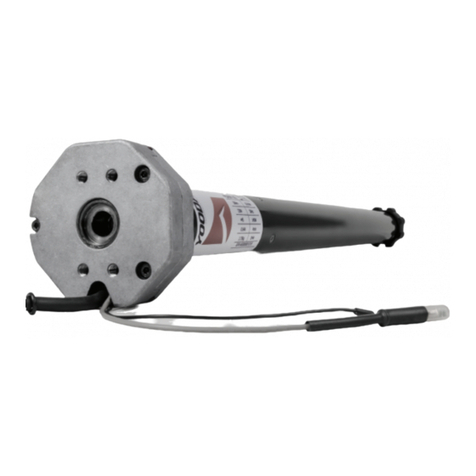
The DVH55B series motors are designed to automate the work
of facade blinds.
They have electronic limit switches that stop the motor when
the blind is open or closed. The motor has an emergency stop
button that protects the blind against damage.
Power supply:
230 V / 50 Hz
Speed:
26 RPM
Max. number of rotations:
∞
Max. time of work:
6 min.
Operating temperature:
from -10°C to 50°C
Protection degree:
IP54
Motor for facade blind DVH55B
Non-compliance with the specification might cause risk for life or health and can determine proper work of the blind.
We strongly recommend to comply with the specification.
Installation of the tubular motor should be performed by specialists with 1kV or higher SEP-certified electrician's licence (SEP - Association of Polish
Electrical Engineers) or equal license.
MOTORS FOR FACADE BLIND DVH55B
www.sukcesgroup.pl
Motor for facade blind DVH55B
2. Safety
1
Before installing or using motor please read the following instruction. The installer must comply with the standards and regula-
tions in force in the country where the appliance will be installed and provide information to users about the conditions and
maintenance of the device. Failure to follow these instructions can present risk to life and health, or invalid functioning of the
roller shutter. This also results in the loss of warranty rights.
1. Motors torque parameter should be adequate to the weight of the roller shutter curtain.
2. Motor cables must be secured so that they are not damaged by a working blind.
3. Electrical system control should be performed regularly to detect any signs of use or damage of the motor.
4. Electrical supply needs to be disconnected before conducting any maintenance, cleaning and/or repair work.
5. All contact of the motor with any liquids should be reduced to minimum.
6. Motor and its control system should be kept out of children reach.
power plug
emergency
stop button
power socket
3. Motor assembly
4. Connection
2
1. We mount adapters and rubber pads. 2. We place the motor in the gutter
and secure it against shifting.
interior space
rotations
direction
UP
network connection
1
PE
3
2
1
blue
neutral wire
black
1 direction
brown
2 direction
yellow-green
protective wire
2 3 PE
5. Limit positions setting
6. Deleting limit positions
Device is designed to operate in places shielded from unfavourable weather conditions. Motor should be installed in accord-
ance with all provisions of regional law and professional standards. All cables connecting power receiver with electric source
should be protected from overload and short-circuits effects with devices automatically disconnecting power. Device should
be powered with a separate source and protected only with a fast-blow fuse (never slow-blow fuse). Creating electrical system
using inadequate fuse may result in loosing rights under the provisions of warranty. When connecting device to power source
with cables with adequate cross-section should be used. Long-lasting output load capacity table should be the ground for
choosing adequate cables.
When the limit positions are not set, the motor stops after being started for 1 second.
The following procedure can be performed when the limit positions are not programmed.
After deleting the limit positions, they can be reprogrammed after 10 seconds.
The limit positions can be removed using the following procedure when the limit positions have been set by method 2.
METHOD 1:
METHOD 2:
We start the motor towards UP.
We stop him in the upper limit position.
Press UP and DOWN
buttons 5 times, at intervals
of 0.5 seconds.
METHOD 1:
We start the motor
towards UP.
We start the motor in the
DOWN direction.
When the motor stops in the lower limit position, press
the UP and DOWN buttons 5 times, in 0.5s intervals.
When the motor stops in the upper limit
position, press the UP and DOWN buttons 5
times, in 0.5s intervals.
We start the motor
towards UP.
We start the motor in the
DOWN direction.
Press the emergency stop button
on the motor to stop it in
the upper limit position.
When the shutter reaches the lower
end position, we start the motor towards
UP for min. 5s.
Press UP and DOWN
buttons 5 times, at intervals
of 0.5 seconds.
We start the motor in the DOWN direction.
We stop him in the lower limit position.
OK
The limit positions
have been set.
OK
The limit positions
have been set.
OK
The limit positions
have been set.
METHOD 2:
We start the motor in the
DOWN direction.
Press and hold the emergency stop
button on the motor for 5 seconds.
Motor will make short DOWN move,
confirming that the end positions
have been removed.
OK
The limit positions
have been set.
lower limit
position.
lower limit
position
lower limit
position
upper limit
position
5s.
upper limit
position
0,5s.
x5
x5
0,5s.
x5
x5
0,5s.
x5
x5
0,5s.
x5
x5
Other YOODA Engine manuals

YOODA 35 R/S Series User manual

YOODA

YOODA 35 R/S Series User manual

YOODA 35EV/S Series User manual

YOODA

YOODA 35EV/S Series User manual

YOODA 35R User manual

YOODA

YOODA 35R User manual

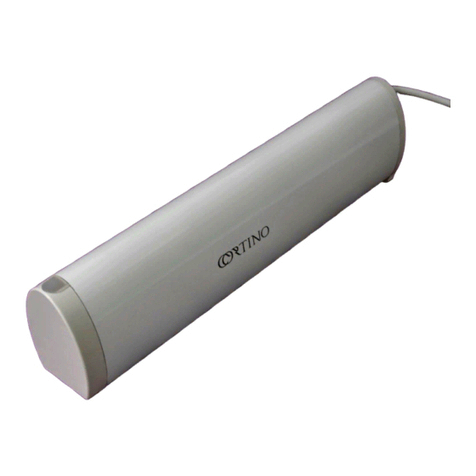
YOODA Ortino DT72TE Series User manual

YOODA

YOODA Ortino DT72TE Series User manual

YOODA 45 EZ/Y Series User manual

YOODA

YOODA 45 EZ/Y Series User manual

YOODA 25TE Series User manual

YOODA

YOODA 25TE Series User manual

YOODA Smart Home 45 EM/S Series User manual

YOODA

YOODA Smart Home 45 EM/S Series User manual

YOODA Cortino DT72EN User manual

YOODA

YOODA Cortino DT72EN User manual

YOODA 18LE Series User manual

YOODA

YOODA 18LE Series User manual

YOODA CORTINO DT72LE Series User manual

YOODA

YOODA CORTINO DT72LE Series User manual

YOODA 35EVY Series User manual

YOODA

YOODA 35EVY Series User manual

Popular Engine manuals by other brands

Gaspar XICOY X Series user manual

Gaspar

Gaspar XICOY X Series user manual

Harbor Freight Tools Predator 69784 owner's manual

Harbor Freight Tools

Harbor Freight Tools Predator 69784 owner's manual

MTU 12 V 4000 M73 x operating instructions

MTU

MTU 12 V 4000 M73 x operating instructions

Beninca AU.45L Operating instructions and spare parts catalogue

Beninca

Beninca AU.45L Operating instructions and spare parts catalogue

Kohler KS530 Service manual

Kohler

Kohler KS530 Service manual

Simu T5 Hz.02 manual

Simu

Simu T5 Hz.02 manual

Yanmar BY series Service manual

Yanmar

Yanmar BY series Service manual

B&R 8LS 3 Series user manual

B&R

B&R 8LS 3 Series user manual

3W 24i user manual

3W

3W 24i user manual

Robin America EH41 parts manual

Robin America

Robin America EH41 parts manual

Texas Instruments Stellaris user manual

Texas Instruments

Texas Instruments Stellaris user manual

Briggs & Stratton 400000 Professional Series operating & maintenance manual

Briggs & Stratton

Briggs & Stratton 400000 Professional Series operating & maintenance manual

Briggs & Stratton 120000 Operating & maintenance instructions

Briggs & Stratton

Briggs & Stratton 120000 Operating & maintenance instructions

Jamara MAGNUM A2208/8 Instruction

Jamara

Jamara MAGNUM A2208/8 Instruction

Siemens SIMOGEAR BA 2730 operating instructions

Siemens

Siemens SIMOGEAR BA 2730 operating instructions

Himax HC2212 Series quick start guide

Himax

Himax HC2212 Series quick start guide

Kohler Lombardini 3 LD 450 Use & maintenance

Kohler

Kohler Lombardini 3 LD 450 Use & maintenance

Volvo B16B Repair instructions

Volvo

Volvo B16B Repair instructions

manuals.online logo
manuals.online logoBrands
  • About & Mission
  • Contact us
  • Privacy Policy
  • Terms and Conditions

Copyright 2025 Manuals.Online. All Rights Reserved.