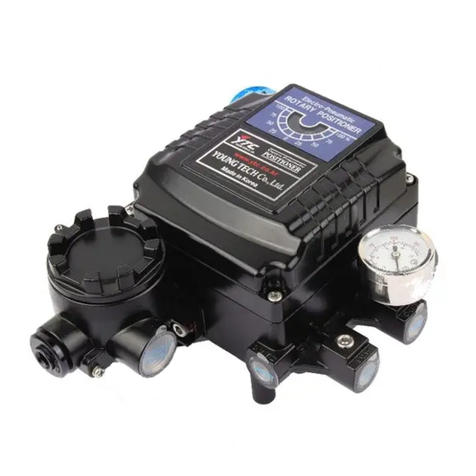
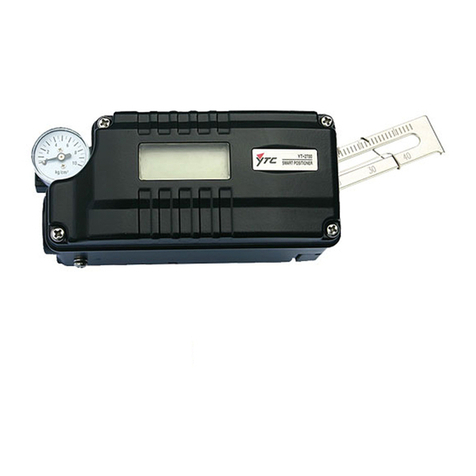
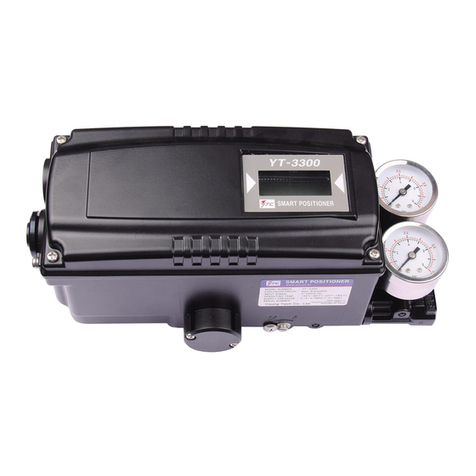
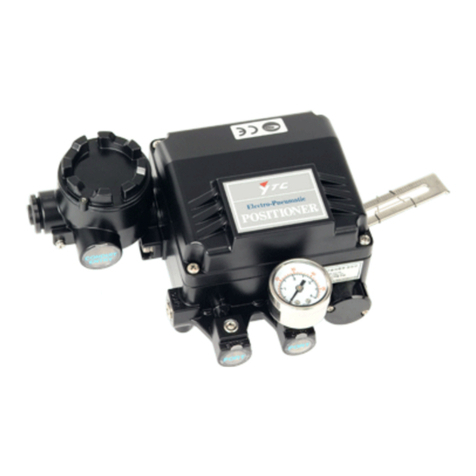
Ytc TMP-3000 User manual

SMART POSITIONER PRODUCT MANUAL
TMP-3000
VERSION 1.03

SMART POSITIONER
TMP-3000 PRODUCT MANUAL
Ver. 1.03 2
Contents
1. Introduction ......................................................................................................................................... 4
1.1 General Information for the users ..................................................................................................................4
1.2 Safety precautions and Manufacturer Warranty ......................................................................................4
2. Product Description............................................................................................................................ 5
2.1 General.........................................................................................................................................................................5
2.2 Main Features and Functions............................................................................................................................5
2.3 Label types and contents....................................................................................................................................7
2.4 Product Code............................................................................................................................................................8
2.5 Product Specification ............................................................................................................................................9
2.6 Certificate and Approvals................................................................................................................................. 10
2.7 Parts and Assembly (Exploded View) ......................................................................................................... 11
2.8 Exterior Parts and Description ....................................................................................................................... 12
2.9 Filter Cleaning........................................................................................................................................................ 12
2.10 Dimensions.............................................................................................................................................................. 13
3. Installation.......................................................................................................................................... 14
3.1 Safety......................................................................................................................................................................... 14
3.2 Tools required for Installation ........................................................................................................................ 14
3.3 TMP-3000 Installation........................................................................................................................................ 14
3.3.1 TMP-3000 Installation Example................................................................................................................ 14
3.3.2 Installing.............................................................................................................................................................. 15
3.3.3 Warning ............................................................................................................................................................... 17
4. Pneumatic Connections ................................................................................................................... 18
4.1 Safety......................................................................................................................................................................... 18
4.2 Supply Pressure Condition .............................................................................................................................. 18
4.3 Piping Condition................................................................................................................................................... 18
4.4 Piping Connection of the Positioner and Actuator.............................................................................. 19
4.4.1 Single Acting Actuator ................................................................................................................................. 19
4.4.2 Double Acting Actuator............................................................................................................................... 19
5. Power Connection............................................................................................................................. 20
5.1 Warning .................................................................................................................................................................... 20
5.2 Terminal Connections......................................................................................................................................... 20
6. Auto Calibration and How to Operate ......................................................................................... 21
6.1 Warning .................................................................................................................................................................... 21
6.2 Button Description .............................................................................................................................................. 21
6.3 Run Mode (RUN).................................................................................................................................................. 21
6.4 Auto Calibration Mode (AUTO CAL) ........................................................................................................... 22
6.4.1 Auto 1 Calibration Mode (AUTO1) ......................................................................................................... 22

SMART POSITIONER
TMP-3000 PRODUCT MANUAL
Ver. 1.03 3
6.4.2 Auto 2 Calibration Mode (AUTO2) ......................................................................................................... 22
6.5 Manual Mode (MANUAL)................................................................................................................................. 23
6.6 Parameter Mode (PARAM)............................................................................................................................... 23
6.6.1 Dead-Zone (dEAdZONE).............................................................................................................................. 24
6.6.2 PT1, PT2 Values................................................................................................................................................ 24
6.6.3 ESR1, ESR2 Values........................................................................................................................................... 24
6.6.4 PR1, PR2 Values ............................................................................................................................................... 25
6.6.5 PERIOD Time ( PERIOD ) ............................................................................................................................. 25
6.7 Hand Calibration Mode (CALIb).................................................................................................................... 25
6.7.1 Input Signal Selection (SEL IN)................................................................................................................. 26
6.7.2 Zero-Point (PV_ZERO) and End-Point (PV_END) .............................................................................. 26
6.7.3 Zero-Point (TR_ZERO) and End-Point (TR_END) ............................................................................... 26
6.7.4 Normal/Reverse Feedback Signal (TR NORM / REVS) .................................................................. 27
6.8 Valve Mode (VALVE)............................................................................................................................................ 27
6.8.1 Acting Adjustment (ACT RA / dA) .......................................................................................................... 28
6.8.2 Characteristic Adjustment (CHAR) .......................................................................................................... 28
6.8.3 User defining flow Characteristics (USER SET).................................................................................. 28
6.8.4 Tight Shut Open (TSHUT OP).................................................................................................................... 30
6.8.5 Tight Shut Close (TSHUT CL)..................................................................................................................... 30
6.8.6 Custom Zero Setting Mode (CST ZERO).............................................................................................. 30
6.8.7 Custom End Setting Mode (CST ENd) .................................................................................................. 31
6.8.8 Single and Double Acting Adjustment (SINGLE / dOUBLE) ....................................................... 31
6.9 INFO Mode (INFO).............................................................................................................................................. 32
7. Error and Warning Code.................................................................................................................. 33
7.1 Error Code (Error code)..................................................................................................................................... 33
8. LCD Operating Order ....................................................................................................................... 34

SMART POSITIONER
TMP-3000 PRODUCT MANUAL
Ver. 1.03 4
1. Introduction
1.1 General Information for the users
Thank you very much for purchasing our products. Our products are manufactured,
inspected and delivered in uniform quality with strict regulations at the factory. To use
this product correctly and efficiently, please read this manual carefully before installing
and using the product.
➢The manual should be provided to the end-user.
➢The contents of this manual are subject to change without prior notice. Product
specifications, designs and parts are not immediately reflected in the manual when
they are changed, but are reflected in the next revision.
➢The meaning of the valve original point (Zero) in this manual is the position of the
valve when the air pressure is completely out of positioner OUT1. That is, in the case
of the linear direct acting type actuator, the stem of the actuator is raised when the
air pressure is completely released from the OUT1 of the positioner. In the case of
the linear dynamic type actuator, when the air pressure is completely released from
the OUT1 of the positioner, the stem of the actuator comes down and this is called
original point (Zero).
➢This manual cannot be reproduced or reused for any purpose without our approval.
➢If any problem arises that is not described in this manual, please contact us
immediately.
➢This product is an accessory device of control valve. Be sure to read the instruction
manual of the corresponding control valve before starting operation.
1.2 Safety precautions and Manufacturer Warranty
➢When handling this product, for the protection and safety of the operator, the
product and the system in which the product is installed, should follow the safety
instructions mentioned in this manual. If you do not follow the safety instructions in
this manual correctly, we cannot guarantee the safety of the operator.
➢Any changes or repairs to the product are allowed only when described in this
manual. If any changes or modifications are made by the customer, we will not
compensate for any personal or material damage that may occur. If you need to
change or modify the product, please contact us.
➢The warranty period of the product is 18 months based on the date of shipment
unless stated otherwise.
➢If any misuse, accident, alteration, modification, manipulation, negligence, improper
installation, improper maintenance, repair, maintenance or service, or model or serial
number change, manipulation, Damage, disasters, power surges, or serious damage

SMART POSITIONER
TMP-3000 PRODUCT MANUAL
Ver. 1.03 5
are not covered by the warranty.
➢Please contact us for further information on product warranty.
2. Product Description
2.1 General
The TMP-3000 Smart Positioner not only precisely controls the valve opening according
to the current signal of 4 ~ 20mA DC input from the controller or the central control
room, but also performs the auto calibration by the computation action of the built-in
high performance microprocessor and PD control. It is a highly reliable positioner that
performs various powerful functions such as optimum control.
2.2 Main Features and Functions
➢In case of Fail Freeze optional product, it maintains the current valve position without
any additional equipment such as lockup valve or solenoid valve in case of input
signal and pneumatic failure.
➢Back light function LCD is attached so you can check the status of the positioner
directly in the field.
➢Four adjustment buttons and unique functions of the buttons are applied in the
same way throughout the firmware, so it is very easy to use.
➢The initialization time is very short, which minimizes the change of valve stroke in
case of temporary power failure and improves system stability.
➢Very strong against vibration and can be used in extremely high vibration areas.
➢The change in supply pressure during use has almost no effect on the adjustability
of the positioner.
➢Auto calibration is very simple, so first time users can handle the product easily.
➢Compact size makes it easy to attach to small actuators.
➢Very low air consumption which allows large plants to reduce their operating costs.
➢The valve system can be stabilized by outputting an analog feedback signal.
➢Variable valve flow control characteristics such as Linear, Quick Open, Equal % can be
changed.
➢It is possible to implement special flow control characteristics by specifying 16 points
at user's discretion.
➢You can minimize valve leakage by setting the sealing function of Tight Shut-Off /
On.
➢Half-interval control (Split Range) is available such as 4 ~ 12mA and 12 ~ 20Ma.
➢You can change Zero and Span freely through Hand Calibration function.
➢By manual operation, valve can be operated arbitrarily irrespective of input signal, so

SMART POSITIONER
TMP-3000 PRODUCT MANUAL
Ver. 1.03 6
it is easy to judge whether or not there is an abnormality of valve.
➢Ingress protection of IP67.
➢The product's enclosure is made of a material with excellent chemical resistance and
moisture resistance, so it can be used stably for a long time even in a corrosive
atmosphere.
➢The internal structure is very simple and modular, so there is little possibility of
failure and maintenance is simple.
➢It is equipped with a foreign material prevention filter which is easy to maintain.
➢Flow rate can be selected according to actuator size.
➢Solenoid valve with superior durability of over 200 million cycles.
➢Non-contact potentiometer has permanent wear resistance.

SMART POSITIONER
TMP-3000 PRODUCT MANUAL
Ver. 1.03 7
2.3 Label types and contents
Fig. L-1 : TMP-3000 Label
•MODEL : The basic model name of the product is indicated.
•EXPLOSION PROOF : Indicates certified explosion proof grade.
•INGRESS PROTECTION : Indicates IP protection level.
•POWER SUPPLY : Indicates the supply power applied to the product. 24VDC ± 10%
•INPUT SIGNAL : The range of the input current signal is indicated.
•OPERATING TEMP. : The ambient temperature range in which the positioner can operate
is indicated.
•SUPPLY PRESSURE : Indicates the range of pneumatic pressure supplied to the positioner.
•SERIAL NUMBER : The unique serial number of the product.
•YEAR : Indicates the year of manufacture of the product.
※Precautions
Be careful not to apply volatile solvent (hardener of instant adhesive, acetone, WD-40,
etc.) to the sticker nameplate. Printed contents may be erased.

SMART POSITIONER
TMP-3000 PRODUCT MANUAL
Ver. 1.03 8
2.4 Product Code
TMP-3000 1 2 3 4 5 6
1 Pneumatic Output
S :
D :
Single Acting (Single)
Double Acting (Double)
2 Explosion Protection
N :
Non-Explosion
3 Conduit –
Pneumatic Connection
G :
M16*1.5P - G1/8
4 Flow Capacity
1 :
2 :
20LPM
50LPM
5 Options
0 :
1 :
None
Internal Position Transmitter
6 Fail Option
F :
S :
Fail Freeze
Fail Safe

SMART POSITIONER
TMP-3000 PRODUCT MANUAL
Ver. 1.03 9
2.5 Product Specification
Model
TMP-3000
Acting Type
Single / double
Power supply
24V DC ±10%
Input Signal
0~20mA / 4~20mA / 0~5V / 0~10V
Power Consumption
<4W
Output Signal
4~20mA (DC 9~28V)
Fail Option : Power / Air
Current Position (Freeze), Move to safe position (Safe)
Supply Pressure
0.05~0.7MPa (0.5~7bar)1)
Flow Capacity : 0.6MPa Supplied
20LPM / 50LPM
Air consumption
0 LPM
Filtering Size, particle size
5 Micron
Air Connection
G1/8 (Ø6mm Tube)
Operating Temp.
-10~60°C (14~140°F)
Conduit
2-M16×1.5P
Stroke
5~40mm
Ingress Protection
IP67
Vibration
100Hz @ No resonance up to 6G
Body Material
PPS
Cover Material
PC (Tansparent)
Weight
820 g (1.8 lb)
The above specifications are based on an ambient temperature of 20 ° C, an absolute pressure of 760 mmHg, and a
relative humidity of 65%.
For inquiries about information which is not included in the standard specifications, please contact us.
1) Supply pressure should be more than 0.05 ~ 1MPa than minimum pressure for operation of valve actuator.

SMART POSITIONER
TMP-3000 PRODUCT MANUAL
Ver. 1.03 10
2.6 Certificate and Approvals
➢Electromagnetic Compatibility (EMC)
- EMC directive 2014/30/EC from April 2016
- EC Directive for CE conformity marking

SMART POSITIONER
TMP-3000 PRODUCT MANUAL
Ver. 1.03 11
2.7 Parts and Assembly (Exploded View)
Fig. 2-1: TMP-3000 Exploded View
1. Base Cover 6. Solenoid Valve
2. PCB Cover 7. Manifold
3. Main PCB 8. Filter
4. Potentiometer 9. Base Body
5. Feedback Shaft
1
8
4
3
7
4
3
2
5
4
3
4
3
3
6
4
3
9
4
3

SMART POSITIONER
TMP-3000 PRODUCT MANUAL
Ver. 1.03 12
2.8 Exterior Parts and Description
Fig. 2-2: TMP-3000 Exterior Parts and Description (Base Cover Removed)
2.9 Filter Cleaning
TMP-3000 has a built-in filter that filters foreign substances from the outside. During
maintenance, please observe the followings to clean the filter.
➢All input signals to valves, actuators, and other peripherals, pneumatics, etc. must be
completely stopped.
➢Disconnect the control valve from the system with a bypass valve or other similar
device to prevent shutdown of the entire system.
➢Make sure there is no air pressure in the actuator.
➢Filter size is 5 micron.
➢Please assemble carefully after disassembly and reassembly..
➢Tool required for disassembly is 6mm wrench.
Fig. 2-3: TMP-3000 Filter Cleaning
Filter

SMART POSITIONER
TMP-3000 PRODUCT MANUAL
Ver. 1.03 13
2.10 Dimensions
Fig. 2-4: TMP-3000 Dimensions

SMART POSITIONER
TMP-3000 PRODUCT MANUAL
Ver. 1.03 14
3. Installation
3.1 Safety
When installing the positioner, be sure to read and follow the safety instructions below.
➢Ensure that all input signals to the valves, actuators and other peripherals,
pneumatics, etc. are completely shut off and there is no pneumatic pressure left in
the actuator.
➢Disconnect the control valve from the system with a bypass valve or other similar
device to prevent shutdown of the entire system.
3.2 Tools required for Installation
➢Hexagonal wrench set
➢(+) (-) Screw driver
➢Spanner
3.3 TMP-3000 Installation
The TMP-3000 is used for linear motion valves. It is used for the angle valve in which the
actuator stem is moved up and down linearly by using the spring return type diaphragm
actuator or by using the piston actuator.
3.3.1 TMP-3000 Installation Example
Fig. 3-1: TMP-3000 Installation Example

SMART POSITIONER
TMP-3000 PRODUCT MANUAL
Ver. 1.03 15
Make sure you have the following parts before proceeding with the installation.
➢Positioner
➢Feedback Shaft
3.3.2 Installing
1. Check actuator stroke (max 40mm) and screw size (M26X1.5P) on actuator.
Please check if it is possible to assemble with the feedback shaft provided.
The screw at the bottom of the feedback shaft is M6 with 8mm depth.
Fig. 3-2: TMP-3000 Feedback Shaft

SMART POSITIONER
TMP-3000 PRODUCT MANUAL
Ver. 1.03 16
2. Assemble the Actuator adapter on top of the actuator.
Fig. 3-3: TMP-3000 Feedback Shaft Assembly
3. Using a flat head screwdriver, tighten the M6x1.0P male thread of the actuator to the
female thread of the coupling at the top end of the feedback shaft.
Fig. 3-4: TMP-3000 Fixing the Stem

SMART POSITIONER
TMP-3000 PRODUCT MANUAL
Ver. 1.03 17
4. Insert the TMP-3000 main body into the assembled actuator adapter, rotate it in the
desired direction and tighten both wrench bolts. (The head of the wrench bolt is
3mm.)
Fig. 3-5: TMP-3000 Fixing the Body
3.3.3 Warning
After installation, temporarily connect the pneumatic regulator directly to the actuator
and operate the valve from 0 to 100% stroke. At 0% and 100%, check if feedback shaft
works smoothly.

SMART POSITIONER
TMP-3000 PRODUCT MANUAL
Ver. 1.03 18
4. Pneumatic Connections
4.1 Safety
➢Be careful to select pneumatic compressors and pneumatic systems so that moisture,
oil, foreign substances, etc. are not mixed in the pneumatic pressure used in the
positioner.
➢Prevent the entry of moisture, oil and foreign substances by attaching a separate
filter to the positioner's supply port or applying a pneumatic regulator (such as YT-
200) with a built-in filter.
➢We have not tested the operation of the positioner using gases other than clean
normal air. If you have additional questions, please contact us.
4.2 Supply Pressure Condition
➢Use dry air with a dew point of at least 10 ° C below the ambient temperature dew
point.
➢Filter out foreign substances with 5 micron filter.
➢Do not include oil or lubricant in the air.
➢Must comply with ISO 8573-1 or ISA 7.0.01.
➢This positioner is intended for use in the pneumatic range of 0.05 to 0.7 MPa (0.05
to 7 bar). Do not use it outside this range.
➢Set the pressure output from the regulator to 10% higher than the operating
pressure of the actuator or the spring range pressure of the actuator.
4.3 Piping Condition
➢Remove any foreign substances inside the piping before installing for piping.
➢The piping must be free of any pressed or damaged parts.
➢The piping of the positioner and actuator connection at the time of piping should be
free from leakage.
Hunting occurs when there is a leakage, which also shortens product life.
➢Use the one-touch fitting provided by our company to prevent leakage of piping.

SMART POSITIONER
TMP-3000 PRODUCT MANUAL
Ver. 1.03 19
4.4 Piping Connection of the Positioner and Actuator
4.4.1 Single Acting Actuator
Our positioner is set to use only OUT1 port for single acting type. Therefore, when using
a single acting spring return type actuator, connect the OUT1 port to the actuator's
pneumatic port.
Fig. 4-1: Single Acting Actuator Pneumatic Piping Example
4.4.2 Double Acting Actuator
For double acting actuators, both OUT1 and OUT2 ports are used. If the current input
signal is increased, the air pressure is output from the OUT1 port. Refer to below and
install the piping.
Fig. 4-2: Double Acting Actuator Pneumatic Piping Example

SMART POSITIONER
TMP-3000 PRODUCT MANUAL
Ver. 1.03 20
5. Power Connection
5.1 Warning
➢Make sure power is off before connecting to the terminal.
➢The operating power supply uses DC 24V and the input signal uses one of 4 ~
20mA, 0 ~ 20mA, 0 ~ 5V, 0 ~ 10V.
➢If PTM option is available, supply 9 ~ 28V DC power separately.
The maximum voltage must not exceed 30V.
➢Do not install cables near noise-generating equipment such as high-capacity
transformers or motors.
5.2 Terminal Connections
Fig. 5-1: TMP-3000’s Terminal
Table of contents
Other Ytc Valve Positioner manuals
Popular Valve Positioner manuals by other brands

Siko
Siko AP09 User information

Metso
Metso NP700/B Installation, maintenance and operation instructions

NUOVA ELETTRONICA
NUOVA ELETTRONICA PRG 920 Manual For Use and Programming

halstrup-walcher
halstrup-walcher PSD4 Series instruction manual

STI
STI SA-1 instruction manual

Azbil
Azbil 700 series user manual

GEM
GEM 1435 ePos Assembly instructions

Flowserve
Flowserve ARGUS MW 8 Installation and operating instructions

EL-O-MATIC
EL-O-MATIC POSIFLEX F20 Installation and operation manual

StoneAge
StoneAge Sentinel LWPS-100-X user manual

Lincoln Electric
Lincoln Electric POSIMATIC PS08 Safety instruction for use and maintenance

GEM
GEM 543 eSyStep operating instructions