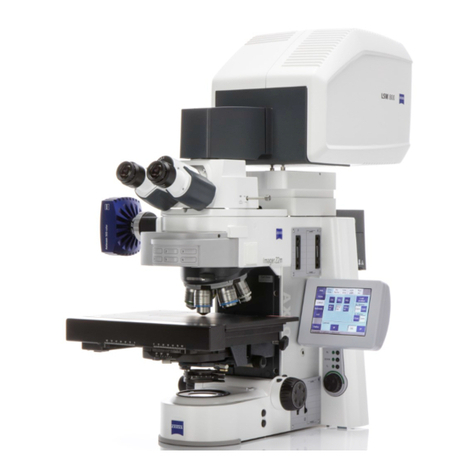
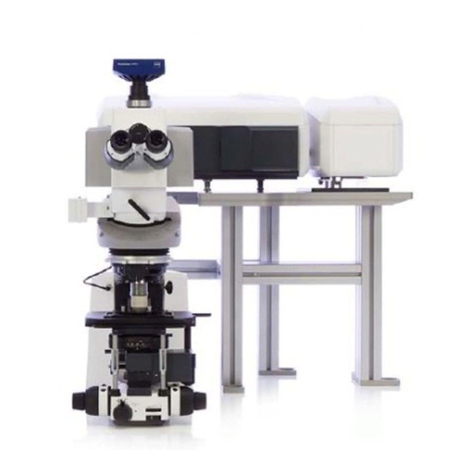
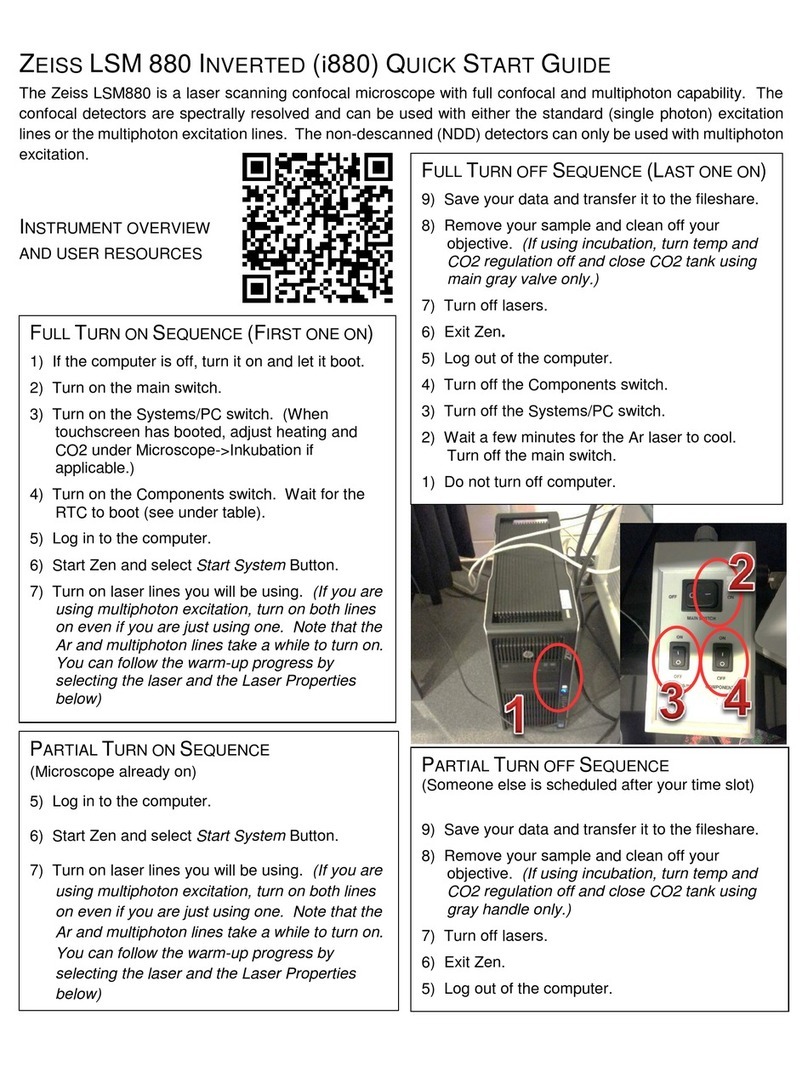
Zeiss LSM 880 with AiryScan FAST Setup guide

Training Guide for Carl Zeiss LSM 880 with AiryScan FAST
ZEN 2.3
Optical Imaging & Vital Microscopy Core
Baylor College of Medicine (2018)

!
2 – LSM 880 Training Guide
Power ON Routine
1
Turn ON ‘Main Switch’ from the
remote control paddle.
2
Turn ON both ‘Systems/PC’ and
‘Components’ switches.
By default, the ‘Lasers’ key located
on the side of the remote paddle
should always be in the ‘ON’ state,
but please verify.
3
Turn ON HXP-120V epi-fluorescence
light source.
This light source is required for
visualizing fluorescence via the
microscope eyepieces.

!
3 – LSM 880 Training Guide
Power ON Routine
4
Turn ON HP Z840 PC.
Wait for PC to boot into Windows
OS and login to ‘oivm’ user account.
5
Double click ZEN Black icon to start
software.
Note: Be sure to use Zen Black
instead of ZEN Blue. Icon above is
for Black version.
6
When software has started, you will
be presented with a login screen.
Select ‘Start System’ to scan new
images. If processing existing
images, select ‘Image Processing’.
Wait for initialization of system to
complete.
!

!
4 – LSM 880 Training Guide
Getting Started with ZEN 2.3
ZEN 2.3 is separated into three distinct areas.
Image Acquisition Tools
Represented by a group of blue bars each containing a series of tools for sample observation, image acquisition, image
processing and system maintenance.
Image Display
This area is where each newly captured image will appear. Settings here allow the user to control how the image is viewed
on screen.
Catalog of Open Images
This list displays each image that is currently open within the ZEN software. This area contains tools for saving data sets.

!
5 – LSM 880 Training Guide
Getting Started with ZEN 2.3

!
6 – LSM 880 Training Guide
Powering ON Lasers
Before we begin setting up the software for imaging, we first need to verify that our lasers are powered on. There is a
considerable wait time for the Argon laser to warm up (5 minutes) so please complete these steps first if the system is being
powered on from an off state.
1. Select ‘Acquisition’ from the main toolbar.
2. Expand the blue toolbar labeled ‘Laser’ and select ‘Argon’ from the laser list.
3. Toggle ‘Power’ button from Off to On.
Note: This laser requires a 5-minute warm up time. Once you select
‘On’ the system will count down from 300 seconds. You will not be able
to use the laser until this warmup is complete.
4. Turn ON remaining lasers (as required) from the software dialog
‘Laser’.
Note: The 405 laser is direct modulated and automatically powered on
when the laser is selected in the light path dialog.
The 561, 594 and 633 lasers can be powered on by selecting each laser
and switching from Off to On state.

!
7 – LSM 880 Training Guide
Mounting Sample on the Microscope
While the lasers are warming up, we can mount our specimen on the stage above the microscope objective.
1. Place sample on microscope stage above objective (roughly in the
center of the field of view).
2. Select the ‘Locate’ tab in the Image Acquisition Tools.
3. Use the Shortcut buttons to select filter set for visualization in the
eyepieces.
Green
– generic green filter set
Red
– generic red filter set
Blue
– generic blue filter set
TL/DIC
– transmitted light
All Closed
– turn off all light sources.
Note: These shortcut buttons will automatically select the filter set and
open the light source shutter.
Alternatively, you can turn on the epi-fluorescence light path manually
using the ‘Microscope Control’ tab located below the configuration
shortcuts. Here you can turn on/off the epi-fluorescence light source (A),
change your filter set (B) and control transmitted light (C) if applicable.

!
8 – LSM 880 Training Guide
Mounting Sample on the Microscope
4. Via the microscope eyepieces, visualize your sample and adjust the focus (Z) and stage position (X,Y) accordingly.
5. Once a suitable location is found, click ‘ALL CLOSED’ from shortcuts (3).
6. Select ‘Acquisition’ from main toolbar to begin imaging.

!
9 – LSM 880 Training Guide
Light Path Configuration
The confocal portion of the LSM 880 is equipped with a 34-channel spectral detector plus transmitted light and has 5 lasers with
wavelengths 405nm, 458nm, 488nm, 514nm, 561nm, 594nm, and 633nm. The Light Path configuration allows you to program
precisely how your image acquisition will be executed.
The first step is to decide how you wish to collect each fluorophore. You have 3 choices:
1.
Simultaneous
– collect up to 4 fluorophores simultaneously.
Note: While this mode is the fastest approach – many fluorophore combinations will exhibit enough spectral overlap to be
able to detect unwanted signal from neighboring fluorophores using this method. This phenomenon is known as spectral
overlap or ‘bleed’.
2.
Sequential
– collect fluorophores sequentially.
Note: This mode tends to be the slowest mode – but provides accurate spectral separation of multiple fluorophores.
3.
Spectral
– lambda mode allows you to collect fluorophores simultaneously and unmix based on reference spectra.
Note: This mode is both the fastest AND the most accurate mode of spectral separation, however it requires single label
controls to differentiate between the unique spectral trace(s) from your fluorophore(s).

!
10 – LSM 880 Training Guide
Light Path Configuration
In the following example, we will design a sequential acquisition of two fluorophores (Alexa 568 and Alexa 488).
Zeiss uses ‘Tracks’ to group a series of settings specific to a single fluorophore. Using sequential imaging, you should have one
track for each fluorophore. These tracks can be switched in one of two ways:
1.
Line
– track settings are switched after scanning each X line in the image.
Note: Line track switches minimize the time lag between colors, however no hardware settings are permitted to change
between tracks apart from laser line and detector choice. All other settings must remain the same. This limits you to a
maximum of 4 fluorescence channels plus one transmission image with this mode.
2.
Frame
– track settings are switched after scanning the entire XY frame for each image.
Note: Frame switch introduces the most time lag between colors, but the user can change any hardware setting between
tracks, even using the same detector with different settings. You must use Frame for more than 4 color imaging
sequentially. Also note that Zeiss introduces a 750ms delay between each track change to allow for mechanical changes.
You must add this to the acquisition time between each color.
Decide on which track mode (line or frame) you will use prior to setting up your light path.

!
11 – LSM 880 Training Guide
Light Path Configuration
In the following example, we will design a 2 fluorophore (Alexa 568 and Alexa 488) sequential acquisition using the line-wise track
switch.
1. From the Acquisition toolbar, expand the blue dialog labeled
‘Imaging Setup’ and set ‘Switch track every’ to ‘Line’.
2. Begin with the longest wavelength fluorophore (Alexa 568 in
this case) on Track 1.
Note: By default, ZEN will start with one track (Track 1). To add
additional tracks, click the + button next to the track list.
3. Click ‘Visible Light’ to open the laser dialog.
4. Select the laser line you wish to use for this track (561 for Alexa
568 in this case).
5. Set laser power slider – in this example, we are using 2% (this is
a starting value and can be changed later).
6. Set MBS (Main Beam Splitter) to a filter that matches the
combination of laser lines you will need for ALL TRACKS.

!
12 – LSM 880 Training Guide
Light Path Configuration
7. Choose detector for imaging.
Note: PMT selection will be based on where your fluorophore(s) fall in the linear
range of the emission spectrum. Meaning that Ch1 typically corresponds to the
lowest wavelength while Ch2 corresponds to the longest wavelength fluorophore.
In our example, we will be using a sequential scan with Alexa 568 and Alexa 488, so
Ch1(or ChS1) will be used for the Alexa 488 signal and Ch2 will collect the Alexa
568.
8. Define upper and lower emission band thresholds based on the spectrum of your
fluorophore.
9. The system is equipped with a Transmitted Light Detector for imaging DIC or
brightfield images. Check to enable.
10. Click + button to add another track. Repeat steps 3-8 for the next fluorophore
(Alexa 488 in this case).

!
13 – LSM 880 Training Guide
Acquisition Setup
Once our light path setup has been completed we can expand the scanning tools to begin collecting an image. From
‘Acquisition Parameter’ there are 2 blue tabs used for imaging, ‘Acquisition Mode’ and ‘Channels’.
Acquisition Mode
This dialog controls static image settings such as:
Objective
– displays currently selected objective as programmed into
microscope.
Frame Size
– image size in pixels. Default is 512x512, however this can be
optimized based on objective and zoom settings. Ideal sampling
frequency can be quickly selected with the ‘Optimal’ button.
Scan Speed
– overall speed of the scan during acquisition. Reports pixel
dwell time and total scan time. Increasing dwell time (slowing down the
scan) will improve signal-to-noise ratio.
Bit Depth
– the number of bits used to indicate the range of signal level in
the sample. The default A/D conversion is 16 bit. Change this from the
default 8 Bit to 16 Bit always!
Averaging
– selecting ‘Number’ >1 will scan each X line the ‘number’ of
times and average the result. Use to reduce image noise.
Scan Area
– allows scan area adjustments such as X,Y displacement and
rotation of scan in 360 degrees. ‘Zoom’ can be used to increase
magnification without signal loss or objective change.

!
14 – LSM 880 Training Guide
Acquisition Setup
The ‘Channels’ menu contains the three components used to dynamically control image quality. They are (1) Laser Power, (2)
Detector Sensitivity, and (3) Pinhole or Confocal Aperture Diameter. For further discussion on these parameters and how they
affect image quality please see ‘Understanding Image Quality’ starting on page 19.
Channels
Functions available in the Channels dialog:
Lasers
– controls laser power (%) and wavelength selection.
Pinhole
– confocal aperture diameter that controls optical section
thickness. Reports section thickness and pinhole diameter.
Gain (Master)
– controls the analog amplification voltage for the PMT (in
Volts). The higher this value the more sensitive the detector becomes to
the signal. Noise is also amplified by gain, albeit at a slower rate.
Digital Offset
– controls the dark current offset for the imaging system.
When scanning an image with all lasers off this value set to ‘0’ should
report background grey values close to/at 0 grey levels.
Digital Gain
– is a digital amplification of signal that is applied pre A/D
conversion. This amplifies signal at the same rate as it amplifies noise.
Leave this value set to 1 – there are other locations to control image
brightness that are more flexible and less destructive.

!
15 – LSM 880 Training Guide
Scanning an Image
Once the laser(s) have been turned on and our light path has been designed, we can scan an image and begin adjusting our
signal level.
1. From the ‘Channels’ dialog, set the ‘Pinhole’ to 1 AU for the Track with the
longest wavelength (Track 1 in this example).
Note: Setting the pinhole to 1 AU is a compromise between axial resolution
and signal level. When you start with an open pinhole, you are at a point
where your signal is the highest but your axial resolution is at its lowest. As
you reduce the aperture diameter you are increasing your Z resolution but
reducing your signal level. This is a reasonable trade off until you reach 1
AU. Reducing the pinhole lower than 1 AU will still linearly increase your Z
resolution but now signal will start to drop exponentially.
2. Click ‘Set Exposure’ to have the system scan the image and automatically
adjust the gain and offset for both tracks.
Note: The automatic exposure setting works reasonably well with very
bright signals. It is not intended as a final optimization, just as a baseline
for fine tuning.

!
16 – LSM 880 Training Guide
Fine Tuning Image Quality
In order to find the optimal settings for a particular condition, you must first be able to identify the thresholds of the signal level in
the image.
From the ‘Dimensions’ tab of the Image Display toolbar located below the
image being scanned, you will find a checkbox labeled ‘Range Indicator’.
To activate the Range Indicator, place a check in the box.
The Range Indicator LUT assigns red pixels to areas in the image that are
overexposed and blue pixels to background areas that are underexposed.
Note: The ‘Range Indicator’ checkbox in the Dimensions tab is a temporary
setting, meaning it will only activate when you check the box during the live
scan and will automatically turn itself off at the completion of the live scan.
If you want to have the Range Indicator displayed always you can turn it on from
‘Display’ options located at the bottom of the Channels dialog.

!
17 – LSM 880 Training Guide
Fine Tuning Image Quality
To fine tune the image intensity to ideal levels for final image acquisition:
1. Select one Track at a time – begin by highlighting the first Track in your list.
Note: Make sure to uncheck all other tracks during this process so you are only
scanning one color at a time. This will save time and ultimately prevent any
unnecessary photobleaching of other channels.
2. Click ‘Live’ to start scanning.
3. Turn on ‘Range Indicator’ LUT as shown on the previous page.
4. Deselect laser checkbox for the active track.
5. Adjust Digital Offset until background areas are just above the display of any
blue pixels.
6. While scanning, reselect the laser line (4) and increase Gain (Master) until the
brightest areas in the image are just below the display of any red pixels.
7. Stop Scan.
8. Repeat this process for each track independently.
9. Click ‘Snap’ to collect final image.

!
18 – LSM 880 Training Guide
Fine Tuning Image Quality
Ideally, you do not want any area in the final image to contain red or blue pixels with this LUT. For maximum contrast, have the
brightest areas fall just below overexposure (red) and the background areas fall just above underexposure limit (blue). In a
properly balanced image you should see no red or blue pixels with this LUT.
Example of Overexposed (red) and
Underexposed (
blue) Areas in Image
Solution?
Reduce Gain (Master) and increase Digital
Offset
Example of Properly Exposed Image

!
19 – LSM 880 Training Guide
Understanding Image Quality
The result of the final scan above may or may not produce acceptable image quality. Therefore, it is important to have an
understanding of the three key factors that play a role in image quality.
Pinhole (Confocal Aperture)
The confocal aperture controls
both axial resolution and signal
level. Opening the aperture
reduces axial (Z) resolution but
increases signal level reported to
the detector. Closing this aperture
will reduce the signal level but
increase axial resolution.
Laser Intensity
The intensity of the laser
illumination source has obvious
effects on the signal level.
Increasing laser power will increase
signal levels but may also introduce
nonlinear effects such as
phototoxicity and photobleaching.
Detector Sensitivity
The detector sensitivity is regulated
by the high voltage gain applied to
the detector. Increasing the gain
directly increases detected signal
but also amplifies the inherent noise
in the system.

!
20 – LSM 880 Training Guide
Understanding Image Quality
Pinhole (Confocal Aperture)
Ideally, the confocal aperture should be set to the size of the structure(s)
you are trying to resolve. However, for example, some sub-cellular
structures of interest may be beyond Abbe’s diffraction limit and
therefore beyond the microscope’s capability to resolve. The confocal
aperture has some practical limits that can be used to guide the usage
of this setting.
Start by closing down the confocal aperture to 1 AU. You can certainly
close the confocal aperture below this value and continue to improve
resolution, just understand that below 1 AU you will lose signal level at
an exponential rate.
Conversely, you can increase the confocal aperture diameter to improve
the detected signal level if you can sacrifice axial resolution.
In some cases, the signal level may be so low that increasing the aperture diameter is the only way to lower the gain enough to
get a usable image.
In other cases, if the gain is too high (causing excess noise) and the laser power cannot be increased due to photo effects then
increasing the confocal aperture is the only option to improve image quality.
Table of contents
Other Zeiss Microscope manuals

Zeiss
Zeiss LSM 5 MP User manual

Zeiss
Zeiss Stemi DV4 User manual

Zeiss
Zeiss Standard 25 ICS User manual

Zeiss
Zeiss LSM 710 User manual

Zeiss
Zeiss Stemi 305 User manual

Zeiss
Zeiss IV FL User manual

Zeiss
Zeiss VivaTome User manual

Zeiss
Zeiss Axiovert 200 User manual

Zeiss
Zeiss EXTARO 300 User manual

Zeiss
Zeiss LSM 710 User manual

Zeiss
Zeiss Axioplan Universal microscope User manual

Zeiss
Zeiss LSM 510 META User manual

Zeiss
Zeiss SV8 User manual

Zeiss
Zeiss ELYRA User manual

Zeiss
Zeiss OPMI 1 FR pro Instruction manual

Zeiss
Zeiss EM 10 A User manual

Zeiss
Zeiss LSM 700 User manual

Zeiss
Zeiss Stemi 305 cam User manual

Zeiss
Zeiss LSM800-02 Operator's manual

Zeiss
Zeiss Axioscope 5 User manual