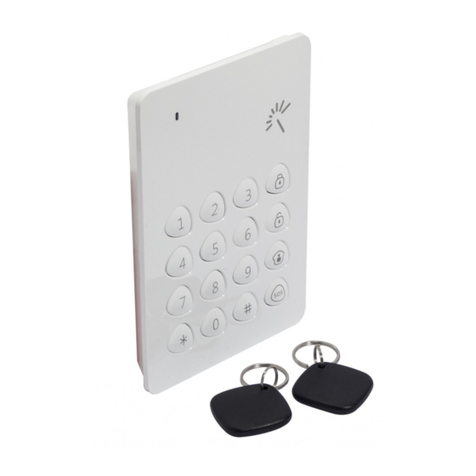
ZKTeco OP-200 User manual

OP200 Quick Start Guide
1
QUICK START GUIDE
Applicable Model: OP-200
Version: 1.2
Date: May 2019

OP200 Quick Start Guide
I
Contents
Safety Precautions...............................................................................................................................................1
1 Appearance & installation & wiring.....................................................................................................2
1.1 Features..................................................................................................................................................2
1.2 Pin Layout.............................................................................................................................................3
1.3 Dimensions & Installation..........................................................................................................4
1.4 Power Connection..........................................................................................................................5
1.5 Ethernet Connection....................................................................................................................6
1.6 RS485 Connection..........................................................................................................................7
1.7 Wiegand Output Connection.................................................................................................8
1.8 Standard Installation.....................................................................................................................9
2 OP-200 Primary Configuration ...............................................................................................................10
2.1 Communication Settings ..........................................................................................................10
2.2 Webserver Settings........................................................................................................................10
2.3 Primary/Secondary Settings....................................................................................................11
2.4 Backup to USB Flash drive.........................................................................................................11
3 OP-200 Secondary Configuration........................................................................................................12
3.1 Comm. Settings................................................................................................................................12
3.2 Primary/Secondary Settings....................................................................................................12
4 Administrator Settings.................................................................................................................................13
4.1 Enroll an administrator................................................................................................................13
4.1.1 Enroll FP.................................................................................................................................13
4.1.2 Enroll Card............................................................................................................................13
4.2 Delete an administrator..............................................................................................................14
4.2.1 Delete FP...............................................................................................................................14
4.2.2 Delete Card .........................................................................................................................14
5 Amag-Symmetry Configuration............................................................................................................15
5.1 Overview...............................................................................................................................................15
5.2 ZK Opera Service Installation..................................................................................................15
5.3 Basic Amag Symmetry Configuration ..............................................................................16
5.3.1 Data Connect License .................................................................................................16
5.3.2 Amag SQL Server configuration...........................................................................16
5.3.3 Symmetry Unique Employee Reference ........................................................17
5.3.4 Data Export Configuration.......................................................................................19
5.3.5 Initial Export........................................................................................................................20
5.3.6 ZK Opera Service Configuration...........................................................................21
5.4 ZK Opera Service.............................................................................................................................24
5.5 Troubleshooting...............................................................................................................................26
6 OP-200 Primary Settings on Webserver...........................................................................................28
6.1 Install the SilkID driver..................................................................................................................28
6.2 Configuration of SilkID driver for SSL (Optional) .......................................................29
6.2.1 Certificate Installation..................................................................................................29
6.2.2 Configuring the Firefox Browser ..........................................................................32

OP200 Quick Start Guide
II
6.3 OP-200 Webserver settings......................................................................................................35
6.3.1 Login Web Server............................................................................................................35
6.3.2 Name the Readers..........................................................................................................36
6.3.3 Set Card formats..............................................................................................................36
6.3.4 Configure Door Settings............................................................................................37
6.3.5 Reader Input and Output settings......................................................................39
6.3.6 Backup Database ............................................................................................................41
6.3.7 Personnel management & fingerprint registration................................. 43
7 Proper Fingerprint Enrollment ...............................................................................................................47
8 Enroll & Verification.........................................................................................................................................50
9 Trouble Shootings ...........................................................................................................................................52

OP200 Quick Start Guide
1
Safety Precautions
Before installation, please read the following precautions carefully to
prevent the risks of danger to the users of this product or those nearby
and damaging the device.
Do not expose to direct sunlight, water, dust and soot.
Do not place any magnetic objects near the device.
Do not place the device next to heating equipment.
Prevent water, drinks or chemicals leaking into the device.
This product is not intended for use by children unless they are
supervised.
Do not drop or damage the device.
Do not disassemble, repair or modify the device.
Do not use the device for any purpose other than those specified.
Remove dust or dirt regularly. While cleaning, wipe dust off with a
smooth cloth or towel instead of water.
Contact your supplier in case of any problem!

OP200 Quick Start Guide
2
1 Appearance & installation & wiring
1.1 Features
USB port
Reset button
Left side view
2.4-inch color screen
Touch keypad
LED indicator
Fingerprint sensor & Card
reader
Front view
Speaker
Right side view
Security screw holes (for securing
the device onto its back plate)
Bottom view

OP200 Quick Start Guide
3
1.2 Pin Layout
4 Pin cable connectors _Ethernet
2 Pin cable connectors _Power in
11 Pin cable connectors
Tamper switch
Back view

OP200 Quick Start Guide
4
1.3 Dimensions & Installation
Mounting the device on Wall
7.70 in
(195.5 mm)
3.43 in
(87 mm)
1.38 in
(35mm)
7.34 in
(186.5 mm)
3.0 in
(76.1mm)
Fix the back plate on the wall using wall mounting screws.
Note: We recommend drilling the mounting plate screws
into solid wood (i.e. stud/beam). If a stud/beam cannot be
found, use supplied drywall plastic anchors.
Attach the device to the back
plate.
Fasten the device to the back
plate with security screws.
0.51 in
(13 mm)
Front view
Back view
Left side view

OP200 Quick Start Guide
5
1.4 Power Connection
Without PoE
With PoE (Optional)
Recommended power supply: 12V DC, at least 750mA (per OP-200)
GND
+12V
12V DC Adaptor
(supplied with OP-200)
Power + Data

OP200 Quick Start Guide
6
1.5 Ethernet Connection
LAN Connection

OP200 Quick Start Guide
7
1.6 RS485 Connection
OSDP Connection
Important Notes:
1. For RS485 communication use shielded twisted pair wire.
2. To minimize chance of signal interference with RS485 communication, it’s
recommended using a bus topology instead of star topology.
3. Adjust the communication speed as needed. The signal strength varies
depending on wiring conditions, and it may be necessary to lower the baud
rates.
4. The GND Signal may be omitted if and only if the GND potential difference is
less than ±5V.
Controller panel
GND
485A
485B
D0
D1
GND

OP200 Quick Start Guide
8
1.7 Wiegand Output Connection
WD1
WD0
GND
Controller panel
GLED
LED
D0
D1
GND

OP200 Quick Start Guide
9
1.8 Standard Installation
TCP/IP
Wiegand/OSDP

OP200 Quick Start Guide
10
2 OP-200 Primary Configuration
2.1 Communication Settings
Press > Main Menu > Comm. Settings > Network Settings to configure.
The Parameters below are the factory default values. Please configure the
parameters for the actual network.
IP Address: 192.168.1.201
Subnet Mask: 255.255.255.0
Gateway: 192.168.1.1
DNS: 8.8.8.8
2.2 Webserver Settings
Click Main Menu > Comm. Settings > Webserver Settings.
Port: The default Port is 80, normally you don’t need modify it, but if it is
necessary, you can change it.
SSL: The network connection is encrypted in the transport layer, which is used
to ensure the security of network data transmission.

OP200 Quick Start Guide
11
2.3 Primary/Secondary Settings
Click Main Menu > Comm. Settings > Primary/Secondary Settings.
Turn on Primary Device, the device will be used as primary reader, the
following data will be same as Comm Settings,it doesn’t need change.
2.4 Backup to USB Flash drive
Insert the USB disk to the reader, click Main Menu > Device Settings > Backup
Data > Backup to USB Disk > Backup start, the data (user data and network
settings) in the device will be copied to the disk. And you can restore the data
with the USB disk too. The menu path is:
Main Menu > Device Settings > Restore Data > Restore from USB Disk >
Restore start.
Secondary reader doesn’t have this function.

OP200 Quick Start Guide
12
3 OP-200 Secondary Configuration
3.1 Comm. Settings
Press > Main Menu > Comm. Settings > Network Settings to configure.
Set the IP of secondary readers.
3.2 Primary/Secondary Settings
Click Main Menu > Comm. Settings > Primary/Secondary Settings.
Turn off Primary Device; the device will be used as secondary reader. And
please set the Primary IP (the IP of the primary reader), Primary Port is default,
it doesn’t need change.
Panel Ack: If you open this function, the reader will get feedback (verify
successfully or unsuccessfully) from controller panel. When you use Wiegand
communication, please turn it “ON”.

OP200 Quick Start Guide
13
4 Administrator Settings
4.1 Enroll an administrator
After enrolling the administrator, the user needs administrator verification to
enter the main menu. An administrator can enroll ten fingerprints and one
card.
4.1.1 Enroll FP
Press > Main Menu > Device Settings > Admin Settings > Enroll FP, to
enroll administrator’s fingerprints.
4.1.2 Enroll Card
Press > Main Menu > Device Settings > Admin Settings > Enroll Card, to
enroll a card for the administrator.

OP200 Quick Start Guide
14
4.2 Delete an administrator
4.2.1 Delete FP
After administrator verification, click Main Menu > Device Settings > Admin
Settings > Enroll FP, select the finger you want to delete, then click “Yes” to delete
administrator’s fingerprint.
4.2.2 Delete Card
After administrator verification, click Main Menu > Device Settings > Admin
Settings > Enroll Card, then click “Yes” to delete administrator’s card.

OP200 Quick Start Guide
15
5 Amag-Symmetry Configuration
5.1 Overview
The ZK Opera Service is a Windows Service which communicates with access
control systems in order to synchronize personnel and card records from those
systems to Opera Personnel records on the primary OP-200 Opera Reader.
Support exists for Amag Symmetry as well as other Access Control systems.
There is a common installation and service handling all systems, with the
system selection (such as Amag) happening at installation time.
This document describes setup and configuration of this service to
communicate with Amag Symmetry. It communicates using Amag’s Data
Connect feature in order to synchronize personnel records between Symmetry
and Opera.
There is also a ZK Opera Service configuration tool which is used to specify the
Host and Port of the primary OP-200 to communicate with. This is also used to
configure the host and credentials to communicate with Symmetry via Data
Connect.
The ZK Opera Service can be installed on the Amag Server or on a separate
Windows machine. Through Data Connect, the service will communicate
directly with a SQL Server database on the Amag Server through either
Windows authentication (SSI) or SQL authentication.
5.2 ZK Opera Service Installation
Extract the ZKOperaHostInstall zip file and run setup from
ZKOperaHostInstall\DISK1 folder.

OP200 Quick Start Guide
16
The installation is currently simple and self-explanatory.
When asked to choose a platform, select AMAG for an Amag integration.
5.3 Basic Amag Symmetry Configuration
All Amag Symmetry related configuration is for Amag DataConnect support
and is not specific to Opera. Data Connect is the Amag Symmetry feature
which allows 3rd party applications, such as the Opera Service, to integrate
with Amag via its SQL Server database.
The Amag Data Connect Manual (9600-0458) should be reviewed.
5.3.1 Data Connect License
A separate Data Connect Module license from Amag is required for Data
Connect support. This license must be acquired and installed on the Amag
server.
5.3.2 Amag SQL Server configuration
Access to multiMaxExport database
Data Connect for Cardholders in Amag works by exporting cardholder data
and changes (adds, modifies, deletes) from Amag to an export database within
the Amag SQL Server. 3rd Party applications such as Opera will then read
records from this database to perform the synchronization.

OP200 Quick Start Guide
17
The administrator must choose and configure credentials (ether a Windows
account or a SQL Server username and password) to use for the 3rd Party Data
Connect applications to connect to the Amag multiMAXExport database and
have read and write authority to the DataExportTable table within that
database. This must be configured within the Amag SQL Server database
using a tool such as SQL Server Management Studio. Contact Amag support
for assistance. As part of the ZK Opera Service configuration, these credentials
will be made known to Opera to use.
Note that Amag support has indicated that the 3rd Party Data Connect
application is responsible for deleting rows from the DataExportTable once
they are processed so that the table does not grow unbounded. Thus, the ZK
Opera Service does this. Note, however, that this implies that only a single 3rd
Party Data Connect application can integrate with a given Amag system for
cardholder export.
5.3.3 Symmetry Unique Employee Reference
3rd Party applications such as Opera need a unique identifier for a cardholder
record within Amag Symmetry so that when a record is modified or deleted, it
can be mapped to the corresponding record that was created in Opera.
After discussion with Amag, the only possible reliable unique identifier in the
Amag Symmetry system that is available to 3rd party applications is the
Cardholder Employee Reference. However, this is only a unique identifier if
Symmetry is configured to have a Unique Employee Reference. By default this
is not enforced. This must be configured for proper operation. This can be
configured by selecting System Preferences from the Symmetry Maintenance
screen. Under Card Settings, check Unique Employee Reference and hit OK.
Other manuals for OP-200
1
Table of contents
Other ZKTeco RFID System manuals

ZKTeco
ZKTeco ProlD Series User manual

ZKTeco
ZKTeco SpeedFace-V5L User manual

ZKTeco
ZKTeco SpeedFace-V5L-RFID User manual

ZKTeco
ZKTeco TSP-4 Series User manual

ZKTeco
ZKTeco SC800 User manual

ZKTeco
ZKTeco Green Label G4L User manual

ZKTeco
ZKTeco FaceKiosk-H13 User manual

ZKTeco
ZKTeco VT07-B01-W User manual

ZKTeco
ZKTeco KF1000-U User manual

ZKTeco
ZKTeco GL300 User manual
Popular RFID System manuals by other brands

Omron
Omron DeviceNet V680-HAM42-DRT user manual

Marson
Marson MR15 user manual

ThingMagic
ThingMagic Mercury6e M6e-30dBm Hardware guide

Balluff
Balluff BF-IDM09 operating guide

Emka Electronics
Emka Electronics Swing Handles Series quick start guide

Emka Electronics
Emka Electronics Swing Handles Series quick start guide