This product can be included and operated in any Z-Wave
network with other Z-Wave certified devices from other
manufacturers and/or other applications. All non-battery
operated nodes within the network will act as repeaters
regardless of vendor to increase reliability of the network.
This product features the latest Security 2 (S2) framework to
remove smart home network hacking risks. This device is
equipped with a unique authentication code for trusted
wireless communication.
WARNING
COMMAND CLASSES
This device requires the following command classes to be
supported and recognized by your Z-Wave controller:
COMMAND_CLASS_ZWAVEPLUS_INFO_V2
COMMAND_CLASS_ASSOCIATION_V2
COMMAND_CLASS_ASSOCIATION_GRP_INFO
COMMAND_CLASS_TRANSPORT_SERVICE_V2
COMMAND_CLASS_VERSION_V2
COMMAND_CLASS_MANUFACTURER_SPECIFIC_V2
COMMAND_CLASS_DEVICE_RESET_LOCALLY
COMMAND_CLASS_POWERLEVEL
COMMAND_CLASS_SECURITY
COMMAND_CLASS_SECURITY_2
COMMAND_CLASS_SUPERVISION
COMMAND_CLASS_FIRMWARE_UPDATE_MD_V4
COMMAND_CLASS_BATTERY
COMMAND_CLASS_WAKE_UP_V2
COMMAND_CLASS_NOTIFICATION_V4
COMMAND_CLASS_CONFIGURATION
COMMAND_CLASS_SENSOR_MULTILEVEL
S2
IN NO EVENT SHALL ZOOZ OR ITS SUBSIDIARIES AND AFFILIATES BE LIABLE FOR ANY
INDIRECT, INCIDENTAL, PUNITIVE, SPECIAL, OR CONSEQUENTIAL DAMAGES, OR
DAMAGES FOR LOSS OF PROFITS, REVENUE, OR USE INCURRED BY CUSTOMER OR ANY
THIRD PARTY, WHE-THER IN AN ACTION IN CONTRACT, OR OTHERWISE EVEN IF ADVISED
OF THE POSSIBILITY OF SUCH DA-MAGES. ZOOZ'S LIABILITY AND CUSTOMER'S
EXCLUSIVE REMEDY FOR ANY CAUSE OF ACTION ARISING IN CON-NECTION WITH THIS
AGREEMENT OR THE SALE OR USE OF THE PRODUCTS, WHETHER BASED ON
NEGLIGENCE, STRICT LIABILITY, BREACH OF WARRANTY, BREACH OF AGREEMENT, OR
EQUITABLE PRINCIPLES, IS EXPRESSLY LIMITED TO, AT ZOOZ'S OPTION, REPLACEMENT
OF, OR REPAYMENT OF THE PURCHASE PRICE FOR THAT POR-TION OF PRODUCTS WITH
RESPECT TO WHICH DA-MAGES ARE CLAIMED. ALL CLAIMS OF ANY KIND ARISING IN
CONNECTION WITH THIS AGREEMENT OR THE SALE OR USE OF PRODUCTS SHALL BE
DEEMED WAIVED UNLESS MADE IN WRITING WITHIN THIRTY (30) DAYS FROM ZOOZ'S
DELIVERY, OR THE DATE FIXED FOR DELI-VERY IN THE EVENT OF NONDELIVERY.
FCC NOTE
THE MANUFACTURER IS NOT RESPONSIBLE FOR ANY RADIO OR TV INTERFERENCE
CAUSED BY UNAUTHORIZED MODIFICATIONS TO THIS EQUIPMENT. SUCH
MODIFICATIONS COULD VOID THE USER’S AUTHORITY TO OPERATE THE EQUIPMENT.
STORE INDOORS WHEN NOT IN USE. SUITABLE FOR DRY LOCATIONS ONLY. DO NOT
IMMERSE IN WATER. NOT FOR USE WHERE DIRECTLY EXPOSED TO WATER.
This device complies with Part 15 of the FCC Rules.
Operation is subject to the following conditions:
1. This device may not cause harmful interference,
2. This device must accept any interference received, including interference that may
cause undesired operation.
This equipment has been tested and found to comply with the limits for a Class B digital
device, pursuant to part 15 of the FCC Rules.
These limits are designed to provide reasonable protection against harmful interference
in a residential installation.
This equipment generates, uses and can radiate radio frequency energy and, if not
installed and used according to instructions, may cause harmful interference to radio
communications.
However, there is no guarantee that interference will not occur in any given installation.
If this equipment causes harmful interference to radio or television reception, the user
may try to correct the interference by taking one or more of the following measures:
- Reorient or relocate receiving antenna
- Increase the separation between equipment and receiver
- Connect equipment into a separate outlet or circuit from receiver
- Consult the dealer or an experienced radio/TV technician for additional assistance
All brand names displayed are trademarks of their respective holders.
© Zooz 2019
WARRANTY
This product is covered under a 12-month limited warranty.
To read the full warranty policy or file a warranty claim, please
go to ww.getzooz.com/warranty
30 FEET
100º
100º
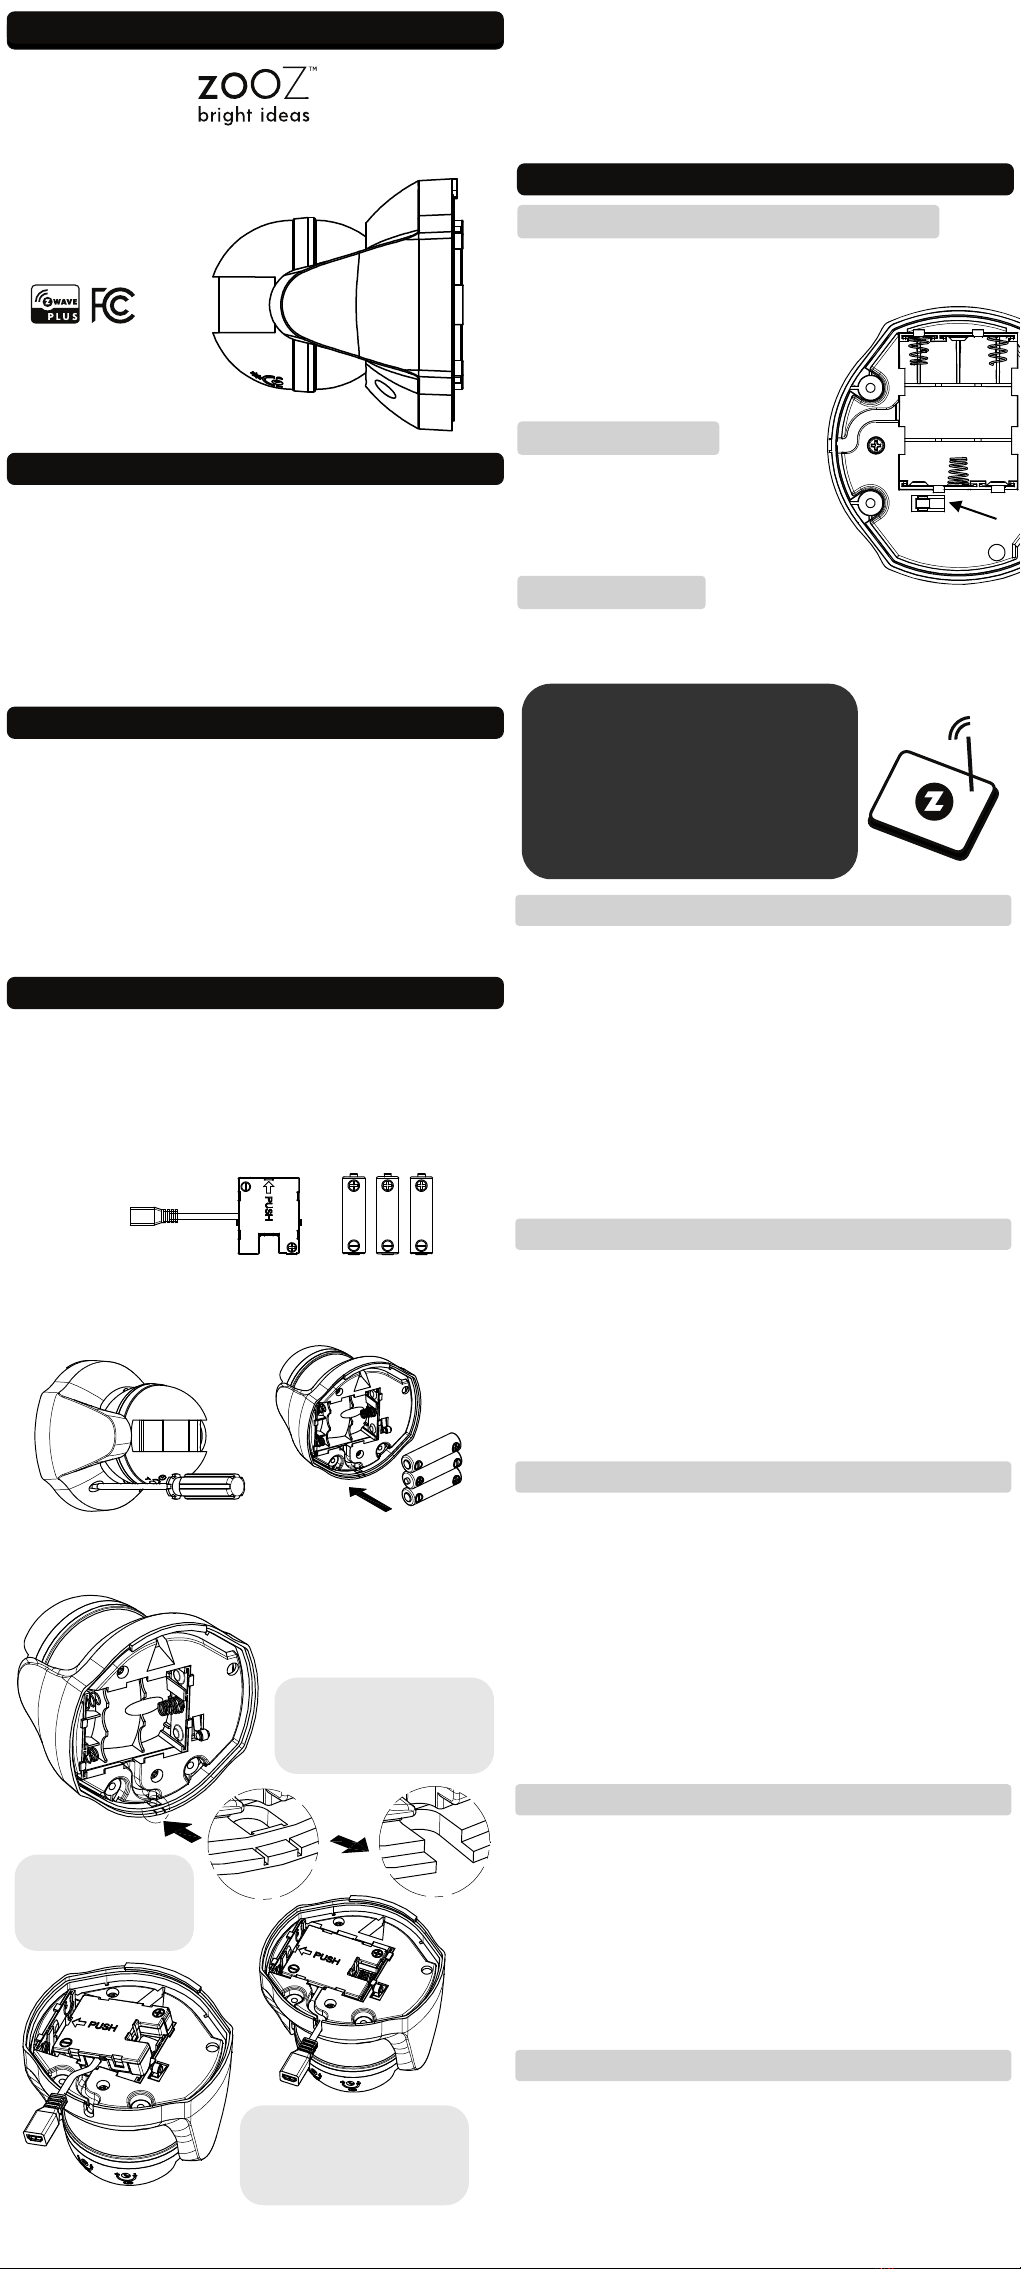
1. MARK HOLES
Use the back cover to mark 2 mounting holes on a dry clean
surface 6 feet above ground.
2. INSTALL BACK COVER
Drill holes and use the supplied anchors and
screws to fix the back cover to the wall.
3. MOUNT SENSOR
Attach the sensor to the back
cover with the original screws.
It will go from TEST mode to
NORMAL mode within
10 seconds.
PROGRAMMING
The sensor works in 2 modes:
1. TEST MODE when it’s not mounted on the wall and the
tamper switch isn’t pressed. The LED indicator will then flash
every time motion is detected. Use this mode to make sure
the mounting location for your sensor is within Z-Wave range
and to optimize positioning for motion detection. Turn the
timer and lux knobs all the way to the le to launch test mode
for the sensor. It will now report motion and trigger
associated Z-Wave lights anytime movement is detected
(regardless of daylight and as oen as every 5 seconds).
Remember to adjust the knobs using the supplied flat
screwdriver tool when exiting test mode.
TEST MODE
MIN 5 SEC
MAX 12 MIN MAX 900 LUX
MIN 10 LUX
2. NORMAL MODE when the sensor is mounted on the wall
and the tamper switch is pressed in for at least 10 seconds.
The LED indicator will NOT flash when motion is detected to
save battery. The sensor will send motion alerts and trigger
connected lights according to the timer and lux knob settings
or advanced Z-Wave settings. If the LED indicator flashes
when motion is detected in normal mode, it means LOW
BATTERY.
ŸThis product should be installed indoors or outdoors in a
sheltered area upon completion of any building
renovations.
ŸPrior to installation, the device should be stored in a dry,
dust-and-mold-proof place.
ŸDo not install the device in a place with direct sun exposure,
high temperature, or humidity.
ŸKeep away from chemicals, water, and dust.
ŸEnsure the device is never close to any heat source or open
flame to prevent fire.
ŸNo part of the device may be replaced or repaired by the
user except for the batteries.
PAGE 3PAGE 4
Find a spot within Z-Wave range to install the sensor. It should
be a clean flat surface with the sensor’s head looking down so
the lens is protected from rainfall. Make sure you test the
sensor before mounting it.
A FEW TIPS:
ŸThe sensor best detects movement to the sides of the lens
rather than activity directly in front of it.
ŸMount it 6 feet above the ground. Use a standard phillips
screwdriver to attach the mounting screws.
ŸDon’t position it facing a window, direct sunlight, or above
any source of heat (radiator, boiler, etc.).
MOUNTING
Always have the
timer / lux knobs face the
ground and covered from
direct rain and snow fall!
ADVANCED SETTINGS
Parameter 3: Adjust motion sensitivity where 10 is the most
sensitive setting.
Values: 1-10 (default: 10)
Size: 1 byte dec
Parameter 4: Set lux level trigger with 10 being the lowest
reported value and 900 being the highest reported value. The
sensor will report motion to the hub and associated devices only
if the brightness (lux) level is below the set trigger value.
Values: 0 - set manually by lux knob; 1 - ignore lux readings and
always report motion; 10-900 - set custom trigger (default: 0)
Size: 2 byte dec
Parameter 5: Set motion re-trigger time for the delay before the
sensor reports no motion to the hub and associated devices aer
detecting the last motion activity.
Values: 0 - set manually by timer knob; 5-720 (seconds) - set
custom re-trigger time (default: 0)
Size: 2 byte dec
Parameter 6: Set lux reporting frequency to decide how oen
the sensor will measure and send brightness level data to the
hub and associated devices. Note: Frequent reports will affect
battery life.
Values: 1 - 1440 (minutes); default: 30 (minutes)
Size: 2 byte dec
We listed the most helpful settings above. For a complete list
of parameters, go to www.support.getzooz.com