Reboot: Press and hold the IP broadcast button on the front panel for around 10
seconds, then release. The device will automatically reboot.
Reset: Press and hold the reset button on the speaker internal mainboard for
around 5 seconds till you hear voice prompts “Resetting factory defaults, rebooting...”,
now release the reset button, and the SQ10 speaker will now reset. After recovery, the
system light enters a flash state.
Reboot & Reset
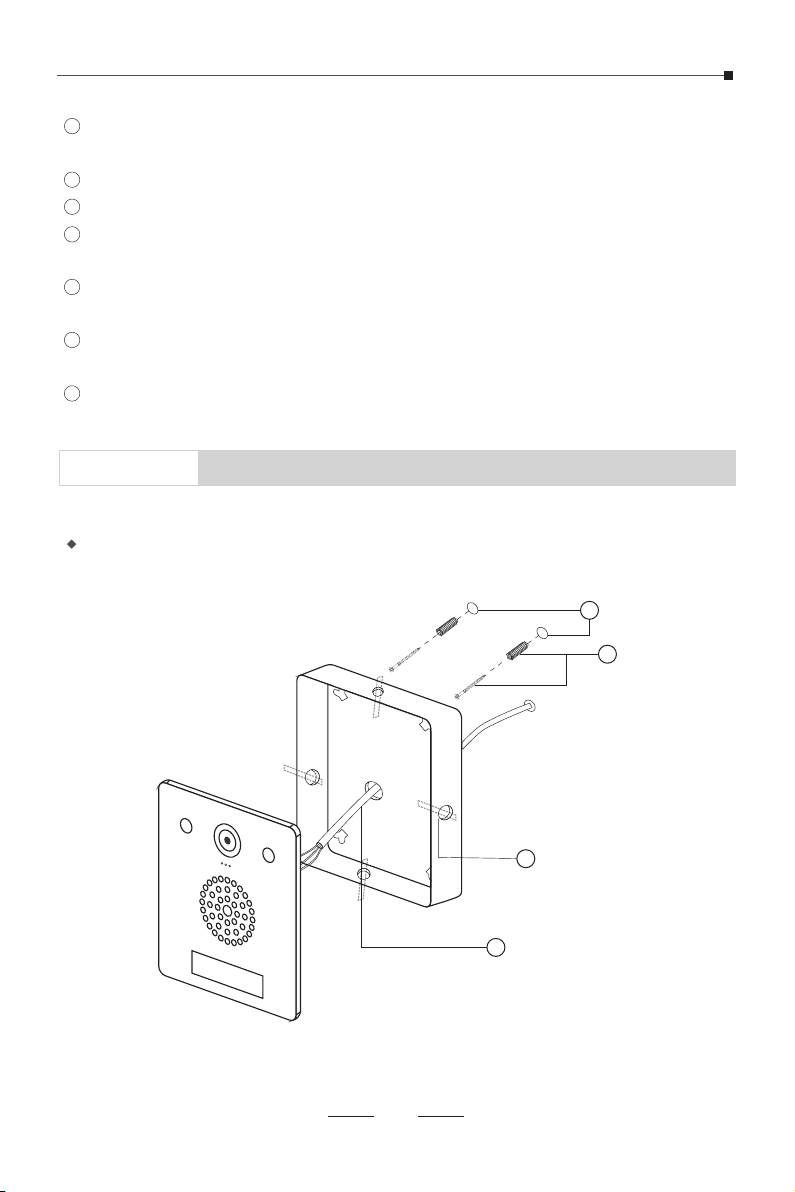
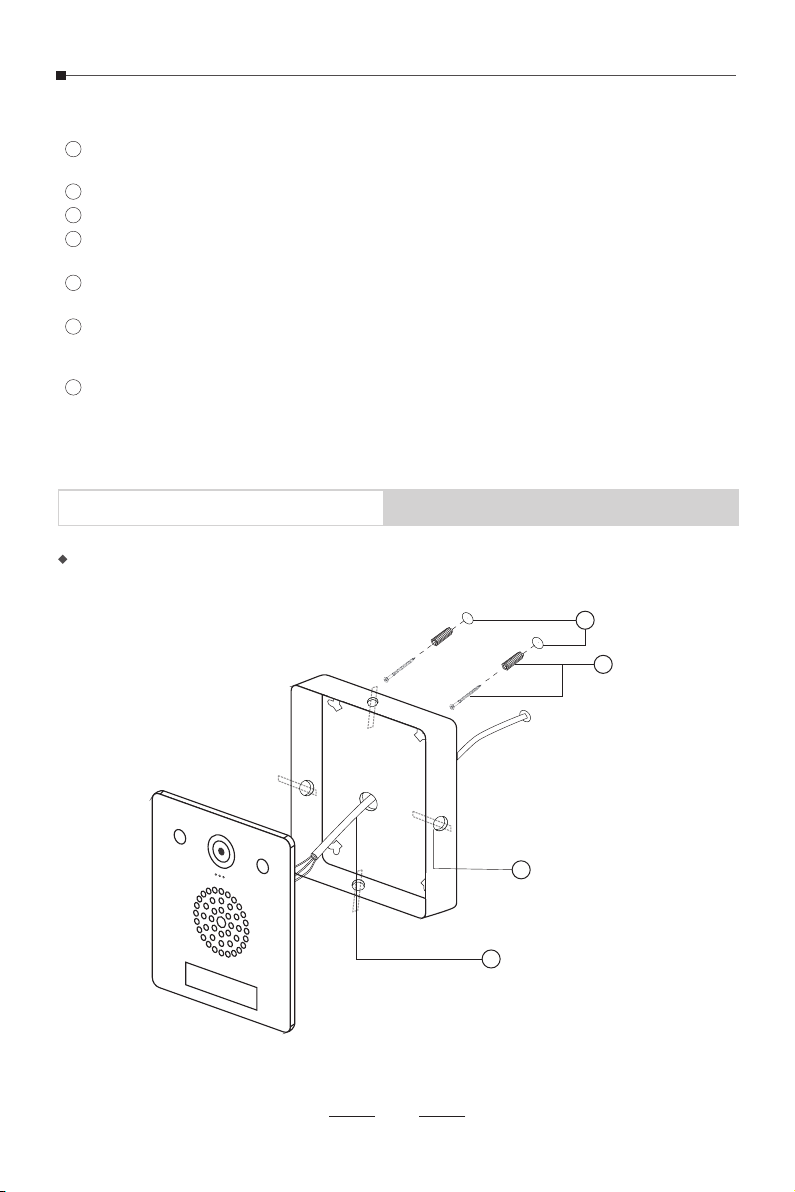
Use an electric drill to drill 2 holes on the installation wall according to the distance
between the hook holes.
Push the anchors into each mounting hole with a rubber hammer, then install the
screws.
Knock out the necessary hole guard(s) and pass the network cable through.
If PoE cable is not used, please connect the power cable to the DC socket through
the net coil or the rear enclosure hole.
If there are any buttons, relays, and/or other devices that need to be used. Please
connect them to the phoenix terminal of the J2 connector through the net coil or the rear
enclosure hole.
Align the hooks on the rear enclosure with the installed screws and hang it on.
Install the front panel onto the rear panel box and tighten with the M4*25mm screws
using a screwdriver.
1
2
3
4
5
6
7
1
2
06
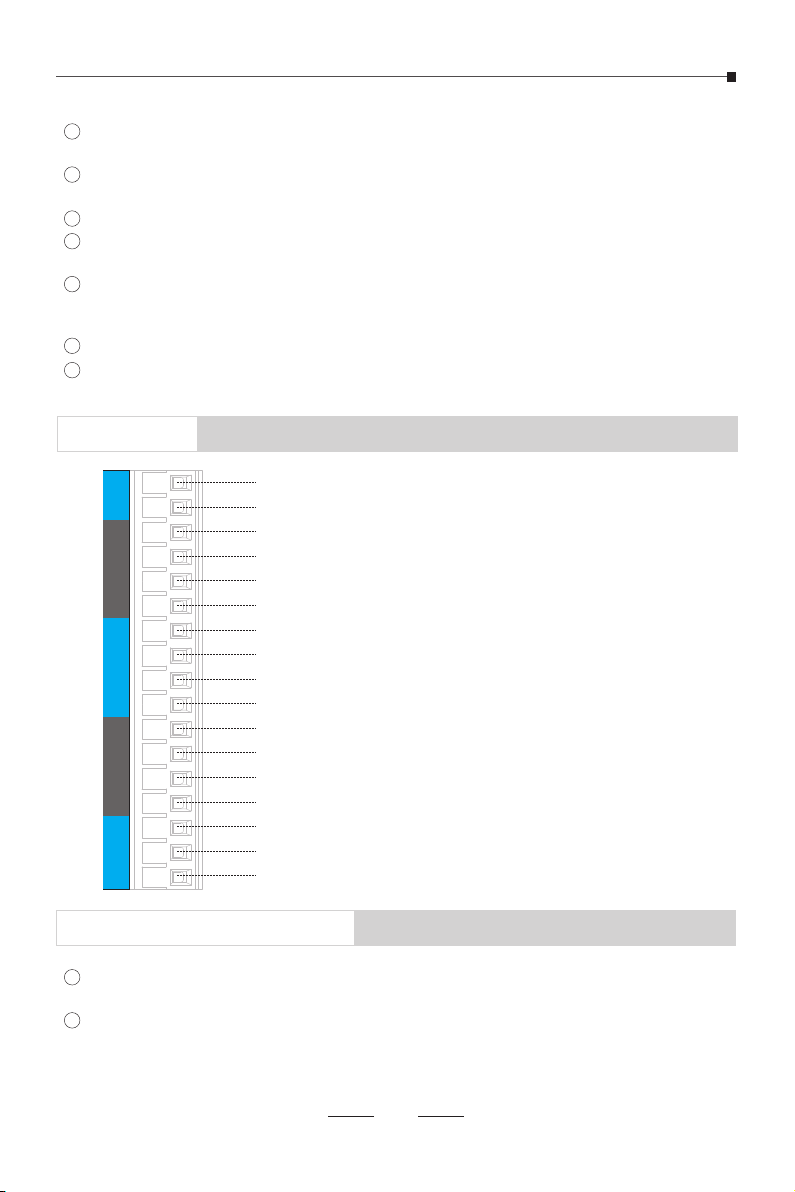
NO COM NC RX VCC KEY+ KEY- LED- LED+ KEY-
KEY+ LED- LED+ 24V+24V-TX
GND
Interfaces
Power 24V+
Power 24V-
Button 1 LED+
Button 1 LED-
Button 1 Switch-
Button 1 Switch+
Button 2 LED+
Button 2 LED-
Button 2 Switch-
Button 2 Switch+
Power Supply Output (5V)
Serial Receive Input
Serial Transmit Output
Ground Supply Output (0V)
Dry Contact Signal Normally Closed Output
Dry Contact Signal Common Input
Dry Contact Signal Normally Open Output