3M Filtrete FAP04 User manual

Air Purifier Model Series
FAP-04
Replacement Filter Model Series
FAPF-04
For more information go to
www.filtrete.com
UltraSlim
Air Purifier

Table of Contents:
Safety Information
FCC Information for the Remote Control
Warnings & Cautions
Installation Requirements
Location Requirements
Electrical Requirements
Battery Installation
Wall Mount Bracket
Features and Functions
Air Purifier Use
Turning the Air Purifier On/Off
Adjusting the Fan Speed
Running in Automatic Mode
Using the Lighting Features
Turning the Ionizer On/Off
Setting the Timer
Resetting the Filter Timer
Cleaning
Filter Removal
Filter Replacement
Troubleshooting
Assistance or Service & Warranty
1
2
3
4
5
6
7
9
11
12
13
14
15
16

Safety Information
Please read, understand, and follow all of the safety
information contained in these instructions prior to
using the Filtrete™ Ultra Slim Air Purifier. READ AND
SAVE THESE INSTRUCTIONS for future reference.
Intended Use:
The Filtrete™ Air Purifier is intended for indoor
household use, with Filtrete™ brand filters and
standard 120V AC power. This Air Purifier has not
been tested with non-Filtrete brand filters, operated at
different voltages, or used outdoors. Each of these
misuses could damge the Air Purifier and/or create
unsafe operating conditions.
1
Safety Information
Explanation of Signal Words
Indicates a potentially hazardous
situation, which if not avoided, could
result in death or serious injury.
Indicates a potentially hazardous
situation, which if not avoided, may
result in minor or moderate injury.
WarninG
CautioN
FCC Information for the Remote Control
This device complies with Part 15 of the FCC Rules. Operation
is subject to the following two conditions: (1) this device may
not cause harmful interference, and (2) this device must accept
any interference received, including interference that may
cause undesired operation.
Note: This equipment has been tested and found to comply
with the limits for a Class B digital device, pursuant to part 15
of the FCC Rules. These limits are designed to provide
reasonable protection against harmful interference in a
residential installation. This equipment generates, uses and can
radiate radio frequency energy and, if not installed and used in
accordance with the instructions, may cause harmful
interference to radio communications. However, there is no
guarantee that interference will not occur in a particular
installation. If this equipment does cause harmful interference
to radio or television reception, which can be determined by
turning the equipment off and on, the user is encouraged to try
to correct the interference by one or more of the following
measures:
-Reorient or relocate the receiving antenna.
-Increase the separation between the equipment and receiver.
-Connect the equipment into an outlet on a circuit different
from that to which the receiver is connected.
-Consult the dealer or an experienced radio/TV technician for
help.
FCC ID: DGFCHIMFAP-04
Modifications to this device shall not be made without the
written consent of 3M Company. Unauthorized modifications
may void the authority granted under Federal Communication
Rules permitting the operation of this device.
2

4
Location Requirements:
•Select a location where the air intake
and filtered air outlet are not obstructed.
•Place the Air Purifier on a flat, level surface at least two
feet from any heat source,
such as ranges or heaters.
•Do not block the air openings or place the Air Purifier
on a soft surface such as a bed, chair, or sofa.
•Operate indoors only.
Installation Requirements
• For indoor dry location use only. Do not use
outdoors or in a wet environment.
• Do not submerge the Air Purifier in water.
• Do not place fingers and/or any objects into air
and/or motor housing vents.
• Do not allow children or pets to have
unsupervised access to this product.
• Do not block any air vents during use.
• Do not use any combustible or flammable items
on or near the Air Purifier.
• Do not spill or spray any liquids or aerosols into
the Air Purifier or on the filter.
• Do not place the Air Purifier near a heat source.
• Do not sit on or place any object
on this product.
WarninG
CautioN
To reduce the risk associated
with hazardous voltage:
• Plug the power cord correctly and
tightly into a properly rated
electrical outlet.
• Do not use the Air Purifier if the
power cord is frayed or otherwise
damaged.
• Do not touch the power cord
with wet hands.
• Disconnect electrical power before
servicing the filter.
• Use indoors and in dry locations
only.
• Do not submerge the Air Purifier in
water.
• Do not modify or attempt to
modify this product.
• Do not disassemble the Air Purifier.
• Except for filter replacement, the
Air Purifier is not intended to be
serviced and does not contain any
serviceable replacement parts or
adjustments.
•Do not use if the interlock switch
is damaged.
•Do not attempt to override the
interlock switch.
To reduce the risk
associated with hazardous
voltage, and/or fire:
• Plug the Air Purifier into a properly
rated electrical outlet.
• This eqipment should be inspected
frequently and collected dirt
removed from it regularly to
prevent excessive accumulation
that may result in flashover or a
risk of fire.
To reduce the risk associated
with hazardous voltage and/or
moving blades:
• Do not place fingers and/or any
objects into air and/or motor
housing vents.
3
Warnings and Cautions
To reduce the risk associated
with fire:
• Do not block any air vents
during use.
• Do not place the Air Purifier
near a heat source.
To reduce the risk associated
with hazardous voltage, and/or
fire, and/or explosion:
• Do not use any combustible or
flammable items on or near
the Air Purifier.
• Do not spill or spray any liquids
or aerosols into the Air Purifier or
on the filter.
To reduce the risk associated
with various hazards:
• Read and understand the operating
manual before using the Air Purifier.
• Do not allow children or pets to
have unsupervised access to this
product.
To reduce the risk associated
with environmental
contamination:
•Dispose of the Air Purifier, batteries,
and filters in accordance with local,
state, and federal regulations.
To reduce the risk associated
with various hazards:
•Replace the filter when the filter
change timer begins flashing red.
•The filter should be changed
after no more than 90 days of
continuous use, or sooner
depending on the conditions in
your home.
•Periodically inspect the filter
for damage or blockage.
To reduce the risk associated
with falling, and/or impact:
• Do not sit on or place any object
on this product.
• Do not install the wall bracket in a
location or manner that cannot
support the weight of the Air
Purifier.
WarninG
CautioN

6
Wall Mount Bracket (optional)
Installing the Wall Mount Bracket:
•The mounting location for the wall bracket is at
the top of the back side of the Air Purifier.
•The components should be lined up in the following order:
Air Purifier, metal bracket, screws (included).
•Use a screw driver to install the wall mount bracket firmly,
but not too tightly.
Installing the Wall Bracket:
•Select a wall location that will be able to handle
the weight of the Air Purifier, such as a wall stud.
•Select wall fastening hardware (screws, etc.- not included)
that is appropriate for the specific wall surface.
•
Fasten the wall bracket to the wall, making certain the bracket tab
is accessible to the wall mount bracket on the Air Purifier.
•Contact a qualified professional if difficulties are
encountered in the installation.
Mounting the Air Purifier on the Wall:
•Carefully lift the Air Purifier into position so that the wall mount
bracket on the Air Purifier fully engages the wall bracket.
•
Visually and physically examine the wall mount connection before
operating the Air Purifier.
CautioN
• Do not install the wall
bracket in a location or
manner that cannot support
the weight of the Air Purifier.
Battery Installation in the Remote Control:
•Slide the battery compartment door open on the back
of the remote control.
•Install one 12V alkaline battery in the remote control
by aligning the +/- of the battery with the marks
inside the battery compartment.
•Replace the battery compartment door.
•Always use 12V alkaline batteries.
•12V Alkaline batteries can be disposed of with
normal household waste.
•12V Alkaline batteries can be found in
most major retail outlets.
5
Installation Requirements
Electrical Connection:
•Plug the Air Purifier into a 120V AC electrical outlet.
•This product is equipped with a polarized AC plug (a plug
having one blade wider than the other). This plug will fit into
the electrical outlet only one way. If the plug does not fit fully
into the outlet, reverse the plug. If it still does not fit, contact
qualified personnel to install the proper outlet. DO NOT
DEFEAT the safety purpose of this polarized plug in any way.
• Plug the Air Purifier into
a 120V AC electrical outlet.
• Plug the power cord correctly and
tightly into a properly rated electrical outlet.
• Do not use the Air Purifier
if the power cord is frayed or
otherwise damaged.
• Do not touch the power cord with wet hands.
WarninG

8
Night-Light:
This Air Purifier also has a stylish night-light on the front air
inlet. The night-light can be turned on/off as described in the
Air Purifier Use section.
Remote Control:
This Air Purifier comes with a remote control, which allows
you to turn the unit on/off and control the settings from
across the room. The remote control uses a radio signal, so it
will operate through many objects like doors and walls. As
with any remote control, the working distance is usually
within a moderate distance from the device. The Air Purifier
will beep when receiving a signal from the remote control.
Air Quality Sensor:
This Air Purifier includes an air quality sensor. The air quality
sensor reacts to odors and gases in the air and causes the
Air Purifier to change speed. This Air Purifier is primarily
designed to remove particles from the air. However, odors
and particles are often formed together, such as cooking
smoke, tobacco smoke, etc., so in many cases the air quality
sensor will react to changes in particle concentration. The Air
Purifier will run on higher speeds when more gases or odors
are detected and on lower speeds when less gases or odors
are detected. The air quality sensor will respond to many
different gases, but it may be more sensitive to some and
less sensitive to others. The air quality sensor can only
respond to gases that contact the sensor, so an odor noticed
by the user may not be detected by the sensor. The air
quality sensor will only operate while the Air Purifier is in the
Automatic Mode.
Filter Change Indicator:
This Air Purifier includes a filter change indicator. The change
indicator monitors how long the Air Purifier has operated, not
just how many days since the filter was installed. The filter
should be changed after not more than 90 days of
continuous use, and the timer is set for this timing.
Depending upon the conditions in your home, the filter may
need to be changed more frequently. The filter change
indicator has been set to indicate filter change for typical
household conditions; using the Air Purifier in environments
with tobacco smoke, candle burning, construction work,
sanding projects, wood-burning stove or fireplace smoke, or
pets in the home may decrease the filter’s life. The filter
should be periodically checked for damage or blockage. A
yellow caution light will come on when the filter is about 80%
used. A flashing red warning light will come on when the filter
needs to be changed.
Features and Functions
This Filtrete™ Air Purifier from 3M comes complete with
the latest advances in air filtration technology and
includes the following product features:
• A Filtrete™ air cleaning filter - model FAPF-04
• An ionizer that can help produce fresher indoor air
• Backlit controls
• A stylish night-light
• A stylish radio frequency (RF) remote control
• An air quality sensor
• A filter change indicator
The Air Purifier is also designed to be quiet and not
disruptive to your everyday activities.
Filtration:
The Filtrete™ filter contains electrostatically charged
fibers that initally increase the filter's ability to remove
particles from indoor air and also provide low airflow
resistance. Particles can be introduced into the air of a
room from many sources, including open doors and
windows or by simply disturbing dust resting on a
surface. To maximize the air cleaning in the room that
contains the Air Purifier, it is recommended that you clean
and seal, as much as possible, the room in which the Air
Purifier operates; continue to dust surfaces and vacuum
on a normal schedule; and close all windows and doors
during operation. Also, remember that any Air Purifier
can only help clean the air that passes through the filter.
Ionizer:
The ionizer in this product produces negative ions, which
help improve small particle filtration. This unit emits a
very small amount of ozone but has been certified to
produce less than allowable limits by strict Underwriter's
Laboratory (UL) standards. Running this machine with
the ionizer on can produce fresher indoor air. If you are
sensitive to ozone, use this product with the ionizer off.
Backlit Controls:
This Air Purifier is equipped with backlit controls to easily
read and control the settings in low lighting conditions.
The backlit controls can be turned off to maintain a dark
environment. Please see the Air Purifier Use section for
more details.
7
Features and Functions
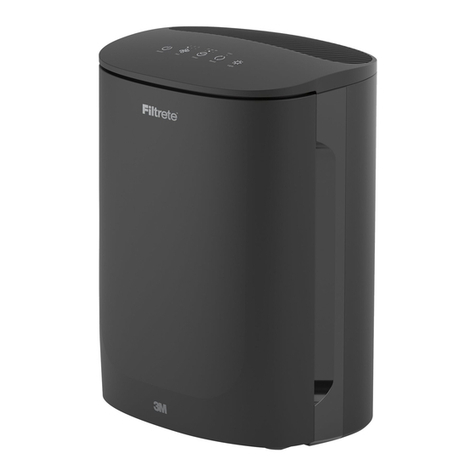
Turning the Air Purifier On/Off:
•Ensure that the Air Purifier is plugged into a 120V AC outlet properly.
•Press the ON/OFF button on either the Air Purifier or the
remote control to turn the Air Purifier on.
•The previous operation of the Air Purifier is automatically stored and
will automatically be repeated when the purifier is restarted.
•Once the Air Purifier is on, pressing the ON/OFF button on the Air
Purifier or remote control will turn the Air Purifier off.
Adjusting the Fan Speed:
•Once the Air Purifier is turned on, the fan speed
can be adjusted to one of three settings.
•The fan speed is displayed on the controls display.
•Pressing the SPEED button on either the Air Purifier or
the remote control will step between the three
fan speeds of Low/Medium/High.
•If the fan speed is set at either Low or Medium, pressing
the SPEED button will increase the speed
to the next highest setting.
•If the fan speed is set at High, pressing the SPEED
button will decrease the fan speed to Low.
Running in Automatic Mode:
•Running in Automatic Mode allows the air quality sensor to control
the speed of the fan. The Air Purifier will run on higher speeds when
more gases or odors are detected and on lower speeds when fewer
gases or odors are detected.
•To run in Automatic Mode, press the AUTOMATIC MODE button
on either the Air Purifier or the remote control. The light beside the
Automatic Mode icon on the Air Purifier will illuminate when the Air
Purifier is running in Automatic Mode.
•The Air Purifier will also display the current fan speed
while running in Automatic Mode.
•To turn Automatic Mode off, press the FAN SPEED
button to select a new speed.
•Please note: The air quality sensor takes several minutes to warm
up when the Air Purifier is first plugged in. During this time, the
Automatic Mode light on the Air Purifier will slowly flash. The light will
stop flashing when the air quality sensor
is warmed up and ready for use.
10
Air Purifier Use
On/Off
Fan Speed
Automatic Mode
Night Light
Ionizer
Timer
Filter Timer Reset
Air Quality Sensor
9
Air Purifier Use
•Read and understand the operating
manual before using the Air Purifier.
WarninG

12
Cleaning
Cleaning:
•Turn the room Air Purifier off and
unplug it before cleaning.
•The outside of the room Air Purifier can be cleaned
with a soft, clean, dampened cloth.
•The air inlet and outlet grills can be cleaned with a
small, soft brush. To clean the air inlet grill, remove
the inlet disc on the front of the Air Purifier. The
disc is held in place with a magnet and is designed
to be removed. The inlet disc only fits one way, so
be sure to check the direction of the tabs on the
inside of the disc before installation.
•If you wish to clean the inside of the Air Purifier,
please only use a clean, dry, soft cloth to
wipe it down. Please do not attempt to
clean the ionizer needle because it may be
damaged and cause the ionzer in the Air
Purifier to malfunction.
Using the Lighting Features:
•The lighting features include both the night-light and the backlit
controls display. The Air Purifier has three different settings for the
lighting features:
1. Night-light and controls backlight on.
2. Night-light off, controls backlight on.
3. Night-light off, controls backlight off.
•To switch between modes, press the LIGHT button
on either the Air Purifier or the remote control.
•For setting #3 (night-light off and controls backlight off),
the LIGHT button will stay lit for easy identification. All other
buttons will continue to work correctly, but will not be lighted.
Turning the Ionizer On/Off:
•The Air Purifier can be run with the ionizer on or off.
•The air will be cleaned more effectively with the ionizer turned on.
•The Air Purifier must be turned on for the ionizer to operate.
•Once the Air Purifier is turned on, the ionizer can be turned on or
off by pressing the IONIZER button on either the
Air Purifier or the remote control.
•The controls display on the Air Purifier indicates when the ionizer
is turned on by illuminating a light next to the IONIZER button.
Setting the Timer:
•The Air Purifier has a built-in countdown timer that can be set for
two, four, or eight hours.
•Press the TIMER button on either the Air Purifier
or the remote control once to activate the timer.
•The timer will increase by one step each time
the TIMER button is pressed.
•The timer can be turned off by pressing the TIMER
button once while the eight hour setting is displayed.
Resetting the Filter Timer:
•When the filter is about 80% used, a yellow light will illuminate as
a reminder to purchase a replacement filter.
•When the filter needs to be changed, the yellow light will turn red
and start slowly flashing. Replace the filter immediately by
following the instructions in the Filter Replacement section.
•To reset the filter timer, hold down the FILTER RESET button
for three seconds. The red light will start flashing quickly while the
button is depressed, and the Air Purifier will beep once after three
seconds to indicate that the timer has been reset.
Release the button.
11
Air Purifier Use
• This eqipment should be
inspected frequently and
collected dirt removed from it
regularly to prevent excessive
accumulation that may result in
flashover or a risk of fire.
WarninG

•Remove the plastic
wrapper and paper insert
on the replacement filter.
•Be sure that the filter is
aligned properly. The
arrow on the side of the
filter should point toward
the Air Purifier when you
install the filter.
•To install the filter:
Securely position the
bottom of the filter in the
bottom filter slot. Gently
push the top of the filter
toward the Air Purifier
until it snaps past the
filter holding tabs and
into position.
•The final air seal of the
filter occurs when air
flows through the filter
and presses it against the
filter sealing track.
•Replace the filter cover by
placing the bottom tabs
on the cover into the
slots in the Air Purifier.
Push the top of the cover
toward the Air Purifier
until the cover locks
into place.
•Plug the Air Purifier into a
120V AC outlet and turn
it back on.
•To reset the filter timer,
hold down the FILTER
RESET button for three
seconds. The red light will
start flashing quickly
while the button is
depressed, and the Air
Purifier will beep once
after three seconds to
indicate that the timer
has been reset. Release
the button.
14
Filter Replacement
Use only FiltreteTM brand
replacement filters in this Air Purifier
•Turn off and unplug the Air
Purifier before replacing the
Air Purifier filter.
•Remove the filter cover on the
back of the Air Purifier by
grasping the filter door tabs on
both sides of the filter door and
pulling the cover outward.
•Lift the cover from the bottom
cover slots to remove the cover
from the Air Purifier.
•Set the cover aside.
•To remove the used filter: Grasp
the top of the filter on both
sides. Gently pull outward to
clear the filter holding tabs. For
easier removal, remove the filter
one side at a time. Lift the filter
out of the bottom filter slot.
•Dispose of the used
filter properly.
Note: The ionizer needle may
be touched when the filter is
removed. Please do not touch
the ionizer needle because it
may be damaged and cause the
ionzer in the Air Purifier to
malfunction.
• Disconnect electrical power
before servicing the filter.
• Dispose of the Air Purifier,
batteries, and filters in
accordance with local, state,
and federal regulations.
•Replace the filter when the filter
change timer begins flashing
red.
•The filter should be changed
after no more than 90 days
of continuous use, or sooner
depending on the conditions
in your home.
•Periodically inspect the filter
for damage or blockage.
13
Filter Removal
WarninG
CautioN

Assistance or Questions
For more information about using this Air Purifier, visit our
web site at www.filtrete.com or call 1-800-388-3458 from
the United States or Canada.
Warranty
Limited Warranty. This product will be free from defects in material and
manufacture for a period of one year from the date of purchase. The
user is responsible for determining whether the product is fit for a
particular purpose and suitable for the user's application. If this 3M
product is defective within the warranty period stated above, your
exclusive remedy and 3M's sole obligation shall be, at 3M's option, to
replace the 3M product or refund the purchase price of the 3M product.
This warranty does not cover normal wear and tear or damage
resulting from accident, misuse, use of alternate filters, alteration, or
lack of reasonable care.
This warranty gives you specific legal rights, and you may have other
rights which may vary from state to state or country to country. To
obtain warranty service contact 3M at 1-800-388-3458.
Limitation of Liability
3M will not be liable for any loss or damage arising from this 3M
product, whether direct, indirect, special, incidental or
consequential, regardless of the legal theory asserted, including
warranty, contract, negligence or strict liability. Some states and
countries do not allow the exclusion or limitation of incidental or
consequential damages, so the above limitation or exclusion
may not apply to you.
Filtrete is a trademark of 3M Company. © 3M 2006
1615
Replacement filter doesn't fit:
•Check the model number on the filter.
It should be FAPF-04.
•Make sure that the bottom of the filter is
properly placed in the bottom filter slot.
•Make sure that no foreign objects are
blocking the filter opening.
•A small force is required to push the filter past the filter
holding ribs: try installing with greater force.
Air Purifier will not turn on:
•Be sure the Air Purifier is properly plugged
into a 120V AC outlet.
•Be sure the Air Purifier is turned on.
•Check if a fuse is blown or if a circuit
breaker has been tripped.
Remote control does not operate:
•Try using the remote control closer to the Air Purifier.
•Be sure that the 12V alkaline battery is fresh
and installed properly.
Decreased airflow:
•Check the Air Purifier to make sure that nothing is
blocking the air inlet and filtered air outlet.
•Check the condition of the filter and if dirty,
replace with a new Filtrete™ FAPF-04 filter.
Noisy operation:
•Check the condition of the filter and if dirty,
replace with a new Filtrete™ FAPF-04 filter.
•Be sure that nothing is blocking the air
inlet or filtered air outlet.
Troubleshooting
•Do not modify or attempt to modify this product.
•Do not disassemble the Air Purifier.
•Except for filter replacement, the Air Purifier is not
intended to be serviced and does not contain any
serviceable replacement parts or adjustments.
•Do not use if the interlock switch is damaged.
•Do not attempt to override the interlock switch.
WarninG
This manual suits for next models
1
Table of contents
Other 3M Air Cleaner manuals

3M
3M Filtrete FAP-C01 Series User manual

3M
3M Filtrete FAP-C01BA-G1 Series User manual

3M
3M 963 User manual

3M
3M Filtrete FAP-TT-ADH Series User manual

3M
3M FAP00-RS User manual

3M
3M Versaflo TR-600 Series User manual

3M
3M mini air ionizer 960 User manual

3M
3M Filtrete FAP-T03-A2 Series User manual

3M
3M FAP04-RC - 3M Filtrete Ultra-Slim Room Air... User manual

3M
3M Filtrete FAP02 User manual