manuals.online logo
Brands
  1. Home
  2. •
  3. Brands
  4. •
  5. Aastra
  6. •
  7. IP Phone
  8. •
  9. Aastra 7446ip User manual

Aastra 7446ip User manual

USER GUIDE
USER GUIDE6/1553-DBC 446 01G20120222
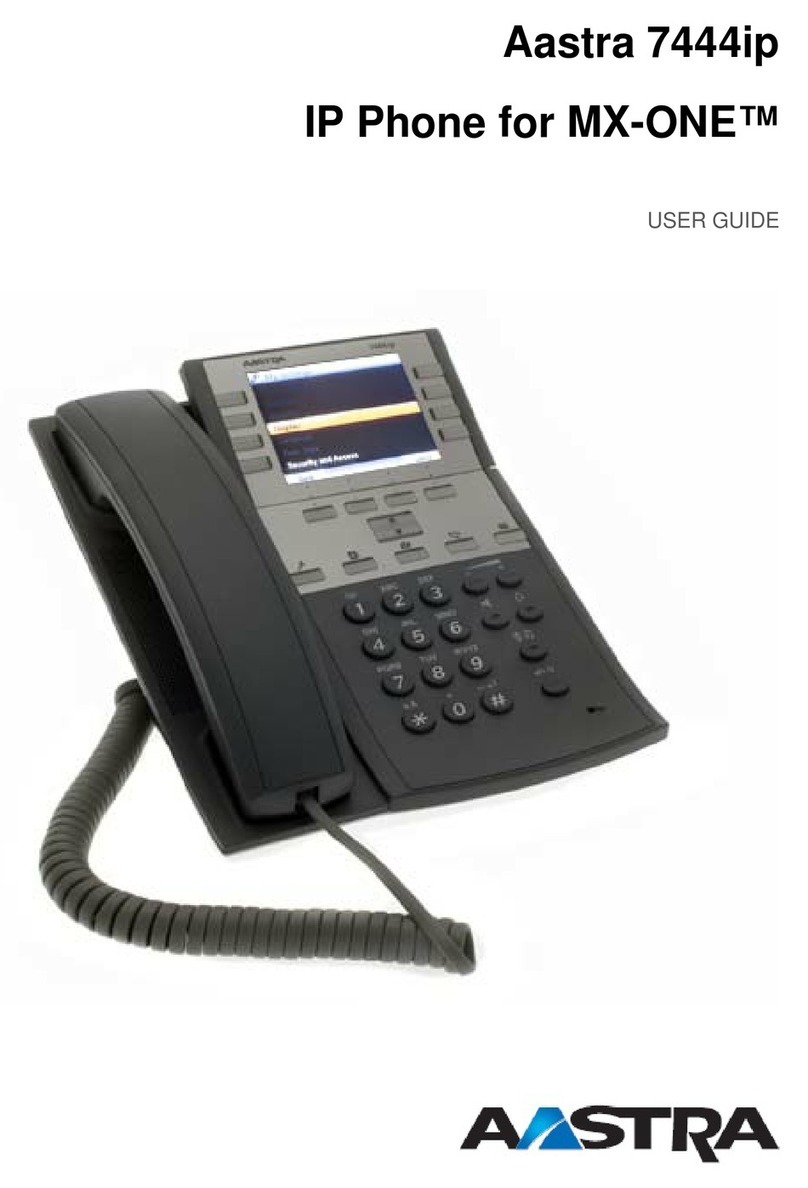
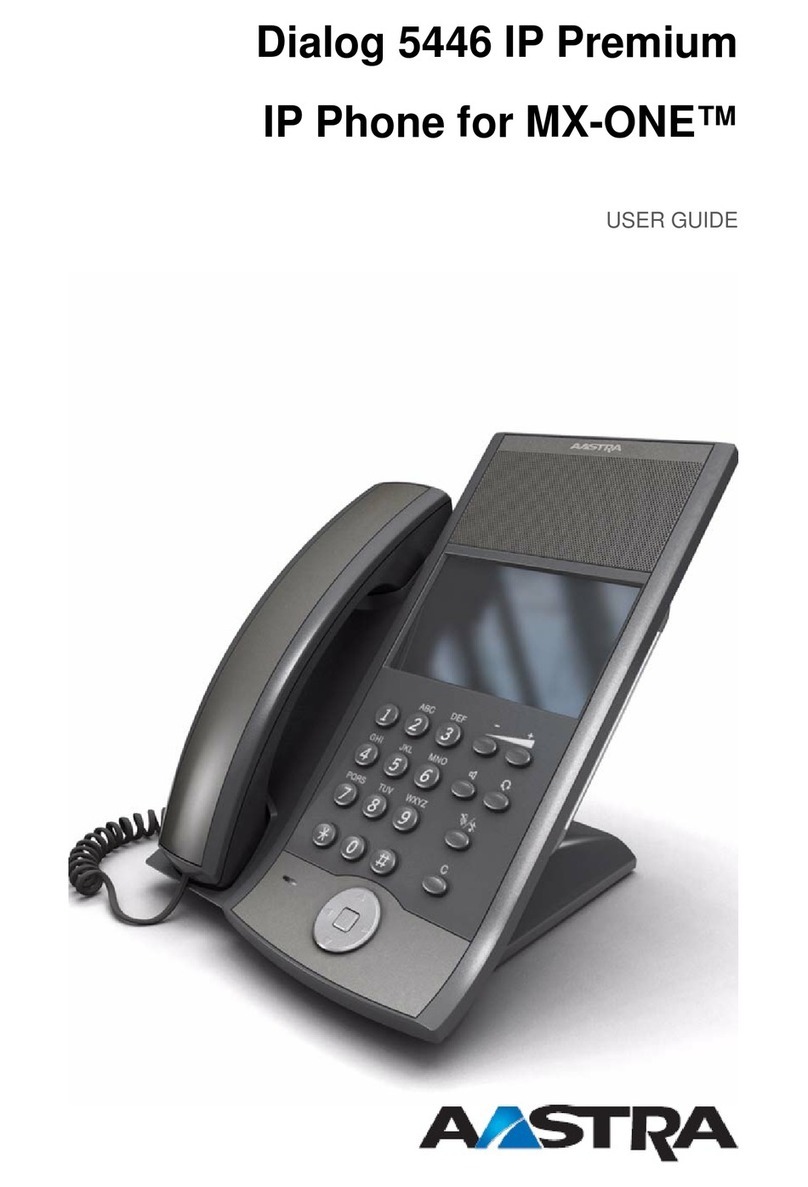
Aastra 7446ip
IP Phone for MX-ONE
T Wolftwelve
6/1553-DBC 446 01 Uen G 2012-02-22 2
Copyright
© Copyright Aastra Telecom Sweden AB 2010. All rights reserved.
No parts of this publication may be reproduced, stored in retrieval
systems, or transmitted in any form or by any means, electronic,
mechanical, photocopying, recording or otherwise, without prior written
permission of the publisher except in accordance with the following
terms.
If this publication is made available on Aastra media, Aastra gives its
consent to downloading and printing copies of the content provided in
this file only for private use and not for redistribution. No parts of this
publication may be subject to alteration, modification orcommercialuse.
Aastra will not be liable for any damages arising from use of an illegal
modified or altered publication.
IP PHONE FOR MX-ONE
36/1553-DBC 446 01 Uen G 2012-02-22
1 Important User Information
TRADEMARK
Aastra is a registered trademark of Aastra Technologies Limited. All
other trademarks herein are the property of their respective owners.
DISCLAIMER
While every effort has been made to ensure accuracy, Aastra will not be
liable for technical or editorial errors or omissions contained within this
documentation. The information contained in this documentation is
subject to change without notice.
DECLARATION OF CONFORMITY
Hereby, Aastra Telecom Sweden AB, Box 42214,
SE-126 17 STOCKHOLM, declares that this product(s) is in conformity
with the essential requirements and other relevant provisions of the
European Directive 1999/5/EC (R&TTE Directive).
Details to be found at www.aastra.com/sdoc
6/1553-DBC 446 01 Uen G 2012-02-22 4
IMPORTANT USER INFORMATION
FCC Statement
This equipment has been tested and found to comply with the limits for
a Class B digital device, pursuant to Part 15 of the FCC rules.
These limits are designed to provide reasonable protection against
harmful interference in a residential installation. This equipment gener-
ates, uses and can radiate radio frequency energy and, if not installed
and used in accordance with the instructions, may cause harmful inter-
ference to radio communications.
However, there is no guarantee that interference will not occur in a
particular installation. If this equipment does cause harmful interference
to radio or television reception, which can be determined by turning the
equipment off and on, the user is encouraged to try to correct the inter-
ference by one or more of the following measures:
• Reorient or relocate the receiving antenna.
• Increase the separation between the equipment and receiver.
• Connect the equipment into an outlet on a circuit different from that
to which the receiver is connected.
• Consult the dealer or an experienced radio/TV technician for help.
HAC (Hearing Aid Compatible)
IP PHONE FOR MX-ONE
56/1553-DBC 446 01 Uen G 2012-02-22
IMPORTANT SAFETY INSTRUCTIONS (ENGLISH)
When using your telephone equipment, basic safety precautions should
always be followed to reduce the risk of fire, electric shock and injury to
persons, including the following:
• Do not use this product near water, for example, near a bath tub,
wash bowl, kitchen sink or laundry tub, in a wet basement or near
a swimming pool.
• Avoid using a telephone(other than acordless type) during an elec-
trical storm. There may be a risk of electric shock from lightning.
• Do not use the telephone to report a gas leak in the vicinity of the
leak.
• Use only the power cord indicated in this manual.
SAVE THESE INSTRUCTIONS
IMPORTANTES MESURES DE SÉCURITÉ (FRANÇAIS)
Certaines mesures de sécurité doivent être prises pendant l’utilisation
de matérial téléphonique afin de réduire les risques d’incendie, de choc
électrique et de blessures. En voici quelquesunes:
• Ne pas utiliser l’appareil près de l’eau, p.ex., près d’une bagnoire,
d’un lavabo, d’un évier de cuisine, d’un bac à laver, dans un
sous-sol humide ou près d’une piscine.
• Éviter d’utiliser le téléphone (sauf s’il s’agit d’un appareil sans fil)
pendantunorageélectrique.Cecipeutprésenter unrisquedechoc
électrique causé par la foudre.
• Ne pas utiliser l’appareil téléphonique pour signaler une fuite de
gaz s’il est situé près de la fuite.
• Utiliser seulement le cordon d’alimentation indiqué dans ce
manuel.
CONSERVER CES INSTRUCTIONS
2 INTRODUCTION
These directions for use describe the user procedures to handle the
features available for the Aastra 7446ip phone (previously called Dialog
5446, but also known as DBC 446).
6/1553-DBC 446 01 Uen G 2012-02-22 6
INTRODUCTION
This document is valid for MX-ONE Telephony System -– Telephony
Switchand MX-ONE Telephony System – Telephony Server. Whenever
only one system is applicable, this is specifically stated in the document.
All the procedures, suffix digits, tone messages and times used in this
document are according to the standard application system.
Not all exchanges are equipped with all features. By categorization, it is
possible to vary the number of features assigned to each individual
extension. This can affect the display information. The person (depart-
ment) responsible for telecommunications in your organization will
inform you which features that have been assigned to you.
The Aastra 7446ip phone conforms to the H.323 and the SIP standards.
To find out which protocol is active, refer to 4.5 Software Version on
page 24.
The phone supports Dynamic Host Configuration Protocol (DHCP) for
determination of IP addresses.
* * * * * * * * * * * * * * * * * * * * * * * * * * * * * * * * * * * * * * *
Note: Be careful not to keep credit cards near the phone, since they
may be demagnetized due to the strong magnets in the phone.
This phone can be used without lifting the handset. When stated
Lift the handset before dialing a procedure or a phone number
you can also dial directly without lifting the handset.
For more information, see 3.7.1 Using the Headset on page 19.
* * * * * * * * * * * * * * * * * * * * * * * * * * * * * * * * * * * * * * *
IP PHONE FOR MX-ONE
76/1553-DBC 446 01 Uen G 2012-02-22
Important Safety Instructions
Save these instructions. Read these safety instructions before use!
Note: When using your telephone or connected equipment, the
following basic safety precautions should always be followed to
reduce risk of fire, electrical shock and other personal injury.
Follow instructions in the equipment's user guide or other docu-
mentation.
Always install equipment in a location and environment for which it
is designed.
For mains powered telephones:Only operatewith the mains power
voltage indicated. If you are uncertain of the type of power supplied
to the building, consult property management or your local power
company.
For mains powered telephones: Avoid placing the telephone's
power cable where it can be exposed to mechanical pressure as
this may damage the cable. If the power supply cord or plug is
damaged, disconnect the product and contact qualified service
personnel.
Headsets used with this equipment must comply with EN/IEC
60950-1 and for Australia AS/NZS 60950.1-2003.
Do not make any changes or modifications to equipment without
seeking approval from the party responsible for compliance. Unau-
thorized changes or modifications could void the user's authority to
operate the equipment.
Do not use the telephone to report a gas leak in the vicinity of the
leak.
Do not spill liquid of any kind on the product or use the equipment
near water, for example, near a bathtub, washbowl, and kitchen
sink, in a wet basement or near a swimming pool.
Do not insert any object into equipment slots that is not part of the
product or auxiliary product.
Donotdisassembletheproduct.Contactaqualifiedserviceagency
when service or repair work is required.
Do not use a telephone (other than cordless type) during an elec-
trical storm.
Disposal of the Product
Your product should not be placed in municipal waste. Please check
local regulations for disposal of electronic products.
6/1553-DBC 446 01 Uen G 2012-02-22 8
AASTRA 7446IP DESCRIPTION
3 Aastra 7446ip Description
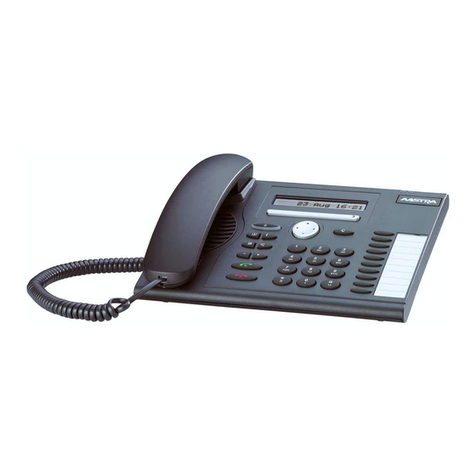
TheAastra 7446ipphone (previouslycalledDialog5446, but alsoknown
as DBC 446) has a backlit display with a 480 x 272 pixels color touch
screen. Most features are activated from the display, and the phone is
equipped with a stylus for this purpose. For more information on the
display, see 3.3 Display on page 12.
Note: Clean the phone with a cloth slightly moisten with a mild soap
solution.
Figure 1: Aastra 7446ip: Front View
IP PHONE FOR MX-ONE
96/1553-DBC 446 01 Uen G 2012-02-22
Figure 2: Aastra 7446ip: Back View
All connections at the back of the phone are marked for easier identifi-
cation.The tiltablestand makesit easyto connect thecables, andallows
you to adjust the angle of the phone.
Table 1 Phone Connections
Connection Description
(Optional) The phone is powered by an external 24 V
AC/DC adapter (see details below) or, alternatively,
over a Power over Ethernet (PoE) capable hub.
If you use the external power adapter, connect one
end of the adapter to the phone connection marked
“POWER”, and the other end to a power outlet.
If you use the PoE connection, you only have to
connect the phone to the LAN.
Connect one end of the Ethernet cable to the phone
connection marked “LAN”, and the other end to a LAN
connection.
The phone conforms to the 802.1x standard for LAN
authentication.
6/1553-DBC 446 01 Uen G 2012-02-22 10
AASTRA 7446IP DESCRIPTION
Note: The phone does not work during power failure, unless powered
through a PoE.
The phone can be powered either from the network or from a 24 V
AC/DC plug-in power adapter. Only use the 24 V AC/DC plug-in adapter
(power supply) listed below, or an adapter approved by your local
retailer.
If the telephone is equipped with a gigabit Ethernet
unit (DBY 412 02) and connected to a 1 gigabit LAN, it
can be powered by a power adapter, or by a power
hub.
If the telephone has the gigabit Ethernet unit installed,
and is connected to a 10/100 megabit LAN, the
telephone has to be powered by a power adapter. The
alternative is to remove the gigabit Ethernet unit.
Connect one end of the PC cable to the phone
connection marked “PC”, and the other cable end to a
RJ45 connection on your PC.
When the phone is starting up (booting), a connected
PC will lose network connection for a few seconds.
(Optional) You can connect a headset to the phone
connection marked “HEADSET”.
Connect the handset to the phone connection marked
“HANDSET”.
USB connection. Currently not used.
Product Number Power Rating
RES 141 316/1 20VA 110-230V/24V (EU)
RES 141 316/2 20VA 110-230V/24V (US)
RES 141 316/3 20VA 110-230V/24V (UK)
IP PHONE FOR MX-ONE
11 6/1553-DBC 446 01 Uen G 2012-02-22
3.1 Keypad
The phone is equipped with a standard alpha numeric keypad and 7
function keys used for the most basic telephony functions, see table
below. Most other telephony functions are invoked from the display, see
3.3 Display on page 12.
Table 2 Aastra 7446ip Function Keys
Key Function
Press the loudspeaker key to enable handsfree
connection.
Press the volume control keys to adjust the volume
level of the ring signal and incoming speech in the
handset, headset, or loudspeaker.
Press the left volume control key to turn down the
volume level, and the right volume control key to turn
up the volume level.
Press the headset key to enable headset connection.
Press and hold down the headset key for 4 seconds to
activate the headset preset mode.
Leave the headset mode by pressing the speaker key
for 4 seconds (see above).
Press the mute key to turn off the microphone in
speech state. This is useful when you do not want the
person at the other end of the line to hear what you
say to your colleague.
If you press the mute key when the phone is in idle
state, silent ringing is activated. Deactivate silent
ringing by pressing any key.
Press the clear key to disconnect an ongoing call if
you are using the handsfree mode. In idle mode, you
can press Cto exit a page, expect from the internet
page.
Press the navigation key to move between display
tabs, to select menu items in a menu, and to move
between fields in a screen.
Press up, down, left, or right on the navigation key to
move between items in a display window, and press
the square in the middle of the navigation key to select
an item, to enter information you have typed, or to
confirm an action.
6/1553-DBC 446 01 Uen G 2012-02-22 12
AASTRA 7446IP DESCRIPTION
3.2 Navigation
Typically, you can highlight and select a display item such as an option
or a setting in one of the following ways:
Highlight the item using the navigation key and select it by tapping the
Select button (or relevant button).
Highlight and select the item by tapping it with the stylus or with your
finger.
Note: To return to the previous page, press repeatedly
Figure 3: Menu Structure
3.3 Display
Inthe Aastra 7446ip phone, most functions are invokedfrom the display.
When you have logged on to the phone, the main page is displayed, see
below.
Note: The look of the page may vary depending on which features are
activated.
IP PHONE FOR MX-ONE
13 6/1553-DBC 446 01 Uen G 2012-02-22
Figure 4: Display Menu
The top of the display contains a menu bar with tabs that each open a
page where you can access a number of services that are available for
your extension. The tabs are, from left to right, applications and settings,
shortcuts, messages, main page, call list, contacts, and internet.
In idle mode, and when you log on to your phone, the main page is
displayed by default. The main page contains the following information:
• The right, central area of the page displays the date and time, as
well as the name and number of the user logged in on the exten-
sion. Icons indicate thering volume for your extension, orthat there
are messages in your mailbox (if available), as well as activated
features such as Follow me or Free on 2nd.
Whenyoureceiveacall, thecaller’s numberandpossibly nameare
displayed here.
• The left central area of the page displays status information on
certain services for your extension. It also contains information on
how an incoming has been obtained, directly or by transfer.
When you make a call, the called party’s number and possibly
name are displayed here. The called party's status (that is, free,
busy, and so on) is displayed here.
Duringanongoingcall,anew incomingcallmaybe indicated bythe
Line 2 button, provided that the Free on busy feature has been acti-
vated (available in H.323 phones only).
• The bottom area of the page contains buttons as well as informa-
tion on number of missed calls.
6/1553-DBC 446 01 Uen G 2012-02-22 14
AASTRA 7446IP DESCRIPTION
3.3.1 Menu Tabs
The menu tabs appear in the menu bar at the top of the display window.
To open a page, tap the tab icon.
Tap the applications and settings tab to open the
Applications and Settings page, which contains the
sub-pages My Availability and My Settings.
For information on availability settings, see 14.1 My
Availability Settings on page 74.
For information on telephone settings, see 14.6 Time and
Date on page 82.
Tap the shortcuts tab to open the Shortcuts pages, where
your can store frequently used phone numbers for easy
access. For more information on shortcuts, see 6.7 Shortcut
Keys on page 37.
Tap the messages tab to open the Messages page, where
you can retrieve your messages.
Tap the telephony tab to open the Telephone page. This
page is the default screen where you make and receive
calls, set presence options, log off the phone, and so on. For
detailed information on how to make and receive calls, see 5
Incoming Calls on page 25 and 6 Outgoing Calls on page 28.
Tap the call list tab to open the Call List page.
The phone keeps a call list of 50 positions listing answered
incoming calls, outgoing calls, and missed and rejected calls.
Next to the number, you can see how calls have been made
from that number.
When you select a contact number in the call list, that
number is highlighted and appears as a button. To call the
number, tap the button. There is a position indicator showing
where in the phone book the present page is located.
In case of power failure, or if another user (extension
number) logs on from this phone, the call list is cleared. For
information on how to use the call list, see 6.5.2 Redial a
Call from the Call List on page 36.
Tap the contacts tab to open the Contacts page. For more
information on contacts, see 9 Contacts on page 48.
Tap the web browser tab to open the Internet page where
you can enter web address you wish to load. For more
information on the web browser, see 15 Web Browser on
page 84.
IP PHONE FOR MX-ONE
15 6/1553-DBC 446 01 Uen G 2012-02-22
3.3.2 Icons
On the right side of the main page, a number of icons may appear in
different situations. The icons are described below.
System warning. Indicates reduced system access, which
means that some features may not work. Reduced system
access occur when the phone is registered to another
exchange than the usual one.
Silent ringing/mute. Indicates that the ring signal is
switched off. The icon appears in the same position as the
volume level bar.
Volume level. Depending on the mode, this icon indicates
the volume level of the ring signal, the speech level of the
ear piece, or the headset volume.
Headset. Indicates that incoming and outgoing calls will be
connected to the headset when you answer or make a call
without lifting the handset.
Incoming call. Indicates an answered incoming call.
Outgoing call. Indicates an answered outgoing call.
Missed call. Indicates a missed incoming call.
Follow me. Indicates that all incoming calls are forwarded to
another extension. Tap the icon to reset the follow-me
settings.
Message. Indicates that you have one or more unread
messages waiting. You can retrieve the messages by tapping
the message tab in the top menu bar. When you have read
the message, the icon changes so that it looks like an open
envelope.
Soft keyboard. The built-in soft keyboard appears as an
icon on pages where it is possible to enter text, for example
when you want to add a contact by typing the name and
number manually. Tap the icon to enlarge the keyboard. By
tapping the keyboard buttons at the bottom of the soft
keyboard, you can change character sets, and switch
between numbers and letters.
Free on busy. Enables you to receive a second incoming
call during an ongoing call.
6/1553-DBC 446 01 Uen G 2012-02-22 16
AASTRA 7446IP DESCRIPTION
3.4 Indicator Lights
Instead of LED indicators on the phone keys, the IP phone has indicator
lights built into the display buttons. The indicator lights indicates line
status using different flash patterns, see below.
3.5 Tones and Signals
The Ring Signals settings page containsthe Ring tone and Select Ring
Melody settings. You can choose between 10 different ring tones
(between 0 and 9) and a number of ring melodies. In order to distinguish
between internal, external and call back calls, the signal you choose will
be used with different ring cadences/characteristics for each call type.
You can also distinguish between callers by giving each phone number
its own ring signal.
This section describes the ring signals and tones characteristics avail-
able in the phone.
3.5.1 Tone Characteristics
The ring tones have the following cadences depending on the meaning:
Callback. When you call a number and receive a busy tone,
or there is no answer, you can order automatic callback for
that number. As soon as the extension or line becomes free
(or, when there is no answer, when the extension has been
used), you will be called back.
Off Indicates idle status
Fast blinking Indicates an incoming call
Steady glow with fast blinking Indicates a busy line
Dial tone
Special dial tone
IP PHONE FOR MX-ONE
17 6/1553-DBC 446 01 Uen G 2012-02-22
* The conference tone can be disabled by the system administrator.
Note: The ring tones differ depending on the country where the phone
is being used.
3.5.2 Ring Signals
At an incoming call on the free on second line, the phone rings only the
first period and with a low level. This is valid for both the internal and
external ring signal.
The following types of ring signals are available:
Ring tone or
queue tone
Busy tone
Congestion tone
Vacant number
tone
Call waiting tone
or verification
tone
Intrusion tone
Conference tone*
Connection in
progress tone
Internal ring
signal
External ring
signal
6/1553-DBC 446 01 Uen G 2012-02-22 18
AASTRA 7446IP DESCRIPTION
Note: The ring signals differ depending on the country where the phone
is being used.
3.5.2.1 Ringing Volume
To adjust the ring volume, press the -and +keys on the phone in idle
mode (when no call is connected), or when the phone is ringing.
3.5.2.2 Silent Ringing
Pressing the mute key when the phone is ringing or is in idle mode, acti-
vates the silent ringing mode. This means that the tone ringer will be
inactivated for incoming calls. When there is an incoming call, the Line
1or Line 2 button is flashing. The silent ringing mode remains active
until you press any key. The silent ringing mode is indicated by the mute
icon, .
3.6 Handset and Speakerphone
3.6.1 Handsfree
Most features are described using the handset. However, you can
answer and make calls without using the handset.
3.6.2 Using the Handset and the Headset
In handsfree mode, you do not lift the handset to start a procedure, and
instead of replacing the handset after a call, you press the Ckey (Clear).
Note: Everything that works with the handset, also works with the
headset.
3.6.3 Using the Speakerphone
Using handsfree with the loudspeakerenablesyou to dial a number,and
monitor the progress of a call.
Note: Make sure that the phone is placed on a flat surface, otherwise
the handsfree feature may not work properly.
Recall signal
(Callback
reminder)
IP PHONE FOR MX-ONE
19 6/1553-DBC 446 01 Uen G 2012-02-22
3.7 Headset
3.7.1 Using the Headset
Usingaheadset enablesyou tomake andreceive callswithout usingthe
handset.
Answer a call Tap the line button that indicates an
incoming call (the button's light
indicator is blinking).
Make a call Dial the number you want to call. When
someone answers, the speakerphone
is activated. You can then either pick
up the handset, or continue to use the
speakerphone.
Clear a call Press the Ckey.
Switch from speakerphone to
handset Lift the handset.
Switch from handset to
speakerphone Press and replace the handset.
Switch from speakerphone to
headset Press .
Switch from headset to
speakerphone Press .
Make a call Press and dial the desired
number and. In headset preset mode,
you are not required to press the
headset key.
Receive a call Press .
Switch from headset to
handset Lift the handset.
Switch from handset to
headset Press and replace the handset.
Clear a call Press the Ckey.
6/1553-DBC 446 01 Uen G 2012-02-22 20
STARTING THE PHONE
3.7.1.1 Call Handling through the Line Buttons
Bydefault, thephone isset toconnect callsto the loudspeakerwhen you
answerincoming calls,or when you make callsby tapping aLine button.
Thisdefaultsetting isknown asthe loudspeakerpreset mode.When you
dial a number without lifting the handset, the call is also connected to the
loudspeaker by default.
When you use a headset, you can switch to the headset preset mode to
have calls connected to the headset. If the headset preset mode is acti-
vated and you press , the call is connected to the loudspeaker.
Note: The headset preset mode can only be activated and deactivated
when the phone is in idle mode. When you lift the handset to
answer an incoming call, the call is automatically connected to
the handset, regardless of which preset mode is active.
4 Starting the Phone
4.1 Starting and Logging On
Depending on the settings in your network and telephony system, the
startup procedure may differ from phoneto phone. Check the display on
your phone and read the relevant sections in this chapter to continue
with the startup procedure.
When the phone is connected to the network, your phone automatically
initiates the startup procedure when the power is connected to the
phone.
Activating Headset
Preset Mode To activate the headset preset mode, press
and hold down for 4 seconds. When
you hear a ring signal, and the headset icon
appears in the display to the right, the
headset preset mode is activated.
Deactivating Headset
Preset Mode To deactivate the headset preset mode,
press and hold down for 4 seconds.
When you hear a ring signal, and when the
headset icon disappears from the display to
the right, the headset preset mode is
deactivated.

This manual suits for next models

2

Other Aastra IP Phone manuals

Aastra Clearspan 6731i User manual

Aastra

Aastra Clearspan 6731i User manual

Aastra 675xi Series Instruction Manual

Aastra

Aastra 675xi Series Instruction Manual

Aastra 480I CT User manual

Aastra

Aastra 480I CT User manual

Aastra Clearspan 6757i User manual

Aastra

Aastra Clearspan 6757i User manual

Aastra 9112I User manual

Aastra

Aastra 9112I User manual

Aastra 5361 User manual

Aastra

Aastra 5361 User manual

Aastra 57I CT User manual

Aastra

Aastra 57I CT User manual

Aastra 6730I User manual

Aastra

Aastra 6730I User manual

Aastra 612d Instruction manual

Aastra

Aastra 612d Instruction manual

Aastra 5361 User manual

Aastra

Aastra 5361 User manual

Aastra 480I SIP IP PHONE User manual

Aastra

Aastra 480I SIP IP PHONE User manual

Aastra 55I IP User manual

Aastra

Aastra 55I IP User manual

Aastra 6757i CT RP User manual

Aastra

Aastra 6757i CT RP User manual

Aastra 6755i User manual

Aastra

Aastra 6755i User manual

Aastra 6737i User manual

Aastra

Aastra 6737i User manual

Aastra VentureIP 480i Service manual

Aastra

Aastra VentureIP 480i Service manual

Aastra Clearspan 6739i User manual

Aastra

Aastra Clearspan 6739i User manual

Aastra Clearspan 6757i User manual

Aastra

Aastra Clearspan 6757i User manual

Aastra 57I CT User manual

Aastra

Aastra 57I CT User manual

Aastra 6865i User manual

Aastra

Aastra 6865i User manual

Aastra 6863i User manual

Aastra

Aastra 6863i User manual

Aastra 7434ip User manual

Aastra

Aastra 7434ip User manual

Aastra 57I IP User manual

Aastra

Aastra 57I IP User manual

Aastra VentureIP 480i User manual

Aastra

Aastra VentureIP 480i User manual

Popular IP Phone manuals by other brands

ATCOM AT800 Series user manual

ATCOM

ATCOM AT800 Series user manual

Topcom Butler E751 TripleButler E751 Quattro user guide

Topcom

Topcom Butler E751 TripleButler E751 Quattro user guide

Cisco 8845 quick start guide

Cisco

Cisco 8845 quick start guide

Slican VPS-2000P user manual

Slican

Slican VPS-2000P user manual

Fanvil C56 Quick installation guide

Fanvil

Fanvil C56 Quick installation guide

switel DC2000 user manual

switel

switel DC2000 user manual

Telematrix 3300IP-TRM user manual

Telematrix

Telematrix 3300IP-TRM user manual

Nortel IP Phone 1110 Getting started

Nortel

Nortel IP Phone 1110 Getting started

gesko Ikarus 1200s Instructions for use

gesko

gesko Ikarus 1200s Instructions for use

Yealink SIP-T21 E2 user guide

Yealink

Yealink SIP-T21 E2 user guide

Nortel 1165E user guide

Nortel

Nortel 1165E user guide

Avaya J129 user manual

Avaya

Avaya J129 user manual

Uniden DTL-8R-1 User Operation and Specification

Uniden

Uniden DTL-8R-1 User Operation and Specification

Avaya 4600 Series installation guide

Avaya

Avaya 4600 Series installation guide

NEC Univerge SV8100 Reference sheet

NEC

NEC Univerge SV8100 Reference sheet

Cisco Unified 6921 Quick user guide

Cisco

Cisco Unified 6921 Quick user guide

Avaya IP Office 5621 Quick reference guide

Avaya

Avaya IP Office 5621 Quick reference guide

Auerswald COMfortel 3200 Operation guide

Auerswald

Auerswald COMfortel 3200 Operation guide

manuals.online logo
manuals.online logoBrands
  • About & Mission
  • Contact us
  • Privacy Policy
  • Terms and Conditions

Copyright 2025 Manuals.Online. All Rights Reserved.