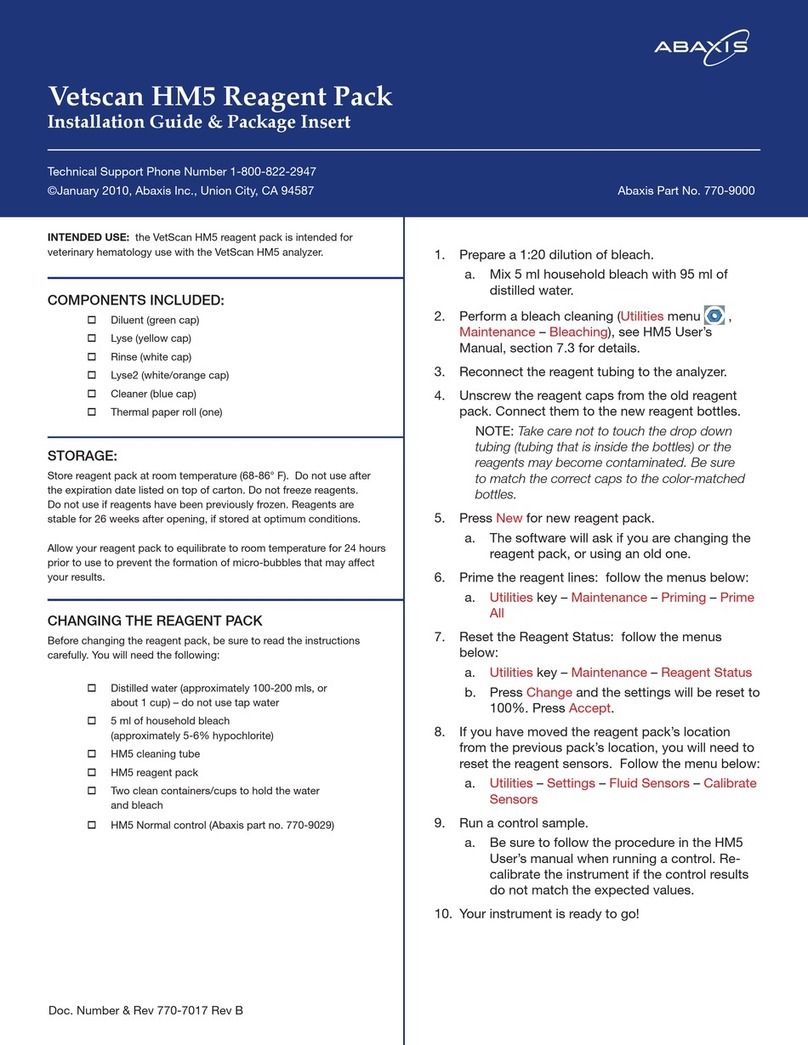
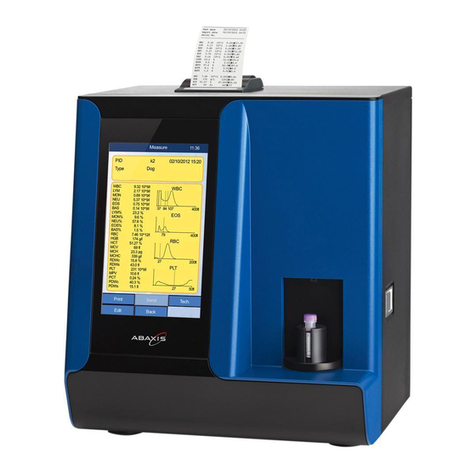
Abaxis VetScan i-STAT 1 User manual

i-STAT®1
User Guide
©2014 Abbott Point of Care Inc. All rights reserved.
Printed in USA. i-STAT is a registered trademark of
the Abbott group of companies in various jurisdictions.
Abaxis and VetScan are registered trademarks of Abaxis.
For Veterinary Use Only.

Art: 723085-00K Rev. Date: 30-OCT-2014

Overview of the VetScan i-STAT 1 System .................................................2–3
Precautions.................................................................................................4–5
Prepare the Analyzer...................................................................................6–7
Install/Change Batteries
Check/Change Date and Time
Check Software and Status
Analyzer Customization Options...............................................................8–10
Shipment and Storage of Cartridges
...............................................................11
Using a Cartridge for Patient Tests................................................................11
Perform a Patient Test (CG4+, CG8+, G, Crea, E3+, 6+, CHEM8+, EC8+, or ACT Celite cartridges)....12–15
Collect the Sample
Prepare the Sample and Cartridge
ill and Insert the Cartridge
Perform a Patient Test (cTnI cartridge)..............................................................16-18
Review Results.............................................................................................19
VetScan i-STAT Test Reference Ranges .......................................................20
Quality Checks, Troubleshooting, Cartridge & Test Information....................21
Reviewing Stored Results ............................................................................22
Printing Results ......................................................................................23–29
Downloader and Downloader/Recharger ................................................30–31
Deleting Results from the Analyzer..............................................................32
Manufacturer’s Quality System Instructions ................................................33
Checking Analyzer with the Electronic Simulator .........................................34
Periodic Procedures......................................................................................35
Cleaning and Decontamination
Updating Software
Thermal Probe Check
Symbols..................................................................................................36–37
Bibliography for VetScan i-STAT Test Reference Ranges ........................37–38
Warranty .......................................................................................................39
Table of Contents
Art: 723085-00K Rev. Date: 30-OCT-2014

2 Art: 723085-00K Rev. Date: 30-OCT-2014
Fill ark
Tab for
Snap Closure
Sample Well
(Blood goes here)
Cartridge
Features
VetScan i-STAT 1
Features
Display
ON/OFF Key
Print Key
Backlight
and 0 Key
enu Key
Cartridge Port
Numeric
Keys (0-9)
Page Key
Scan Key
Clear Key
Enter Key
Laser Barcode
Scanner
Window
Battery
Compartment
Infrared
Communication
Window
Fill ark
Sample Well
(Blood goes here)
Tab for
Snap Closure

Art: 723085-00K Rev. Date: 30-OCT-2014 3
T
he VetScan i-STAT 1 System incorporates a comprehensive group of components
needed to perform blood analysis. A portable handheld analyzer, a cartridge with the
required tests, and 1 to 3 drops of blood will allow the veterinarian to view quantitative
results for tests commonly needed. A portable printer allows test records to be printed.
To perform a test, the operator lls a cartridge with sample, seals the cartridge with
its closure, and inserts the cartridge into the analyzer. The cartridge contains all
components to perform the tests. The analyzer automatically controls all steps in the
testing cycle including: uid movement, reagent mixing, calibration and temperature
control. Quality checks are performed continuously throughout the testing cycle.
Operator, patient identication and other patient information can be entered into the
test record. When the test cycle is complete, results are displayed and the test record
is stored. This degree of automation, along with the ability to test whole blood,
eliminates many sources of error as well as time- consuming and costly steps inherent
in other methods.
Overview of the VetScan i-STAT 1 System
ill and seal cartridge
with patient sample.
Insert into analyzer.
Read Results.
4
4
Note Regarding ystem Reliability:
The VetScan i-STAT System automatically runs a comprehensive set of quality checks of
analyzer and cartridge performance each time a sample is tested. This internal quality system will suppress results if the analyzer
or cartridge does not meet certain internal specifications. To minimize the probability of delivering a result with medically significant
error, the internal specifications are very stringent. It is typical for the system to suppress a very small percentage of results in
normal operation given the stringency of these specifications. If, however, the analyzer or cartridges have been compromised,
results may be persistently suppressed, and one or the other must be replaced to restore normal operating conditions. Where
unavailability of results while awaiting replacement of analyzer or cartridges is unacceptable, Abaxis recommends
maintaining both a backup Vet can i- TAT 1 Analyzer and cartridges from an
alternate lot number.

Incorrect cartridge storage. Cartridges should be stored
at 2-8 ˚C (35 to 46 ˚F).
Incorrect sample collection and/or sample handling:
•For all cartridges except ACT, test only fresh whole
blood samples collected in tubes with lithium or
sodium heparin anticoagulant.
•
For ACT testing, use only fresh whole blood samples
collected in plastic syringes or evacuated tubes with
no anticoagulants, activators or serum separators.
•
When measuring TCO2, fill tubes to capacity.
Do not use “short fill” tubes.
•
When measuring TCO2, test samples within 10 minutes
of collection. When measuring PO2, test samples
within 10 minutes of collection if stored anaerobically.
Otherwise, run immediately. When measuring Lactate,
test samples immediately.
•Any deviations will cause inaccurate results.
Use of expired cartridges
If the pouch/portion pack has been punctured, the
cartridge should not be used.
DO NOT OPEN THE ANALYZER or any other VetScan i-STAT
product, or perform any unauthorized procedures. Opening a
VetScan i-STAT product, including the analyzer, Electronic
Simulator, printer, or communication device, in an attempt to
repair it or resolve a problem, may cause erroneous results and
invalidate your warranty. If the troubleshooting procedures
found in this guide or requested by Abaxis Technical Service do
not resolve the problem, the product must be returned for repair.
The use of other software that was not provided as part
of the System on the same PC with the Central Data
Station software may compromise the System, including
permanent loss of patient records.
To protect yourself and others from infection: Do not
perform blood or control fluid testing in areas where food
and drink are stored or consumed. Wash hands after
handling blood or blood soiled items. Do not use a cartridge
if blood is spilled on it. Discard contaminated (blood soiled)
items in a biohazard waste container. Decontaminate
analyzer or work surface if blood is spilled on it. Since blood
spots may not be noticeable on the analyzer and since a
cartridge could contaminate the inside of the analyzer, treat
the analyzer as capable of transmitting infection.
Potential ources of
Error in Patient Results
Potential ources of
Harm to the Operator
Precautions
4 Art: 723085-00K Rev. Date: 30-OCT-2014

A falling or dropped analyzer. Place analyzer and peripherals
on a stable surface.
Barcode scanner: Do not look into laser beam coming
from scanner, or point into eyes of someone else.
Needles: take care to prevent needle sticks. Use safety
tips when transferring sample from a blood collection tube
to a cartridge.
Analyzer and peripherals are not suitable for use in an
oxygen enriched atmosphere.
Do not attempt to remove a cartridge during the testing
cycle. The force necessary to do so could damage the
analyzer. The message “Cartridge Locked” will remain
on the screen until the analyzer unlocks the cartridge.
The analyzer may be rendered inoperative by damage
due to mishandling, such as dropping, by exhausting the
batteries, or by other causes.
The analyzer will continue to initialize test cycles when the
analyzer is customized to warn, but not block testing
when a scheduled external Electronic Simulator is
missed, when a FAIL result for the external Electronic
Simulator test is ignored, and when the analyzer fails the
internal Electronic Simulator test and the lockout feature
is not enabled.
Dispose of analyzer, peripheral electronics, and batteries
according to local, state, and/or national guidelines.
If the analyzer is not to be used for an extended period of
time, the batteries should be removed to prevent leakage.
Allow analyzer to equilibrate to ambient temperature if
transported from a location at a significantly different
temperature.
Do not store analyzer in a location that may raise its
temperature.
Potential ources of
Harm to the Operator
(continued)
Potential ources of
Damage to the Analyzer
Precautions
Art: 723085-00K Rev. Date: 30-OCT-2014 5

“+”
Prepare the Analyzer
Install/Change Batteries
The analyzer requires two 9-volt lithium batteries. Before using
a new analyzer, or when battery replacement is indicated, install
batteries as follows:
1. Slide the battery compartment door off.
2. Tilt the analyzer to slide out the battery carrier.
3. Locate two (2) 9 volt lithium batteries. Insert a battery into
each side of battery carrier, matching + and - marks on
batteries to the + and - marks on battery carrier.
4.
Slide battery carrier into the analyzer as shown (Label facing up).
5. Slide battery door back into place.
Note:
Two 9 volt lithium batteries will provide power for approximately
400 chemistry cartridges. The analyzer will display a “BATTERY
LOW” message when the On/Off key is pressed, and a ashing
battery icon will appear when battery replacement is needed.
Stored results are not lost when batteries are fully discharged or
removed. Stored results and clock settings are maintained by an
internal lithium battery that should last for seven years.
444
Before using the analyzer, complete these simple procedures:
•Install/change the batteries
•Check/change the analyzer’s date and time
•Check the analyzer’s software and status
Caution: New analyzers or analyzers that have been repaired and returned or
replaced will have standard CLEW and application software. If a different CLEW
and/or application software is in use in your facility, it must be installed in new,
repaired, or replaced analyzers before they are put into use. Check the analyzer
Status Page for the installed CLEW and application software.
6 Art: 723085-00K Rev. Date: 30-OCT-2014

Check/Change Date and Time
1. Press to turn on analyzer
2. Press
to change screen to Administration Menu
3. Press (Set Clock)
4. Press (No password is required)
5. Use or to move the cursor to a digit if it
needs to be changed. Use number keys to change digit.
Note: Analyzer uses a 24 hour clock.
Therefore, 1:00 PM is displayed as 13:00.
6.
Press to accept changes, or to cancel changes.
MENU
MENU
5
ENT
3
ENT
3
4
4
13:26 18 UNyy
Administration Menu
1 - Analyzer Status
2 - Data Review
3 - Quality Tests
4 - Customization
5 - Set Clock
6 - Transmit Data
7 - Utility
Enter Current
Time And Date
13:36
06/18/13
mm/dd/yy
ENTER - Set And Exit
MENU - Cancel
Check Software and Status
1. rom the
Administration Menu, press
(Analyzer Status)
2. Check that software (CLEW & Version) in the
Analyzer is up to date.
1
15:26 18 UNyy
Administration Menu
1 - Analyzer Status
2 - Data Review
3 - Quality Tests
4 - Customization
5 - Set Clock
6 - Transmit Data
7 - Utility
Analyzer Status
Temp: 27.1˚C
Pressure: 761mmHg
Battery: 8.54V
Uses: 100
Serial: 30144-B
CLEW: A12
Version: AMS121B
Custom: Default0
Stored Records
Total: 1
Unsent: 1
Temp: Analyzer’s reading of room temperature.
Analyzer will function between 16-30˚C.
Pressure: Analyzer’s reading of barometric pressure.
Analyzer will function between
300-1000mmHg.
Battery: Analyzer’s reading of battery voltage.
Uses:
Total number of cartridge
runs on analyzer.
Serial: Serial number of analyzer.
CLEW: Standardization software installed on analyzer.
Maintains accuracy of tests.
Version: Application software installed on analyzer.
Directs
functions.
Custom: Name of customization prole in analyzer.
Default0 indicates default settings. Analyzer can be
customized for certain site-specic and cartridge
testing characteristics.
Art: 723085-00K Rev. Date: 30-OCT-2014 7

Setting Units
New analyzers or analyzers that have been repaired and returned or replaced will have
standard unit sets installed. If a different unit of measurement for a particular analyte is
in use in your facility, follow these instructions to change the unit in question:
1. Press to turn on the analyzer.
2. Press
to change screen to the Administration Menu
.
3. Press (Customization).
4. Press (Change).
5. Press (No password is required).
6. Press (Results).
7. Press (Units and Ranges).
8. Press the number key corresponding to the analyte
you wish to change units for. Press key to see
additional analytes if the analyte you wish to change
is not on the screen.
9. Press (Enabled).
10. Press the number key corresponding to the units
in which you would like the analyte reported.
11. Once all analytes are set to the units you wish to
report, press twice to return to the Main Menu.
8 Art: 723085-00K Rev. Date: 30-OCT-2014
Analyzer Customization Options
ENT
3
15:26 18 UNyy
Administration Menu
1 - Analyzer Status
2 - Data Review
3 - Quality Tests
4 - Customization
5 - Set Clock
6 - Transmit Data
7 - Utility
Customization
Default0
1 – View
2 – Change
Change
Customization
Default0
1 – Analyzer
2 – ID Entry
3 – Patient Tests
4 – QC Tests
5 – Results
6 – Password
7 – Restore Factory
Settings
Change
Customization
Results
1. Units and ranges
2. Options
4
4
2
2
5
1
MENU
MENU
Results
Units and Ranges
1Cl mmol/L
Ref 98/109
2Kmmol/L
Ref 3.5/4.9
3Na mmol/L
Ref 138/146
4BUN mg/dL
Ref 8/26
5iCa mmol/L
Ref 1.12/132
Page“
Change
Customization
Cl
1. Disabled
2. Enabled
Change
Customization
Cl
1. mmol/L
2. mEq/L

Art: 723085-00K Rev. Date: 30-OCT-2014 9
Cartridge Testing
Cartridge use requires operators to turn on the analyzer, enter an Operator ID and
Patient ID, and then scan the cartridge lot number before inserting a cartridge into the
analyzer for testing. To customize the analyzer:
1. Press to turn on the analyzer.
2. Press
to change screen to Administration Menu.
3. Press (Customization).
4. Press (Change).
5. Press (No password is required).
6. Press (Patient Tests).
7. Press (Cartridge Information).
8. Press to change setting to “Required”.
9. Press (Cartridge Lot Number).
10. Press to change setting to “Required”.
11.
Both “Cartridge Information” and “Cartridge
Lot Number”
should be now appear on display
as “Required”.
12. Press to turn analyzer off and save
the settings.
(If settings are not shown as
“Required”, return to Step 7).
MENU
4
3
2
2
ENT
3
15:26 18 ANyy
Administration Menu
1 - Analyzer Status
2 - Data Review
3 - Quality Tests
4 - Customization
5 - Set Clock
6 - Transmit Data
7 - Utility
Customization
Default0
1 – View
2 – Change
Change
Customization
Default0
1 – Analyzer
2 – ID Entry
3 – Patient Tests
4 – QC Tests
5 – Results
6 – Password
7 – Restore Factory
Settings
Patient Tests
Customization
1 Cartridge
Auto-chart
Disabled
2 Cartridge
Information
Required
3 Cartridge
Barcode
Not Required
4 Cartridge
Lot Number
Required
5 Comment Code
In Range
Disabled
2
Change
Customization
Cartridge
Lot Number
1–Not Required
2– Required
4
2

10 Art: 723085-00K Rev. Date: 30-OCT-2014
Hematocrit Options
Selecti n f K2EDTA r K3EDTA Hemat crit Cust mizati n
The reference method for hematocrit is the microhematocrit (MH) method. All
instruments measuring hematocrit are expected to be traceable, or calibrated, to this
reference method.
The VetScan i-STAT System provides two customization settings for reporting
hematocrit results. The “K3EDTA” customization is the default analyzer setting and it
reports hematocrit results traceable to MH-K3EDTA. The “K2EDTA” customization
reports hematocrit results traceable to MH-K2EDTA.
or best agreement of the VetScan i-STAT1 and hematology analyzer results, the
VetScan i-STAT1 customization setting is selected according to the calibration of the
comparative hematology analyzer (MH-K3EDTA or MH-K2EDTA) currently in use at the
facility and not the type of EDTA anticoagulant in the collection tube used to draw
samples for the hematology analyzer.
Instructions for Customizing the VetScan i-STAT 1 Analyzer for Hematocrit Options
1. Press to turn on the analyzer.
2. Press
to change screen to the Administration Menu
.
3. Press (Customization).
4. Press (Change).
5. Press (No password is required).
6. Press (Results).
7. Press (Options).
8. Press (Hematocrit).
9. Press the number key corresponding to the
desired CPB customization setting.
1 – Prompt CPB (Default setting)
2 – CPB Always
3 – CPB Never
10. Press the number key corresponding to the
desired hematocrit EDTA customization setting.
1 – K3 EDTA
2 – K2 EDTA
11. Press twice to return to the Main Menu.
ENT
3
MENU
ENT
3
4
2
5
2
3
MENU
Change
Customization
Results
1. Units and ranges
2. Options
Results
Customization
1Decimal Separator
(.) Period
2Test Selection
Disabled
3Hematocrit
CPB Always
K3 EDTA
4
Page
“
Change
Customization
Hematocrit
1. Prompt CPB
2. CPB Always
3. CPB Never
Change
Customization
Hematocrit
1–K3 EDTA
2– K2 EDTA

Art: 723085-00K Rev. Date: 30-OCT-2014 11
4
Tear open cartridge
pouch at notch.
Remove cartridge from
pouch. Always hold by
sides.
4
Place on level surface.
A level surface includes
running the analyzer in the
downloader/recharger.
•
Prior to using a cartridge, it must be removed from refrigerated storage and kept at
room temperature in its protective pouch for at least 5 minutes. An entire box of
cartridges should be kept at room temperature for 1 hour before use.
• A cartridge must be used immediately after removing it from its protective pouch.
Do
not remove it until you reach the appropriate step in the patient testing process.
Using a Cartridge for Patient Tests
Removing a Cartridge from the Protective Pouch
Required procedures for cartridge storage:
Refrigerated Storage
Store cartridges at 2 to 8˚C (35 to 46˚ ).
•Refrigerated cartridges may be used until
date shown on cartridge box and pouch.
Room Temperature Storage
•Refer to the cartridge box for room temperature storage requirements.
•Read date on the pouch label. Do not use the cartridge if this date has passed.
Shipments and Storage of Cartridges

12 Art: 723085-00K Rev. Date: 30-OCT-2014
To perform a patient test you will need:
•VetScan i-STAT 1 Analyzer •i-STAT cartridge
•Blood sample in green top tube, •Gauze
or arterial blood sample in syringe
(except for ACT tests)
•or ACT testing: blood sample in
plain, plastic syringe or plastic evacuated
tube with no anticoagulant, activators,
or serum separators
•Sample transfer device
Collect the Sample
Correct sample collection & handling are important for accurate results!
F r Ven us Samples (except for ACT testing):
•Use a blood collection tube containing lithium or sodium heparin.
•Use an appropriate size gauge needle.
•
If alcohol is used to clean the site, allow it to air dry before performing venipuncture.
•ill blood collection tube to capacity. Gently invert tube about 10 times.
•Perform a new venipuncture if blood does not flow freely into collection tube.
•If testing for lactate, test immediately after sample collection. Test CHEM8+, CG8+,
CG4+ and EC8+ cartridges within 10 minutes of sample collection. or other
cartridges, test within 30 minutes of sample collection.
F r Arterial Samples (except for ACT testing):
•Arterial samples should be collected by personnel trained on proper procedures.
Collect from an arterial puncture, skin puncture, arterial cannulation or arterial line.
•Wait at least 20 to 30 minutes after changing IO2 before taking a blood sample.
•
Use plain plastic syringe if testing can be performed immediately. Otherwise, use syringe
with dry (lyophilized) heparin labeled for tests to be performed. or measuring ionized
calcium, syringe must be labeled for this test or labeled as containing balanced heparin.
•ill a heparinized syringe to the capacity recommended in the labeling.
•After sample collection, remove the needle and place cap on syringe.
•Do not place filled syringe in ice water.
•Perform the test within 10 minutes of sample collection. If testing for lactate, test
immediately after sample collection.
Perform a Patient Test
CG4+, CG8+, G, Crea, E3+, 6+, CHEM8+, EC8+, r ACT Celite cartridges

Art: 723085-00K Rev. Date: 30-OCT-2014 13
Collect the Sample (continued)
F r Ven us r Arterial Samples f r ACT Testing:
•
Use a plain, plastic syringe or plastic evacuated tube with no anticoagulant, activators,
or serum separator. Test must be performed immediately upon sample collection.
Prepare the Analyzer
1. Press to turn on analyzer.
2. Press
3. ollow analyzer prompts:
Note: If you make a mistake, press left arrow key to clear entry
a.
Scan or manually enter your operator ID as
prompt
ed.
Press
(
or press the ENT button to bypass this prompt)
b.
Scan or manually enter the patient ID as
prompted
. Press
(or press the ENT button to bypass this prompt)
c. Scan the lot number on the cartridge pouch.
Position barcode 3-9 inches from scanner
window on the analyzer. Press and hold
to activate the scanner. Align the red laser light
so it covers the entire barcode. The analyzer will
beep when it reads the barcode successfully.
ENT
3
ENT
3
2
SCAN

14 Art: 723085-00K Rev. Date: 30-OCT-2014
Prepare the Venous Sample and Cartridge
1. Remove cartridge from pouch.
2. Gently invert tube of blood 2–3 times.
Proceed to next step without delay.
3. Remove stopper or cap from tube and insert pipette end
below meniscus level. Draw sample into pipette.
Note: An air bubble near tip of pipette must be removed -
see step 4.
If air bubbles are mixed with the blood sample,
use another pipette
. DO NOT put blood back into tube.
4.
Hold pipette so tip is pointing upward. Hold gauze pad at tip to absorb blood. Press
pipette plunger slowly until air is removed. If air bubble is stuck, tap pipette gently. If
an air bubble was trapped at top of pipette it may start to move toward tip. In this case,
wait until bubble reaches tip and remove it
.
Prepare the Arterial Sample and Cartridge
1. Remove cartridge from pouch.
2.
If sample has been collected in a syringe without
anticoagulant, proceed to step 4
immediately.
3.
Samples collected in syringes with anticoagulant must be well mixed. Briskly roll
the syringe back and forth between the palms for 5 seconds in each of three different
directions.
4. Remove cap from syringe and dispense a few drops of blood onto a gauze pad.
Proceed immediately to “ ill and Insert the Cartridge”.

Art: 723085-00K Rev. Date: 30-OCT-2014 15
Fill and Insert the Cartridge
1. Hold syringe tip directly over sample well of cartridge and gently press plunger to
deliver blood into cartridge.
When blood reaches fill mark on cartridge, stop adding blood. Some blood must be in
sample well – add blood to well if necessary. Put cap back on syringe (arterial samples).
2.
Pressing on tab, fold snap closure over sample well until it
clicks into place. DO NOT
press directly over sample well. Slightly lift finger and ensure cartridge is closed
before completely removing finger from closure.
3. Push cartridge into analyzer port as shown until cartridge clicks into place. The
analyzer will first display “Identifying Cartridge”, then a time-to-result bar. Results
will be shown in 2 to 3 minutes.
or ACT and hematocrit testing, keep the analyzer on a level surface
with the
display facing up during testing. A level surface includes running the analyzer in
the downloader/recharger.
DO NOT remove cartridge until the “Cartridge Locked”
message is removed and
results are displayed on screen.
4. When results are shown, the cartridge may be removed and discarded with
other test materials.

16 Art: 723085-00K Rev. Date: 30-OCT-2014
Prepare the Analyzer and Remove Cartridge from Pack
1. Press to turn on the analyzer.
2. Press to select “i-STAT Cartridge”
3. ollowing prompts on screen, use number keys to enter an
Operator and Patient ID. Press when each ID number
is complete. If ID numbers are not required, just
press
to continue.
Note: Press to clear a wrong number.
Note:
ID numbers can also be scanned into the analyzer.
4. Position barcode on back of cartridge pack 3 - 9 inches
from analyzer. Press and hold to activate laser
barcode scanner. Align the red laser light so it covers
the entire barcode on the back of the cartridge pack.
The analyzer will beep when it reads the barcode
successfully. Try again if the “Scan Cartridge Lot Number”
message is still displayed.
Note: Manually entering the cartridge lot number will
cause Quality Check Code 69.
Scan or Enter
Operator ID
_ _ _ _ _ _ _ _ __ _
Cartridge Locked
Scan or Enter
Patient ID
_ _ _ _ _ _ _ _ __ _
Cartridge Locked
ENT
3
ENT
3
ENT
3
ENT
3
2
SCAN
4
To perform a patient test you will need:
•VetScan i-STAT 1 Analyzer •Gauze
•i-STAT cTnI cartridge •1 cc syringe with safety tip
(for sample transfer from tubes)
•Heparinized whole blood or plasma sample
collected in green top tube or syringe containing
lithium or sodium heparin
Collect the Sample
Correct sample collection & handling are important for accurate results!
•Use a plastic blood collection tube containing lithium or sodium heparin.
•Use an appropriate size gauge needle.
•
If alcohol is used to clean the site, allow it to air dry before performing venipuncture.
•ill collection tube to capacity and gently invert tube about 10 times.
•Do not test a sample from a traumatic draw.
•The use of whole blood or plasma samples containing EDTA, oxalate, and citrate
will result in decreased cTnI readings.
Perform a Patient Test
Cardiac Tr p nin I cartridges

Art: 723085-00K Rev. Date: 30-OCT-2014 17
5. Once “INSERT CARTRIDGE” is displayed, analyzer will remain active for 15
minutes before turning off.
6. Remove cartridge from pack just before testing.
Note: Once cartridge is removed from the pack, it must be used within 15 minutes. If
not used within 15 minutes, discard it and use a fresh cartridge. (Cartridges in
unopened packs can be stored at room temperature for up to 14 days)
ill Mark
Closure Clip
Inlet Port
(Blood goes here)
2. There are two ways to transfer blood from a tube to the cartridge, syringe or
plastic pipette.
If using a syringe, invert tube and push the syringe’s safety
tip through stopper into
blood sample. Slowly pull back on
plunger to draw blood into syringe until it is about
half full.
Bubbles can cause a quality check failure. If air bubbles form throughout sample, discard
syringe and repeat this step.
Fill and Close the Cartridge
1. Gently invert tube of blood 2–3 times.
3. Hold syringe so tip is pointing upward. Hold a gauze
pad at tip to absorb blood. Press syringe plunger
slowly until air is removed and at least one drop of
blood is discarded. If air bubble is stuck, tap syringe
gently. If an air bubble was trapped at top of syringe
it may start to move toward tip. In this case, wait
until bubble reaches tip and remove it.
If using a plastic pipette, slowly remove rubber
stopper from collection tube, and draw about 1/4” of
blood into pipette. Maintain constant pressure on
pipette.

18 Art: 723085-00K Rev. Date: 30-OCT-2014
4. With cartridge on flat surface,
hold syringe tip or pipette
tip over inlet port on cartridge.
Gently press syringe
plunger or pipette bulb to deliver a single drop of blood
to the inlet port.
Blood must reach fill mark on cartridge.
Add a second small drop to inlet port
if
necessary. Some blood may be on outside
of port - this will not affect result.
5. Hold cartridge side edges between thumb and index
finger away from the inlet port. Use thumb of other
hand to slide the plastic closure clip to the right until it
locks into place. Keep fingers away from other side of
clip to avoid getting blood on gloves.
6. Push cartridge into analyzer port until cartridge clicks
into place. The analyzer will first display
“Identifying Cartridge”, then a time-to-result bar.
Results will be shown in 10 minutes.
The analyzer ust re ain on a level surface with the display facing up during
testing. A level surface includes running the analyzer in the downloader/recharger.
Motion of the analyzer during testing can increase the frequency of suppressed
results or quality check codes.
Table of contents
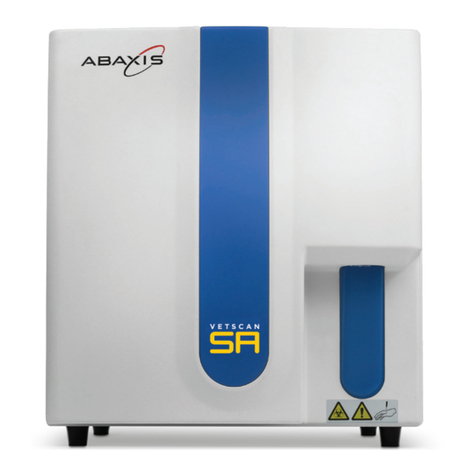
Other Abaxis Measuring Instrument manuals
Abaxis
Abaxis VetScan HM5 User manual
Abaxis
Abaxis VetScan HM5 User manual

Abaxis
Abaxis Piccolo Xpress AB-801-110-0000 User manual
Abaxis
Abaxis VetScan UA10 User manual

Abaxis
Abaxis VetScan HM5 User manual

Abaxis
Abaxis VetScan HM5 User manual
Abaxis
Abaxis VetScan SA User manual

Abaxis
Abaxis VetScan HM5 User manual

Abaxis
Abaxis i-STAT Alinity v User manual

Abaxis
Abaxis VetScan vs2 User manual