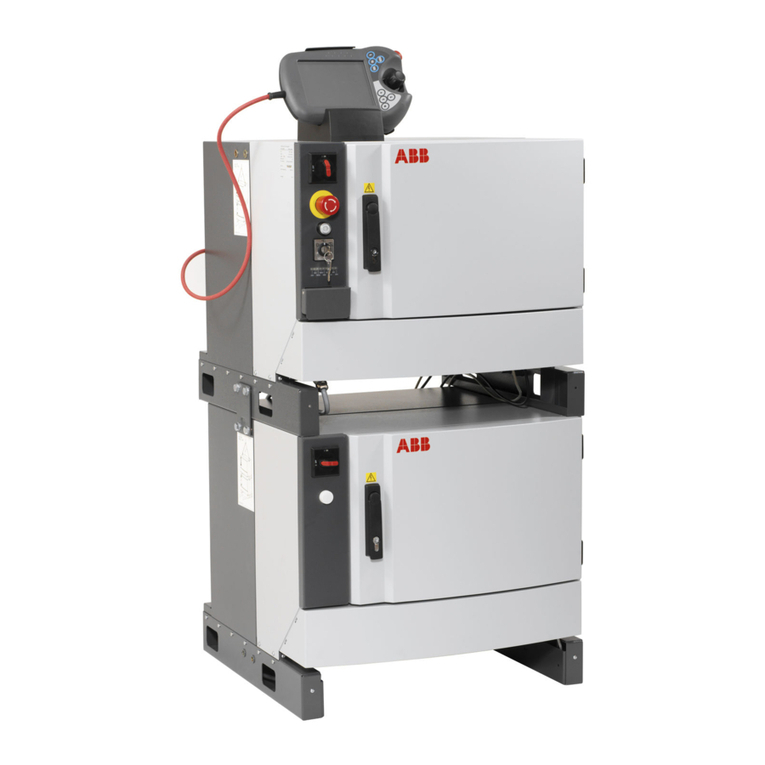
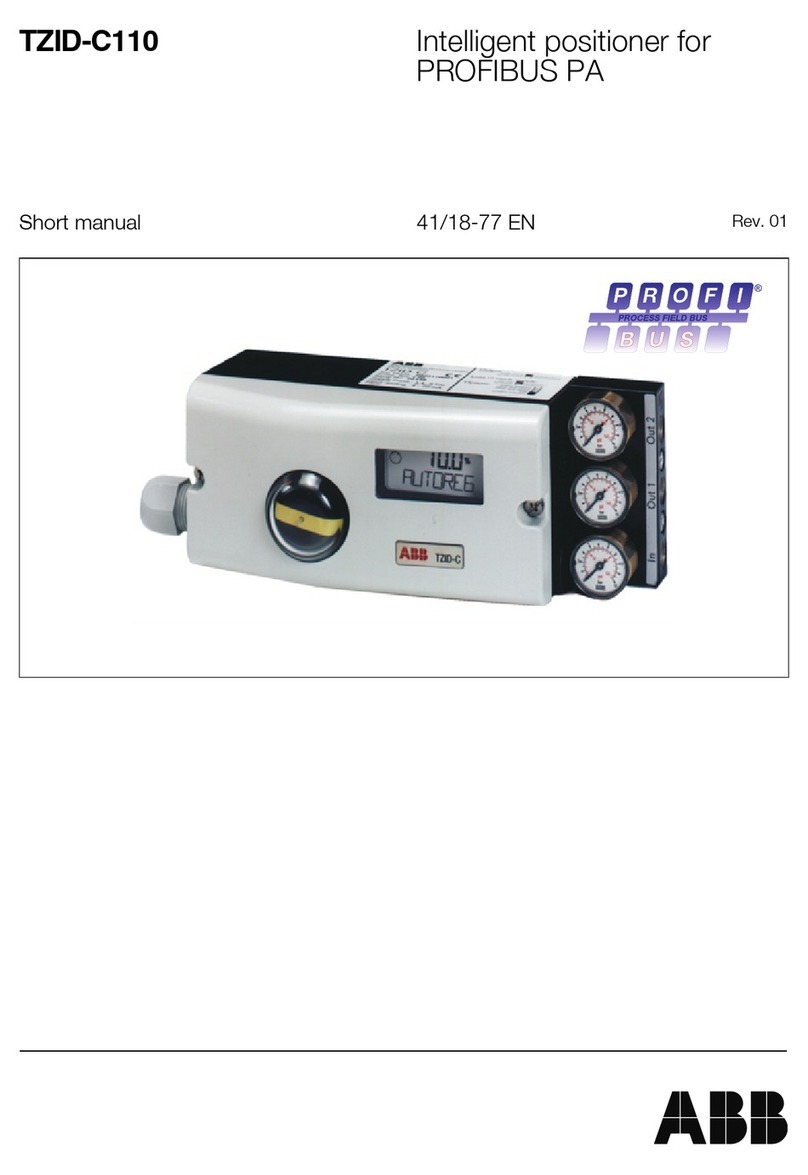
ABB RSD Series User manual

Operating Instructions
42/68-285-EN
Electrical Linear Actuato
r
RSD10 ... 200 (Contrac)
Pos: 1 /Titelbl ätter / Copyright/BA- IA/Aktorik/Antri ebe/Linearantriebe/ RSD10 ... RSD200 @ 18\mod_1203660 879093_3101.doc @ 164023
Rated force 10 kN ... 200 kN
(2200 ... 45000 lbf)
P R OF I
BU S
PROCESS FIELD BUS
®
Pos: 2 /Titelbl ätter / Copyright/Copy right-Seite @ 0\mod_113878 1938968_3101.doc @ 3122

Blinder Text
2 RSD10 ... 200 (Contrac) 42/68-285-EN
Electrical Linear Actuator
RSD10 ... 200 (Contrac)
Operating Instructions
42/68-285-EN
05.2008
Rev. D
Manufacturer:
ABB Automation Products GmbH
Schillerstraße 72
32425 Minden
Germany
Tel.: +49 551 905-534
Fax: +49 551 905-555
[email protected]b.com
© Copyright 2008 by ABB Automation Products GmbH
Subject to change without notice
This document is protected by copyright. It assists the user with the safe and efficient operation of the
device. The contents may not be copied or reproduced in whole or in excerpts without prior approval of
the copyright holder.
Pos: 3 /Inhaltsv erzeichnis/Inhalt sverzeichnis für all e Dokumente @ 0\mod_113871031089 0_3101.doc @ 3129
Contents

Contents
42/68-285-EN RSD10 ... 200 (Contrac) 3
1Safety....................................................................................................................................................................5
1.1 General Safety Information ............................................................................................................................5
1.2 Proper use......................................................................................................................................................5
1.3 Technical limits...............................................................................................................................................5
1.4 Warranty provision .........................................................................................................................................6
1.5 Labels and symbols........................................................................................................................................6
1.5.1 Symbols and warnings ............................................................................................................................6
1.5.2 Name plate..............................................................................................................................................7
1.6 Operator liability .............................................................................................................................................7
1.7 Personnel qualification ...................................................................................................................................7
1.8 Returning devices...........................................................................................................................................8
1.9 Disposal..........................................................................................................................................................8
1.9.1 Information on WEEE directive 2002/96/EC (Waste Electrical and Electronic Equipment) ...................8
1.10 Transport safety information ..........................................................................................................................8
1.11 Storage conditions..........................................................................................................................................9
1.12 Installation safety information.........................................................................................................................9
1.13 Electrical installation safety information .......................................................................................................10
1.14 Operating safety information ........................................................................................................................10
1.15 Maintenance safety information ...................................................................................................................10
2Design and function ..........................................................................................................................................11
3Installation..........................................................................................................................................................12
3.1 Actuator check..............................................................................................................................................12
3.2 Mounting position .........................................................................................................................................12
3.2.1 RSD10 / RSD20 ....................................................................................................................................12
3.2.2 RSD50 / RSD100 / RSD200 .................................................................................................................13
3.3 Installation instructions .................................................................................................................................13
3.3.1 Valve requirements ...............................................................................................................................14
3.4 Mounting examples ......................................................................................................................................14
3.5 Adaptation of actuator stroke to the valve stroke.........................................................................................15
3.6 Assembly with the valve ...............................................................................................................................15
4Electrical connection ........................................................................................................................................16
4.1 Cable shield..................................................................................................................................................16
4.1.1 Signal part .............................................................................................................................................16
4.2 Terminal connection diagrams .....................................................................................................................17
4.2.1 Power Electronic Unit EBS853 (Contrac) / EBS861 (Contrac) .............................................................17
4.2.2 Analog / digital.......................................................................................................................................17
4.2.3 PROFIBUS DP......................................................................................................................................18
4.2.4 Power Electronic Unit EBS852 (Contrac) / EBS862 (Contrac) .............................................................19
4.2.5 Analog / digital.......................................................................................................................................19
Contents
4 RSD10 ... 200 (Contrac) 42/68-285-EN
5Operation............................................................................................................................................................20
5.1 Automatic / manual mode.............................................................................................................................20
6Maintenance.......................................................................................................................................................21
6.1 Inspection and overhaul ...............................................................................................................................21
6.2 Brake adjustment .........................................................................................................................................22
6.3 Oil change ....................................................................................................................................................22
6.4 Filling capacity..............................................................................................................................................23
7Trouble shooting ...............................................................................................................................................24
7.1 Electrical test values.....................................................................................................................................24
8Technical data....................................................................................................................................................25
8.1 General information......................................................................................................................................25
8.2 Technical Data RSD10 ... RSD20 ................................................................................................................25
8.3 Technical Data RSD50.................................................................................................................................25
8.4 Technical Data RSD100...............................................................................................................................26
8.5 Technical Data RSD200...............................................................................................................................26
9Appendix ............................................................................................................................................................27
9.1 Permits and certifications .............................................................................................................................27
10 Index ...................................................................................................................................................................29

Safety
42/68-285-EN RSD10 ... 200 (Contrac) 5
Pos: 4.1 /Überschr iften/1/S - U/Sicherhei t@ 0\ mod_1129703894050_3101.doc @ 3168
1 Safety
Pos: 4.2 /Sicherheit/ Allgemein/Allgemeines z urSic herheit @ 0\mod_1129703939516_3101. doc @3260
1.1 General Safety Information
The “Safety” chapter provides an overview of the safety aspects to be observed for the
operation of the device.
The device is built based on state-of-the-art technology and is operationally safe. It was tested
and left the factory in a proper state. The requirements in the manual as well as the
documentation and certificates must be observed and followed in order to maintain this state for
the period of operation.
The general safety requirements must be complied with completely during operation of the
device. In addition to the general information, the individual chapters of the manual contain
descriptions about processes or procedural instructions with specific safety information.
Only the observance of all safety information enables the optimal protection of personnel as well
as the environment from hazards and the safe and trouble-free operation of the device.
Pos: 4.3 /Übersc hriften/1.1/1-spal tig/A - C/Bestimmungs gemäße Verwendung @ 1\mod_11476 75805609_3101.doc @ 10755
1.2 Proper use
Pos: 4.4 /Sicher heit/Aktorik/Antr iebe/Allgemein/ Bestimmungsgemäße Verwendung @ 16\ mod_1197272116328_3 101.doc @ 144907
The actuators are used for operating final control elements (valves, vanes, etc.). They may only
be operated using the appropriate Contrac electronic unit. Do not use these actuators for any
other purpose. Otherwise, a hazard of personal injury or of damage to or impairment of the
operational reliability of the device may arise. In addition to these operating instructions, the
relevant documentation for the electronic unit and software tools must be observed.
Pos: 4.5 /Sicher heit/Allgemein/H inweis zur bestimmungs widrigren Verwendung (War tung/Reparatur) @ 0\ mod_1129707002440_3101.d oc @ 3240
Repairs, alterations and enhancements or the installation of replacement parts is only
permissible as far as described in the manual. Further actions must be verified with ABB
Automation Products GmbH. Excluded from this are repairs performed by ABB-authorized
specialist shops.
Pos: 4.6 / Sicherheit/Al lgemein/Technis che Grenzwer te BA @ 0\ mod_1140156564953_3101. doc @ 3252
1.3 Technical limits
The device is designed for use exclusively within the stated values on the name plate and in the
technical specifications (see "Technical Specifications” chapter and data sheet). These must be
complied with accordingly, e.g.:
• The maximum operating temperature may not be exceeded.
• The permitted operating temperature may not be exceeded.
• The housing protection system must be observed.
Pos: 4.7 /======= Seitenumbruch ========@ 0\mod_112653236 5768_3101.doc @ 3830

Safety
6 RSD10 ... 200 (Contrac) 42/68-285-EN
Pos: 4.8 /Sicher heit/Allgemein/G ewährleistungsbesti mmungen @ 0\mod_1129706207246 _3101.doc @ 3261
1.4 Warranty provision
A use contrary to the device’s stipulated use, disregarding of this manual, the use of under-
qualified personnel as well as unauthorized alterations excludes the manufacturer of liability
from any resulting damages. The manufacturer’s warranty expires.
Pos: 4.9 /Übersc hriften/1.1/1-spal tig/S - U/Schilder und Sy mbole @ 0\mod_1129721947139 _3101.doc @ 3204
1.5 Labels and symbols
Pos: 4.10 /Übersc hriften/1.1.1/1-s paltig/Symbole und Si gnalwörter @ 20\mod_12084226 98260_3101.doc @ 180868
1.5.1 Symbols and warnings
Pos: 4.11 /Sicher heit/Allgemein/S ymbole und Signalwörter @ 20\mod_1208422453167_3101.d oc @ 180843
Danger – <Serious damage to health / risk to life>
One of these symbols in conjunction with the “Danger“ warning indicates an imminent danger.
If it is not avoided, death or serious injury will result.
Warning – <Bodily injury>
The symbol in conjunction with the “Warning“ message indicates a possibly dangerous
situation. If it is not avoided, death or serious injury could result.
Caution – <Slight injuries>
The symbol in conjunction with the “Caution“ message indicates a possibly dangerous
situation. If it is not avoided, slight or minor injury can result. May also be used for property
damage warnings.
Notice – <Property damage>!
The symbol indicates a possibly damaging situation. If it is not avoided, the product or
something in its area can be damaged.
Important
The symbol indicates operator tips or especially useful information. This is not a message for a
dangerous or damaging situation.
Pos: 4.12/======= Seitenumbruch ======== @ 0\mod_1126532365768_3 101.doc @ 3830

Safety
42/68-285-EN RSD10 ... 200 (Contrac) 7
Pos: 4.13 /Übersc hriften/1.1.1/1-s paltig/Typensc hild @ 0\mod_1140617210906_3101. doc @ 3227
1.5.2 Name plate
Pos: 4.14 /Sicher heit/Aktorik/Antr iebe/Allgemein/Ty penschild RSD @ 18\mod_120366215 6375_3101.doc @ 164070
Fig. 1
1 Complete Name plate
2 Fabrication no./ NL no. (no. of non-
standard version)
3 Rated force / Year of manufacture
4 Permissible ambient temperature and
protection class / CE mark
5 min./max. stroke and max. actuating
speed / heater
6 Filled oil types
7 Associated Contrac electronic unit
8 blank
9 blank
10 Blank for customer-specific entry
Pos: 4.15 /Sicher heit/Aktorik/All gemein/Pflichten des Betreibers @ 10\mod_118172 3170562_3101.doc @ 105157
1.6 Operator liability
The operators must strictly observe the applicable national regulations in their countries with
regards to installation, function tests, repairs, and maintenance of electrical devices.
Pos: 4.16 /Sicher heit/Allgemein/O rganisatorische Maßnahm en/Qualifikati on des Personals @ 0\mod_1129728 800194_3101.doc @ 3247
1.7 Personnel qualification
The installation, commissioning and maintenance of the device may only be carried out through
trained specialist personell authorized by the plant operator. The specialist personnel must have
read and understood the manual and comply with its instructions.
Pos: 4.17/======= Seitenumbruch ======== @ 0\mod_1126532365768_3 101.doc @ 3830

Safety
8 RSD10 ... 200 (Contrac) 42/68-285-EN
Pos: 4.18 /Sicher heit/Allgemein/O rganisatorische Maßnahm en/Rücksendung von Gerät en @ 0\mod_1129730744499_310 1.doc @ 3248
1.8 Returning devices
Use the original packaging or a suitably secure packaging for returning the device for repair or
for recalibration. Include the properly filled out return form (see attachment) with the device.
According to EC guidelines for hazardous materials, the owner of hazardous waste is
responsible for its disposal or must observe the following regulations for its shipping:
All delivered devices to ABB Automation Products GmbH must be free from any hazardous
materials (acids, alkali, solvents, etc.).
Pos: 4.19 /Sicher heit/Allgemein/O rganisatorische Maßnahm en/Entsorgung @ 10\mod_11764 47410937_3101.doc @ 81544
1.9 Disposal
ABB Automation Products GmbH actively promotes environmental consciousness and has an
operational management system in accordance with DIN EN ISO 9001:2000,
EN ISO 14001:2004 and OHSAS 18001. Our products and solutions should have minimum
impact on the environment and persons during manufacture, storage, transport, use and
disposal.
This includes the environmentally friendly use of natural resources. Through its publications
ABB conducts an open dialog with the public.
This product/solution is manufactured from materials that can be reused by specialized
recycling companies.
1.9.1 Information on WEEE directive 2002/96/EC (Waste Electrical and Electronic Equipment)
This product/solution is not subject to the WEEE directive 2002/96/EC and relevant national
laws (e.g., ElektroG in Germany).
Dispose of the product/solution directly in a specialized recycling facility and do not use the
municipal garbage. Only privately used products may be disposed of in the municipal garbage
according to the WEEE directive 2002/96/EC. Proper disposal prevents negative effects on
people and the environment, and supports the reuse of valuable raw materials.
If it is not possible to dispose of old equipment properly, ABB Service can accept and dispose of
returns for a fee.
Pos: 4.20 /Übersc hriften/1.1/1-spal tig/S - U/Sicherheit shinweise zum Transpor t @ 0\mod_1140166475703_3101. doc @ 3206
1.10 Transport safety information
Pos: 4.21 /Transpor t/Allgemein/Pr üfung @ 0\mod_1129815371197_3 101.doc @ 3317
Check the devices for possible damage that may have occurred from improper transport.
Damages in transit must be recorded on the transport documents. All claims for damages must
be claimed without delay against the shipper and before the installation.
Pos: 4.22/======= Seitenumbruch ======== @ 0\mod_1126532365768_3 101.doc @ 3830

Safety
42/68-285-EN RSD10 ... 200 (Contrac) 9
Pos: 4.23 /Übersc hriften/1.1/1-spal tig/J - L/Lagerbedingunge n @ 8\mod_1176907016921_3 101.doc @ 84229
1.11 Storage conditions
Pos: 4.24 /Sicher heit/Aktorik/Li nearantriebe/All gemein/Lagerbedingungen @ 18\ mod_1203662966453_310 1.doc @ 164094
The actuators may be stored under moist and aggressive condition for a short time. The
equipment is protected externally against corrosive influences. However, direct exposure to
rain, snow, etc., must be avoided.
Observe the permissible storage and transport temperatures.
Actuators, equipped with an anti-condensation heater, are additionally protected by desiccant,
which is placed in the following locations:
Servo motor: under the brake cover
Position sensor: in connection chamber
electronic unit (separately supplied): electrical connection area
The desiccant guarantees sufficient protection for approximately 150 days. It can be
regenerated at a temperature of 90 °C (114 °F) within 4 h.
Important
Remove the desiccant prior to commissioning the actuator or the electronic unit.
If you intend to store or transport the device for a longer time, we recommend that you wrap it in
plastic foil and add desiccant. Regularly check whether the desiccant is still active.
During longer periods of downtime (> 6 months) with thrust rod extended, the chrome-plated
stem surface must be protected with a suitable anti-corrosive agent. Before recommissioning,
clean the thrust rod to avoid damage by the stripper and thrust rod gasket.
Pos: 4.25 /Übersc hriften/1.1/1-spal tig/S - U/Sicherheit shinweise zur Montage @ 0\ mod_1140166528109_3101.doc @ 3208
1.12 Installation safety information
Pos: 4.26 /Sicher heit/Aktorik/Antr iebe/Allgemein/S icherheitshinweis e zur Montage @ 10\mod_118156334 8656_3101.doc @ 102853
• The actuators perform movements for positioning vanes and valves, etc.
• Only qualified specialists who have been trained for these tasks are authorized to mount and
adjust the control actuator, and to make the electrical connection.
• When working on the actuator itself or the electronics always observe the locally valid
accident prevention regulations and the regulations concerning the construction of technical
installations.
• The eyebolt at the top of the actuator may only be used to lift or lower the actuator vertically.
• Do not use the handwheel to lift or to lower the actuator..
• Do not use it if the actuator is mounted at the valve! Make sure that the final control element
is not exposed to process forces.
Pos: 4.27/======= Seitenumbruch ======== @ 0\mod_1126532365768_3 101.doc @ 3830

Safety
10 RSD10 ... 200 (Contrac) 42/68-285-EN
Pos: 4.28 /Übersc hriften/1.1/1-spal tig/S - U/Sicherheit shinweise zur elekt rischen Installat ion @0\ mod_1140166567843_3101. doc @ 3207
1.13 Electrical installation safety information
Pos: 4.29 /Sicher heit/Allgemein/S icherheitshinweis ez ur elektrischen Inst allation @ 13\mod_119193043 0247_3101.doc @ 128893
The electrical connection may only be performed by authorized specialist personnel according
to the electrical plans.
Comply with electrical connection information in the manual. Otherwise, the electrical protection
class can be affected.
The secure separation of contact-dangerous electrical circuits is only guaranteed when the
connected devices fulfill the requirements of the DIN EN 61140 (VDE 0140 Part 1) (basic
requirements for secure separation).
For secure separation, run the supply lines separated from contact-dangerous electrical circuits
or additionally insulate them.
Pos: 4.30 /Übersc hriften/1.1/1-spal tig/S - U/Sicherheit shinweise zum Betri eb @0\ mod_1140166424437_3101. doc @ 3205
1.14 Operating safety information
Pos: 4.31 /Sicher heit/Aktorik/Li nearantriebe/All gemein/Sicherheits hinweise zum Betrieb RSD @ 18\ mod_1205151868234_3101.doc @ 168798
Warning - risk of injury!
Note that the actuator position may be changed accidentally by the repelling power of the
valve when the brake is released!
Make sure that process forces are not exerted on the thrust rod.
Before switching on, ensure that the specified environmental conditions in the “Technical Data”
chapter or data sheet are complied with and that the power supply voltage corresponds with the
power electronic unit.
When there is a chance that safe operation is no longer possible, put the device out of operation
and secure against unintended operation.
When mounting the actuator in areas which may be accessed by unauthorized persons, take
the required protective measures.
Switch off the power supply to the motor prior for manual operation.
Pos: 4.32 /Übersc hriften/1.1/1-spal tig/S - U/Sicherheit shinweise zur Wartung @ 10\ mod_1181811822343_3101. doc @ 106052
1.15 Maintenance safety information
Pos: 4.33 /Sicher heit/Aktorik/Antr iebe/Allgemein/S icherheitshinweis e zur Wartung @ 10\mod_118181204 6750_3101.doc @ 106075
• When changing the oil of the actuator, thoroughly remove any oil that may have run down on
the floor during the procedure to avoid accidents.
• Dispose of the waste oil in compliance with the respective local regulations. Make sure that
no oil reaches the water cycle.
• Switch off the supply voltage for the power electronic unit and separate anti-condensation
heater (option) when working on the actuator or related subassemblies and take precautions
to prevent unintentional switch-on.
• Make sure that any oil leaking from the device cannot come into contact with hot parts
Pos: 5 /======= Seitenumbruc h ========@ 0\mod_112653236576 8_3101.doc @ 3830

Design and function
42/68-285-EN RSD10 ... 200 (Contrac) 11
Pos: 6.1 /Überschr iften/1/A - C/Auf bau und Funktion @ 0\mod_112979762073 3_3101.doc @ 3140
2 Design and function
Pos: 6.2 /Aufbau und Funkt ion/Aktorik/ Antriebe/Linearant riebe/Allgemein/ Aufbau Linearantri eb @ 18\mod_1203664363421_3101. doc @ 164145
Fig. 2: RSD10 ... 200 (illustrations may differ from actual installation)
1 Servo motor
2 Hand wheel
3 Thrust rod
Pos: 6.3 /Aufbau und Funkt ion/Aktorik/ Antriebe/Linearant riebe/Allgemein/ Konzept @ 18\mod_120366426109 3_3101.doc @ 164122
Functionality
Actuator for the operation of final control elements with preferably linear movement. The
actuator thrust rod transfers the force directly to the final control element.
A continuous power electronic unit controls the actuator. The electronic unit serves as the
interface between actuator and control system.
During continuous positioning the power electronic unit varies the motor torque steplessly until
the actuator force and the restoring process forces are balanced. High response sensitivity and
high positioning accuracy with short positioning time ensure an excellent control quality and a
long actuator life.
Pos: 7 /======= Seitenumbruc h ========@ 0\mod_112653236576 8_3101.doc @ 3830

Installation
12 RSD10 ... 200 (Contrac) 42/68-285-EN
Pos: 8.1 /Übersc hriften/1/M - O/Montage @ 0\ mod_1140519732218_3101. doc @ 3159
3 Installation
Pos: 8.2 /Übersc hriften/1.1/1-spal tig/A - C/Antriebsk ontrolle @ 10\mod_118163252703 1_3101.doc @ 103415
3.1 Actuator check
Pos: 8.3 /Montage/Ak torik/Linearant riebe/Allgemein/ Antriebskontroll e @ 10\mod_1182147634156_3101. doc @ 107239
Before you start to install the actuator make sure that the delivery status corresponds to the
ordered status and to the intended use.
• Check the oil level when installing the device in positions other than IMV 1.
• Did you fasten the separately delivered venting plug (spare part no. 9287338) in the
uppermost bore (depending on the mounting orientation)?
• Make sure that the motor and the connection chambers are free of dirt, moisture and
corrosion.
• Make sure adequate travel is provided for the valve stroke.
Pos: 8.4 /Überschr iften/1.1/1-spal tig/D - F/Einbaulage @ 3\m od_1158651041937_3101.doc @ 41702
3.2 Mounting position
Pos: 8.5 /Montage/Ak torik/Linearant riebe/Allgemein/ Einbaulage Beschrei bung @ 18\mod_1203676956187_31 01.doc @ 164547
The gears of the actuator RSD10 ... 200 (Contrac) are oil lubricated. They contain the max. oil
quantity when leaving the manufacturer. Once the actuator is installed replace the uppermost
check plug by the separately supplied venting plug.
Pos: 8.6 /Übersc hriften/1.1.1/1-s paltig/RSD10 / RSD20 @ 18\ mod_1203677004421_0.doc @ 164570
3.2.1 RSD10 / RSD20
Pos: 8.7 /Montage/Ak torik/Linearant riebe/Allgemein/ Einbaulage Zeich. RSD_RS DE 10/20 @ 10\mod_11819011533 75_3101.doc @ 106675
Fig.3
1 Inspection plug
2 Venting plug
Pos: 8.8 /======= Seitenumbruch ========@ 0\mod_112653236 5768_3101.doc @ 3830

Installation
42/68-285-EN RSD10 ... 200 (Contrac) 13
Pos: 8.9 /Übersc hriften/1.1.1/1-s paltig/RSD50 / RSD100 / R SD200 @ 18\mod_1203677154375_0. doc @ 164616
3.2.2 RSD50 / RSD100 / RSD200
Pos: 8.10 /Mont age/Aktorik/Linear antriebe/Allgemein/ Einbaulage Zeich. RSD_RSD E 50/100/200 @ 18\mod_12036748 45156_3101.doc @ 164287
Fig. 4
1 Inspection plug
2 Venting plug
Pos: 8.11 /Mont age/Aktorik/Linear antriebe/Allgemein/ Einbaulage @ 10\mod_11821 47471406_3101.doc @ 107216
All mounting orientations shown in and fig. Fig. 4 are permissible. To facilitate mounting and
maintenance, however, it is recommended to use orientation IMV 1. For each mounting
position, check the oil level prior to commissioning.
In order to ensure sufficient ventilation and space for motor de-/installation allow for min.
80 mm (3.15 inch).
Pos: 8.12 /Übersc hriften/1.1/1-spal tig/M - O/Montagehinwei se @ 10\mod_1181632708234_ 3101.doc @ 103461
3.3 Installation instructions
Pos: 8.13 /Mont age/Aktorik/Linear antriebe/RSD10...200/ Montagehinweise @ 18\ mod_1205131105921_3101. doc @ 168683
• Make sure that the actuator is accessible from all sides to ensure convenient hand wheel
operation, electrical connection, and replacement of assemblies.
• Avoid direct exposure to rain, snow and other environmental influences.
• In IMV 1 mounting position, the actuators are resistant against vibrational loading acc. to EN
60068-2-6, table C.2 up to 150 Hz and additionally 1 g / 30 min. If the operating conditions
do not clearly allow you to estimate whether the vibrational loading remains significantly
below the proven contingent, reduce the maintenance intervals accordingly.
• Make sure that the thrust rod and the valve stem are not exposed to additional vibrational
loading that exceeds by double the rated force (e.g., by a spring coupling or a vibration
absorber between thrust rod and valve stem).
• The maximum rated force of the actuator may not be permanently exceeded. For a short
period, the force can be increased by up to twice the rated force is permitted.
• When mounting the actuator close to heat sources use an insulating layer or shielding.
Pos: 8.14/======= Seitenumbruch ======== @ 0\mod_1126532365768_3 101.doc @ 3830

Installation
14 RSD10 ... 200 (Contrac) 42/68-285-EN
Pos: 8.15 /Übersc hriften/1.1.1/1-s paltig/Anforderungen an di e Armaturenkons truktion @ 10\mod_11819008 02953_3101.doc @ 106629
3.3.1 Valve requirements
Pos: 8.16 /Mont age/Aktorik/Linear antriebe/Allgemein/ Anforderung an die Armat urenkonstruktion @ 10\mod_1181892329781_3101.doc @ 106372
• The force in the end position can be up to 2.5 times higher than the rated force.
Pos: 8.17 /Übersc hriften/1.1/1-spal tig/M - O/Montagebeis piel @ 10\mod_11816372563 90_3101.doc @ 103672
3.4 Mounting examples
Pos: 8.18 /Mont age/Aktorik/Linear antriebe/Allgemein/ Montagebeispiel @ 10\ mod_1181899902640_3101. doc @ 106583
1
2
3
4
5
6
7
8
9
10
11
12
13
M00310
Fig. 5: Installation example RSD10 ... 200 (Contrac)
1 Cover for thrust rod
2 Servo motor
3 Hand wheel
4 Mounting screws (8.8)
5 external stop
6 Coupling
7 Valve stem
8 Valve yoke
9 Valve
10 Mechanical position indicator
11 Thrust rod
12 Screw plug for stop position
13 Thrust rod cover
Pos: 8.19/======= Seitenumbruch ======== @ 0\mod_1126532365768_3 101.doc @ 3830

Installation
42/68-285-EN RSD10 ... 200 (Contrac) 15
Pos: 8.20 /Übersc hriften/1.1/1-spal tig/A - C/Anpassung des Antriebshubs an den Hub der Ar matur @ 10\mod_1181900918937_3 101.doc @ 106652
3.5 Adaptation of actuator stroke to the valve stroke
Pos: 8.21 /Mont age/Aktorik/Linear antriebe/RSD10...200/ Anpassung des Antr iebshubs @ 18\mod_1203665619359_ 3101.doc @ 164193
The factory-set actuator stroke corresponds to the stroke named on the ID-label + 1 mm
(0.04 inch). If an application requires stroke adjustment, proceed as follows (comply with
min./max. stroke; see "Technical Data"):
Important
With a mounting position other than IMV 1, drain the oil until the oil level is below the thrust rod
cover (Fig. 5/13).
1. Manually drive the thrust rod completely out. The internal limit stop should now be touching
the driving sleeve.
2. Loosen the screws of the thrust rod cover and remove the cover.
3. Open the screw plug in the thrust rod cover.
4. Both Allen clamping screws are accessible through the opening. Loosen the screws.
5. Use the hand wheel to drive in the thrust rod until the actuator stroke matches the required
valve stroke.
6. Turn the internal limit stop (slotted ring nut) clockwise until it is touching the drive sleeve.
Finally, turn it back approx. 1 turn.
7. Tighten both Allen screws to the required torque.
RSD10 / RSD20: 26 Nm
RSD50: 26 Nm
RSD100: 40 Nm
RSD200: 69 Nm
8. Reattach the cover for the thrust rod.
9. Screw in the lateral screw plug.
10. Fill the oil according to mounting position.
Pos: 8.22 /Übersc hriften/1.1/1-spal tig/V - Z/Zusammenbau mit dem Stellglied @ 10\mod_118163 4985953_3101.doc @ 103507
3.6 Assembly with the valve
Pos: 8.23 /Mont age/Aktorik/Linear antriebe/Allgemein/ Zusammenbau mit dem Stel lglied @ 10\mod_1181891414750 _3101.doc @ 106349
1. Drive the thrust rod completely in and put the actuator onto the valve yoke.
2. Make sure the valve stem is aligned with the center of the bore and at right angles to the
actuator seat (permissible parallel deviation < 0.1 mm (0.009 inch) with regard to total
stroke).
3. Fasten the actuator to the yoke with screws of property class 8.8 (tensile strength 800
N/mm2(116032 pounds/square inch); yield strength 640 N/mm2(93550 pounds/square
inch)).
4. Use the hand wheel to drive the thrust rod out; link the rod with the valve stem via the
coupling.
5. Manually retract the thrust rod to check whether or not the external stop of the actuator is on
the housing flange before the valve cone touches the cover.
6. If required, adjust with the coupling (only possible within certain limits!).
Pos: 9 /======= Seitenumbruc h ========@ 0\mod_112653236576 8_3101.doc @ 3830

Electrical connection
16 RSD10 ... 200 (Contrac) 42/68-285-EN
Pos: 10.1 /Übersc hriften/1/D - F/Elektr ischer Anschluss @ 0\mod_1140 620471687_3101.doc @ 3143
4 Electrical connection
Pos: 10.2 /Elektr ischer Anschluss/ Aktorik/Antriebe/ Allgemein/Elektri scher Anschluss @ 16\mod_1197274 093609_3101.doc @ 14505 3
Each actuator requires a Contrac electronic unit which is loaded with the type specific-software.
Carefully consider the instructions for the electronic unit and compare the data labels of the
actuator and the electronic unit in order to ensure a proper hard- and software assignment.
Pos: 10.3 /Übersc hriften/1.1/1-spal tig/J - L/Kabelschi rm @ 10\mod_1181823716656_3101. doc @ 106187
4.1 Cable shield
Pos: 10.4 /Übersc hriften/1.1.1/1-s paltig/Signaltei l @ 10\mod_1182501083765_31 01.doc @ 108573
4.1.1 Signal part
Pos: 10.5 /Elektr ischer Anschluss/ Aktorik/Antriebe/ Allgemein/Kabelsc hirm Anschluss @ 10\mod_11818230 21906_3101.doc @ 106144
3
3
4
2
2
1
1
M00307
Fig. 6: Fitting the shield
1. Remove approx. 2 cm of cable sheathing (3) from the end of the cable.
2. Separate the shield and peel it back to its inner sheathing (4).
3. Push the cable through the cable gland and fasten with clamp (1).
4. Make sure that the shielding is touching the clamp and the electronic unit housing (2).
Pos: 10.6/======= Seitenumbruch ======== @ 0\mod_1126532365768_3 101.doc @ 3830

Electrical connection
42/68-285-EN RSD10 ... 200 (Contrac) 17
Pos: 10.7 /Übersc hriften/1.1/1-spal tig/A - C/Anschluss pläne @ 0\mod_1139844727625_ 3101.doc @ 3179
4.2 Terminal connection diagrams
4.2.1 Power Electronic Unit EBS853 (Contrac) / EBS861 (Contrac)
Pos: 10.9 /Technisc he Daten / Datenblatt/ Aktorik/Antriebe/ Linearantriebe/Al lgemein/El. Ansc hluss mit separater Elekt ronik EBN853 (EBN861) @ 7\ mod_1172049298312_3101. doc @ 69413
ve
4.2.2 Analog / digital
Important
The electrical connection is provided by a plug on the actuator and the terminals on the electronic unit.
Fig. 7

Electrical connection
18 RSD10 ... 200 (Contrac) 42/68-285-EN
4.2.3 PROFIBUS DP
Fig. 8
Pos: 10.10/======= Seitenumbruch ======== @ 0\mod_1126532365768_3101. doc @ 3830

Electrical connection
42/68-285-EN RSD10 ... 200 (Contrac) 19
Pos: 10.11 /Übersc hriften/1.1.1/1-s paltig/Leistungs elektronik EBS852 (Contr ac) / EBS862 (Contrac) @ 10\m od_1182165403125_3101.doc @ 107553
4.2.4 Power Electronic Unit EBS852 (Contrac) / EBS862 (Contrac)
Pos: 10.12 /Tec hnische Daten / Datenblatt/Aktorik/Antriebe/Linearantriebe/Allgemei n/El. Anschluss mi t separater Elektronik EBS852 (EBS862) @ 7\mod_117489558 2718_3101.doc @ 74303
4.2.5 Analog / digital
Important
The electrical connection is provided by a plug on the actuator and the terminals on the electronic unit.
Fig. 9
Pos: 11 /======= Seitenumbruch ======== @ 0\mod_11265323657 68_3101.doc @ 3830

Operation
20 RSD10 ... 200 (Contrac) 42/68-285-EN
Pos: 12.1 /Übersc hriften/1/A - C/Betri eb @ 10\mod_1175678278921_3101. doc @ 76015
5 Operation
Pos: 12.2 /Übersc hriften/1.1/1-spal tig/A - C/Automatik /Handbet rieb @ 10\mod_118171557 0281_3101.doc @ 104973
5.1 Automatic / manual mode
Pos: 12.3 /Bedienung/ Aktorik/Antr iebe/Linearantri ebe/Allgemein/Aut omatik / Handbetrieb @ 10\mod_118180 5435734_3101.doc @ 105927
The motor triggered by the power electronics controls the axially fixed drive sleeve /nut
assembly via oil-lubricated spur gears. A ball bearing screw (see Figure Fig. 10) radially fixed by
an anti-twist arrester converts the rotary motion to a linear one. The screw is the upper part of
the thrust rod and has an adjustable mechanical stop.
A position sensor detects backlash-free the thrust rod position via mechanical reduction
gearing.
The motor brake locks the actuator in the current position if the power supply is cut off.
Pos: 12.4 /Bedienung/ Aktorik/Antr iebe/Linearantri ebe/Allgemein/Sc hnittbild durch Kugelmut ter mit Spindel @ 10\mod_118190 0287234_3101.doc @ 106607
M00308
Fig. 10: Ball bearing screw with nut, cross-section
Pos: 12.5 /Bedienung/ Aktorik/Antr iebe/Linearantri ebe/RSD10...200/Handr adbetrieb @ 18\mod_12040126 41000_3101.doc @ 165074
Manual mode allows you to move the actuator manually when the electrical power is off.
Caution - Risk of injury!
When pressing the hand wheel lock, restoring force from the valve may be present in the hand
wheel.
To prevent the hand wheel from turning unintentionally, hold the hand wheel with one hand.
1. Press the hand wheel lock.
Important
Turning the hand wheel to the right causes the thrust rod to extend.
2. Turn the hand wheel to move the part-turn actuator to the desired position.
3. Release the lock.
Pos: 13 /======= Seitenumbruch ======== @ 0\mod_11265323657 68_3101.doc @ 3830
This manual suits for next models
5
Table of contents
Other ABB Controllers manuals

ABB
ABB Contrac PME120AI User manual

ABB
ABB LME620-AI User manual

ABB
ABB COM600 series User manual

ABB
ABB ACS580-01 drives User manual

ABB
ABB PS D75 840 Series Technical specifications

ABB
ABB 6153 EB-500 User manual

ABB
ABB ACH400 Series User manual

ABB
ABB SACE Tmax XT Series User manual

ABB
ABB LME620-AI User manual

ABB
ABB AC 800M User manual