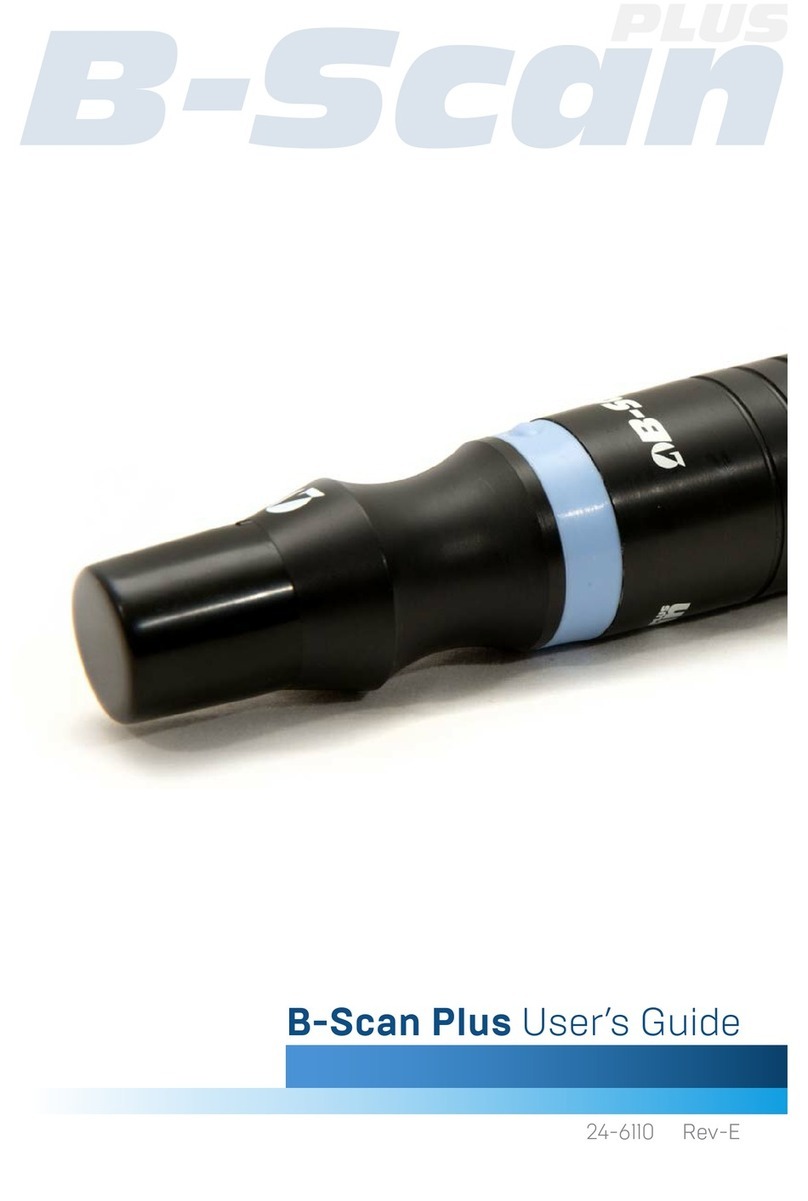
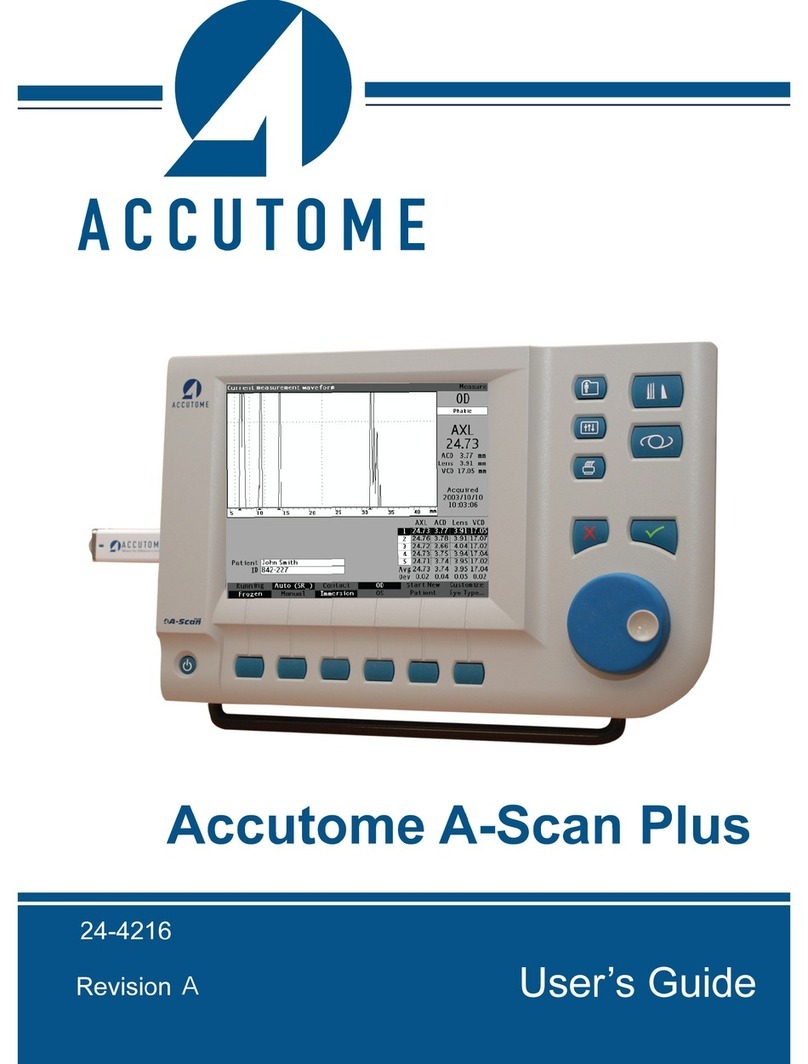
Accutome a-scan plus User manual


Federal law restricts this device to sale by or on the order of a physician.
FEDERAL COMMUNICATIONS COMMISSION (FCC)
UNINTENTIONAL EMITTER PER FCC PART 15
This device has been tested and found to comply with the limits for a Class B digital
device, pursuant to Part 15 of the FCC rules. These limits are designed to provide
reasonable protection against harmful interference in an ofce installation. This
equipment generates, uses, and can radiate radio frequency energy and, if not installed
and used in accordance with the instructions in the user manual, may cause harmful
interference to radio or television reception. However, there is no guarantee that
interference will not occur in a particular installation. If this equipment does cause
interference to radio or television reception, which can be determined by turning the
equipment off and on, the user is encouraged to try to correct the interference by one or
more of the following measures:
• Reorient or relocate the receiving antenna.
• Increase the separation between the equipment and receiver.
• Connect the equipment to an outlet on a different circuit from that to which the
receiver is connected.
• Consult Accutome Ultrasound, Inc. or an experienced radio/TV technician for help.
This device complies with Part 15 of the FCC Rules. Operation of this product is subject
to the following two conditions: (1) this device may not cause harmful interference, and
(2) this device must accept any interference received, including interference that may
cause undesired operation.
CAUTION:
Changes or modications not expressly approved by Accutome Ultrasound, Inc. could
void the FCC compliance and negate your authority to operate the product.
Authorized Representative in Europe (for regulatory affairs only):
The A-Scan Plus Connect is Manufactured by:
Accutome, Inc.
3222 Phoenixville Pike
Malvern, PA 19355 USA
Toll Free (USA): 1-800-979-2020
International: 610-889-0200
Fax: 610-889-3233

Table of Contents
Chapter 1: Introduction.....................................................................1
Accutome A-Scan Plus Connect Overview ................................................. 1
Features . ...................................................................................................... 2
Measurements............................................................................................... 2
IOL Calculations . ........................................................................................ 3
Components.................................................................................................. 3
Optional Components................................................................................... 3
About this Manual......................................................................................... 4
Chapter 2: Safety..................................................................................6
Safety Information......................................................................................... 6
Safety Issues to Consider When Using the Accutome
A-Scan Plus Connect.................................................................................... 6
Indications for use. ....................................................................................... 6
Side Effects................................................................................................... 6
Contraindications.......................................................................................... 7
Symbol Denitions for the Accutome A-Scan Plus Connect . ..................... 7
Safety Precautions ......................................................................................... 7
Disposal Requirements.................................................................................. 7
Disposal of the product within the EU. ........................................................ 8
Disinfection and Cleaning............................................................................ 8
How to Prevent Patient-To-Patient Transfer of Infection.......................... 8
Electrical Hazard and Safety ....................................................................... 9
Avoiding Equipment Damage....................................................................... 10
Avoiding Electromagnetic and Other Interference ...................................... 11
Chapter 3: Getting Started...............................................................12
Assembling the Accutome A-Scan Plus Connect ........................................ 12
What you Need............................................................................................. 12
Personal Computer Specications................................................................ 13
A-Scan Plus Connect Control Unit. ............................................................. 13
A-Scan Plus Connect 10MHz Composite A-Probe...................................... 13
USB Foot Switch.......................................................................................... 13
A-B Type USB Cable (Control Unit to Computer) ..................................... 14
Printer. .......................................................................................................... 14
Accutome A-Scan Plus Connect Software................................................... 14
Assembling the A-Scan Plus Connect........................................................... 14
Connecting the Probe . ................................................................................. 15
Probe Setup .................................................................................................... 16
Accutome Ultrasonic Probe Kit (PN 24-4001) . .......................................... 17

Accutome Probe with Goldman Tonometer Adapter . ................................. 18
Accutome Probe with Handle Extension ..................................................... 19
Connecting the A-Scan Plus Connect to the Computer ............................... 21
Installation of the Software. ......................................................................... 21
Basic Operation.............................................................................................. 22
Starting Accutome A-Scan Plus Connect Program . .................................... 22
How to Start a New Patient Exam................................................................ 23
Entering Patient Exam Information.............................................................. 23
Using the Test Block . .................................................................................. 28
Preparing a Patient for Examination . .......................................................... 29
Measurement Settings. ................................................................................. 29
How to Take a Patient Measurement ........................................................... 30
How to Perform a Calculation ..................................................................... 31
How to Print or Save Report . ...................................................................... 35
Chapter 4: How to Navigate the Screens and Buttons...37
Overview ........................................................................................................ 37
Main Tabs....................................................................................................... 37
Exams . ......................................................................................................... 38
Measurement. ............................................................................................... 39
IOL Calculation............................................................................................ 40
Setup............................................................................................................. 41
Chapter 5: Setting Up Personal Preferences........................42
Overview......................................................................................................... 42
Setup Tab Selections...................................................................................... 44
Options . ....................................................................................................... 45
Default Folder .............................................................................................. 46
Default Folder of Exams. ............................................................................. 46
Save and Conrm Conguration Changes.................................................. 48
Default Folder of Version 4.0 . ..................................................................... 49
Net Share Folder .......................................................................................... 51
Exam Name Combination . .......................................................................... 53
How to Set the Default Eye Type ................................................................. 54
Eye Type....................................................................................................... 54
Eye Type Materials and Velocities. .............................................................. 55
Selecting the Default Eye Type. ................................................................... 56
How to Set the Default Formula .................................................................. 56
Formulas....................................................................................................... 57
Selecting the Formula................................................................................... 57
How to Set the Default Scan Method .......................................................... 57
Contact. ........................................................................................................ 57

Immersion..................................................................................................... 58
Selecting the Default Scan Method.............................................................. 58
How to Set the Default Capture Mode......................................................... 59
Automatic. .................................................................................................... 59
Manual.......................................................................................................... 59
Selecting the Default Capture Mode. ........................................................... 59
Auto Restart.................................................................................................. 59
How to Set the Auto Capture Mode ............................................................ 61
Audio Feedback on Live Scan....................................................................... 62
How to Activate Audio Feedback on Live Scan........................................... 62
Selecting the Default K Index ...................................................................... 62
Selecting the Default K Index:. .................................................................... 62
Setting the IOL Step. .................................................................................... 63
How to Adjust the IOL Step. ........................................................................ 63
Target.............................................................................................................. 63
How to Set the Default Target Refraction. ................................................... 63
Reset All to Defaults ...................................................................................... 64
Gain ................................................................................................................ 65
Adjusting the Gain. ...................................................................................... 65
Import /Export .............................................................................................. 66
How to turn on Synergy Mode..................................................................... 66
Snapshots/ Reports......................................................................................... 67
How to Activate the Export Snapshots Function.......................................... 67
How to Activate Save Patient Demographics to an
XML File With Snapshot Function. ............................................................. 68
How to Activate the Show Snapshot in a Separate Window Function......... 68
Select Folder to Export the Snapshot. .......................................................... 69
Default Folder............................................................................................... 69
How To Activate the Export Reports........................................................... 70
Print New Report to Default Printer............................................................. 70
Show Report in Separate Window................................................................ 70
Convert PDF to JPEG. ................................................................................. 71
Select the Folder and Drive to Export Report. ............................................. 71
R/W Test.......................................................................................................... 72
Facilities.......................................................................................................... 72
How to Add New Facilities. ......................................................................... 72
Deleting Facilities......................................................................................... 74
Duplicate Facilities from Selected . ............................................................. 75
Set Selected Facility as Default.................................................................... 75
Save. ............................................................................................................. 75
Physicians ....................................................................................................... 76
How to Add a New Physician....................................................................... 76

Deleting Physicians. ..................................................................................... 78
Set Selected Physician as Default . .............................................................. 78
Save. ............................................................................................................. 78
Users................................................................................................................ 79
How to Add a New User............................................................................... 79
Deleting Users. ............................................................................................. 81
Set Selected User as Default. ....................................................................... 82
Save. ............................................................................................................. 82
Eye Types ....................................................................................................... 82
Overview. ..................................................................................................... 82
To add a new Eye Type:. .............................................................................. 83
Adding a New Lens Material ....................................................................... 84
How to Add a New Lens Material................................................................ 84
How to Remove Lens Material . .................................................................. 87
Adding a New Anterior/Vitreous Material. .................................................. 88
How to Add a New Anterior/Vitreous Material............................................ 88
How to Remove an Anterior/Vitreous Material . ......................................... 90
How to Create New Eye Type ..................................................................... 91
How to Create a New Eye Type Based on a
Previously Stored Eye Type. ........................................................................ 98
How to Delete an Existing Eye Type. .......................................................... 100
Personalizing IOL Overview. ....................................................................... 101
Personalizing Lens Constants....................................................................... 101
How to Personalize Constants...................................................................... 101
Auto Personalization. ................................................................................... 102
Selecting the Patient Record to be Personalized. ......................................... 105
Manual Entry of Personalization Information............................................ 108
Overview. ..................................................................................................... 108
Selecting IOL Group and Lens..................................................................... 108
Manual Entry of a Patient Record to be Personalized.................................. 110
Save and Conrm Conguration Changes. .................................................. 112
Updating IOL Constant. ............................................................................... 113
Deleting Postoperative Results..................................................................... 114
Deleting Current Postoperative Result......................................................... 115
Deleting All Postoperative Results............................................................... 116
Save and Conrm Conguration Changes. .................................................. 117
Chapter 6: Entering Patient Information................................118
Overview ........................................................................................................ 118
Exam Tab ....................................................................................................... 118
New A-scan Study.......................................................................................... 119
Entering Information On New A-scan Plus Connect Study Screen.......... 120

Entering Data................................................................................................ 120
Moving Between Fields. .............................................................................. 120
Selecting Items from a Drop Down List. ..................................................... 120
Patient Info. .................................................................................................. 120
Required Fields.............................................................................................. 120
First and Last Name. .................................................................................... 121
Medical Record Number. ............................................................................. 121
Date of Birth................................................................................................. 122
Remark. ........................................................................................................ 123
Control Unit Info............................................................................................ 124
Serial Number................................................................................................ 124
Name................................................................................................................ 124
Facility............................................................................................................. 125
Physician......................................................................................................... 125
Operator.......................................................................................................... 126
How to Start Exam......................................................................................... 126
Recall Existing Patient................................................................................... 127
Selecting Existing Patient for Rescan........................................................... 128
Selecting Rescan............................................................................................. 129
Import Patient Information from Previously
Saved B-Scan Plus/ UBM Plus Information................................................ 130
Selecting Existing B-scan/ UBM Patient for Rescan. .................................. 130
Delete Selected Exams Button....................................................................... 132
Refresh List..................................................................................................... 133
Select Folder................................................................................................... 133
Exams Folder.................................................................................................. 134
Reset Exams Folder....................................................................................... 134
Manage Version 4.0 Exams........................................................................... 134
Chapter 7: Measuring A Patient...................................................135
Overview ........................................................................................................ 135
Measurement Tab........................................................................................... 136
Eye Type.......................................................................................................... 137
How to Set the Eye Type.............................................................................. 137
Capture Method ............................................................................................ 138
Immersion ...................................................................................................... 138
Contact ........................................................................................................... 138
Display Range................................................................................................. 138
Gain................................................................................................................. 139
OD/OS............................................................................................................. 139
Rescan/Stop.................................................................................................... 139
Auto/Manual Capture................................................................................... 139

Auto Mode...................................................................................................... 139
To Switch Between the Auto and Manual Modes........................................ 140
Auto Restart................................................................................................... 140
Using the Footswitch...................................................................................... 140
Edit Exam....................................................................................................... 141
Save Exam....................................................................................................... 141
Snapshot.......................................................................................................... 141
Printing Records............................................................................................ 141
How to Print a Record.................................................................................. 142
Screen Printout Formats. .............................................................................. 142
How to Select the Right Printout Format. .................................................... 142
Sample Printouts. ......................................................................................... 142
Moving Gates.................................................................................................. 144
Overview. ..................................................................................................... 144
Available Gates/Threshold............................................................................ 145
Selecting Gates/Threshold to Adjust............................................................ 145
Chapter 8: Performing Calculations..........................................147
Overview ........................................................................................................ 147
Calculating the Lens...................................................................................... 147
Calculation after Corneal Refractive Surgery............................................... 147
IOL Calculation Tab...................................................................................... 148
Overview. ..................................................................................................... 148
Manage IOL Groups...................................................................................... 150
How to Manage IOL Groups:....................................................................... 150
Manage IOL Groups Screen......................................................................... 151
Entering IOL Group Information. ................................................................ 152
Clear................................................................................................................ 156
Restore............................................................................................................. 156
Remove Selected Groups............................................................................... 157
Done................................................................................................................. 157
Save Changes.................................................................................................. 158
Select IOL Groups.......................................................................................... 159
Selecting Formula.......................................................................................... 159
Changing the AXL Value............................................................................... 160
Selecting an Individual Measurement. ......................................................... 160
Entering an AXL Value................................................................................. 160
Entering K1 and K2 Values........................................................................... 161
How to Enter the K1, K2 Values. ................................................................. 162
Entering the Target Refraction. .................................................................... 162
Rx Surgery...................................................................................................... 163
Overview. ..................................................................................................... 163

Double K Method......................................................................................... 163
Determining Corneal Power after Refractive Surgery.................................. 164
Post Rx Surg IOL Calculation Steps. ........................................................... 164
Changing Rx Surg Field to Yes. ................................................................... 165
Clinical History Method............................................................................... 166
Clinical History Fields. ................................................................................ 166
Contact Lens Method. .................................................................................. 168
Shammas Clinical Method. .......................................................................... 169
Calculation Results........................................................................................ 170
Formula Compare Feature........................................................................... 170
Printing Records............................................................................................ 171
Screen Printout Formats. .............................................................................. 171
How to Select the Right Printout Format. .................................................... 171
How to Print a Record.................................................................................. 171
OD/OS.......................................................................................................... 171
Sample Printouts. ......................................................................................... 172
Save Exam.................................................................................................... 172
Chapter 9: Synergy Mode................................................................173
Introduction.................................................................................................... 173
How to turn on Synergy mode...................................................................... 173
Network Folder or USB Disk Mode............................................................. 174
IOLMaster 500 version 7.7............................................................................ 174
Setting up the A-Scan Plus Connect Synergy
Software for IOLMaster 500 version 7.7. .................................................... 175
IOL Master 500 version 7.5 or older (7.4, 7.3, etc)...................................... 177
Operation of the Accutome A-Scan Plus Connect
Software with IOL Master 500 version 7.7.................................................. 178
Chapter 10: Maintenance.................................................................180
General Maintenance..................................................................................... 180
Safety Inspection. ......................................................................................... 180
Visual Inspection. ......................................................................................... 180
Ultrasound Inspection................................................................................... 180
Calibration of Accutome A-Scan Plus.......................................................... 180
Chapter 11: Specications...............................................................181
Overview......................................................................................................... 181
Physical Specications................................................................................... 181
Environmental Specications....................................................................... 182
Measurement Accuracy................................................................................. 183
Computer Specication................................................................................. 183

Operating Modes............................................................................................ 184
Formula References....................................................................................... 185
Storage/Range Specications........................................................................ 186
Acoustic Output............................................................................................. 188
EMC Compliance Information..................................................................... 189
Chapter 12: Warranty and Repairs............................................. 190
Warranty......................................................................................................... 190
Product Returns............................................................................................. 191
Service and Repair........................................................................................ 191
All Other Returns. ........................................................................................ 191
Non-returnable Merchandise........................................................................ 191
Replacement Parts......................................................................................... 192
Documentation. ............................................................................................ 192
Appendix...................................................................................................193

List of Figures
Figure 1-1 Accutome A-Scan Plus Connect.................................................................... 1
Figure 3-1 Control Unit and Probe Connector (Right Side of Instrument). ................... 15
Figure 3-2 Probe Connected. .......................................................................................... 16
Figure 3-3 Accutome Ultrasonic Probe Kit (PN 24-4001). ............................................ 17
Figure 3-4 Accutome Probe. ........................................................................................... 17
Figure 3-5 Probe Setup with Immersion Shell................................................................ 18
Figure 3-6 Probe with Goldman Tonometer Adapter...................................................... 18
Figure 3-7 Inserting the Probe into the Handle Extension.............................................. 19
Figure 3-8 Probe with Handle Extension and Insertion Tool.......................................... 20
Figure 3-9 Probe with Handle Extension........................................................................ 20
Figure 3-10 A-Scan Plus Connect Control Unit
Connect to a Laptop via USB Cable............................................................................... 20
Figure 3-10 Accutome A-Scan Plus Connect Desktop Shortcut. ..................................... 22
Figure 3-11 Main Screen Starting New Exam. ............................................................... 23
Figure 3-12 New A-scan Study Screen........................................................................... 24
Figure 3-13 Entering New Patient Information. ............................................................. 24
Figure 3-14 Selection Facility. ........................................................................................ 25
Figure 3-15 Selection Physician.. ................................................................................... 26
Figure 3-16 Selecting Operator....................................................................................... 26
Figure 3-17 Click Done Creating a New Exam. ............................................................. 27
Figure 3-18 Measurement Screen. .................................................................................. 27
Figure 3-19 Measuring Test Block.................................................................................. 28
Figure 3-21 Measurement Screen Shown. ...................................................................... 29
Figure 3-22 Measurement Done. .................................................................................... 31
Figure 3-23 IOL Calculation Screen............................................................................... 32
Figure 3-24 K1, K2 Values. ............................................................................................ 33
Figure 3-25 Calculation Complete.................................................................................. 34
Figure 3-26 Saving a Report........................................................................................... 35
Figure 3-27 Click Yes to Save......................................................................................... 36
Figure 4-1 A-Scan Plus Connect Exams Screen. ............................................................ 38
Figure 4-2 Measure Screen. ............................................................................................ 39
Figure 4-3 IOL Calculation Screen Selected. ................................................................. 40
Figure 4-4 Setup Screen Selected. .................................................................................. 41
Figure 5-1 Desktop Icon. ................................................................................................ 42
Figure 5-2 Select Setup Tab. ........................................................................................... 43
Figure 5-3 Setup Tab Opened. ........................................................................................ 44
Figure 5-4 Option Screen................................................................................................ 45
Figure 5-5 Selecting Main Exam Folder......................................................................... 46
Figure 5-6 Browse For Folder......................................................................................... 47
Figure 5-7 Selecting Save Changes. ............................................................................... 48
Figure 5-8 Are You Sure. ................................................................................................ 48
Figure 5-9 User Select, Default Folder of Version 4.0.................................................... 49
Figure 5-10 Windows Browser - Locate Exam Folder. .................................................. 50
Figure 5-11 Net Share. .................................................................................................... 51

Figure 5-12 Windows Browser - Locate Exam Folder. .................................................. 52
Figure 5-13 Selecting Exam Name Combinations.......................................................... 53
Table 5-2 Eye Types........................................................................................................ 55
Table 5-3 Lens Materials and Velocities. ........................................................................ 55
Table 5-4 Anterior/Vitreous Materials and Velocities..................................................... 55
Figure 5-14 Selecting the Default Eye Group................................................................. 56
Figure 5-15 Selecting the Default Formula. ................................................................... 57
Figure 5-16 Selecting Default Scan Method................................................................... 58
Figure 5-17 Selecting Default Capture Mode................................................................. 60
Figure 5-18 Selecting the K Index.................................................................................. 63
Figure 5-19 Selecting Save Changes. ............................................................................. 64
Figure 5-20 Are You Sure. .............................................................................................. 64
Figure 5-21 Gain Adjustment Knob................................................................................ 65
Figure 5-22 Turn On the Synergy Mode......................................................................... 66
Figure 5-23 Selecting the Snapshot Format.................................................................... 67
Figure 5-24 Snapshot Selection Completed.................................................................... 68
Figure 5-25 Selecting Network Location........................................................................ 69
Figure 5-26 Activating Export Report. ........................................................................... 70
Figure 5-27 Selecting Network Location........................................................................ 71
Figure 5-28 Successful Read Write Test. ........................................................................ 72
Figure 5-29 Selecting “New” Facility............................................................................. 72
Figure 5-30 Facility Information Being Entered. ........................................................... 73
Figure 5-31 Are You Sure. .............................................................................................. 74
Figure 5-32 Are You Sure. .............................................................................................. 75
Figure 5-33 Physicians Screen........................................................................................ 76
Figure 5-34 Physician Name Entered. ............................................................................ 77
Figure 5-35 Are You Sure. .............................................................................................. 77
Figure 5-36 Are You Sure. .............................................................................................. 78
Figure 5-37 Users Screen................................................................................................ 79
Figure 5-38 New User Information................................................................................. 80
Figure 5-39 Are You Sure. .............................................................................................. 81
Figure 5-40 Are You Sure. .............................................................................................. 81
Figure 5-41 Are You Sure. .............................................................................................. 82
Figure 5-42 Additional Eye Types. ................................................................................. 83
Figure 5-43 Eye Type Screen.......................................................................................... 83
Figure 5-44 New Lens Material Window Activated. ...................................................... 84
Figure 5-45 New Lens Material Entered. ....................................................................... 85
Figure 5-46 Are You Sure. .............................................................................................. 86
Figure 5-47 Are You Sure You Want to Remove. ........................................................... 87
Figure 5-48 New Anterior/Vitreous Material Window Activated................................... 88
Figure 5-49 New Anterior/Vitreous Material Entered. ................................................... 89
Figure 5-50 Are You Sure. .............................................................................................. 90
Figure 5-51 Are You Sure You Want to Remove. ........................................................... 90
Figure 5-52 Are You Sure. .............................................................................................. 90
Figure 5-53 Creating a New Eye Type............................................................................ 91

Figure 5-54 New Eye Type Window Opened. ................................................................ 92
Figure 5-55 New Eye Type Name Entered. .................................................................... 93
Figure 5-56 Selecting Lens Material............................................................................... 94
Figure 5-57 Entering Assumed Thickness. ..................................................................... 95
Figure 5-58 Selecting the AC Material. .......................................................................... 96
Figure 5-59 Selecting Vitreous Material......................................................................... 97
Figure 5-60 Are You Sure. .............................................................................................. 98
Figure 5-61 Create New Eye Type From Existing Eye Type.......................................... 98
Figure 5-62 New Eye Type Completed........................................................................... 99
Figure 5-63 Are You Sure. .............................................................................................. 99
Figure 5-64 Are You Sure. .............................................................................................. 100
Figure 5-65 IOL Personalization..................................................................................... 102
Figure 5-66 Selecting IOL Group. .................................................................................. 103
Figure 5-67 Selecting Lens to be Personalized............................................................... 103
Figure 5-68 Selecting the Formula. ................................................................................ 104
Figure 5-69 Files Transferred.......................................................................................... 105
Figure 5-70 Selecting Patients to be Personalized.......................................................... 106
Figure 5-71 Power of Lens Entered. ............................................................................... 106
Figure 5-72 Multiple Entries Completed. ....................................................................... 107
Figure 5-73 Unlock IOL Groups..................................................................................... 108
Figure 5-74 Select Lens. ................................................................................................. 109
Figure 5-75 Selecting the Formula. ................................................................................ 110
Figure 5-76 Select Manual Enter. ................................................................................... 110
Figure 5-77 Manual Entry............................................................................................... 111
Figure 5-78 Selecting Save Changes. ............................................................................. 112
Figure 5-79 Are You Sure. .............................................................................................. 113
Figure 5-80 Are You Sure. .............................................................................................. 114
Figure 5-81 Are You Sure. .............................................................................................. 115
Figure 5-82 Are You Sure. .............................................................................................. 116
Figure 5-83 Selecting Save Changes. ............................................................................. 117
Figure 5-84 Are You Sure. .............................................................................................. 117
Figure 6-1 Selecting New Exam..................................................................................... 119
Figure 6-2 Create New A-scan Exam. ............................................................................ 119
Figure 6-3 New A-Scan Study Screen. ........................................................................... 121
Figure 6-4 Medical Record Number Field...................................................................... 121
Figure 6-5 Entering Patients Date of Birth. .................................................................... 122
Figure 6-6 Entering Patients Gender............................................................................... 122
Figure 6-7 Entering Remark. .......................................................................................... 123
Figure 6-8 Control Unit Info........................................................................................... 124
Figure 6-9 Selecting Facility. .......................................................................................... 125
Figure 6-10 Selecting Physician. .................................................................................... 125
Figure 6-11 Selecting Operator. ...................................................................................... 126
Figure 6-12 Starting New Exam, Click Done................................................................. 126
Figure 6-13 Measurement Screen. .................................................................................. 127
Figure 6-14 Recalled Patient Record. ............................................................................. 128

Figure 6-15 Select Rescan to Start Measurement........................................................... 129
Figure 6-16 Rescan Are You Sure................................................................................... 129
Figure 6-17 Exams Tab. .................................................................................................. 130
Figure 6-18 Import B-scan Exam. .................................................................................. 131
Figure 6-19 List of Saved B-Scans. ................................................................................ 131
Figure 6-20 Selecting a Patient Record to Delete........................................................... 132
Figure 6-21 Are You Sure. .............................................................................................. 133
Figure 6-22 Select Folder Open...................................................................................... 133
Figure 6-24 Manage Version 4.0 Section........................................................................ 134
Figure 7-1 Measurement Screen. .................................................................................... 136
Figure 7-2 Select Eye Type............................................................................................. 137
Figure 7-3 Sclera and Retina Activated. ......................................................................... 140
Figure 7-4 Measurement Reports.................................................................................... 143
Figure 7-5 Calculation Reports....................................................................................... 143
Figure 7-6 Gates.............................................................................................................. 145
Figure 7-7 Reset Gates.................................................................................................... 146
Figure 8-1 IOL Calculation Screen................................................................................. 148
Figure 8-2 IOL Calculation Screen................................................................................. 149
Figure 8-3 Manage IOL Groups Screen.......................................................................... 150
Figure 8-4 IOL Groups Screen Opened. ......................................................................... 151
Figure 8-5 Select New IOL Group.................................................................................. 152
Figure 8-6 New IOL Group Selected.............................................................................. 152
Figure 8-7 Group Name Added....................................................................................... 153
Figure 8-8 Entering the Description of the Lens. ........................................................... 153
Figure 8-9 Entering A-Constant...................................................................................... 155
Figure 8-10 First Lens Entered. ...................................................................................... 155
Figure 8-11 Lens Group Completed and Locked............................................................ 156
Figure 8-12 Selecting Lens Group to be Removed......................................................... 157
Figure 8-13 Save Changes. ............................................................................................. 158
Figure 8-14 Selecting IOL Group. .................................................................................. 159
Figure 8-15 Formula Selected......................................................................................... 159
Figure 8-16 K1 and K2, Target Fields. ........................................................................... 162
Figure 8-17 Changed Rx Surg Field. .............................................................................. 165
Figure 8-18 K-Post Formula Selection Window Open. .................................................. 167
Figure 8-19 Post Rx on Completion of Contact Lens Method. ...................................... 168
Figure 8-20 Post Rx on Completion of Shammas Method............................................. 169
Figure 8-21 Compare All Featured Turned On. .............................................................. 170
Figure 8-22 Print Icon..................................................................................................... 171
Figure 9-2 Setup Screen.................................................................................................. 173
Figure 9-3 Import/Export Screen.................................................................................... 174
Figure 9-4 Import/Export Screen.................................................................................... 176
Figure 9-5 Export Icon.................................................................................................... 177
Table 11-1 Accutome A-Scan Plus Control Unit Physical Specications. ..................... 181
Table 11-2 Accutome A-Scan Plus Connect Physical Specications. ............................ 182
Table 11-3 Environmental Specications. ...................................................................... 182

Table 11-4 Measurement Accuracy................................................................................. 183
Table 11-5 Recommended Computer Specications. ..................................................... 184
Table 11-6 Operating Mode(s)........................................................................................ 184
Table 11-7 Formula References. ..................................................................................... 185
Table 11-8 Data Specications........................................................................................ 186
Table 11-9 Data Specications........................................................................................ 187
Table 10-11 Acoustic Output Reporting Table for Track 1
Non-Autoscanning Mode................................................................................................ 188
Table 11-11 Acoustic Output Reporting Table for Track 1
Non-Autoscanning Mode................................................................................................ 189
Table 12-1 Accutome Replacement Parts. ...................................................................... 192
Table A-1 A-Scan Plus Connect System Messages. ..................................................... 193
Table A-1 A-Scan Plus Connect System Messages. ..................................................... 194

All Accutome A-Scan Plus Connect units are manufactured by Accutome, Inc. at:
3222 Phoenixville Pike
Malvern, PA 19355
USA

Chapter 1: Introduction
1
Accutome A-Scan Plus Connect Overview
The Accutome A-Scan Plus Connect pictured below has all the features that
make it easy to obtain scans with extreme accuracy and improved patient
outcomes.
Figure 1-1 Accutome A-Scan Plus Connect
Introduction

2
Accutome A-Scan Plus Connect User’s Guide
Features
The Accutome A-scan Plus Connect is designed for easy access to all screens
and functions.
The windows based software and proprietary universal interface provides
unsurpassed ease of use and the straightforward Graphical User Interface guides
you through every operation.
What you can’t see on the surface is also important. Industry-leading signal
acquisition and processing helps you assure accurate measurements. Reliable
design and efcient manufacturing provide scal value. Upgradable software
protects your investment.
The A-Scan provides the following general features:
• Use on any Windows based computer
• Universal interface and probe
• Easily updated software
• Provides a variety of printouts
• Portable
Measurements
The accuracy of the Accutome A-Scan Plus Connect measurement is provided
by the following:
• High-resolution, real-time waveform display
• High-speed digitalization acquires over 4000 points per waveform
• Continuous display of Axial Length, ACD, Lens Thickness, and Vitreous
dimensions
• Audible feedback of contact and capture
• Immersion mode yields improved accuracy - Contact mode also supported
• Automatically or Manually capture up to 5 waveforms for each eye
• Adjustable Gain, Velocities, Gates, and Amplitude Thresholds
• Modify all waveform parameters using real-time or frozen waveforms
• Predened Eye Types and Velocities handle most situations such as phakic,
dense cataract, three types of pseudo-phakic, aphakic, silicone oil lled,
and even phakic ICL eyes. All velocities are fully adjustable
• Custom Eye Types and Material Velocities can be created to handle individual
preferences, special pathologies, or future trends
• Highly sensitive 10MHz composite Broadband probe features a xation
light and multiple mounting options

3
Accutome A-Scan Plus Connect User’s Guide
IOL Calculations
The Accutome A-Scan Plus Connect is also a leader in IOL Calculations and
provides the following:
• Modern formulas including Hoffer Q, Holladay, SRK/T, and Haigis
• Compare results of all formulas simultaneously on a single screen for
selected lenses
• Instantly calculates emmetropic and targeted ametropoic IOL powers
for dozens of lenses, viewed four at a time, using the average of selected
waveforms, a single waveform, or manually entered data
• Conveniently group lenses by favorite designation such as surgeon, user,
type, manufacturer, etc.
• Personalization of IOL Constants is easy and straightforward, encouraging
improved patient outcomes
• Maintains individual IOL Constants for each formula. Clearly identies
which IOL constant is used with the selected formula
• IOL Calculation for Post Refractive Surgery Patients
Components
The components that are standard with each Accutome A-Scan Plus Connect
instrument are:
• Ultrasonic probe
• Control Unit
• Footswitch
• Software CD which contains:
• User’s Guide
• System Software (to be loaded onto PC)
• A-B Type USB Cable
• Test Block
• Installation Instructions
• Quick Reference Guide
Optional Components
There is an additional component which further simplies the use of the
Accutome A-Scan Plus Connect:
• Immersion Shell
Introduction

4
Accutome A-Scan Plus Connect User’s Guide
About this Manual
Chapter 2
Chapter 3
Chapter 4
Chapter 5
Chapter 6
Safety
Getting Started
How to navigate
screens and buttons
Setting up personal
Preferences
Entering Patient
Information
Summarizes safety precautions,
warnings, symbols, and terms.
Provides assembly instructions,
overview of Accutome A-Scan Plus
Connect basic operation.
Describes the interface and how to
use all the buttons and screens.
Provides instructions on how to set
up custom eye types and system
personal preferences.
Provides instructions on how to
create a new exam and enter patient’s
information.
Other manuals for a-scan plus
2
Table of contents
Other Accutome Medical Equipment manuals

Accutome
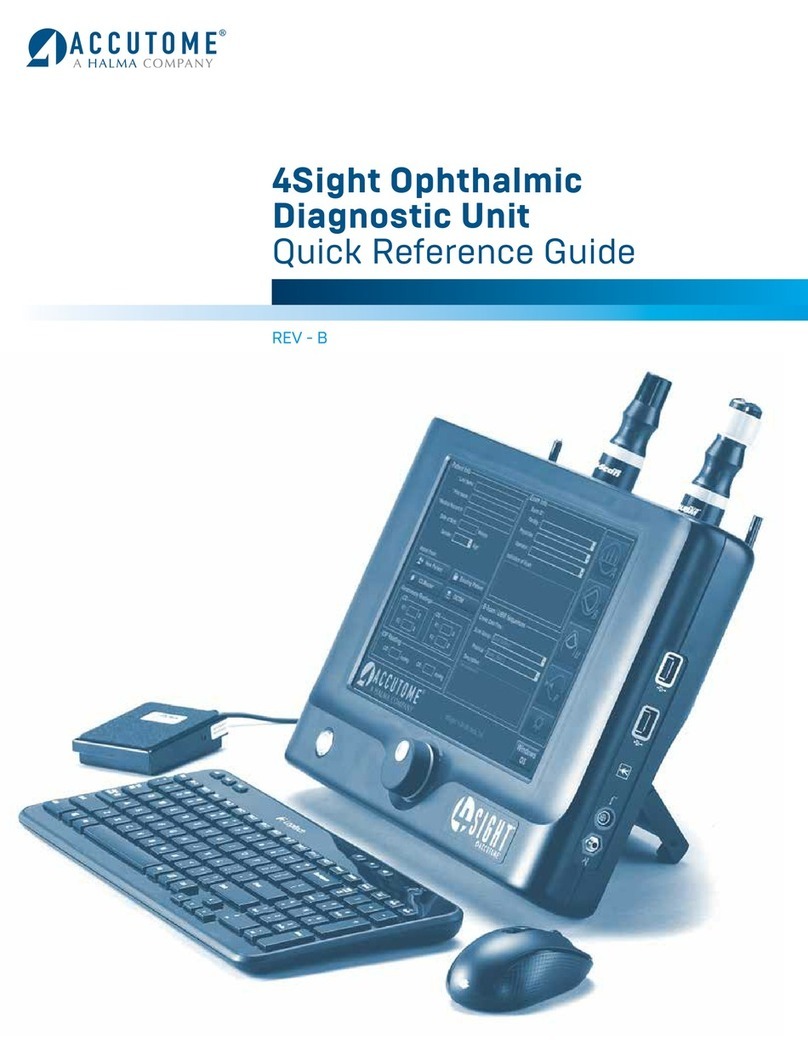
Accutome 4Sight User manual

Accutome
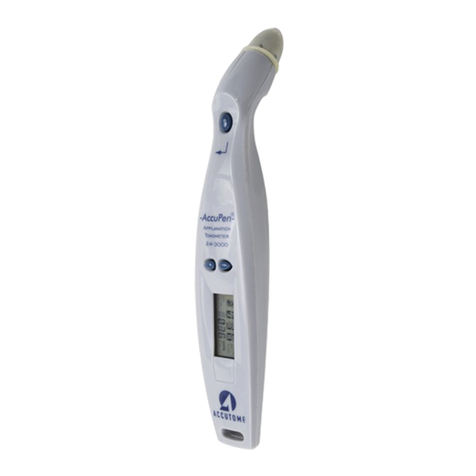
Accutome ACCUPEN User manual

Accutome
Accutome a-scan plus User manual

Accutome
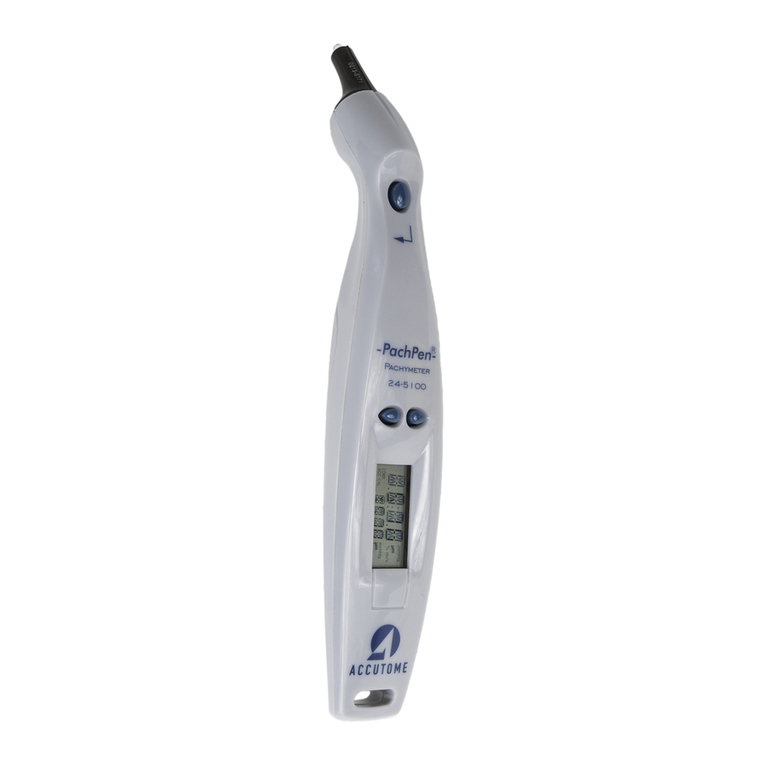
Accutome PachPen User manual

Accutome
Accutome a-scan plus User manual

Accutome
Accutome B-Scan Plus User manual

Accutome
Accutome 4Sight User manual

Accutome
Accutome B-Scan Plus User manual