Accutome B-Scan Plus User manual

B-Scan Plus User’s Guide
24-6110 Rev-E

www.accutome.com • (800) 979.2020 US & CA • (610) 889.0200 International • +31 (0) 485.350300 Europe
ii
Accutome B-Scan Plus Manual
Federal law restricts this device to sale by or on the order of a physician.
FEDERAL COMMUNICATIONS COMMISSION (FCC)
UNINTENTIONAL EMITTER PER FCC PART 15
This device has been tested and found to comply with the limits for a Class B
digital device, pursuant to Part 15 of the FCC rules. These limits are designed to
provide reasonable protection against harmful interference in an ofce installation.
This equipment generates, uses, and can radiate radio frequency energy and, if
not installed and used in accordance with the instructions in the user manual,
may cause harmful interference to radio or television reception. However, there
is no guarantee that interference will not occur in a particular installation. If this
equipment does cause interference to radio or television reception, which can be
determined by turning the equipment off and on, the user is encouraged to try to
correct the interference by one or more of the following measures:
• Reorient or relocate the receiving antenna.
• Increase the separation between the equipment and receiver.
• Connect the equipment to an outlet on a different circuit from that to which
the receiver is connected.
• Consult Accutome, Inc. or an experienced radio/TV technician for help.
This device complies with Part 15 of the FCC Rules. Operation of this product is
subject to the following two conditions: (1) this device may not cause harmful
interference, and (2) this device must accept any interference received, including
interference that may cause undesired operation.
CAUTION: Changes or modifications not expressly approved by Accutome, Inc. could void
the FCC compliance and negate your authority to operate the product.
The B-Scan Plus is Manufactured by:
Accutome, Inc.
3222 Phoenixville Pike
Malvern, PA 19355 USA
Toll Free (USA): 1-800-979-2020
International: 610-889-0200
Fax: 610-889-3233

(800) 979.2020 US & CA • (610) 889.0200 International • +31 (0) 485.350300 Europe • www.accutome.com iii
Chapter 1: Introduction 1
Accutome B-Scan Plus Overview 1
Features 1
Adjustable TGC Curves 2
Gamma Settings 2
Gain Adjustment 2
Automatic Image Orientation Labeling 2
Image Playback 2
Measurements 2
Patient Data Storage and Retrieval 2
Reports and Printouts 2
Components 2
About This Manual 3
Chapter 2: Safety 4
Safety Information 4
Safety Issues to Consider When Using the Accutome B-Scan Plus 4
Indications for use 4
Disposal Requirements 4
Symbol Denitions for the Accutome B-Scan Plus 4
Safety Precautions 4
Disinfection and Cleaning 5
Safety Precautions 5
Cleaning Procedure at Point of Use 6
Disinfection of the Probes with Alcohol 6
High- Level Disinfection of the Probe 6
Electrical Hazard and Safety 6
Avoiding Equipment Damage 7
Chapter 3: Getting Started 8
Assembling the Accutome B-Scan 8
What you need 8
Installing the Software 9
Installation - Phase One 9
Installation - Phase Two 10
Installation - Phase Three 10
Probe 11
Footswitch Setup 11
Basic Operation 12
Starting Accutome B-Scan Plus Program 12
How to Start a New Patient Exam 12
Operation 15
Scanning 15
Table Of Contents

www.accutome.com • (800) 979.2020 US & CA • (610) 889.0200 International • +31 (0) 485.350300 Europe
iv
Accutome B-Scan Plus Manual
How to Print an Exam 16
How to Save Patient Exams 16
Chapter 4: Setup 17
Setting Up the B-Scan Plus 17
How to Access Setup 17
Setup Menu Selections 17
Facilities 18
Users 20
Sequences 22
Options 28
Image Controls 32
Physicians 36
Chapter 5: Performing Exams 39
Overview 39
Exam Steps 39
How to Start a New Exam 39
Initial Exam Screen 40
Exam Screen Features 45
Exam Information Displayed above Image 45
Current View 46
All Views 46
Tools Palette 46
Add View 47
Edit Current View 48
Probe Orientation 48
Edit Exam Info 48
Analyze 49
Menu Buttons 49
Probe Usage in Scanning 49
How the B-Scan Probe Works 49
Probe Operation 50
Marker Alignment 50
Probe Positions 51
How to Scan 52
Macula Scans 56
Horizontal Macula 56
Longitudinal Macula 56
Labeling Macula Scans 56
A-Vector 56
Completing Patient Exam 57
Main Menu 57
New Exam 57
Exit 57
Analyze 57

(800) 979.2020 US & CA • (610) 889.0200 International • +31 (0) 485.350300 Europe • www.accutome.com v
Table Of Contents
Chapter 6: Patient Image Analysis 58
Overview 58
Selecting Images for Analysis 58
How to Select an
Existing Exam 58
Analyze Screen 59
Exam Information Displayed above Image 59
Current View 60
Editing Current View Info 60
Selecting an Existing Exam 61
How to Edit Exam Info 62
Exams 64
Playing an Exam 64
Stopping an Exam 64
Pause 64
Forward 64
Backward 65
TGC Adjustment 65
How to Adjust the TGC 65
Image Enhancement Gammas 66
Linear 66
S-Curve 67
Log 67
Color 68
Changing Gamma Settings 68
How to Use Zoom 68
Reset Zoom 69
How to Move Image 69
How to Take a Measurement on an Existing Image 70
Measurement Types 70
A-Vector 71
Comments on Image 72
Chapter 7: Printing Images & Reports 74
Overview 74
Printing Images 74
How to Print an Image 74
Creating Reports 75
Selecting Patient Exam 76
Capturing Snapshots 76
Reports Tool 76
Create a New Report 78
Report Form 78
Selecting Snapshots 79
Inserting Selected Snapshots 80
Print or Save Report 80

www.accutome.com • (800) 979.2020 US & CA • (610) 889.0200 International • +31 (0) 485.350300 Europe
vi
Accutome B-Scan Plus Manual
Chapter 8: Archive and Restore 82
Overview 82
Archive Screen 82
Archive to CD or DVD 83
Selecting Patient Exams 83
Burn Disc 84
Archive to a Local/Net Hard Disk 85
Additional Archive Features 86
Restore Screen 88
Restore from DVD or CD 89
Selecting Patient Exams 89
Selecting Individual Exams 90
Select All 90
Clear All 90
Restore 91
Restore Local/Network Hard Disk 91
Selecting the Local/Network HD Tool 91
Selecting the Folder for Restoring Exams 92
Selecting Patient Exams 92
Executing Restore 92
Additional Restore Features 93
Exams on Backup Features 93
Select All 93
Clear All 93
Total Space Needed 93
Check Conict 93
Overwrite Old Exams 94
Exams on Destination 94
Select All 94
Clear All 94
Remove Selected Exams 94
Exams on System 95
DVD/CD Features 95
Free Space On The System 95
Select Folder 95
Information of Media 95
Eject 96
Load 96
Abort 96
Available Exams 96
Local/Net Hard Disk 96
Select Folder 96
List Exams in the Folder 96
Abort 96
Main Menu and Exit 96

(800) 979.2020 US & CA • (610) 889.0200 International • +31 (0) 485.350300 Europe • www.accutome.com vii
Chapter 9: Maintenance 97
General Maintenance 97
Chapter 10: Specifications 98
Overview 98
Physical Specifications 98
Environmental Specifications 99
Computer Specifications 99
Operating Modes 100
Storage/Range Specifications 100
Acoustic Output 101
EMC Compliance Information 101
Warranty 105
Product Returns 105
Service and Repair 105
All Other Returns 105
Non-Returnable Merchandise 105
Chapter 11: Warranty & Repairs 105
Replacement Parts 106
Table Of Contents

www.accutome.com • (800) 979.2020 US & CA • (610) 889.0200 International • +31 (0) 485.350300 Europe
viii
Accutome B-Scan Plus Manual
Figure 1.1 - Accutome B-Scan Plus Components 1
Table 1.1 - B-Scan Computer Specications 8
Figure 3.1 - Accutome B-Scan Plus Probe 11
Figure 3.2 - Accutome B-Scan Plus Footswitch 11
Figure 3.4 - Main Screen Starting New Exam 12
Figure 3.3 - Accutome B-Scan Plus Desktop Shortcut 12
Figure 3.5 - New Exam Info Screen 13
Figure 3.6 - Entering New Patient Information 13
Figure 3.7 - Selecting Facility 13
Figure 3.11 - Exam Screen 14
Figure 3.8 - Selecting Physician 14
Figure 3.9 - Selecting Scan Group and Protocol 14
Figure 3.10 - Selecting Scan Group and Protocol 14
Figure 3.13 - Probe Tab Active 15
Figure 3.14 - Cine Tab Active 15
Figure 3.15 - TGC Tab Active 15
Figure 3.12 - Tools Palette and Current View 15
Figure 3.16 - Gamma Tab Active 15
Figure 4.1 - Selecting Setup 17
Figure 4.3 - Selecting “New” Facility 18
Figure 4.2 - Setup Facilities Tab 18
Figure 4.4 - New Facility Information Active 19
Figure 4.5 - Saving New Facility 19
Figure 4.6 - Update Restore Point Dialog 20
Figure 4.7 - Restore Facilities Dialog 20
Figure 4.8 - Users Screen 20
Figure 4.10 - New User Information Active 21
Figure 4.9 - Users Screen, New User 21
Figure 4.11 - Saving New User 21
Figure 4.12 - Update Restore Point Dialog 22
Figure 4.13 - Restore Users Dialog 22
Figure 4.14 - Sequences Screen 22
Figure 4.16 - Adding New Sequence 23
Figure 4.17 - Assigning Name to New Sequence 23
Figure 4.15 - Adding New Sequence 23
Figure 4.18 - New Sequence - New View Active 24
Figure 4.19 - First Scan Editing View 24
Figure 4.20 - Adding a New Sequence Scan 25
Figure 4.21 - New Sequence Scan (View) Added 25
Figure 4.22 - Change Probe Orientation 25
Figure 4.24 - Saving New Sequence 26
Figure 4.23 - Change Probe Orientation 26
Figure 4.25 - Deleting a Sequence 26
Figure 4.26 - Duplicating Current Sequence 27
List Of Figures

(800) 979.2020 US & CA • (610) 889.0200 International • +31 (0) 485.350300 Europe • www.accutome.com ix
Figure 4.27 - Update Restore Point Dialog 27
Figure 4.29 - Options Screen 28
Figure 4.28 - Restore Sequences Dialog 28
Figure 4.30 - Selecting Main Exam Folder 29
Figure 4.32 - Selecting Restored Exam Folder 29
Figure 4.31 - Windows Browser - Locate Exam Folder 29
Figure 4.33 - Windows Browser - Locate Exam Folder 29
Figure 4.34 - Selecting Exam Name Combination 30
Figure 4.33 - Windows Browser - Locate Exam Folder 30
Figure 4.34 - Selecting Probe Depth 31
Figure 4.35 - Selecting Probe Cine Buffer 31
Figure 4.36 - Adjusting the Power Level 31
Figure 4.37 - Image Settings Before Adjustment 33
Figure 4.38 - TGC Adjustment 33
Figure 4.39 - Selecting a Preset Gamma 33
Figure 4.41 - Image Settings After Adjustments 34
Figure 4.42 - Selecting Gain Adjustment 34
Figure 4.40 - Adjusting Contrast and Brightness 34
Figure 4.43 - Adjusting Gain 35
Figure 4.44 - Restore All to System Defaults 35
Figure 4.45 - Update Restore Point Dialog 35
Figure 4.46 - Restore Options Dialog 35
Figure 4.47 - Exiting Setup (Cancel) 35
Figure 4.48 - Physicians Screen 36
Figure 4.49 - Physician Name Entered 36
Figure 4.50 - Saving New Physician 37
Figure 4.51 - Update Restore Point Dialog 37
Figure 4.52 - Restore Physicians Dialog 38
Figure 5.1 - Starting a New Exam 39
Figure 5.3 - Initial Exam Screen 40
Figure 5.2 - No Probe Found Message 40
Figure 5.4 - Initial Exam Screen with Patient Name 42
Figure 5.5 - Selecting Gender 42
Figure 5.6 - Selecting Facility 43
Figure 5.7 - Selecting Physician 43
Figure 5.8 - Selecting Operator 44
Figure 5.9 - Selecting Scan Group 44
Figure 5.10 - Selecting Scan Protocol 44
Figure 5.11 - Starting New Exam 45
Figure 5.12 - Exam Screen Layout 45
Figure 5.13 - Probe and Scan Controls Tab Selected 46
Figure 5.14 - TGC Adjustments Tab Selected 47
Figure 5.15 - Gamma Adjustments Tab Selected 47
Figure 5.16 - Cine Adjustments/Play Tab Selected 47
Figure 5.17 - Edit Exam Information Window 48
Figure 5.18 - B-Scan Example 50
Figure 5.19 - Eye and Probe Marker Alignment 50
Figure 5.20 - New Exam with Selected Protocol - First Scan Complete 53

www.accutome.com • (800) 979.2020 US & CA • (610) 889.0200 International • +31 (0) 485.350300 Europe
x
Accutome B-Scan Plus Manual
Figure 5.21 - New Exam No Protocol - First Scan Selected 53
Figure 5.22 - New Exam First Scan Complete 54
Figure 5.23 - New Exam Second Scan Complete 54
Figure 5.24 - Adding a View 54
Figure 5.28 - Changing a View - Done 55
Figure 5.25 - Adjusting Gain 55
Figure 5.26 - Changing a View - Probe Position 55
Figure 5.27 - Changing a View - Slice Position and Global Orbit 55
Figure 5.29 - Labeling an LMAC Scan 56
Figure 5.30 - LMAC Scan Labeled 56
Figure 5.31 - Selecting “Show A-Vector” 56
Figure 5.32 - A-Vector Displayed 57
Figure 6.2 - Analyze Screen 58
Figure 6.1 - Starting Existing Exam 58
Figure 6.3 - Analyze Screen Layout 59
Figure 6.4 - Selecting a Patient Exam 61
Figure 6.5 - Existing Exam Displayed 62
Figure 6.6 - Edit Exam Information Window 63
Figure 6.7 - Restore Changes Information Dialog 63
Figure 6.8 - Exit Edit Exam Information Dialog 63
Figure 6.9 - Exams Tab 64
Figure 6.10 - Starting Scan Play 64
Figure 6.11 - Scan Stopped and Returned to Beginning 64
Figure 6.12 - TGC Adjustments Displayed 65
Figure 6.13 - Linear Full Range Gamma Setting 66
Figure 6.14 - S-Curve Full Range Gamma Setting 67
Figure 6.15 - Log Full Range Gamma Setting 67
Figure 6.16 - Color Gamma Setting 68
Figure 6.17 - Selecting a New Gamma Setting 68
Figure 6.18 - Zoom Selected 68
Figure 6.19 - Zoom Changed 69
Figure 6.20 - Image Move Icon 69
Figure 6.22 - Line 1 Measurement Displayed 70
Figure 6.21 - Line 1 Measurement Selected 70
Figure 6.24 - Area 1 Measurement Display 71
Figure 6.23 - Area 1 Measurement Selected 71
Figure 6.26 - A-Vector Displayed 72
Figure 6.25 - Selecting “Show A-Vector” 72
Figure 6.27 - Selecting “Comments on Image” 72
Figure 6.28 - Entering Comments 73
Figure 6.29 - Comments Appearing on Image 73
Figure 7.1 - Printing a Frame 75
Figure 7.2 - Selecting Reports Tool 76
Figure 7.5 - Conrming Snapshot Deletion 77
Figure 7.3 - Selecting Snapshot List 77
Figure 7.4 - Selecting Snapshot List 77
Figure 7.7 - Creating a New Report 78
Figure 7.6 - Executing Manage Reports 78
List Of Figures
(800) 979.2020 US & CA • (610) 889.0200 International • +31 (0) 485.350300 Europe • www.accutome.com xi
Figure 7.8 - Report Form 79
Figure 7.9 - Selecting Snapshots 79
Figure 7.10 - Inserting Selected Snapshots 80
Figure 7.11 - Saving a Patient Report 80
Figure 7.12 - Selecting File Type 81
Figure 7.13 - Saving Report 81
Figure 8.1 - Selecting Archive 82
Figure 8.2 - Archive Screen 83
Figure 8.3 - Selecting the First Exam 83
Figure 8.4 - Selecting the Second Exam 83
Figure 8.6 - All Exams Displayed - Clear All 84
Figure 8.7 - Burning the Disc 84
Figure 8.5 - Select All 84
Figure 8.8 - Disc Burning Progress 85
Figure 8.9 - Selecting the Local/Net Hard Disk Tools 85
Figure 8.10 - Launching Select Destination Folder 85
Figure 8.13 - Backup Activity 86
Figure 8.12 - Destination Folder Displayed 86
Figure 8.11 - Windows Browser - Locating Destination Folder 86
Figure 8.15 - Deleting Exam Warning 86
Figure 8.14 - Delete Selected Exams 86
Figure 8.17 - Verify Burn Results 87
Figure 8.16 - “Disc Info” 87
Figure 8.18 - Selecting the Restore Screen 88
Figure 8.19 - Restore Screen 89
Figure 8.24 - Selected Exams To Be Restored - Clear All 90
Figure 8.23 - Select All Exams to be Restored 90
Figure 8.20 - Selecting the First Exam 90
Figure 8.21 - First Exam Selected 90
Figure 8.22 - Selecting the Second Exam 90
Figure 8.26 - Exam Restoring Progress 91
Figure 8.27 - Selecting the Local/Net Hard Disk Restore Tools 91
Figure 8.28 - Local/Network HD Restore Tools Active 91
Figure 8.25 - Restoring the Exam from the CD 91
Figure 8.34 - Restore Activity 92
Figure 8.30 - Windows Browser 92
Figure 8.32 - Source Folder Displayed 92
Figure 8.33 - Execute Restore Exams on Local/Network HD 92
Figure 8.29 - Launching Select Folder (for Restoration) 92
Figure 8.31 - Locating Source Folder 92
Figure 8.35 - Exams on Backup Tab Active 93
Figure 8.36 - Overwrite Warning 94
Figure 8.37 - Exams on Destination - Restored Exams Folder 94
Figure 8.39 - Removing Exam from Restored Folder Warning 95
Figure 8.40 - Exams on System - Accutome Exam Data Folder 95
Figure 8.41 - Free Space on The System 95
Figure 8.42 - Information od Media 95
Figure 8.38 - Remove Selected Exams 95

www.accutome.com • (800) 979.2020 US & CA • (610) 889.0200 International • +31 (0) 485.350300 Europe
xii
Accutome B-Scan Plus Manual
Table 10.1 - Accutome B-Scan Plus Physical Specications 98
Table 10.2 - Environmental Specications 99
Table 10.3 - Recommended Computer Specications 99
Table 10.4 - Operating Mode(s) 100
Table 10.5 - Data Specications 100
Table 10.6 - Range and Accuracy 100
Table 10.7 - Acoustic Output Reporting Table for
Track 1 Non-Autoscanning Mode 101
Table 5.4 - Guidance And Manufacturer’s Declaration -
Electromagnetic Emissions 102
Table 5.5 - Guidance And Manufacturer’s Declaration -
Electromagnetic Immunity 102
Table 5.6 - Guidance And Manufacturer’s Declaration -
Electromagnetic Immunity 103
Table 5.7 - Recommended Separation Distances Between
Portable And Mobile Rf Communications Equipment And The B-Scan Plus 104
Table 11.1 - Accutome Replacement Parts 106

(800) 979.2020 US & CA • (610) 889.0200 International • +31 (0) 485.350300 Europe • www.accutome.com 1
Chapter 1: Introduction
1Introduction
Accutome B-Scan Plus Overview
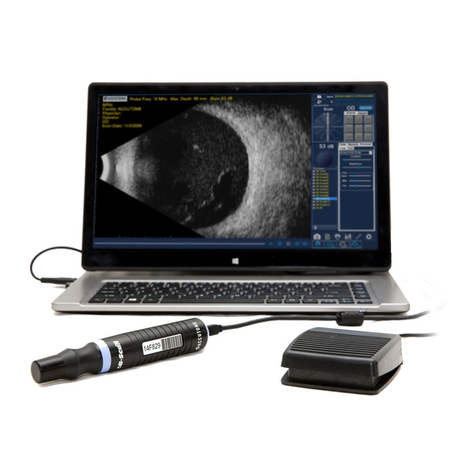
The Accutome B-Scan Plus provides high quality B-Scan imaging and playback
with the ease of plugging into any computer in the world. The Accutome B-Scan
also has many additional features that allow multiple methods of viewing,
diagnosing and printing acquired images.
Figure 1.1 - Accutome B-Scan Plus Components
Features
The Accutome B-Scan Plus images the internal structure of the eye is designed for
easy access to all functions.
The B-Scan provides the following general features:
• Adjustable TGC (Time Gain Compensation) curves
• Gamma Settings (Post Image Processing)
• Automatic Image Orientation Labeling
• A-Vector
• Image Annotation
• Image Movie Playback
• Image Diagnostic Measurements - Distance and Area
• Patient data storage and retrieval
• Patient data reports and printouts

www.accutome.com • (800) 979.2020 US & CA • (610) 889.0200 International • +31 (0) 485.350300 Europe
2
Accutome B-Scan Plus Manual
Adjustable TGC Curves
The Accutome B-Scan Plus allows you to adjust the Gain, Time Gain Compensation
(TGC) as a default in Setup, live during an exam or on a saved existing exam.
Gamma Settings
The Accutome B-Scan Plus allows you to adjust the Gamma settings as a default in
Setup, live during an exam or on a saved existing exam.
Gain Adjustment
The Accutome B-Scan Plus allows you to adjust the signal gain while scanning or
on a saved image enhancing image quality.
Automatic Image Orientation Labeling
The Accutome B-Scan Plus allows you to set image orientation labels as a default
in Setup, live during an exam or on a saved existing exam.
Image Playback
The Accutome B-Scan Plus allows you to play live images during scanning or to
playback saved images.
Measurements
The Accutome B-Scan Plus provides several types of image measurements:
• Point- to-Point
• Distance
• Area
Patient Data Storage and Retrieval
The Accutome B-Scan Plus saves all patient exams in a preset designated folder
on the user computer, allowing you to playback, archive and backup any and all
patient exams.
Reports and Printouts
The Accutome B-Scan Plus allows you to prepare reports containing exam
information and snapshots of selected imaging views. You can also print a
snapshot at any time; during an exam or from a stored exam.
Components
The components that are standard with each Accutome instrument are:
• B-Scan Ultrasound Probe
• Probe Holder
• Footswitch
• Wireless Mouse
• This User Manual
• CD containing Accutome B-Scan software
All components are packed in a plastic carrying case. The user supplies a PC with
Windows XP SP2 as the operating system.

(800) 979.2020 US & CA • (610) 889.0200 International • +31 (0) 485.350300 Europe • www.accutome.com 3
Introduction
About This Manual
This manual is a guide for technicians and opthamologists who are experienced in
ultrasonographic biometric techniques.
This manual is organized as follows:
Section 2 - Safety
Summarizes safety precautions, warnings, symbols and terms.
Section 3 - Getting Started
Provides installation instructions, overview of Accutome B-Scan Plus basic
operation.
Section 4 - Accutome B-Scan Plus Setup
Provides instructionson how to set up physicians, users, and system operational
functions.
Section 5 - Performing Exams
Provides detailed instructions on how to acquire exam images.
Section 6 - Patient Image Analysis
Describes how to review and make comments for an individual patient.
Section 7 - Printing Images and Reports
Provides detailed instructions on how to print patient exam images, create and
print or save reports.
Section 8 - Archive
Provides instructions on how to recall patient exams and archive exams to a CD or
DVD.
Section 9 - Maintenance
Provides general maintenance instructions.
Section 10 - Specifications
Provides Accutome B-Scan Plus physical and operational specications
Section 11 - Warranty and Repairs
Describes Accutome B-Scan Plus warranty information and repair procedures.
Having read this manual you will be able to set up the Accutome B-Scan Plus,
perform scans, playback, save frames as snapshots, analyze images, print
snapshots, create reports and archive patient exams.

www.accutome.com • (800) 979.2020 US & CA • (610) 889.0200 International • +31 (0) 485.350300 Europe
4
Accutome B-Scan Plus Manual
Chapter 2: Safety
2Safety
Safety Information
The section lists:
• Safety Precautions associated with the Accutome B-Scan Plus
• Safety Precautions of a general nature
FEDERAL LAW RESTRICTS THIS DEVICE TO SALE BY OR ON THE ORDER OF A PHYSICIAN.
Safety Issues to Consider When Using the Accutome B-Scan Plus
The Accutome B-Scan Plus is non-invasive. The ultrasound probe touches the
surface of the anesthetized eye during image acquisition, and energy in the form
of ultrasound is transmitted into the eye. The power level of the ultrasound pulses
is controllable by the Application Software, and the user has control of this power
setting. The maximum power allowed to be set by the Application Software, and/or
by the user is below the FDA, Health Canada, and EU maximum power limits.
The Accutome B-Scan Plus Probe must be cleaned and disinfected before use.
Indications for use
This instrument is used for imaging the internal structure of the eye including the
opaque media and posterior pathology for the purpose of diagnosing pathological or
traumatic conditions in the eye.
WARNING! THE B-SCAN PLUS IS NOT INTENDED FOR FETAL USE!
Disposal Requirements
The B-Scan Plus contains electronic components. At the end of its useful life it
must be properly disposed of incompliance with local regulations.
Disposal of the product within the EU
EU directives and national regulations currently in force at the time of marketing
prohibit the disposal of the B-Scan Plus specied on the delivery note in domestic
waste or by municipal waste disposal companies. If the B-Scan Plus or its
components are resold, the seller has the duty to notify the buyer that the product
must be disposed of in accordance with currently valid national regulations.
Symbol Denitions for the Accutome B-Scan Plus
Statements, graphics and symbols listed on the next page are used on components
of the Accutome B-Scan Plus. Descriptions and meanings are listed to the right of
the symbols.
Safety Precautions
There are several areas in the use of the Accutome B-Scan Plus that require special

(800) 979.2020 US & CA • (610) 889.0200 International • +31 (0) 485.350300 Europe • www.accutome.com 5
Symbol Definitions for the
B-Scan Plus
Attention! Consult
Instruction Manual
No User
Serviceable Parts
Type B Medical
Device
Do Not Use
Near Flammable
Gasses
Type II Insulation
Disposal of Product
within the EU
attention, as they may pose a safety
threat.
WARNING! DO NOT AUTOCLAVE!
WARNING! DO NOT IMMERSE THE PROBE
TIP IN TAP WATER AS THE FLUORIDE CAN
DAMAGE THE CRYSTAL.
Disinfection and Cleaning
Disinfection issues are conned to
the Accutome probe that comes
in contact with the patient’s eye. In
order to prevent the transmission
of disease, refer to the OSHA and
CDC guidelines for proper control
of disinfection. These guidelines
are frequently updated so be
sure to contact OSHA, CDC, or
your local disease control for the
latest information and disinfection
technique.
Accessories such as the extension
handle or Goldman Tonometer Adapter
which might come in contact with eye
uids should be cleaned with an FDA
cleared high level disinfectant.
The probe must be cleaned between
patients to prevent patient-to-
patient transfer of infection. It is the
user’s responsibility to ensure that
the relevant standards are maintained and that the products and procedures are
effective and appropriate for ophthalmic applications. The following information
is provided for the guidance of users, and specic products are mentioned for
illustration only. Accutome does not endorse the use of these or any other product.
Products must be used in accordance with the manufacturer’s instructions.
Safety Precautions
There are several areas in the use of the above Accutome products that require
special attention, as they may pose a safety threat.
DO NOT AUTOCLAVE THE PROBES OR CONNECTORS.
DO NOT IMMERSE THE PROBE’S CABLES OR METAL CONNECTORS. ALLOW TO DRY
BEFORE USE.
DO NOT WIPE THE PROBE END; IT MAY RESULT IN DAMAGE TO THE CRYSTAL.
Safety

www.accutome.com • (800) 979.2020 US & CA • (610) 889.0200 International • +31 (0) 485.350300 Europe
6
Accutome B-Scan Plus Manual
DO NOT IMMERSE THE PROBE TIPS IN TAP WATER. USE DISTILLED WATER FOR
CLEANING AND DISINFECTION
Cleaning Procedure at Point of Use
Clean the probe handle with a damp cloth. Use appropriate products to clean the
computer, keyboard and monitor. Cables may be cleaned with a soft cloth and
alcohol. The probe holder should be washed with warm water and mild detergent.
Probe and Transducer:
The user must use the following procedure to clean the transducer and probe daily:
Keep the transducer and probe connected, soak/rinse the transducer and probe
end thoroughly with distilled water.
• Inspect all surfaces carefully for debris or build up.
• If there is still debris, soak/rinse the transducer and probe tip end with
distilled water again. Repeat until all debris is gone.
• Let the transducer and probe air dry.
Disinfection of the Probes with Alcohol
One recommended disinfection technique is to clean the probe assemblies with
70% isopropyl alcohol.
A 5-10 minute exposure is recommended. It is imperative that the alcohol be given
to time to evaporate before applying a probe to that patient’s eye. Do not completely
immerse the probe or cable, only the tip of the probe should be placed in the
solution.
After cleaning, rinse the end of the probe thoroughly with distilled water to remove
all traces of the liquid used.
Let transducer and probe air dry.
High- Level Disinfection of the Probe
If high level disinfection is required by your facility, the probe may be cleaned using
an FDA cleared high level disinfectant, such as Cidex® OPA Activated Dialdehyde
Solution.
If your facility is located in the EU, Mikrozid wipes are a compatible method of high-
level disinfection for Accutome probes.
Note: Be sure to follow the disinfectant manufacturer’s written protocol when
using any antibacterial solution, including high level disinfectants.
Electrical Hazard and Safety
The instrument, foot switch and probe of the Accutome B-Scan Plus are electrical/
electronic devices. Reasonable care should be taken when making electrical
connection and handling electrically powered devices. Avoid use of damaged
electrical equipment or frayed electrical cords. If repair or maintenance is being
performed, the equipment must be turned off and the power cord disconnected.
WARNING! THE B-SCAN PLUS IS ONLY TO BE USED WITH A COMPUTER USING A MEDICAL

(800) 979.2020 US & CA • (610) 889.0200 International • +31 (0) 485.350300 Europe • www.accutome.com 7
GRADE POWER SUPPLY COMPLIANT WITH IEC60601-1.
Please refer to the manufacturer’s instructions regarding it’s use.
The User is responsible for ensuring that the PC to which the B-Scan Plus system
is connected must be of the grounding type in compliance with applicable electrical
codes.
To avoid interruption of a procedure the user is responsible for ensuring that all
power and USB connections are secure and that the laptop is fully charged.
CAUTION: To avoid possible loss of patient data stored in the PC, ensure that the data is
backed up on some device external to the PC.
Avoiding Equipment Damage
The Accutome B-Scan Plus provides no explosion protection from static discharge
or arcing components. Do not operate the instrument in the presence of explosive
gases such as ammable mixtures of anesthetic and air, or nitrous oxide.
WARNING!OPERATING OR STORING THE DEVICE BEYOND THE ENVIRONMENTAL RANGES
IN THE SPECIFICATIONS CHAPTER MAY RESULT IN ERRONEOUS READINGS AND/OR
PREMATURE FAILURE OF THE DEVICE.
Avoiding Electromagnetic and Other Interference
Do not use a cellular telephone and other devices not complying with EMC Class B
requirements, as its signals may cause the equipment to malfunction. The effect
of radio signals on medical devices is dependent on various factors and therefore
unpredictable.
To avoid electromagnetic interference, the device must be installed and put into
operation in accordance with the user manual and using the components supplied
by Accutome.
WARNING!THE USE OF ACCESSORIES, TRANSDUCERS AND CABLES OTHER THAN
THOSE SPECIFIED BY THE MANUFACTURER MAY RESULT IN INCREASED EMISSIONS OR
DECREASED IMMUNITY OF THE B-SCAN PLUS.
WARNING! THE B-SCAN PLUS SHOULD NOT BE USED ADJACENT TO OR STACKED WITH
OTHER EQUIPMENTAND THAT IF ADJACENT OR STACKED USE IS NECESSARY, THE B-SCAN
PLUS SHOULD BE OBSERVED TO VERIFY NORMAL OPERATION IN THE CONFIGURATION IN
WHICH IT WILL BE USED.
Safety

www.accutome.com • (800) 979.2020 US & CA • (610) 889.0200 International • +31 (0) 485.350300 Europe
8
Accutome B-Scan Plus Manual
Chapter 3: Getting Started
3Getting Started
Assembling the Accutome B-Scan
The B-Scan Plus accurately images intraocular structures of the human eye using
ultrasound. The product consists of a B-Scan Plus Ultrasound Probe, a Probe
Holder, a footswitch, a wireless mouse, a User Manual, and a CD containing the
Accutome software, all packed in a plastic carrying case. The user supplies a PC
with Windows XP SP2 as the operating system.
The Accutome B-Scan Plus is designed to be used in multiple environments and is
as simple as carrying a notebook computer and probe.
The instrument requires virtually no assembly. You simply need to install the
software and plug the probe, the mouse receiver and footswitch into your
computer’s USB ports and activate the USB ports.
What you need
For a complete Accutome environment you will need the following:
• Windows XP based Personal Computer (PC) - Accutome recommends DellTM
Latitude D820
• Accutome Ultrasonic B-Scan Plus Probe
• Accutome B-Scan Plus software
• 4 USB Port(s)
• Wireless Mouse
• Printer
• Footswitch
PC
The computer used for the Accutome B-Scan Plus should meet the requirements
outlined in Table 1.1 below:
Table 1.1 - B-Scan Computer Specications
PC DellTM Latitude D820 with Intel CoreTM 2 Duo T7200
(2.00GHz) 4M L2 Cache, 667MHz Dual Core or equivalent
with USB ports
Operating System Genuine Windows® XP Professional, SP2, with media
LCD 15.4 inch Wide Screen WSXGA+ LCD Panel or larger
Memory 2.0GB, DDR2-667 SDRAM, 2 DIMMS
Hard Drive 80GB Hard Drive, 9.5MM, 7200 RPM
Module Bay Devices 8X DVD+/-RW w/Roxio SoftwareTM and Cyberlink Power
DVDTM, no media
Graphics 256MB NVIDIA® Quadro NVS 110M TurboCacheTM
Power Supply Medical Grade Power Supply or Isolation Transformer
Other manuals for B-Scan Plus
1
Table of contents
Other Accutome Medical Equipment manuals

Accutome
Accutome 4Sight User manual

Accutome
Accutome PachPen User manual

Accutome
Accutome a-scan plus User manual

Accutome
Accutome B-Scan Plus User manual

Accutome
Accutome 4Sight User manual

Accutome
Accutome a-scan plus User manual

Accutome
Accutome ACCUPEN User manual

Accutome
Accutome a-scan plus User manual
Popular Medical Equipment manuals by other brands

Getinge
Getinge Arjohuntleigh Nimbus 3 Professional Instructions for use

Mettler Electronics
Mettler Electronics Sonicator 730 Maintenance manual

Pressalit Care
Pressalit Care R1100 Mounting instruction

Denas MS
Denas MS DENAS-T operating manual

bort medical
bort medical ActiveColor quick guide

AccuVein
AccuVein AV400 user manual