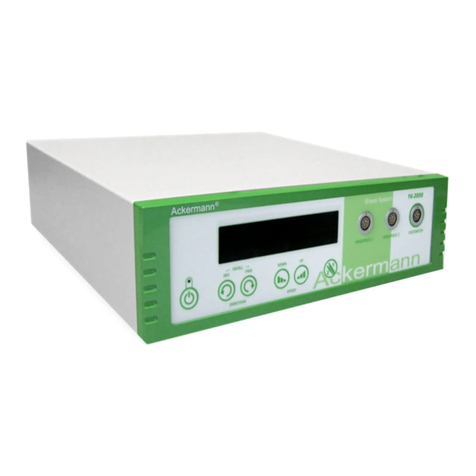
ACKERMANN 16-2009 User manual

ACKERMANN FUSION
Integrated Smart
Integrated Smart
Technology
Technology
User
Manual
16-2009
Ackermann
User Manual 16-2009 | Revision 01/20
16-2009
16-2009
Duo Camera
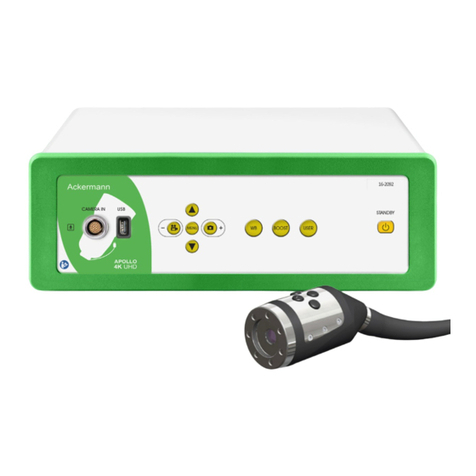
» The DUO Full HD control unit is a medical device
combining a Full HD camera and LED light source
over a single control channel. It is designed to provide
local illumination of the patient’s body and to capture
images taken by health practitioners qualified
in diagnostic procedures or surgical endoscopy
procedures. «

PAGE: 2// 40
INNOVATING TRADITION.
Chapter
4CONTENTS
Chapter
Overview
Chapter
1
Chapter
2
Chapter
3
Chapter
4
Chapter
5
Chapter
6
Chapter
7
Chapter
8
Chapter
9
Chapter
10
Chapter
11
These operating instructions contain information that is subject to copyright.
All rights are reserved.
This manual should not be photo-copied, duplicated on microfilm or otherwise copied or distributed,
completely or in part, without the approval of the manufacturer. The manufacturer will appreciate any errors
or anything unclear in this operating manual being pointed out to us by users of our products. Due to the
continuing progress and development of our products, we reserve all rights for technical alterations.
© by: Ackermann Instrumente GmbH
Rev. 01/2020
Foreword 3
Required information 5
Safety instructions 9
Installation of the equipment 12
Operating principle 14
Disinfection and sterilization 21
After-sales service and routine maintenance 27
Electromagnetic compatibility 29
Technical specifications 33
Disposal and recycling 34
Regulations and standards 35

PAGE: 3// 40
User Manual 16-2009 | Revision 01/20 by
Ackermann
1.1
1.2
WARNING
!
ASSOCIATED DOCUMENTATION
Thank you for your confidence and for buying this equipment.
It is essential that you familiarise yourself with the contents of this manual. It will help you get the best out of
your equipment and ensure all necessary safeguards are in place.
We have tried to make this manual as straight forward as possible to help with installation and use of the
equipment. In addition, references are provided on page 37 of this manual. They look like this: [D1]. They will
help you view the relevant parts of the product more easily.
Note: UDI numbers: custom products have a dierent UDI from the one shown on the cover of this manual.
You will find it on the product label and labels on the packaging.
In this user manual, Ackermann does not use any text, brand names, pictures, figurative signs or other items
liable to mislead the user or patient over the purpose, safety and performance of the device.
ELECTRONIC DOCUMENTATION
The instructions for use for your device can be provided in electronic format as per request on info@
ackermanninstrumente.de as well, and not in printed format. If you do not get any answer immediately, please
be patient, our customer service will come back to you asap.
The electronic user instructions are available in PDF format (Portable Document Format). You will need to
have a PDF file read soware installed to read the electronic version of the user instructions. It is important
for you to have read and understood the content of the user instructions relating to the use of your device and
its accessories.
Do not use the device without first familiarising yourself with the instructions for use.
Quick Start
Lens user manual
E-Ifu consulating
The Quick Start document is a simplified summary designed to help you. The only oicial instructions are
the user manuals and the regulatory documents accompanying the medical device.
Chapter
1FOREWORD
Chapter
1

PAGE: 4// 40
iNNOVATING TRADITION.
As soon as you receive your device, you are asked to print and download all documents or sections of
documents that you may need to consult in the event of an emergency, if you are unable to connect to the
Internet or if your electronic display device (computer, tablet, etc.) stops working. We recommend that you
visit the website regularly to check if there are any downloadable versions of your device’s user instructions.
Users are asked to keep documentation to hand so that it can be consulted when necessary.
All printed and electronic format documentation relating to your medical device must be kept for the device’s
entire service life.
Please retain all original documentation relating to the medical device and its accessories for reference at a
later date. When loaning out or selling the medical device, the documentation must be provided with it.
Chapter
1

PAGE: 5// 40
User Manual 16-2009 | Revision 01/20 by
Ackermann
2.1
2.1.1
2.2
REQUIRED INFORMATION
GENERAL INFORMATION
Note: following notice is only applicable for the United States of America.
United States Federal Law restricts the use of this medical device within its territory to health professionals
who are qualified, fit and certified, or to those under their control.
In the United States and Canada, the “Hospital Grade” power cord provided must be used, and it must be
connected to a “Hospital Grade” power socket.
CONTENTS
This product comprises the following medical devices:
One control channel
One Full HD camera head
One 24mm lens (optional)
One light cable (optional)
And the following accessories:
One USB key with the user manual
One EU or US power cord
One SDI video cable
Two light cable-device adaptors (Ackermann, Olympus and Storz fittings)
Universal light cable adaptors, source end (Ackermann, Storz fitting) and endoscope end (Ackermann,
Storz fitting) (optional)
Note: Any other consumable or accessory not sold by Ackermann will have its own manual. Please refer to it
before using the product.
Keep the packaging in case you need to transport the equipment at a later date.
INDICATION FOR USE
CONTROL UNIT
The DUO Full HD control unit is a medical device combining a Full HD camera and LED light source over a single
control channel. It is designed to provide local illumination of the patient’s body and to capture images taken
by health practitioners qualified in diagnostic procedures or surgical endoscopy procedures (gynaecology,
laparoscopy, arthroscopy, ENT, urology or spinal endoscopy).
On the camera side, the DUO Full HD enables the user to relay images to a monitor and capture photos via the
camera head combined with the lens and endoscope.
On the LED light source side, the DUO Full HD has a 23,000 lux light source; this is equivalent to a 180 Watt
Xenon source. Light is sent from the DUO Full HD control unit along the light cable and then to the endoscope,
providing local illumination of the examination site.
Chapter
2
Chapter
2

PAGE: 6// 40
iNNOVATING TRADITION.
2.3
2.4
2.4.1
PRINCIPLE OF OPERATION
The lens, light cable (both optional) and camera head are sterilised in accordance with the manufacturer’s
user manual. The control unit is used outside the sterile field, unlike the proximal end of the camera head and
light cable.
A compatible lens is fitted to the DUO Full HD camera head and the light cable is equipped with compatible
adaptors at the two ends. The camera head and light cable are connected to the DUO Full HD control unit. The
other end of the light cable and camera head are connected to the endoscope. It is recommended to use a
sterile, single-use protective cover over the camera head and its cable for the duration of the procedure.
The diagnostic or surgical procedure may now be performed. The cavity is illuminated and video camera
images are displayed on the monitor screen. The images may be stored on a USB key connected to the front
of the DUO Full HD control unit.
USER POPULATION RECOMMENDATIONS
This medical device is intended for use by a skilled and capable surgeon qualified for endoscopy explorations.
This device may also be used by an assistant or nurse under the supervision of the practitioner.
This device is suitable for use in a professional healthcare facility environment.
Users must know and comply with the rules of endoscopy practice in compliance with knowledge acquired
in the field and the key medical hygiene principles including cleaning, disinfection and sterilisation of MDs.
The user must wear gloves.
The user is not the patient.
The medical device can be used by any adult dental practitioner of any weight, age, height, gender and
nationality.
The user must not be prone to any of the following:
Visual impairments: any vision problems must be corrected by glasses or lenses.
Infirmity of the upper limbs which could prevent manual manipulation of a hand-held device.
Hearing diiculties that could prevent the user hearing audible alarms depending on medical devices;
Diiculty in memorising or concentrating that could aect the setting of sequences or the performance of
treatment protocols.
USER POPULATION
CAMERA HEAD
The camera head included in the DUO Full HD unit is designed to relay the image captured at the examination
sitetoamonitorviathecontrolchannel.It isdesignedforusebyhealthpractitionersqualified indiagnosticsand
surgical endoscopy procedures (gynaecology, laparoscopy, arthroscopy, ENT, urology or spinal endoscopy).
The practitioner can also control the image settings using three buttons on the camera head: adjust the LED
brightness, or zoom in/out, correct the white balance, move from flexible to rigid mode and vice versa, and
capture photos. The camera head is designed for connection to the DUO Full HD control unit and to a rigid or
flexible endoscope via a lens (endoscope and lens not included). The camera head is equipped with a sterile
protective cover (not included) for the duration of the diagnostic/surgical procedure.
Chapter
2

PAGE: 7// 40
User Manual 16-2009 | Revision 01/20 by
Ackermann
2.4.2
2.4.3
2.5.1
2.5
2.5.2
2.5.3
APPLIED PARTS
The camera and light cable are deemed to be applied parts within the meaning of the IEC 60601-1 standard.
It is recommended that a sterile disposable protective cover be used on the camera regardless of the chosen
sterilisation procedure and throughout the duration of the surgical procedure.
RECOMMENDED PATIENT POPULATION
This device must be used to support the health practitioner on individuals (patients) who are suitable to
undergo an endoscopy procedure.
This medical device is designed to be used with the following patient populations:
Children
Adolescents
Adults
Elderly persons
This medical device can be used irrespectively of the patient's details such as weight, age, height, gender and
nationality.
PATIENT POPULATION
SPECIFIC USER TRAINING
No specific training other than initial professional training is required to use this medical soware.
The practitioner is responsible for performing clinical treatments and for dangers that may arise due to a
lack of skill and/or training.
The user is the only person who can decide whether or not to treat his/her patients.
PATIENT POPULATION RESTRICTION
APPLIED PARTS
The camera and light cable are deemed to be applied parts within the meaning of the IEC 60601-1 standard.
It is recommended that a sterile disposable protective cover be used on the camera regardless of the chosen
sterilisation procedure and throughout the duration of the surgical procedure.
2.6.1
2.6 BASIC SAFETY IN NORMAL USE
The normal usage conditions are as follows:
Storage
Installation
Use
Maintenance
Disposal
NORMAL USAGE CONDITIONS
Chapter
2

PAGE: 8// 40
iNNOVATING TRADITION.
2.62.6.2
2.7
BASIC PERFORMANCE
As stated in the applicable safety standard pertaining to electrical medical devices, the manufacturer has
determined that the medical device does not manage basic performance.
The active part, the camera head, is held by the practitioner throughout the entire medical procedure. As a
highly skilled medical expert, the practitioner can immediately detect any problems at the treatment area
and react accordingly.
It is recommended to have a second camera or light source available in the operating theatre for use in the
event that a loss or deterioration of functionality is observed in the equipment.
PRODUCT SERVICE LIFE
Repeated cleaning and sterilisation of the device will result in normal wear to the medical device.
Chapter
2
WARNING
!

PAGE: 9// 40
User Manual 16-2009 | Revision 01/20 by
Ackermann
3.1 ELECTROMAGNETIC INTERFERENCE AND
ELECTROSTATIC DISCHARGE
3.2 USING ACCESSORIES NOT SUPPLIED BY THE
MANUFACTURER
3.3 CONNECTION AND DISCONNECTION OF ITEMS FROM
THE DEVICE DURING USE
Chapter
3
SAFETY INSTRUCTIONS
Although this product meets standards relating to EMC, it is possible under very specific circumstances that it
may cause interference to other devices, or that it may itself be aected by other devices or an unfavourable
electromagnetic environment.
To avoid such situations, you are recommended:
To ensure the electrical supply network is of good quality (particularly that all devices and trolleys are
earthed);
To keep the device away from sources of electromagnetic interference (e.g. compressor, motor, transformer,
HF generator etc.).
The medical device was designed and developed with its accessories or others oered as an option to
guarantee maximum safety and performance. The use of accessories from other sources could put you and
your patients at risk and could damage your medical device.
Even if the manufacturer or dealer of your accessory claims full compatibility with Ackermann equipment,
it is advisable to exercise caution with regard to the origin and safety of the product oered. Look out for
warning signs such as a lack of information, information in a foreign language, very attractive prices, suspect
appearance, mediocre quality or premature wear.
In the event of doubt, contact an approved dealer or the Ackermann aer-sales service team.
This includes information relating to the interactions, contraindications and prohibitions known by the
manufacturer on the date on which this document was written.
Parts of the device such as the camera or light cable may be connected and disconnected during use.
We recommend clicking the on/o button on the rear of the device before unplugging it.
Chapter
3

PAGE: 10 // 40
iNNOVATING TRADITION.
3.4
3.5
3.6
Unplug the device from the mains supply if you have no plans to use if for a few days or longer.
To unplug the power cord, pull on the plug. Never pull on the cord itself.
Prior to each use, make sure the device does not have any rough surfaces, sharp edges or protuberances
which could lead to safety problems.
Check the compatibility of your endoscope with the manufacturer prior to use.
Devices which connect to the inputs/outputs must comply with the IEC 62368-1 standard.
To prevent any errors or delays in diagnosis, you must make sure that the settings on the monitor being
used are optimised for the procedure being performed, such that they will allow a clean, noise-free colour
image to be obtained.
You are recommended to use a sterile single-use protective cover on the camera throughout the procedure.
You are recommended to set up the device on a stable surface to prevent any risk of it falling.
PRECAUTIONS DURING USE
Do not insert metal objects into the device, to avoid any risk of electric shock, fire, short-circuit or hazardous
emissions.
Do not place heavy objects on top of it.
Do not place the device where it could be splashed with water, or in an excessively damp environment.
Do not use corrosive or abrasive products to clean the device, but only the disinfectant liquids recommended
in the chapter on “Cleaning”.
Do not insert anything other than a light cable in the connector provided for that purpose [C2], as this may
risk the optical system; the same applies to the connector designed for the camera head [C1].
Never look directly at the light outlet or the end of the light cable when the LED is on.
Do not place the furthest end of the light cable or the endoscope directly on the patientor on any other
flammable material (sheets, gauzes, surgical drapes etc.), as it may be very hot and could result in burns.
Do not obstruct the device’s ventilation openings.
Not suitable for use in the presence of a flammable anaesthetic mixture with air and oxygen or nitrous
oxide.
Do not use in an oxygen-rich environment.
Multiple-socket adaptors or extension leads must not be connected to the electromagnetic system.
RESTRICTIONS
There are no known contraindications associated with the DUO Full HD (control unit and camera head).
Please refer to the user manuals for other devices used during surgical endoscopy or diagnostic procedures
(Gynaecology, Laparoscopy, Arthroscopy, ENT or spinal endoscopy).
CONTRAINDICATIONS
Chapter
3

PAGE: 11 // 40
User Manual 16-2009 | Revision 01/20 by
Ackermann
3.7
3.8
3.9
3.10
3.11
Chapter
3
The device is a mobile device, and may be moved using a trolley.
MOVING THE MEDICAL DEVICE
There are no known undesirable secondary eects associated with the DUO Full HD (control unit and camera
head). Please refer to the user manuals for other devices used during surgical endoscopy or diagnostic
procedures (Gynaecology, Laparoscopy, Arthroscopy, ENT or spinal endoscopy).
UNDESIRABLE SECONDARY EFFECTS
The device must only be opened by a competent technician approved by the manufacturer.
This device must not be modified without the manufacturer’s authorisation. If the medical device is
modified, a test and inspection must be carried out to ensure that the medical device satisfies the safety
requirements.
Only the fuses below the switch at the rear of the device may be replaced. The power should be switched o
and the fuses checked and replaced if necessary; only T 1.6A-250V UR time-delay fuses should be used
(only those marked UL/CSA).
ASSEMBLY AND DISASSEMBLY OF THE PRODUCT
Any serious incident concerning the medical device or its accessories, with the exception of the expected
secondary eects must be reported to the relevant competent authorities and to the manufacturer as soon as
possible. Generally speaking, the notification period should take into account the seriousness of the incident.
Consult local applicable regulations.
Manufacturer’s contact details: please see page 18 (CONTACT) of the manual.
VIGILANCE
This device is not sterile; only the camera and lens may be sterilised.
When connecting the light cable or camera to the control channel, do not force the connectors, as this may
damage them.
Abide by the proper usage and storage conditions (see chapter 9).
Ensure there is suicient airflow to prevent any overheating within the device: at least 15 cm clear all round
the device. Do not cover it, and ensure that all of the device’s feet are present.
If the power cord is damaged, immediately switch o the device. It is dangerous to operate this device with
a damaged cord.
Aer the source has been used, when removing the fibre from its light guide, the temperature of the metal
part will be very high and could cause burns.
The light intensity at the fibre outlet may cause eye damage. Be careful handling it when the device is in use.
PARTICULAR WARNINGS

PAGE: 12 // 40
iNNOVATING TRADITION.
INSTALLATION OF THE
EQUIPMENT
Connect the power cord to the cable connector at the rear of the device [C7] .
Connect a video lead to one of the following video outputs: HDMI [C4] or SDI [C6].
Connect the other end of the video lead to the monitor video input.
CONNECTION
The device is fitted with a switch [S1] located on the rear of the device. The device is switched on by setting
this switch to the “I” position.
The screen on the device [L1] will then come on in standby mode; touch the screen to exit standby.
SWITCHING ON
Chapter
4
4.1
4.2
Chapter
4

PAGE: 13 // 40
User Manual 16-2009 | Revision 01/20 by
Ackermann
Connect the camera head connector [C8] to the control channel [C1].
Connect the light cable to the control channel [C2]. The device has two types of connections: Ackermann
(, Storz®) by default on the device.
Olympus®, provided on the rear of the device [D1].
CONNECTION TO THE CAMERA HEAD AND LIGHT
CABLE
Connect the optics to the optical mount ring on the lens.
Connect the light cable to the optics.
CONNECTION OF THE ENDOSCOPE TO THE SENSOR
4.3
4.4
Chapter
4

PAGE: 14 // 40
iNNOVATING TRADITION.
OPERATING PRINCIPLE
When the device starts up you will be taken to a standby screen.
Press the touch screen [L1] to access the main screen for your device.
5.1 STARTING
MAIN SCREEN
To adjust the white balance, proceed as follows:
Once the camera and light source are connected to the endoscope, film a white surface (e.g. white compress),
Launch white balance adjustment:
. Via the interface: press the button
. Via the camera head: perform a long press of the main button [S2]
Continue filming the white surface until the screen displays the message “AWB OK”.
There is also an indicator light on the device screen:
. White: N/A
. Orange: AWB in progress
. Green: AWB OK
. Red: AWB Not OK
WHITE BALANCE
Chapter
5
5.1
5.2
5.2.1
Chapter
5

PAGE: 15 // 40
User Manual 16-2009 | Revision 01/20 by
Ackermann
Please note that the system does not have internal storage. If you wish to use the “Capture” function, you
must provide a storage system, such as a USB key.
Note: We recommend the use of a USB key in FAT32 format.
To capture a photo, first connect a USB key or external hard drive to the device [C3].
An indicator light appears on the device screen, to the right of the capture button , displaying the
storage medium detection status:
. White: N/A
. Orange: Storage medium detection in progress or photo being saved
. Green: Detection OK or photo captured successfully
. Red: Error
When the indicator is green, you can take a photo by clicking the capture button, which will have turned
white
When the indicator is green, you can take a photo by clicking the capture button, which will have turned
, or you can perform a short press of the main button on the camera head.
Your photo will be saved to your storage system in .ti format.
Use the focussing ring [F1] on the sensor lens to focus.
Once the endoscope is connected and the source activated, slowly turn the ring until it is in a position
where objects are seen clearly.
Focussing from suicient distance (d~5cm) allows you to have suicient depth of field for the procedure
without frequent focussing being required.
FOCUSSING
Function unavailable
Function available
CAPTURING PHOTOS
5.2.2
5.2.3
Chapter
5
CAUTION
!

PAGE: 16 // 40
iNNOVATING TRADITION.
MODE SELECTION: RIGID OR FLEXIBLE
The camera is in rigid mode by default. This mode must be used if you are using an endoscope equipped
with lenses.
If you are using a flexible endoscope equipped with optical fibre, change over to flexible mode:
. Via the interface: press the
If you are using a flexible endoscope equipped with optical fibre, change over to flexible mode:
button
. Via the camera head: perform a double-press of the main button [S2]
An OSD message, represented by “F”, appears on the screen whenever this mode is active.
To deactivate the mode, press the
An OSD message, represented by “F”, appears on the screen whenever this mode is active.
button again on the interface, or double-press again on the camera
head button.
ADJUSTING THE BRIGHTNESS
To adjust the brightness of the light source, you can:
. Press the + or - buttons on each side of the slider
. Or drag the slider itself to the le or the right.
. If the buttons are set to control the light (see 5.4.2 Settings), you can then use the le button [S3] on
the camera head to reduce the brightness and use the right button [S4] on the camera head to
increase it. A long press on these buttons will reduce or increase thebrightness more quickly.
5.2.5
5.2.4
Function deactivated
Function activated
Chapter
5

PAGE: 17 // 40
User Manual 16-2009 | Revision 01/20 by
Ackermann
On the header row, click the Settings button to go to the video settings screen.
ADJUSTING THE SETTINGS
These are the available settings:
. Brightness
. Sharpness
. Red gain
. Blue gain
. Red phase
. Colour
. Gain
Note When you touch each icon, its name will appear on the screen to tell you which function it represents.
Press the + or - buttons, or move the slider itself to adjust each setting.
To move from one screen to another, press the / buttons
Once they have been changed, you can save your settings by pressing the button.
You can return the device to your last saved settings (or the factory settings if no custom settings have
previously been saved) by pressing the button
5.3
Chapter
5

PAGE: 18 // 40
iNNOVATING TRADITION.
Press the Information button on the header row to go to the device settings and aer-sales service
information screen.
INFORMATION
CONTACT
There are three buttons on the information page:
. Contact: takes you to an information page so that you can contact our Customer Service team (1)
. Date/Time: takes you to a screen where you can adjust the date and time (2)
. Settings: takes you to a screen where you can adjust system settings (3)
123
5.4.1
5.4
SERVICE ADDRESS
Ackermann Instrumente GmbH
Eisenbahnstr. 65-67
78604 Rietheim-Weilheim
Germany
Phone: +49 (0)7461 966 17 - 0
Fax: +49 (0)7461 966 17 - 70
E-Mail: info@ackermanninstrumente.de
Web: www.ackermanninstrumente.de
Chapter
5

PAGE: 19 // 40
User Manual 16-2009 | Revision 01/20 by
Ackermann
DATETIME
To adjust the date, touch the first rectangle at the top
of the screen (marked DD/MM/YYYY).
Then press the digits to complete the date.
To adjust the time, touch the second rectangle at the
top of the screen (marked HH : MM)
Then press the digits to complete the time.
If you want to reset this information, press the
button.
SETTINGS
On this screen you can set:
The device language: FR, EN, TR, DE, IT, ES, AR, DK,
NO, NL, RU, SV, JA, NL, TH, CN, PL
Programming of the camera head buttons [S3] and
[S4], namely: Zoom -/+ or LED -/+
Frequency
Frame speed
Restore the device to its factory settings.
5.4.2
5.4.3
Connect the camera head connector [C8] to the control channel [C1]
CAMERA HEAD OPERATION
CONNECTING THE CAMERA HEAD TO THE SYSTEM
5.5
5.5.1
Chapter
5

PAGE: 20 // 40
iNNOVATING TRADITION.
The Information>Settings menu includes a line with settings for the Zoom -/+ or LED -/+ buttons.
By default the setting selected is LED -/+, but you can change it at any time to Zoom -/+ by pressing the
button
BUTTON S3 AND S4 SETTINGS
Short press:
LED - (by default)
or Zoom -
Short press:
LED + (by default)
or Zoom +
Long press:
AWB
Short press:
Photo capture
Double-press:
Flexible mode
SHUTTING DOWN THE DEVICE
You are recommended to put the device into standby before switching it o. To do that, press the button
provided for that purpose at the top right of the screen
Then operate the switch on the back of the device [S1]
5.5.2
5.6
Chapter
5
Table of contents
Other ACKERMANN Medical Equipment manuals
Popular Medical Equipment manuals by other brands

Drive DeVilbiss Healthcare
Drive DeVilbiss Healthcare 1025DS Service manual

Carroll
Carroll Spirit Series User instruction manual

DHG
DHG SystemRoMedic Eva400 Instructions for use

Leica BIOSYSTEMS
Leica BIOSYSTEMS Devicor Medical Mammotome Neoprobe GDS quick guide

Fukuda
Fukuda 8000 Series Maintenance manual

Winncare
Winncare Medicalys Series manual