ACO 6236 User manual

Sound Level Meter
TYPE 6236
Instruction Manual
ACO Co.,Ltd.

1
Co ponents of this Instruction Manual
This instruction anual refers to the functions of, and operating instructions for, Sound Level Meter
TYPE 6236 (abbreviated to “this equip ent” in what follows)
This instruction anual consists of following chapters.
Outline
The co ponents, characteristics, block diagra of this equip ent are described.
Locations and their functions
The na es and functions of keys and ter inals are briefly described.
Liquid crystal screen
The sy bols displayed on the screen are described.
Preparation
The power supply, check before use, installation of this equip ent, connection of cables and
various key setting are described.
Measure ent
Basic idea of easure ent ethod is described.
Recording
How to save or recall data is described.
Output ter inal
Output ter inal of this equip ent is described.
Specification
The specification of this equip ent is described.
2
Safety precautions
To prevent bodily injury or da age to property, the following safety precautions ust be observed.
This anual contains i portant safety and operating instructions for this equip ent.
Read all instructions, before using the instru ent.
After reading all instructions, keep this anual for quick reference
1. Expressions of safety instructions
WARNING
Calls attention to a procedure, practice, or condition that could possibly cause death or
bodily injury.
CAUTION
Calls attention to a procedure, practice, or condition that could possibly cause bodily
injury or da age to instru ent.
NOTE
It is an advisory explanation to use this equip ent correctly. (It is not a safety
instruction )
3
2. I portant safety instructions
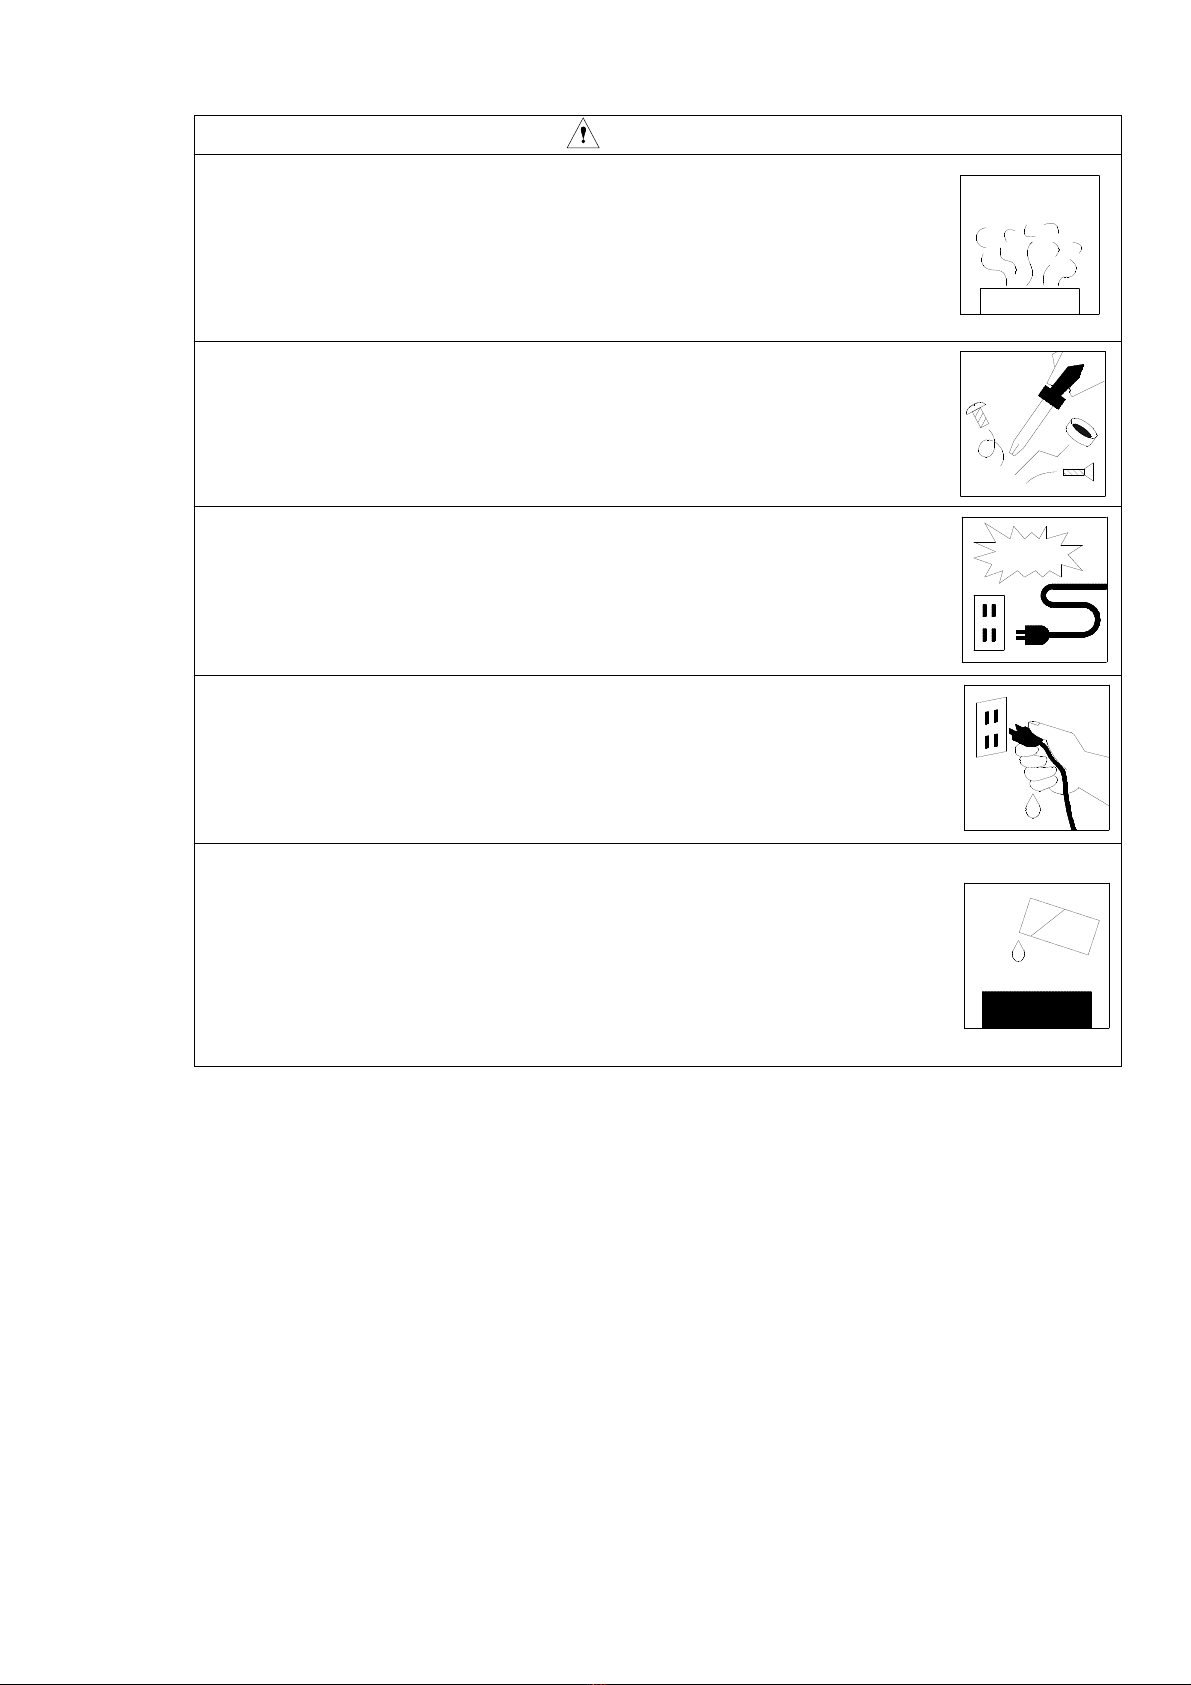
WARNING
Stop using the instru ent, when producing s oke, bad s ell or noise.
It causes fire or shock hazard.
Turn off the POWER switch and unplug the AC adaptor (optional)
fro outlet as soon as possible.
To reduce risk of injury, take it to a qualified service an when
service or repair is required.
Please contact ACO co. or the dealer when service or repair is required.
Do not substitute parts or odify instru ent.
It causes bodily injury, fire or shock hazard.
Do not use the AC power adaptor except the optional AC-1026.
Other type of adaptor ay cause da age to the instru ent.
Do not touch the plug of AC adaptor with wet hands.
It causes shock hazard.
Stop using the instru ent, when an object or liquid falls/spills into
the instru ent.
It causes fire or shock hazard.
Turn off the POWER switch and unplug AC adaptor (optional)
fro outlet as soon as possible.
To reduce risk of injury, take it to a qualified service an
when service or repair is required.
Please contact ACO co. or the dealer when service or repair is required.
4
3. Cautions for usage
This equip ent is asse bled with precision parts.
To prevent bodily injury or da age to the instru ent, the following cautions ust be observed.
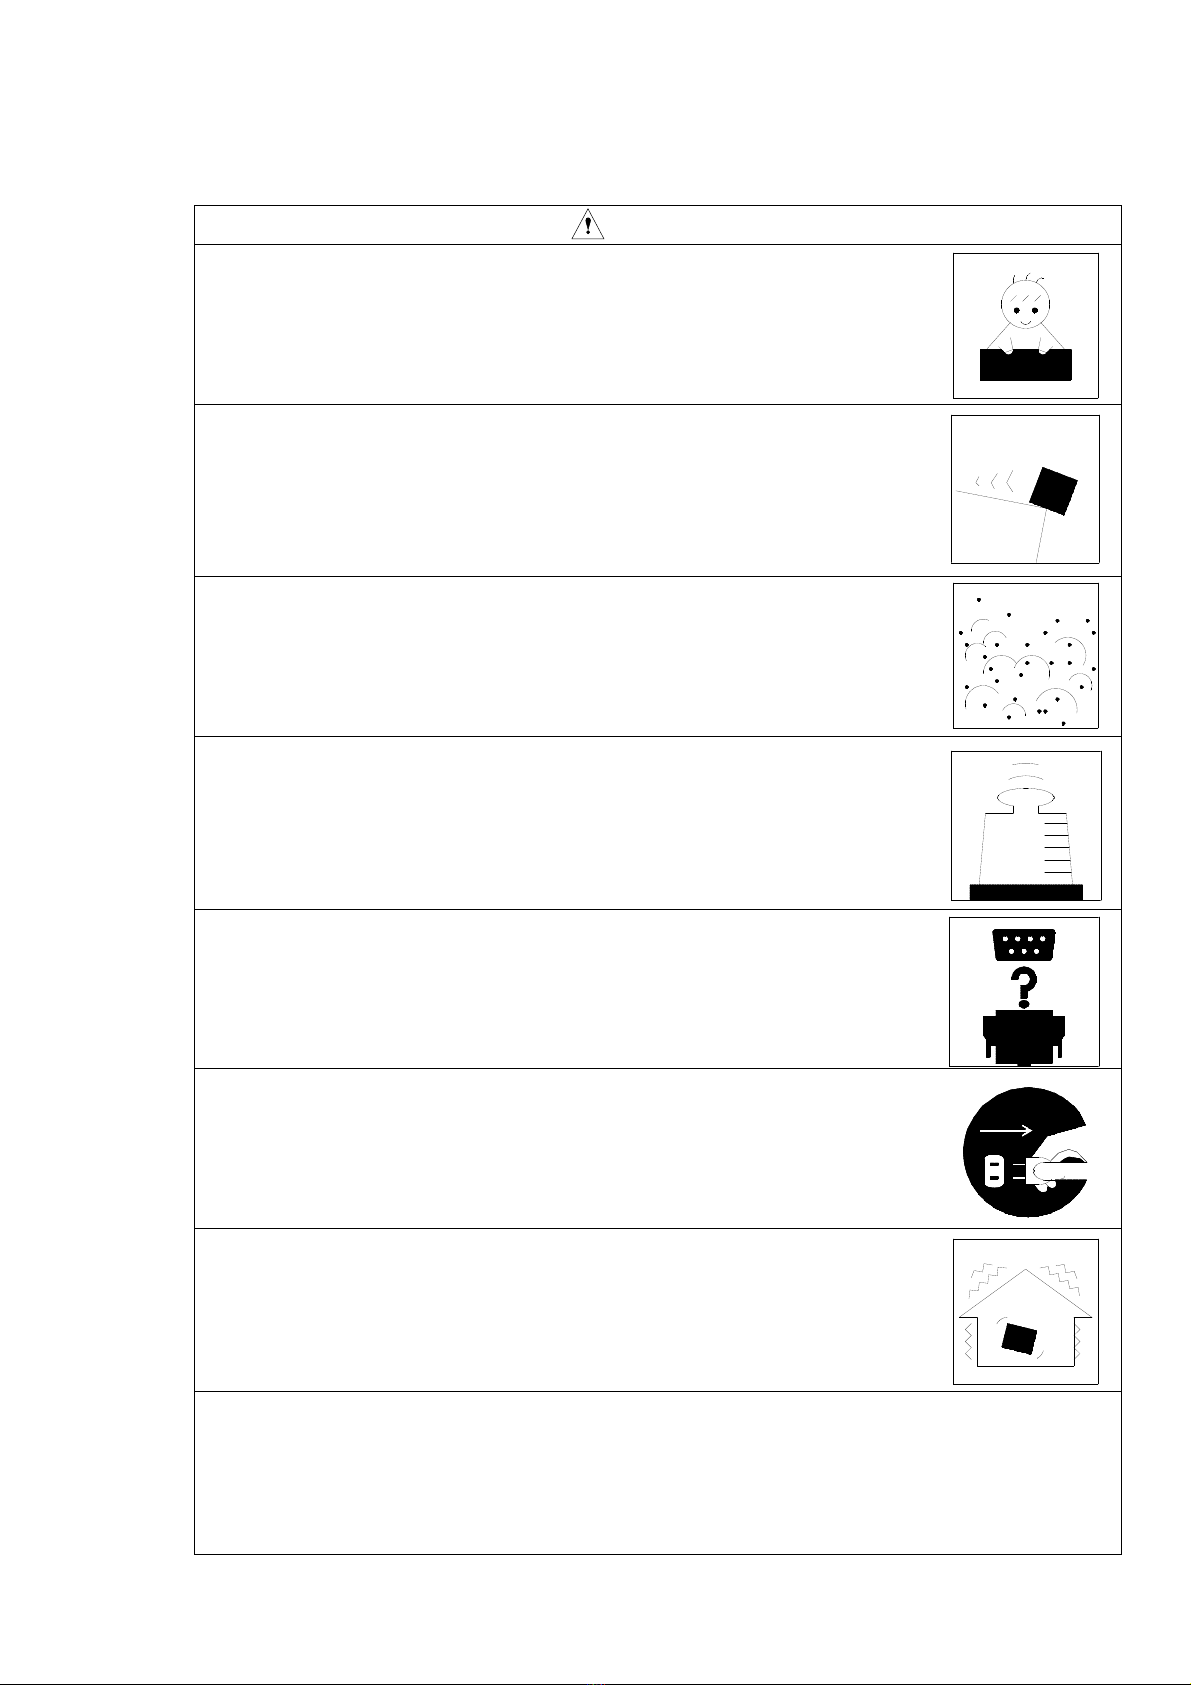
CAUTION
Keep the instru ent away fro the children.
If the instru ent falls down, it is very dangerous.
Do not place it on an unstable place (shaky table or sloping place).
If the instru ent falls down, it is very dangerous.
Do not expose the instru ent to oisture or dust.
It causes fire or shock hazard.
Do not put heavy objects on the instru ent.
It causes da age to the instru ent.
Connect cable properly, it is instructed in this anual.
Wrong connection causes fire hazard.
Before you ove the instru ent to other place, turn off the POWER
switch and re ove all wiring.
Do not put the instru ent on the vibrating place.
If the instru ent falls down, it is very dangerous.
For avoiding liquid spill, re ove alkaline dry batteries
when you don’t use for long period of ti e.
It is reco ended to re ove alkaline dry batteries after each use.

5
Disclai er in usage of the software product
When this software is used, it is assu ed that the custo er has accepted all the following ite s.
(1)The custo er is per itted to use this software product based on the agree ent of use
conditions, not to transfer or sell to the third party.
In case the custo er cannot accept the following ite s, the product cannot be cleared to use,
either.
(2)The software product, together with attached docu ents such as instruction anuals, belongs
to Aco Ltd. and is protected by the Copyright Law., etc.
The
custo er
is not per itted either to copy, odify, alter this software product, or re ove the
product label.
The custo er is not per itted to create any si ilar products, or have the third party do these
actions.
(3)Please do try hard to keep every user or users scheduled about the ite s above before the use
of this product.
As would be realized, the custo er ay be considered to have acted against the agree ent
when the user of this product acted against it.
Disclai er in usage of the SD card
(1)To see the data saved in the e ory card (SD card) using PC, a card reader co patible with
8G or higher is required. Please check in advance that environ ent to recognize the
e ory card (SD card) is secured.
(2)The folder / file in the e ory card (SD card) please do not perfor a change (addition and
deletion) or a for at fro PC.
When I changed it, nor alcy does not work.
(3)When I delete a data file in the e ory card (SD card), please carry out deletion by using
the ain body of TYPE 6236.
<Contents of the e ory card (SD card)>
STD・・・・・・・The folder of the data file of the nor al easure ent
001.csv
・
・
nnn.csv
TM5・・・・・・・Power average value of the axi u sound pressure level in a given interval
001.csv
・
・
nnn.csv
(File na e:001.csv~999.csv)
The data file
(File na e:001.csv~999.csv)
The data file
6
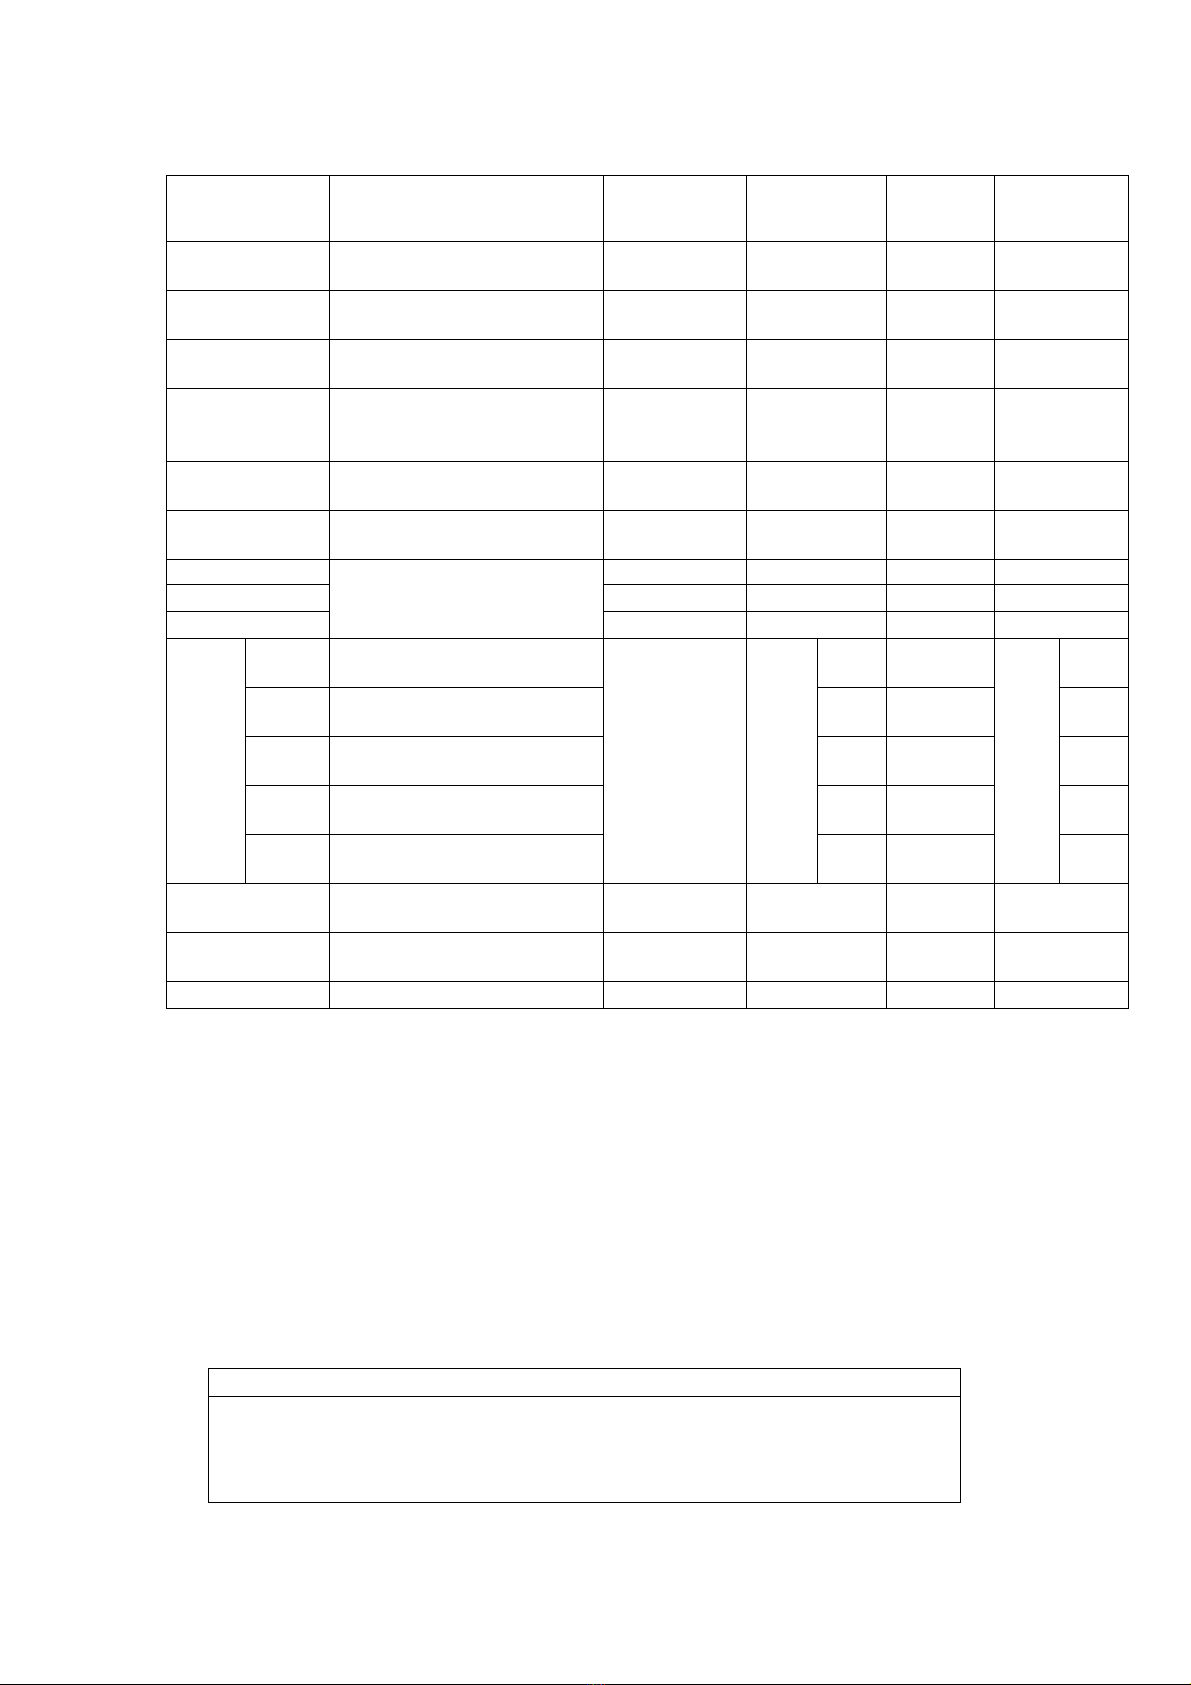
The Quantifier for of International standard and JIS (Japanese Industrial Standards).
The Quantifier is excerpted fro ISO 1996, 3891, IEC 60804, JIS Z 8202, 8731.
Notation of
TYPE6236 Na e
Frequency
weighting
characteristics
ISO IEC JIS
LA A-weighted sound
pressure level A-weighted LpA - LpA
LC C-weighted sound
pressure level C-weighted - - -
LP Z-weighted sound
pressure level Z-weighted LP - LP
LAeq
Equivalent continuous
A-weighted sound
pressure level
A-weighted LAeq ,T LAeq ,T LAeq ,T
LCeq Equivalent continuous
sound pressure level C-weighted - LCeq, T -
Lpeq Equivalent continuous
sound pressure level Z-weighted - - -
LAE
Sound exposure level
A-weighted LAE LAE LAE
Lce C-weighted - - -
Lpe Z-weighted - - -
LAN
LA05 5% of the percentile sound
pressure level
A-weighted LAN,T
LA5,T
-
LAN,T
LA5,T
LA10 10% of the percentile
sound pressure level LA10,T
- LA10,T
LA50 50% of the percentile
sound pressure level LA50,T
- LA50,T
LA90 90% of the percentile
sound pressure level LA90,T
- LA90,T
LA95 95% of the percentile
sound pressure level LA95,T
- LA95,T
LA ax Maxi u sound pressure
level A-weighted - - -
LA in Mini u sound pressure
level A-weighted - - -
LCpeak Peak sound pressure level
C-weighted - LCpeak -
Guarantee
Our product is guaranteed for twelve onths fro the date of delivery.
In the event of failure of the product during operation in the utually-understood
anner within the above- entioned period, we will provide repair free of charge.
Repairs of a failure caused by other factors will be provided at cost.
NOTE
To ake easure ent with this instru ent, either one of Me ory Card,
1/1-1/3 Octave Real-
ti e Analysis Card, FFT Analysis Card, or RSR
Card shall be installed. Otherwise “No Card Error” will be indicated on
the screen and easu
re
ent cannot be ade.

7
Contents
Overview 9
Locations and their functions 10
Front / Back / Side view of the ain body 10
Operating Portion 11
Side view of the ain body 12
Exa ple of syste co ponents 13
AC adaptor 13
Mounting on the tripod 14
Me ory Card(SD card)and progra card 14
Extension Cable 14
Connection with level recorder 14
Connection with personal co puter 14
Preparation 15
Battery installation 15
LCD back-light 16
LCD adjust ent 17
Display (Explanation of easure ent screen ) 18
Measure ent screen
18
Frequency characterisitic and Calculation function 19
Calendar adjust ent 20
Calibration 21
Calibration using Sound Calibrator (TYPE2127) 22
Menu screen 23
Measure ent Procedure
28
Sound pressure level(LA/Lc/Lp)easure ent 28
Ti e level display of Sound pressure level(LA/Lc/Lp)easure ent 29
Equivalent continuous sound pressure level(LAeq)easure ent 30
Single event sound exposure level(LAE)easure ent 31
Maxi u /Mini u sound pressure level(LA ax/LA in)easure ent 32
Percentile level(LAN)easure ent 33
Z-weighted peak sound pressure level(Lpeak)easure ent 34
C-weighted peak sound pressure level (Lcpeak)easure ent 35
Power average value of the axi u sound pressure level in a given interval(LAt 5)
easure ent 36
I pulse sound pressure level(LAI)easure ent 37
I pulse equivalent continuous A-weighted sound pressure level (LAIeq)
easure ent 38
Me ory function 39
Record of e ory 39
Data recall fro the e ory 43
How to use the e ory card (SD Card -Standard-) 44
Card Installation ................................................................................................................ 44
Measure ent ...................................................................................................................... 44
Eject the Card ..................................................................................................................... 45
Delete the card data ........................................................................................................... 45
Exa ple of file creation 46
Saving Data to PC 47
Output ter inal 48
AC,DC Output 48
Specifications 49
Specifications 49
Appearance diagra 52
Pin Connections and How to Connect the Extension cable 53
Co unication Co and
55

8
Interface ................................................................................................................ 55
For at ................................................................................................................... 55
Co and table(CMD) .......................................................................................... 56
Detail of co and ................................................................................................ 58
Preparation(To Re ate Mode) ............................................................................. 60
Various easure ent co unication ti ing ..................................................... 61
USB output (digital data output at any ti e) Detailed description ........................
69
How to set .............................................................................................................. 69
Using interface ...................................................................................................... 69
Output details ....................................................................................................... 69
RSR Card ( Real Sound Recording Card) Detailed description ...............................
69
Wavefor data details .......................................................................................... 70
Wavefor data construction ................................................................................ 70

9
Overview
This specification refers to the Sound Level Meter TYPE6236.It covers ost easurands corresponding
to JIS and –ISO. TYPE 6236, provided with any functions usually ounted in equivalent products, has
been realized at an extre ely low price.
Measure ent of ost easurands, such as Equivalent continuous A-weighted sound pressure level (LAeq),
Sound exposure level (LAE), A-weighted sound pressure level (LA), etc., is possible.
The 6236 was developed to keep co fortable sound environ ent as well as safe and healthy life of people,
both to be realized by the evaluation of environ ental noise such as traffic noise or industrial equip ent
noise, or by better understanding of the labor health environ ent at offices, factories, etc.
The i pressive design of 6236 sy bolizes satisfactory operations and any perfor ances related to JIS
and/or IEC. It sure is a highly efficient and highly reliable sound level eter, to be supported by the next
generation.
Features
● Excellent cost/perfor ance :covers ost easurands in current criteria
● Percentile sound pressure level (LN) :any 5 selectable values is available
● Measure ent of Equivalent continuous A-weighted sound pressure level (LAeq)
:Measure ent of environ ental noise required to
secure occupational heal
● Wide linearity range of 100dB over :Covers wide range of 20~130dB
● Equipped with an USB Ver2.0 function:allows data processing for PC
● Equipped with a e ory function :recording to e ory card(SD card)
● Backlight LCD screen for high :visibility and easy-on-the eye display
● Ti er function :easure ent can be paused or restarted at any
point of ti e by installing the function.
● Abundant progra cards :1/1and 1/3-octave Real-ti e analysis card,
FTT Analysis Card
【Option】
,
RSR card (Real sound recording Card)
【Option】
, etc.
Configuration
1)Sound Level Meter TYPE6236 1
2)Me ory Card ( SD Card ) 1
3)1/1 and 1/3-octave Real-ti e Analysis Card NA-0038 1
4)Windscreen(φ50) NA-0304 1
5)Hand strap 1
6)Instruction Manual 1
7)Guide(TYPE6236, 1/1and 1/3-octave Real-ti e analysis card) Each 1
8)Carrying case 1
9)Option
・FFT Analysis Card NA-0038F
・RSR Card ( Real Sound Recording Card ) NA-0038R
・Data anage ent software NA-0038X
・AC adapter AC-1026
・BNC pin cord BC-0071
・USB interface cable BC-0038PC
・Interface cable BC-0026PC
・Extension cable(2 ~) BC-0046-2~
・Tripod exclusively for sound level eter NA-0333
・Sound calibrator TYPE2127
・220~240V-100V Conversion Transfor er WT-51E
10
Locations and their functions
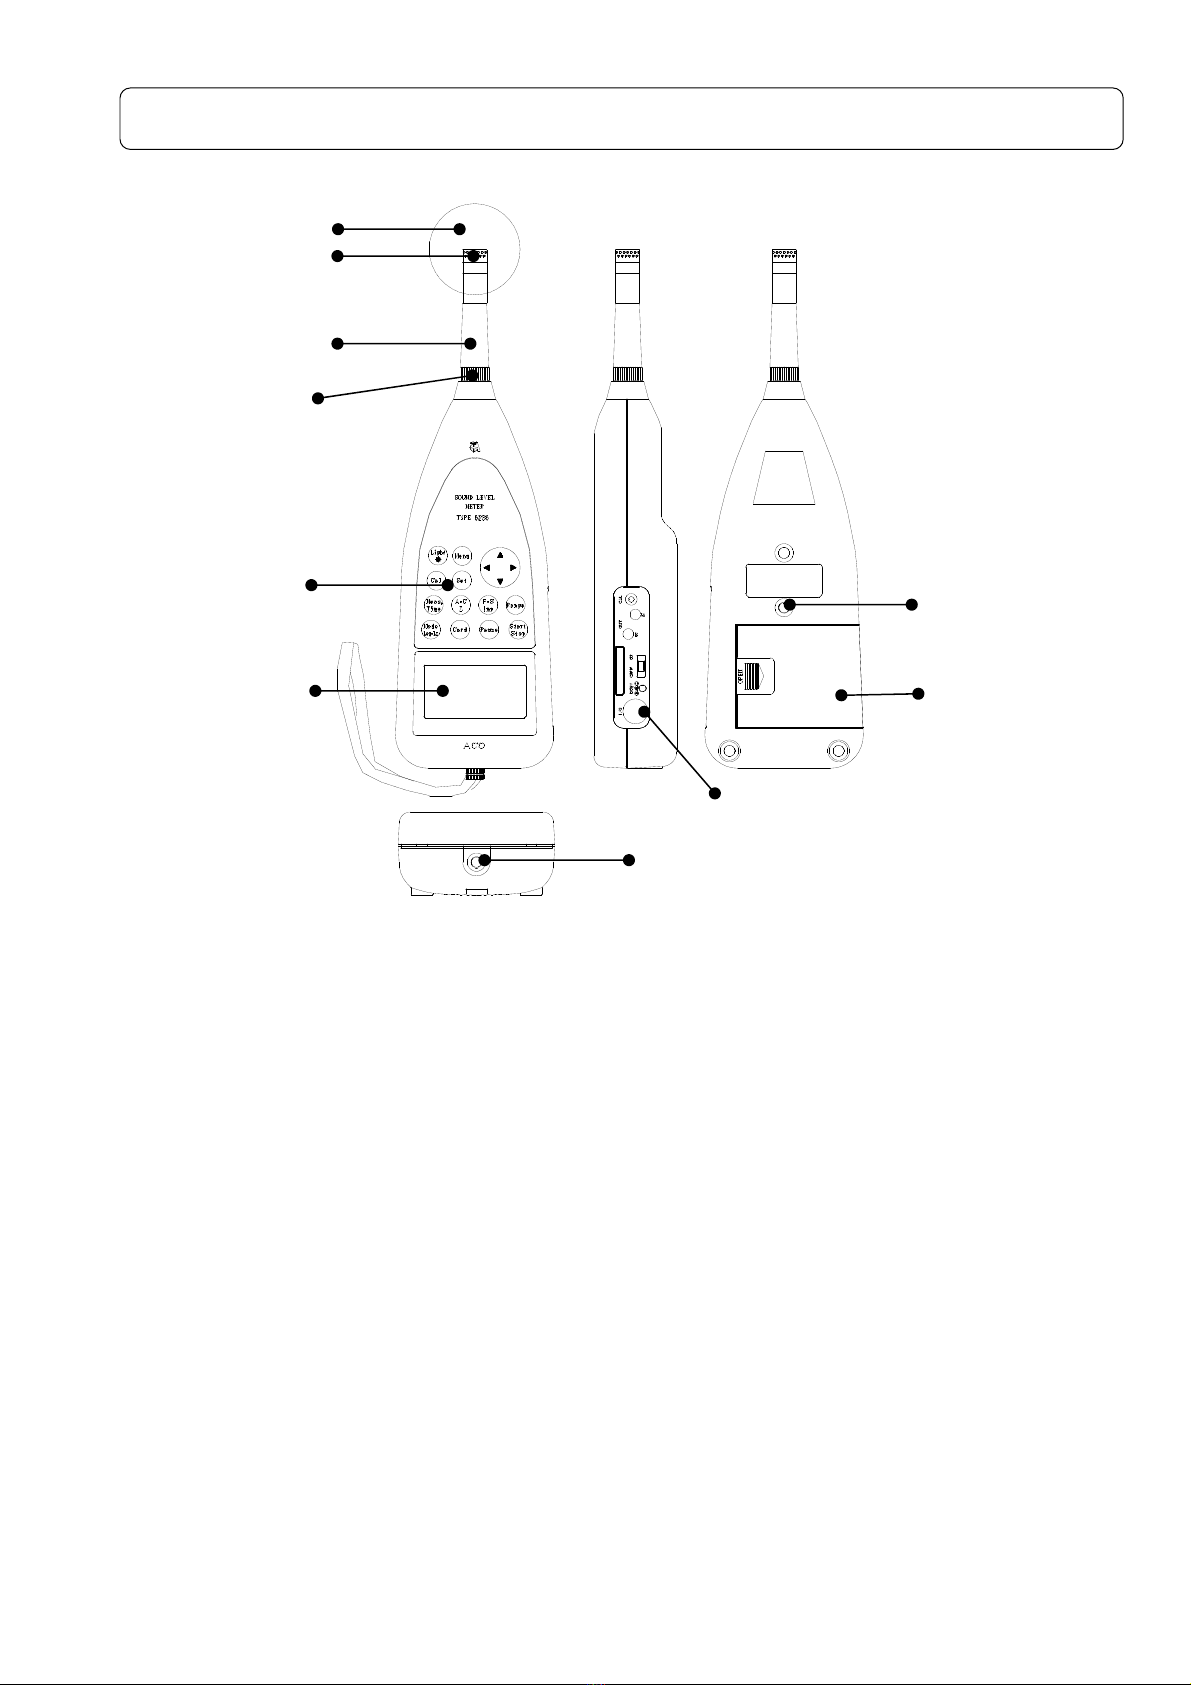
Front/Back/Side view of the ain body
Front
Microphone Prea plifier
The icrophone and the prea plifier are co prised as one body.
They can be placed apart fro the ain body and connected to it with the optional extension
cable
Display
It is a liquid crystal display with backlight. The sound level is displayed here with
nu erical value or bar graph. The operation condition of the sound level eter, setting
condition of the easure ent ode, various alerts, etc. are also displayed.
Windscreen(φ50)
The easure ent error ay be caused in the windy outdoor site or noise easure ent of
ventilator, since the wind drives against the icrophone generating the wind noise.
Under such conditions, it is possible to reduce the wind noise by attaching the φ50
windscreen to the icrophone
Hand Strap
Used to prevent unexpected drop of the ain body. Please put it through your wrist when
you easure with the body in hand.
Back
Fe ale screw for tripod
It is possible to ount the ain body to this tripod for the ca era with screw.
Batteries case
Put four LR6 type Alkali dry batteries.
Microphone
Prea plifier
Threaded
retaining ring
Front panel
Display
Side panel
Fe ale screw for tripod
Fe ale screw
for tripod
Battery cover
Wind screen(
φ
50)

11
Operating Portion
Light key
The backlight illu inates the display in darkness, which goes out auto atically 30 seconds
later or by pushing the key again.
Menu key
It is pushed to set up the easure ent condition, when the display is adjusted to 1/3
page of the enu panel.
The ite is selected with cursor key ▲▼, and input starts with , as well as the
alteration with ▲▼. To go back to the easure ent setting screen, push [Set] key
again.
Cal key
When the calibration or level setting with the equip ent connected, this key is used.
Set key
The key to be used to fix the input.
Meas. Ti e key
The key to set the easure ent period (interval ti e ter inated with a pair of Star/Stop).
It changes on pushing the key as: key is pushed again.
1s, 3s, 5s, 10s, 1 , 5 , 10 , 15 , 30 , and 1h, 8h, 12h, 24h, and *** (Forever: Until
Stop).
A・C,Z key
The key to select frequency weighting A, C, and Z (FLAT)
F・S,I p key
The key to select ti e-weighting Fast, Slow, and I p
Range key
Range setting key which enables the following 6 ranges:
20~80、20~90、20~100、20~110、30~120、40~130
Mode/Leq ・Lx key
The key to display the calculation results. Each push gives various calculation results
selected on the Menu screen.
Card key
The key to use various option cards
Pause key
By pushing the key, the easure ent is paused to eli inate any unexpected noise or
ano aly during the easure ent. It is resu ed by pushing the key again. By using the
data eli ination function, it is possible to exclude the data 3 or 5 seconds before the key is
pushed.
Start/Stop key
The key to start the easure ent of various ode or to ter inate it.
12
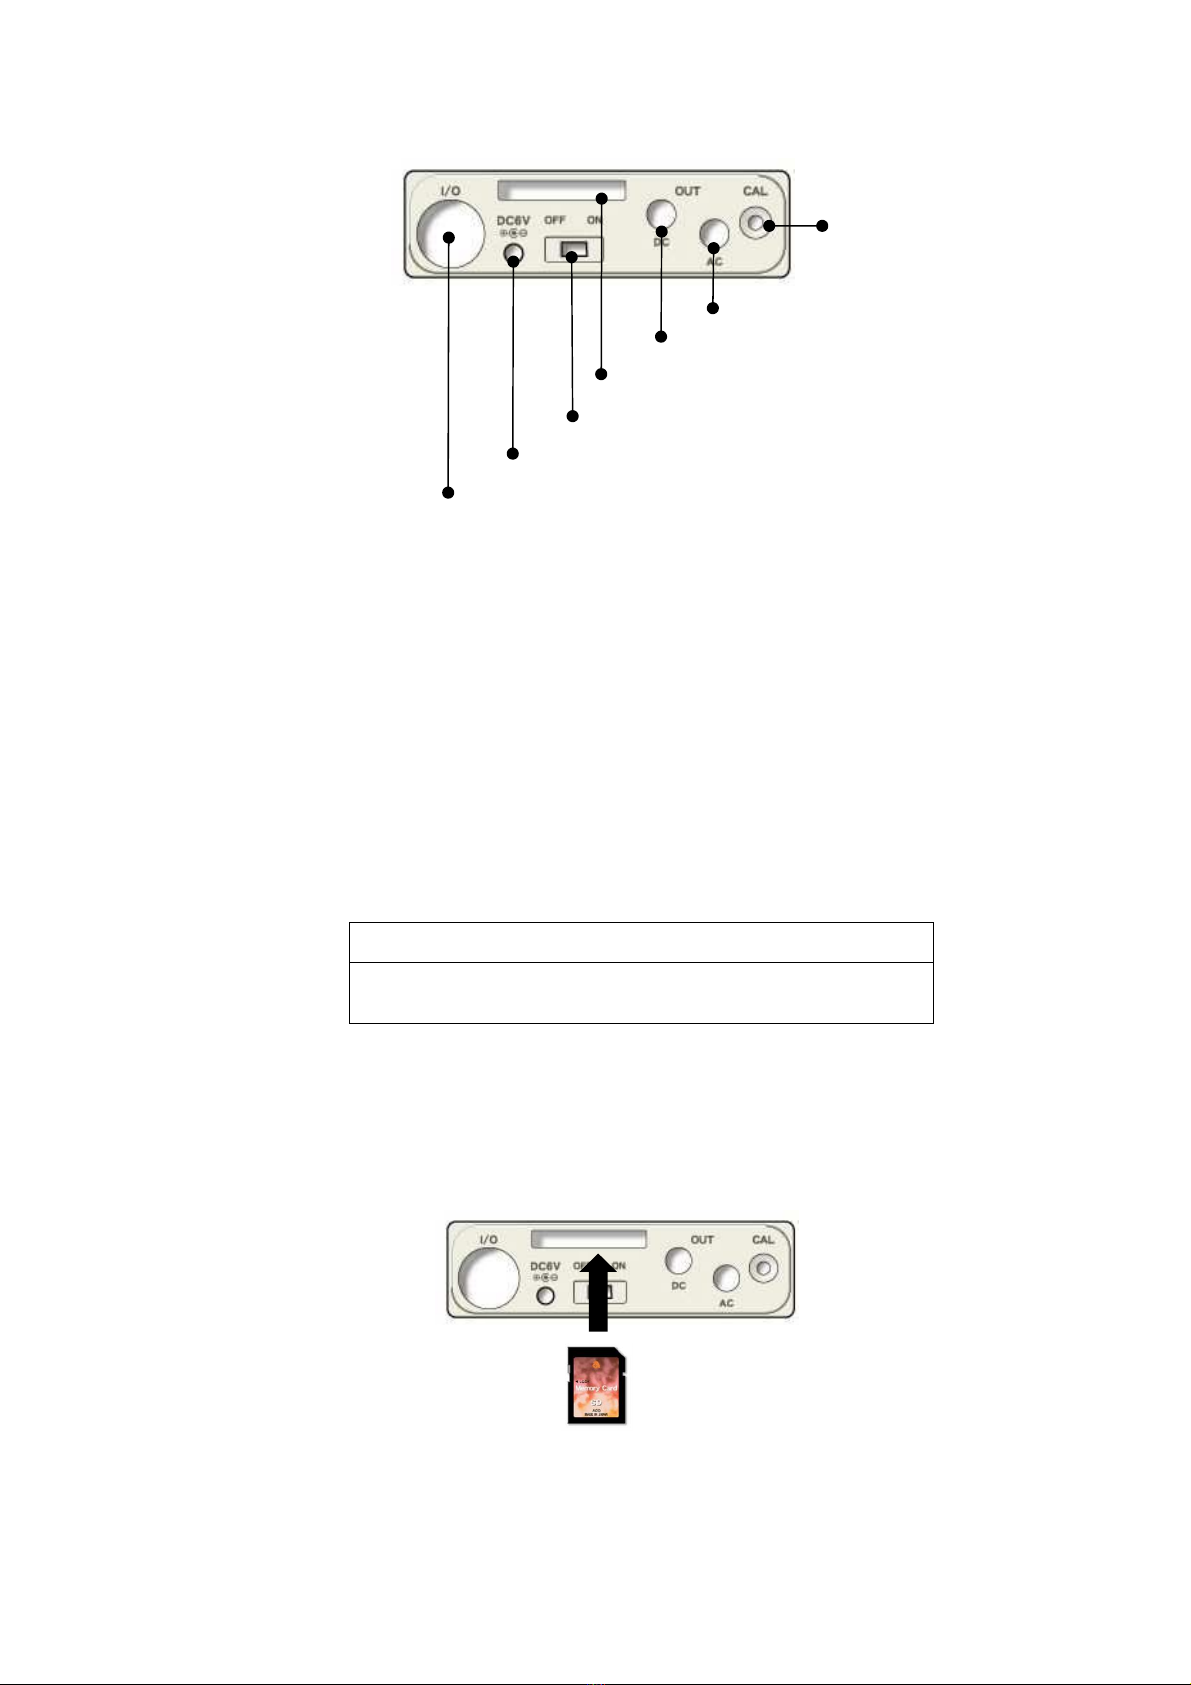
Side view of the ain body
AC power adaptor connector
By using the optional AC adaptor, AC100V is available for the easure ent.
Please do not use any other power supplies than specified AC adaptor. It ay cause
breakdown or alfunction.
AC/DC out connector
AC: outputs frequency-weighted AC signal.
DC: outputs DC level signal .
External Input/Output connector
Input or output ter inal for control signal or easure ent data, which can be connected to
a printer, level recorder, or personal co puter.
Card(SD Card) slot
The slot for e ory card(SD card) or optional progra card.
NOTE
Please watch out for the card slot portion w
hen you have
it in hand. The card ay ju p out.
Inserting and detaching the card
1. Insert the card into the card slot on the side panel.
Press softly the card into the slot until it co es to the end, watching for the direction of the
card.
2. Press the card again for detaching it. The card co es off by itself.
AC power adaptor connector
Side panel
Calibration potentio eter
AC OUT connector
DC OUT connector
POWER switch
External Input/Output connector
Card (SD Card)slot

13
Exa ple of syste configuration
※
The function can be extended by the connecting various option easuring instru ents.
AC adaptor
1) Turn off the power switch.
2) Connect the AC adaptor to the AC adaptor ter inal.
3) Insert the AC plug of the AC adaptor to the AC100V outlet.
NOTE
Please do not use any other power supplies than
specified AC
adaptor. It ay cause breakdown or alfunction.
AC adaptor
AC power adaptor
connector
to AC100V outlet
Windscreen(φ50)
NA-0304
Sound Calibrator
TYPE 2127
Extension cable for icrophone
BC-0046-2~
Tripod exclusively
for sound level eter
NA-0333
Level recorder
TYPE5008A
Progra cards(SD card)
1/1and 1/3-octave Real-ti e Analysis Card
NA-0038
NA-0038F
NA-0038R
FFT Analysis Card
Real Sound Monitor Card
Oscilloscope
BNC pin cord
BC-0071
Sound Level Meter
TYPE6236
AC adapter
AC-1026
WT-51E
220~240V-100V
Conversion
Transfor er
PC
Data easure ent software
NA-0038X
BC-0038PC
USB interface cable
Me ory Card (SD Card)
BC-0026PC
Interface cable

14
Mounting on the tripod
It is possible to ount this equip ent on the Tripod exclusively for sound level eter in
lengthy easure ent. Please be careful enough not to drop the equip ent or fell the tripod.
Me ory card (SD card) and progra card
The easure ent results can be stored in Me ory card(SD card) (SD card) to reedit it on
personal co puter
Moreover, option progra cards enable to set up the conditions of 1/1 or 1/3 octave filter card,
FFT analysis card【Option】, and RSR card (Real sound recording card) 【Option】.
Extension cable
Please ake sure to switch off the power when connecting or disconnecting the icrophone
extension cable.
To avoid the influence of diffraction effect of the sound level eter body, or of the existence of
the easuring person, icrophone can be placed away fro the ain body.
* Certification by the Measure ent Act is applied up to 3 length for the extention cable. If
the extension cable of over 3 is used, then it is not subject to certification by the Measure ent
Act.
Please refer to “Pin Connections and How to Connect Extension cable” in P55 for further
infor ation.
NOTE
Never separate the icrophone fro the prea plifier
,
which
ay
cause breakdown
or alfunction
Connection with level recorder
How to record the sound pressure level
Connect AC output connector on the side panel to level recorder with BNC pin cord as shown in
the following figure.
Connection with personal co puter
External connect I/O on the side panel to USB ter inal of personal co puter with the USB
interface cable.
To input ter inal of the
level recorder
BNC pin cord
AC output connector
USB interface cable To USB ter inal of
personal co puter
External I/O
connector
15
Preparation
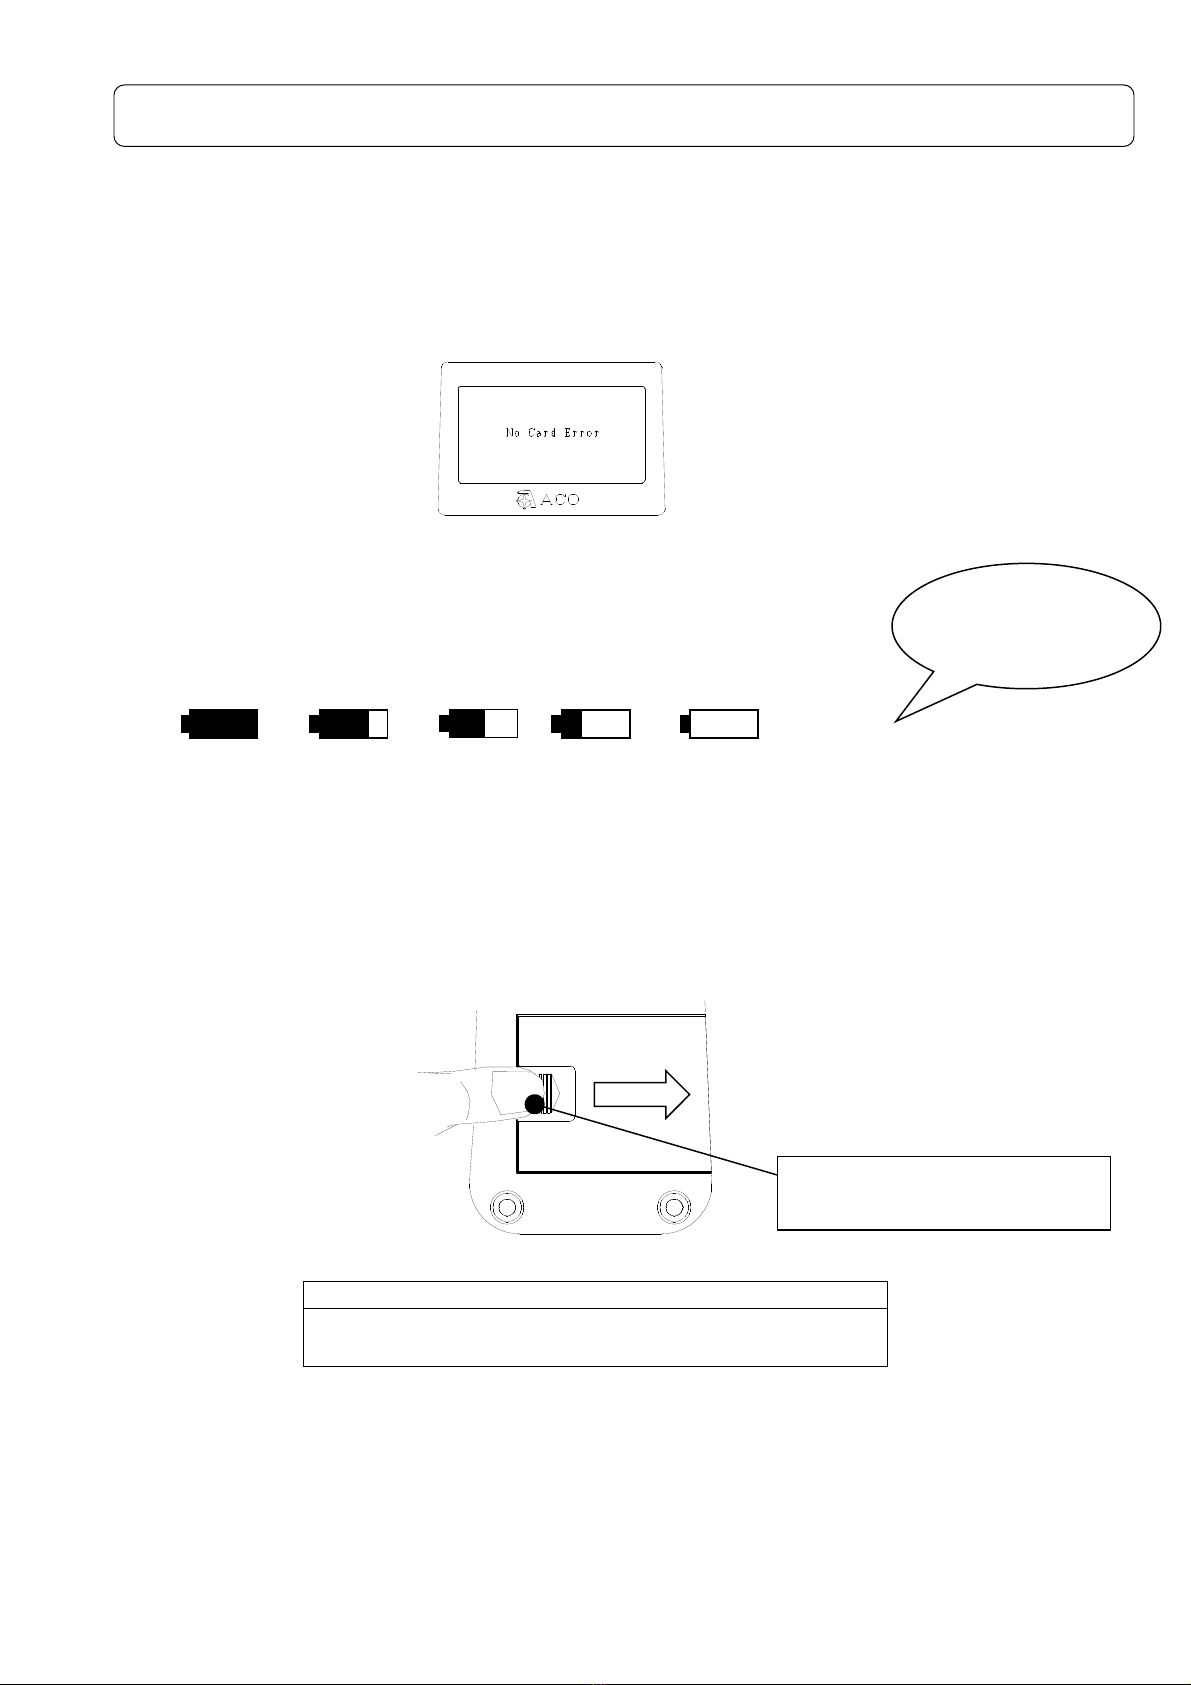
About No Card Error
If either one of Me ory Card, 1/1-1/3 Octave Real-ti e Analysis Card, FFT Analysis Card, or RSR
Card is not installed to this instru ent, “No Card Error” will be indicated on the screen key operation
will beco e i possible. Please insert either one of above entioned cards as necessary before use.
<Indication on the screen when any card is not inserted>
Battery installation
When LCD display tells low battery, install new batteries.
For long-ter easure ent, install new batteries in advance.
The following displays tell you the condition of the batteries.
The battery residual quantity display are the 5 stages like the following.
To install new batteries:
1) Turn off the POWER switch.
2) The slide is done while pushing the battery lid by the thu b.( Refer to the figure below)Put
the new batteries in the case, then shut the cover. The inside of the case shows you the
direction of the batteries.
NOTE
Do not put the batteries in the wrong direction. These
four batteries should be replaced at the sa e ti e.
・Battery life is approxi ately:
9hours (Alkaline batteries, continuous operation)
・Use of LCD back-light shortens the life of the batteries (approxi ately 1/3).
・Please prepare the AC adaptor AC-1026(option) in advance when it is used for a long
period of ti e.
EMPTY
FULL
Replace batteries
It will blink,
if"ENPTY
" is displayed,
and a power supply is
shut off.
LOW
“OPEN” pushing and slide in
the direction of the arrow.

16
LCD back-light
You can use LCD back-light, when your easure ent is carried out in the dark situations.
[Light] key
1) Press [Light] key, LCD back-light goes on.
2) If you press [Light] key again, LCD back-light goes out.
The light auto atically goes out in about 30 seconds after the light goes on.
3) When the batteries are low, LCD back-light di s.

17
<System> 1/3
Mode :Normal
Data delete:off
LCD cont :***
Date y/m/d :00/00/00
Time h/m/s :00:00:00
Printer(PC)set:9600
USB out :OFF
LCD adjust ent
You can adjust LCD contrast, when the batteries were low, or when the new batteries were
installed.
The procedure is as follows.
1) When you press the [Menu] key, the following screen appears.
2) Select LCD cont with Cursor key ▼, then ove the cursor rightward with key.
3) Adjust the LCD contrast with ▲▼ key, then press [Set]key to save the setting.
After pressing [Set] key, the cursor oves to leftward.
4) If you want to go back to easure ent ode, press [Set] key.
LCD adjust ent
[Menu] key
Cursor key
[Set] key

18
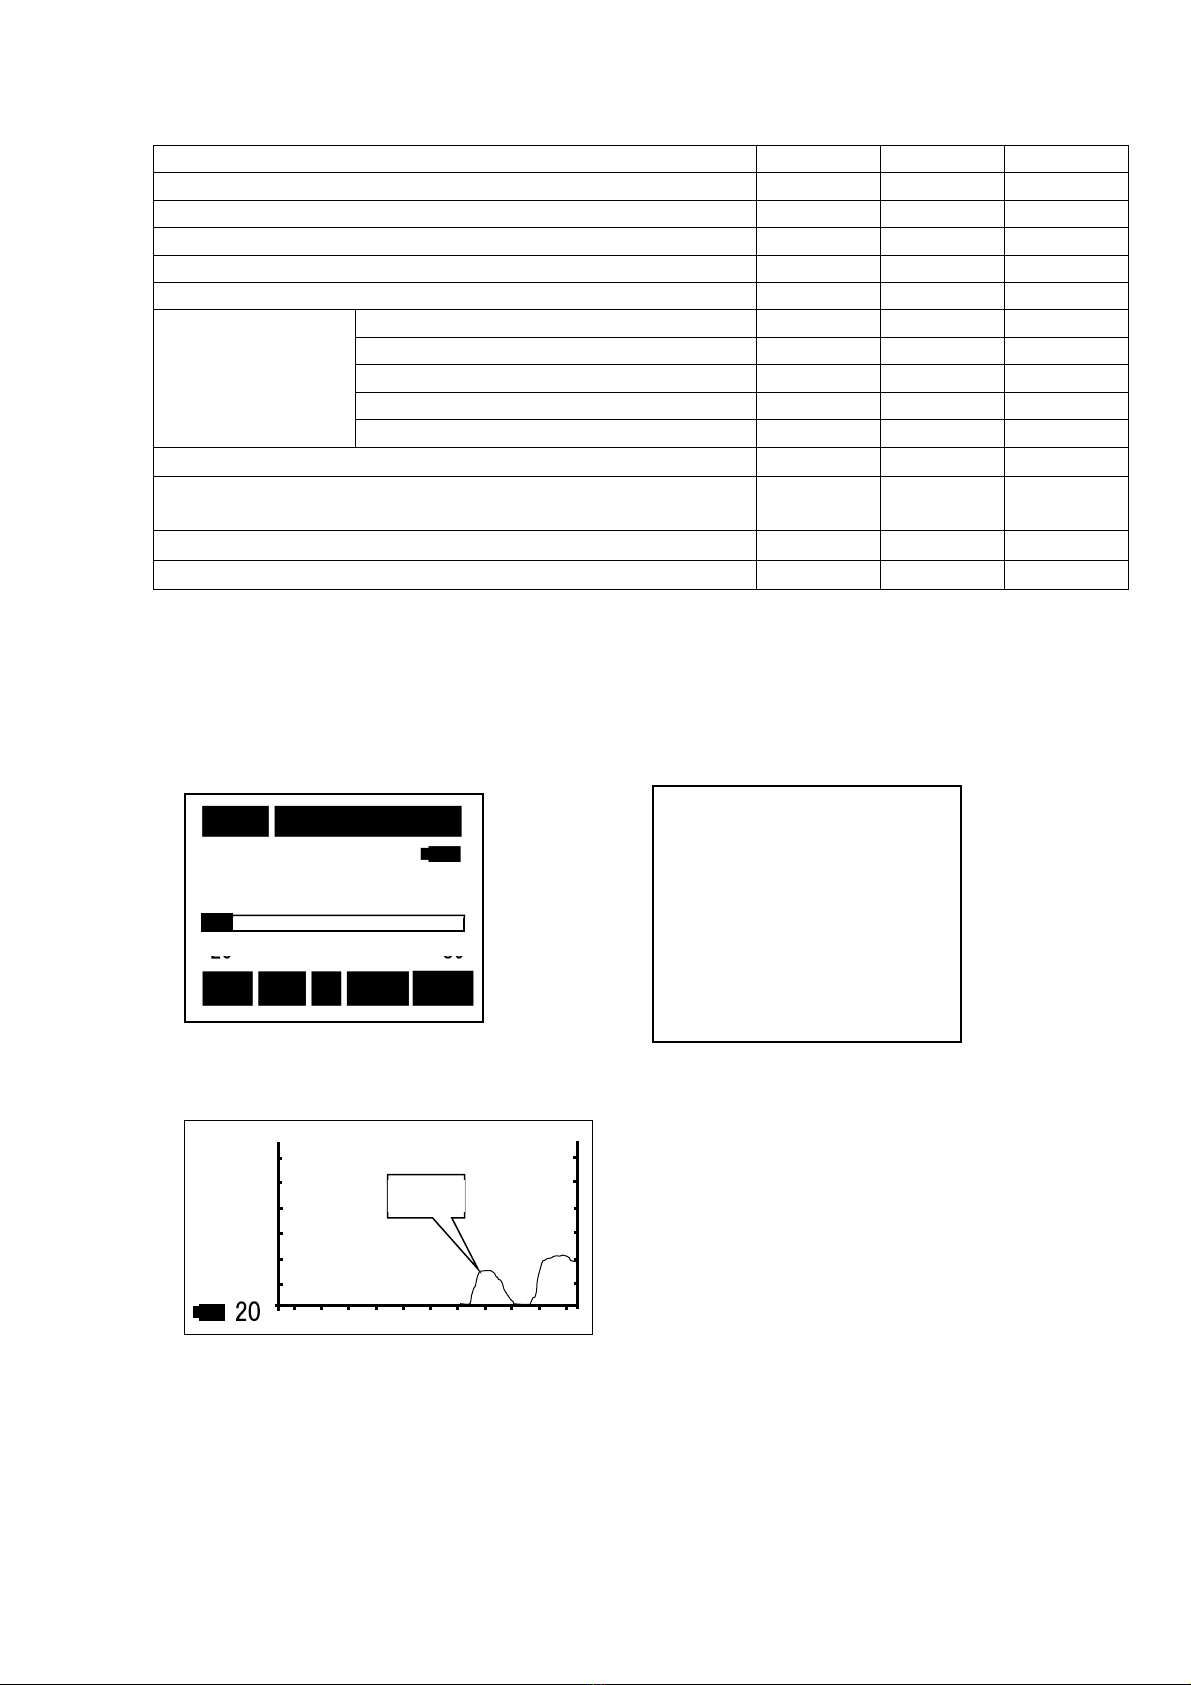
Display (Explanation of easure ent screen)
Measure ent screen
Measure ent ti e
The easure ent ti e is displayed, which is one of the following :.
1s、3s、5s、10s、1 、5 、10 、15 、30 、1h、8h、12h、24h、***(Forever: Until
[Start/Stop] key entry)
Pause (Te porary interruption ark)
Blinks when the calculation or data saving to e ory is canceled, where displayed level is
not updated
Frequency weighting characteristics: Displays the frequency weighting selected
with [A,C,Z] key.
94.0
dB
40 Cal 130
Rec Un A Fast Leq
10m 99h60m60s
Measure ent ti e
Displays the elapsed ti e of the easure ent
With [Start/Stop] key entry, ti e count operation is carried
out until co pletion of the easure ent ti e.
Display data: Displays the current value nu erically.
Re aining capacity of
battery
.
Bar: Displays the current instantaneous level.
Display Range: Displays upper and lower li it of
easurable range, selected according to the agnitude
of sound level.
Measure ent ode. Displays the ode selected with
[Mode] key. (Lp, Leq, L ax・・・・・・・)
Ti e weighting characteristics: Displays the dyna ic
characteristics selected with [F・S I p] key. (Fast, Slow or I pulse)
Displays operation condition
Rec blinking: Under the easure ent started with [Start/Stop] key pushed.
Stp blinking: Measure ent ter inated
Cal、Pause、Card:Displays calibration, pause and card
insertion respectively. Displays Calibration with [Cal]
key, Pause with [Pause] key, and Card with card
inserted, respectively.
Warning
Displays the following ter when the easured value exceeds the range selected.
Ov : Over :upper li ited scale
Un : Under
:
lower li ited scale
19
<System> 1/3
Mode :Normal
Data delete:off
LCD cont :***
Date y/m/d :00/00/00
Time h/m/s :00:00:00
Printer(PC)set:9600
USB out :OFF
Frequency characteristic and Calculation function
Style
A
C
Z
Sound pressure level LA LC Lp
E
quivalent
continuous sound pressure level
L
Aeq
L
Ceq
Leq
S
ound
exposure level
L
AE
L
CE
L
E
Maxi u sound pressure level LA ax LC ax LP ax
M
ini u sound pressure level
L
A in
L
C in
L
P in
Percentile sound
pressure level
(LAN)
Percentile (5%) sound pressure level
L
A05
L
C05
L
P05
Percentile (10%) sound pressure level
LA10 LC10 LP10
Percentile (50%) sound pressure level
L
A50
L
C50
L
P50
Percentile (90%) sound pressure level
L
A90
L
C90
L
P90
Percentile (95%) sound pressure level
LA95 LC95 LP95
Peak sound pressure level ― LCpeak Lpeak
Power average of axi u sound pressure level in a
given interval LAt 5 ― ―
I pulse sound pressure level LAI (LCI) (LPI)
I pulse equivalent continuous sound pressure level LAIeq (LCIeq)
(LPIeq)
※ About the quantity of easure ent in ( ), I can display it operationally, but a quantity it is
not generally used, or not to be suitable for an evaluation.
Display exa ple
<Measure ent screen> <Menu screen>
<Exa ple of T-L (ti e level) display>
10m 000h00m05s
38.6 dB
20
80
Stp A Fast Lp
Data
20
80dB
Fast
Lp
38.6
dB
Table of contents
Other ACO Measuring Instrument manuals


Popular Measuring Instrument manuals by other brands


TFA
TFA 31.1063.01 Instruction manuals

ALFAMATIC
ALFAMATIC Press-Right user manual

PCB Piezotronics
PCB Piezotronics 353B14 Installation and operating manual

Teknoware
Teknoware AALTO WMU TST5108 Connection guide

Swann
Swann AMU-II Oxytrace Operator's manual

Konica Minolta
Konica Minolta AeroDR SKR 4000 Operation manual