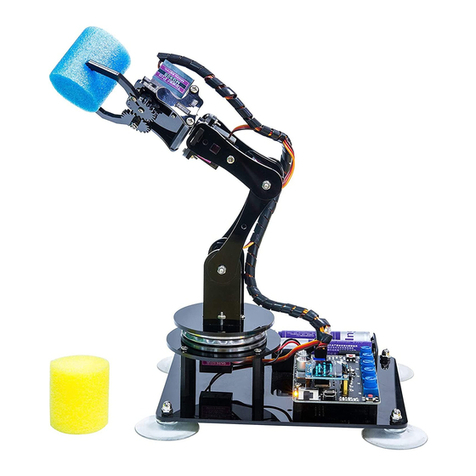
ADEEPT Robotic Arm User manual

1

About Adeept
Adeept is a technical service team of open source software and hardware.
Dedicated to applying the Internet and the latest industrial technology in open source
area, we strive to provide best hardware support and software service for general
makers and electronic enthusiasts around the world. We aim to create infinite
possibilities with sharing. No matter what field you are in, we can lead you into the
electronic world and bring your ideas into reality.
Technical Support: support@adeept.com

Contents
Contents...............................................................................................................................................1
Components List................................................................................................................................. 1
Introduction of Robotic Arm...............................................................................................................6
Introduction of Adeept Arm Drive Board........................................................................................... 9
Lesson 0 Building the Arduino Development Environment............................................................ 11
Lesson 1 How to Read the Data of the Potentiometer......................................................................33
Lesson 2 Controlling the Servo.........................................................................................................40
Lesson 3 Displaying Text on the OLED Screen............................................................................... 47
Lesson 4 Saving Data with EEPROM.............................................................................................. 52
Lesson 5 Servo 90 degree adjustment...............................................................................................58
Lesson 6 How to Assemble the Robotic Arm................................................................................... 62
Lesson 7 GUI application control mode........................................................................................... 97
Lesson 8 GwBlock graphical control mode....................................................................................109
Lesson 9 Potentiometer control mode.............................................................................................135
Lesson 10 Learning mode............................................................................................................... 142
Lesson 11 Processing controls robotic arm.....................................................................................148
Lesson 12 Imitation function(Pen)..................................................................................................162
Lesson 13 Processing controls robotic arm to write and draw....................................................... 171

1
Components List
1.1 Acrylic Plates
A05
1pcs
A01
1pcs
A03
1pcs
A04
1pcs
A02
1pcs
A07
1pcs
A08
1pcs
A06
1pcs

2
The acrylic plates are fragile, so please be careful when assembling them in case
of breaking.
The acrylic plate is covered with a layer of protective film. You need to remove it
first.
Some holes in the acrylic may have residues, so you need to clean them before
the use.
A15
1pcs
A17
1pcs
A10
1pcs
A09
1pcs
A13
1pcs
A11
1pcs
A12
1pcs
A16
1pcs
A14
2pcs
A18
1pcs
A19
1pcs

3
1.2. Machinery Parts
M3
Lock
Nut
www.adeept.com
M3*5
Screw
M2*10
Screw
www.adeept.com
www.adeept.com
www.adeept.com
X2
M3*18
Screw
M3*8
Screw
www.adeept.com
X7
X4
www.adeept.com
www.adeept.com
X1
M3*10
Countersunk
Head
Screw
X5
www.adeept.com
X2
www.adeept.com
X18
www.adeept.com
www.adeept.com
X1
X4
X2
www.adeept.com
www.adeept.com
X5
M3*30
Nylon
Standoff
M3
Nut
X2
X3
X9
M3*40
Nylon
Standoff
www.adeept.com
M3*15
Nylon
Standoff
M3*12
Screw
M2.5*7
Screw
M3*8
Copper
Standoff
www.adeept.com
X5
Sucking disc component
Cap Nut
X4
www.adeept.com
M2
Nut
X11
51108 Bearing
Sucking Disc
X4
M2.5*11
Copper
Standoff
M2*18
Screw

4
1.3. Electronic Parts
Servo X5
Adeept Arm Drive Board X1
USB Cable X1
OLED X1
18650x2 Battery Holder X1
Servo Extension Cable X1

5
Cross Socket Wrench X1
Large Cross-head Screwdriver X1
1.4 Tools
1.5. Self-prepared Parts
Ribbon X1
Pencil X1
18650 Battery X2
Winding Pipe X1

6
Introduction of Robotic Arm
Nowadays, under the progress of science and technology, the biggest difference
between a robotic arm and a human arm lies in flexibility and strength. That is, the
biggest advantage of the robotic arm is that normally it can repeat the same motion
without feeling tired. Today Adeept recommends a robotic learning kit to learn how to
assemble a robotic arm and learn how to write the code to control the robotic arm to
perform the specific motions. We provide a completed using method for learning
Arduino and Processing write PC software and send motion commands to the robotic
arm with Processing; write the motion of the servo of the robotic arm with Arduino.
Assemble video address: https://www.adeept.com/video/detail-81.html
The following figure shows that we control the robotic arm to pick up the object
through the keyboard with serial communication.

7
The following figure shows that we control the robotic arm to write and draw
through the mouse with serial communication.

8
We have added the learning and memory function to the robotic arm. We let the
robotic arm to record the manually controlled mechanical movements we made, and
the robotic arm can learn repeatedly, such as repeat moving the object, repeat drawing
the same graphic, repeat keyboard input and repeat turning book pages.

9
Introduction of Adeept Arm Drive Board
The Adeept Arm Drive Board development board is the main component of the
robotic arm. Similar to the Arduino UNO development board, it is also an easy-to-use
open source electronic prototyping platform, including the hardware part and the
software part (Arduino IDE). The Adeept Arm Drive Board development board is
mainly composed of a microcontroller (MCU), a universal input/output interface, etc.
You can understand it as a microcomputer motherboard. We will introduce the Adeept
Arm Drive Board development board in detail.
【1】Power LED:
Power LED is used to indicate the power status of the system. The LED is on,
indicating that the system is powered on and ready to run; the LED is off, indicating
that the system is not powered on.
【2】Servo:
It is the pin interface of Servo.
【3】Vin(6-24V):

10
It is the pin interface for external power supply. Use 6-24V external power supply
to power the Adeept SmartHub development board.
【4】RESET:
Restarting the Adeept SmartHub development board.
【5】Switch:
When using Vin (6-24V) as an external power supply, Switch can control the OFF
and ON of the Adeept SmartHub development board.
【6】Micro USB:
It is used to connect the Micro USB interface of the computer to realize the serial
communication, uploading program and serial monitoring between the Adeept
SmartHub development board and the computer.
【7】Potentiometer button:
Potentiometer button has five buttons: A0, A1, A2, A3, and A6. By rotating these
buttons, you can control the movement of the robotic arm.
In the following courses, we will combine the application of various components to
further learn the practical application of the Adeept Arm Drive Board development
board.

11
Lesson 0 Building the Arduino Development
Environment
1. Arduino development language
Arduino uses C/C++ to write programs, so before learning Arduino, you need to
master the C/C++ language. Although C++ is compatible with the C language, these
are two different languages. C is a process-oriented programming language, and C++
is an object-oriented programming language. The early Arduino core library was
written in C language. Later, object-oriented ideas were introduced. At present, the
latest Arduino core library is written in C and C++.
Generally speaking, the Arduino language refers to a collection of various
Application Programming Interfaces (APIs) provided by the Arduino core library files.
These APIs are formed by secondary packaging of the lower-level microcontroller
support library. For example, the core library of Arduino using AVR microcontroller is
the secondary packaging of AVR-Libc (GCC-based AVR support library).
In the traditional development method, multiple registers need to be configured to
achieve the corresponding functions. In Arduino, the complicated registers are
encapsulated into simple APIs, which can be intuitively controlled, enhancing the
readability of the program and improving the development efficiency.
2.Arduino program structure
The Arduino program structure is different from the traditional C/C++ program
structure-there is no main() function in the Arduino program. In fact, it is not that
there is no main() function in the Arduino program, but that the definition of the main()
function is hidden in the core library file of the Arduino. In the development of
Arduino, the main function is not directly operated, but the two functions of setup()

12
and loop() are used instead.
3. The construction of the Arduino development
environment
The IDE of the Arduino development environment can be downloaded from the
official website. The download address of the Arduino IDE is:
https://store.arduino.cc/usa/
(1) Install Arduino IDE under Windows
We will teach you how to download and install:
1.Open Google Chrome and enter the URL in the address bar:
https://store.arduino.cc/usa/
After successfully opening the interface as shown below, we click
DOWNLOADS under SOFTWARE.
2. After jumping to the following interface, slide the mouse to the middle to find
the part marked in the red circle.You can find that the official website provides us
with installation files for Windows, Mac OS X, and Linux systems.

13
3. We click the installation package of Windows ZIP file for non admin
install.After the interface jumps, we select JUST DOWNLOAD.And then start the
download. The download status will be displayed in the lower left of Google
Chrome.Then we wait for the download to complete.

14
4.After the download is complete, open the folder.There are downloaded
compressed installation files:
arduino-1.8.12-windows.zip
5. Double-click to open the file and unzip it.

15
6. The file arduino-1.8.12 appears after decompression.As shown follows;
7. Open the arduino-1.8.12 folder and double-click arduino.exe to open the
software.
8. The interface will show as follows after the Arduino software is opened,
indicating that our software has been downloaded and installed successfully.

16
4. Introduction of Arduino software interface
The following figure is the interface introduction of Arduino software

17
(1)Menu bar
Menu bar contains File, Edit, Sketch, Tools and Help.
(1) "File" can operate new file, open file, save file, close file, save, etc. For the
Examples, you can check the official sample program.
(2) "Edit" has the functions for the program code of editing, copying and pasting,
commenting, indenting,searching, etc.
(3) Sketch can perform Verify/Compile, Upload and other operations on the
Table of contents
Other ADEEPT Robotics manuals
ADEEPT
ADEEPT RaspClaws User manual
ADEEPT
ADEEPT Quadruped Robot User manual
ADEEPT
ADEEPT PiCar-B User manual
ADEEPT
ADEEPT RaspTank User manual
ADEEPT
ADEEPT Hexapod User manual
ADEEPT
ADEEPT RaspRover User manual
ADEEPT
ADEEPT PiCar-Pro User manual
ADEEPT
ADEEPT Smart Car Kit User manual

ADEEPT
ADEEPT RaspArm User manual

ADEEPT
ADEEPT RaspClaws User manual
Popular Robotics manuals by other brands
AndyMark
AndyMark Rover am-4100 MK6 Series user guide

M.J. MALLIS GROUP
M.J. MALLIS GROUP SIAT WR100 Instruction manual and spare parts list
Doosan
Doosan M0609 installation manual
Totem
Totem MINI SPIDER Assembly guide
Supereyes
Supereyes Qbot 3.0 Robot Car Kit user manual

Aisoy Robotics
Aisoy Robotics Aisoy1 quick start guide
