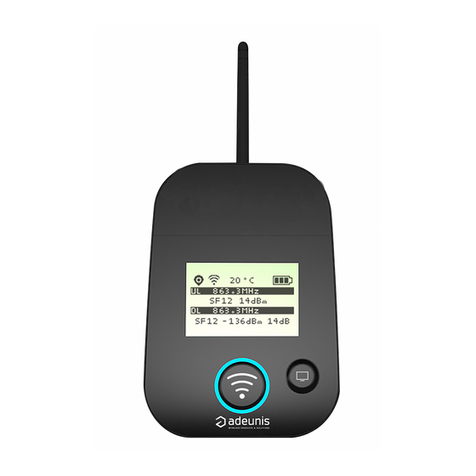
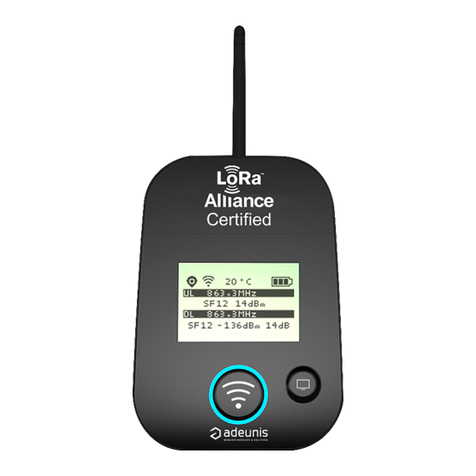
Adeunis RF LoRaWAN 915 FTD User manual

LoRaWAN 915 FTD –User guide version 1.0
LoRaWAN 915 Field Test Device
By Adeunis RF
PROVIDER Edition
User Guide Version 1.0
Document revision
Version
Date
Author
Comment
YRM
YRM
1.0
05/10/2016
YRM
Initial release
ADEUNIS RF
283 rue Louis Néel - Parc Technologique Pré Roux 38920 CROLLES - France
Tel. : +33 (0)4 76 92 07 77 - Fax : +33 (0)4 76 04 80 87
www.adeunis-rf.com [email protected]

LoRaWAN 915 FTD –User guide version 1.0
Information
Document information
Title LoRaWAN 915 Field Test Device by Adeunis RF
Subtitle User Guide Version 1.0
Document type User Guide
Document status Beta
This document applies to the following products
Name Reference Firmware version
LoRaWAN 915 Field Test Device ARF8124AA V1.0

LoRaWAN 915 FTD –User guide version 1.0
Page 3/ 35
Table of contents
DOCUMENT INFORMATION ..................................................................................................................................................................... 2
TABLE OF CONTENTS ...............................................................................................................................................................3
DISCLAIMER.................................................................................................................................................................................... 5
TECHNICAL SUPPORT ........................................................................................................................................................................... 6
DECLARATION OF CONFORMITY CE ....................................................................................................................................................... 7
ENVIRONMENTAL RECOMMENDATIONS.................................................................................................................................................. 8
WARNINGS......................................................................................................................................................................................... 8
READ THE INSTRUCTIONS IN THE MANUAL.................................................................................................................................................. 8
DISPOSAL OF WASTE BY USERS IN PRIVATE HOUSEHOLDS WITHIN THE EUROPEAN UNION ......................................................................... 9
HAFTUNGSAUSSCHLUSS .............................................................................................................................................................. 10
HINWEISE ZUM UMWELTSCHUTZ ........................................................................................................................................................ 10
WARNHINWEISE................................................................................................................................................................................. 10
EMPFEHLUNGEN ZUR VERWENDUNG...................................................................................................................................................... 11
ENTSORGUNG DER ABFÄLLE VON BETREIBERN IN PRIVATHAUSHALTEN INNERHALB DER EUROPÄISCHEN UNION.............................................. 11
1DEVICE OVERVIEW.........................................................................................................................................................12
1.1 DEVICE DESCRIPTION .............................................................................................................................................................. 12
1.2 MECHANICAL DESCRIPTION ...................................................................................................................................................... 12
1.3 TECHNICAL SPECIFICATIONS...................................................................................................................................................... 13
1.4 CHARGING THE FTD ............................................................................................................................................................... 13
2DEVICE OPERATION .......................................................................................................................................................14
2.1 USER INTERFACE .................................................................................................................................................................... 14
2.1.1 Button 1..................................................................................................................................................................... 14
2.1.2 Button 2..................................................................................................................................................................... 14
2.1.3 ON/OFF button.......................................................................................................................................................... 14
2.1.4 Charge State Indicator .............................................................................................................................................. 14
2.1.5 USB connector........................................................................................................................................................... 14
2.1.6 LCD screen description .............................................................................................................................................. 15
2.2 USING THE FTD..................................................................................................................................................................... 17
2.2.1 Default configuration ................................................................................................................................................ 17
2.2.2 Powering up the device ............................................................................................................................................. 17
2.2.3 Join procedure........................................................................................................................................................... 17
2.2.4 Sending a frame ........................................................................................................................................................ 17
2.2.5 Accelerometer ........................................................................................................................................................... 17
2.2.6 GPS ............................................................................................................................................................................ 17
3DEVICE CONFIGURATION ...............................................................................................................................................18
3.1 SERIAL LINK PARAMETERS ........................................................................................................................................................ 18
3.2 COMMAND INTERFACE............................................................................................................................................................ 19
3.3 REGISTERS LIST ...................................................................................................................................................................... 20
3.3.1 Network Keys ............................................................................................................................................................ 20
3.3.2 Activation - OTAA/ABP.............................................................................................................................................. 21
3.3.3 Channels configuration ............................................................................................................................................. 22
3.3.4 RX2 window configuration........................................................................................................................................ 26
3.3.5 LoRa Options ............................................................................................................................................................. 27
3.3.6 UpLink port................................................................................................................................................................ 27
3.3.7 ACK request + Class ................................................................................................................................................... 28
3.3.8 Transmission periodicity............................................................................................................................................ 28
3.3.9 Accelerometer ........................................................................................................................................................... 28
3.3.10 GPS configuration...................................................................................................................................................... 29
3.3.11 Payload format.......................................................................................................................................................... 29
3.3.12 Band type .................................................................................................................................................................. 29
4PAYLOAD DESCRIPTION .................................................................................................................................................30
4.1 FRAME 1.............................................................................................................................................................................. 30
4.2 FRAME 2.............................................................................................................................................................................. 31
LoRaWAN 915 FTD –User guide version 1.0
Page 4/ 35
ANNEX 1: LORA CYCLE ...........................................................................................................................................................32
ANNEX 2: RSSI AND SNR ........................................................................................................................................................33
ANNEX 3: BAND TYPES ..........................................................................................................................................................34
Figure 1: Product during charge........................................................................................................................................................ 13
Figure 2: Product when charge is completed.................................................................................................................................... 13
Figure 3: Front view ......................................................................................................................................................................... 14
Figure 4: Bottom view ...................................................................................................................................................................... 14
Figure 5: Main Screen....................................................................................................................................................................... 15
Figure 6: GPS screen ........................................................................................................................................................................ 16
Figure 7: PER Screen........................................................................................................................................................................ 16
Figure 8: Device as a serial peripheral.............................................................................................................................................. 18
Figure 9: Hercules Terminal............................................................................................................................................................. 18

LoRaWAN 915 FTD –User guide version 1.0
Page 5/ 35
DISCLAIMER
This document and the use of any information contained therein, is subject to the acceptance of the Adeunis RF terms and
conditions. They can be downloaded from www.adeunis-rf.com.
Adeunis RF makes no warranties based on the accuracy or completeness of the contents of this document and reserves the
right to make changes to specifications and product descriptions at any time without notice.
Adeunis RF reserves all rights to this document and the information contained herein . Reproduction, use or
disclosure to third parties without express permission is strictly prohibited. Copyright © 201 6, Adeunis RF.
Adeunis RF is a registered trademark in the EU and other countries.
All rights to this manual are the exclusive property of ADEUNIS RF. All rights reserved. Copying this manual (without written
permission from the owner) via printing, copying, recording or by any other means, translating this manual (in full or partially) into any
other language, including all programming languages, using any electrical, mechanical, magnetic or optical devices, manually or any
by other methods, is prohibited.
ADEUNIS RF reserves the right to change the technical specifications or functions of its products, or to cease manufacturing any of
its products, or to cease technical support for one of its products without notice in writing and urges its customers to make sure that
the information they have is valid.
ADEUNIS RF configuration software and programs are available free of charge in a non-modifiable version. ADEUNIS RF can make
no guarantees, including guarantees concerning suitability and applicability for a certain type of application. Under no circumstances
can the manufacturer, or the distributor of an ADEUNIS RF program, be held liable for any damage caused by the use of the
aforesaid program. Program names, as well as all copyright relating to programs, are the exclusive property of ADEUNIS RF. Any
transfer, granting of licences to a third party, leasing, hire, transport, copying, editing, translation, modification into another
programming language or reverse engineering are prohibited without ADEUNIS RF’s prior written authorisation and consent.
ADEUNIS RF
283, rue Louis Néel
38920 Crolles France
Telephone +33 (0)4 76 92 07 77
Fax +33 (0)4 76 04 80 87

LoRaWAN 915 FTD –User guide version 1.0
Page 6/ 35
Technical Support
Website
Our website contains much useful information: modules and stand-alone products information, user guides, configuration software
and technical documents which can be accessed 24 hours a day.
Email
If you have technical problems or cannot find the required information in the provided documents, contact our Technical Support by
email. Use our dedicated email address ([email protected]) rather than any personal email address of our staff. This makes sure
that your request is processed as soon as possible.
Helpful Information when Contacting Technical Support
When contacting Technical Support please have the following information ready:
Product type (e.g. Wireless M-Bus),
Firmware version (e.g. V3.03)
Clear description of your question or the problem
A short description of the application
Your complete contact details

LoRaWAN 915 FTD –User guide version 1.0
Page 7/ 35
Declaration of conformity CE
We ADEUNIS RF,
283 rue LOUIS NEEL, 38920 CROLLES, FRANCE
Declare under our own responsibility that the products
Name LoRaWAN 868 FTD
Reference(s) ARF8123AA
to which this declaration refers conform with the relevant standards or other standardising documents
EN 300 220-1
(v2.4.1) (2012)
EN 60950-1
(2006 + A1)
(2010 + A2)
(2013 + A11)
(2009 +A12)
2011
EN 301 489-1
(v1.9.2) (2011)
EN 301 489-3
(v1.6.1) (2013)
EN 62479
(2010)
According to the RTTE Directive 99/5/EC
Notes:
Conformity has been evaluated according to the procedure described in Annex III of the RTTE directive
Receiver class (if applicable): 3
Crolles, 2016 MONNET Emmanuel, Certification Manager

LoRaWAN 915 FTD –User guide version 1.0
Page 8/ 35
Environmental recommendations
All superfluous packaging materials have been eliminated. We have done everything possible to make it easy to separate the
packaging into three types of materials: cardboard (box), expanded polystyrene (filler material) and polyethylene (packets, foam
protective sheets). Your device is composed of materials that can be recycled and reused if it is dismantled by a specialist company.
Please observe local regulations concerning the manner in which waste packaging material, used batteries and your obsolete
equipment are disposed of.
Warnings
Valid for the following product: ARF8123AA
Read the instructions in the manual
The safety of this product is only guaranteed when it is used in accordance with its
purpose. Maintenance should only be carried out by qualified persons.
Please note, do not install the equipment close to a heat source or in damp conditions.
Warning: Do not open the product, risk of electric shock.
Please note: for your own safety, you must ensure that the equipment is switched off before carrying out any work on it.
Please note: For your safety, the power supply circuit must be SELV (Safety Extra Low Voltage) and must be a limited power sources.
Please note: for you own safety, you must ensure that equipment is switched off before carrying out any work on it.

LoRaWAN 915 FTD –User guide version 1.0
Page 9/ 35
Recommendations regarding use
Before using the system, check that the power supply voltage shown in the user manual corresponds to your supply. If it
doesn’t, please consult your supplier.
Place the device against a flat, firm and stable surface.
The device must be installed in a location that is sufficiently ventilated so that there is no risk of internal heating and it must not
be covered with objects such as newspapers, cloths, curtains, etc.
The device’s aerial must be free and at least 10 cm away from any conducting material.
The device must never be exposed to heat sources such as heating equipment.
Do not place the device close to objects with naked flames such as lit candles, blowtorches, etc.
The device must not be exposed to aggressive chemical agents or solvents likely to damage the plastic or corrode the metal parts.
Install your device close to its DC power supply.
Disposal of waste by users in private households within the European Union
This symbol on the product or on its packaging indicates that this product must not be disposed off with your other
household waste. Instead, it is your responsibility to dispose of your waste by taking it to a collection point
designated for the recycling of electrical and electronic appliances. Separate collection and recycling of your waste
at the time of disposal will contribute to conserving natural resources and guarantee recycling that respects the
environment and human health. For further information concerning your nearest recycling centre, please contact your
nearest local authority/town hall offices, your household waste collection company or the shop where you bought the
product.
Attention: There is a risk of explosion if the battery is replaced by an incorrect type. Throw away the
used batteries according to instructions. When changing batteries, reassembled correctly and completely the
product.
Switzerland IMPORTANT: Annex 4.10 of SR 814.013 standard is applicable to batteries

LoRaWAN 915 FTD –User guide version 1.0
Page 10 / 35
HAFTUNGSAUSSCHLUSS
Alle Rechte an diesem Handbuch sind das alleinige Eigentum der ADEUNIS RF. Alle Rechte sind vorbehalten. Jede (ohne die
schriftliche Genehmigung des Eigentümers erfolgende) Wiedergabe dieses Handbuches durch Druck, Kopie, Aufzeichnung oder
jedwedes andere Mittel sowie die (vollständige oder teilweise) Übersetzung in jede andere Sprache einschließlich aller
Programmiersprachen durch Verwendung welcher elektrischer, mechanischer, magnetischer, optischer, manueller Vorrichtungen
oder anderen Methoden auch immer, sind verboten.
Die ADEUNIS RF behält sich das Recht vor, ohne irgendeine schriftliche Mitteilung die technischen Spezifikationen oder die
Funktionen ihrer Produkte zu verändern, bzw. die Herstellung eines ihrer Produkte einzustellen oder den technischen Support für
eines ihrer Produkte auszusetzen und bittet ihre Kunden inständig sich zu vergewissern, dass die ihnen zur Verfügung stehenden
Informationen zutreffend sind.
Die Konfigurations- und Programmsoftware der ADEUNIS RF steht kostenlos in einer Version zur Verfügung, die nicht verändert werden
kann. Die ADEUNIS RF kann keinerlei Garantie und auch keine Garantie zur Eignung und Anwendbarkeit für eine Applikation
bestimmten Typs gewähren. Der Hersteller oder der Verkäufer eines Programms der ADEUNIS RF kann in keinem Fall für irgendwelche
Schäden haftbar gemacht werden, die durch die Anwendung des besagten Programms gegebenenfalls verursacht werden könnten. Die
Bezeichnungen der Programme sowie alle Urheberrechte zu den Programmen sind das alleinige Eigentum der ADEUNIS RF. Jede
Übertragung, Gewährung von Lizenzen an einen Dritten, Leasingvergabe, Vermietung, Übereignung, Kopie, Übersetzung, Modifizierung
in eine andere Programmiersprache oder durch ein Reverse Engineering ist ohne die schriftliche Genehmigung und ohne das
Einverständnis der ADEUNIS RF verboten.
ADEUNIS RF
283, rue Louis Néel
38920 Crolles France
Tel +33 (0)4 76 92 07 77
Fax +33 (0)4 76 04 80 87
Hinweise zum Umweltschutz
Alle überflüssigen Verpackungsmaterialien wurden vermieden. Wir haben auch alles getan, was uns möglich ist, damit die Verpackung ohne
Weiteres in drei Typen von Werkstoffen getrennt werden kann : Karton (die Schachtel), geschäumtes Polystyrol (Dämmmaterial) und Polyä-
thylen (Beutel, Schaumfolie zum Schutz). Ihr Gerät besteht aus Werkstoffen, die recycelt und weiterverwendet werden können, wenn es von
einem darauf spezialisierten Unternehmen demontiert wird. Beachten Sie bitte die jeweils geltenden örtlichen Vorschriften zur Entsorgung der
Verpackungsmaterialien, der verbrauchten Batterien und Ihres ausgemusterten Gerätes.
Warnhinweise
Gültig für das Produkt ARF8123AA
Lesen Sie die Anleitungen dieses Handbuches
Die durch dieses Produkt gewährte Sicherheit kann nur bei einer Anwendung entsprechend dem vorgesehenen
Einsatzzweck gewähr-leistet werden.
Vorsicht, installieren Sie das Gerät nicht in der Nähe einer Wärmequelle oder in der Nähe einer Quelle von
Feuchtigkeit.
Warnung: Öffnen Sie das Produkt nicht, die Gefahr eines elektrischen Schlags.
Bitte beachten Sie: für Sie Sicherheit besitzen, müssen Sie das Gerät gewährleistet ist, vor der Durchführung
von Arbeiten an sie ausgeschaltet.

LoRaWAN 915 FTD –User guide version 1.0
Page 11 / 35
Empfehlungen zur Verwendung
• Bevor Sie das System verwenden, prüfen Sie, dass die Stromversorgungsspannung in der Bedienungsanleitung gezeigt zu Ihrem Angebot
entspricht. Wenn dies nicht der Fall, wenden Sie sich bitte an Ihren Lieferanten.
• Stellen Sie das Gerät auf eine ebene, feste und stabile Oberfläche.
• Das Gerät muss an einem Ort installiert werden, der ausreichend so belüftet ist, dass es kein Risiko einer internen Heizung und es darf nicht
mit Gegenständen wie Zeitungen, Tücher, Vorhänge cove¬red werden, usw.
• Das Gerät ist Antenne muss aus jedem leitenden Material frei und mindestens 10 cm entfernt sein.
• Das Gerät darf nie zu Wärmequellen wie Heizungsanlagen ausgesetzt werden.
• Stellen Sie das Gerät in der Nähe Objekte mit offener Flamme nicht platzieren wie brennende Kerzen, Fackeln usw.
• Das Gerät darf nicht mit aggressiven Chemikalien oder Lösungsmitteln ausgesetzt werden wahrscheinlich den Kunststoff zu beschädigen oder
die Metallteile korrodieren.
Entsorgung der Abfälle von Betreibern in Privathaushalten innerhalb der Europäischen Union
Dieses Symbol auf dem Produkt oder auf seiner Verpackung weist darauf hin, dass dieses Produkt nicht gemeinsam mit Ihrem anderen
Haushaltsmüll entsorgt werden darf. Stattdessen haben Sie dafür Sorge zu tragen, Ihre Abfälle bei einer Erfassungsstelle zu entsorgen, die auf
das Recycling elektrischer und elektronischer Geräte spezialisiert ist. Die gesonderte Erfassung und das Recycling ihrer Abfälle bei der
Entsorgung tragen dazu bei, die natürlichen Ressourcen zu bewahren und ein Recycling zu gewährleisten, das dem Schutz der Umwelt und der
menschlichen Gesundheit dient. Für weitere Informationen zu der Ihrer Wohnung am nächsten gelegene Recyclingstelle wenden Sie sich bitte
an die örtliche Gemeindeverwaltung, an die zuständige Dienststelle für die Müllabfuhr oder an das Geschäft, in dem sie das Gerät gekauft
haben
Achtung: Es besteht die Gefahr einer Explosion, wenn die Batterie durch einen falschen type.Throwing ersetzt wird entfernt, die
verbrauchte Batterien gemäß den Anweisungen. Wenn Batteriewechsel wieder zusammen korrekt und vollständig das Produkt.
Schweiz WICHTIG: Anhang 4.10 von SR 814.013 Norm gilt für Batterien

LoRaWAN 915 FTD –User guide version 1.0
Page 12 / 35
1Device Overview
1.1 Device Description
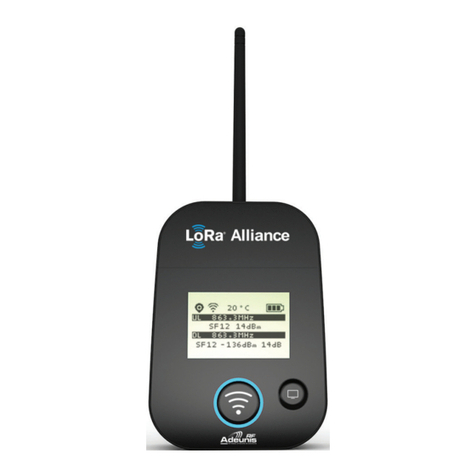
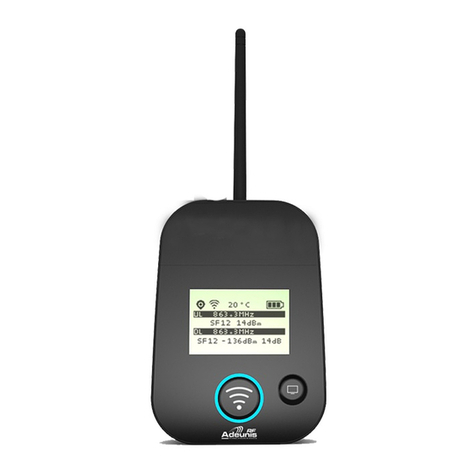
The LoRaWAN Field Test Device (FTD) by Adeunis RF is a LoRaWAN v1.0.1 Class A & C compliant device. It is NOT a point-
to-point device and cannot be operated in such a way. It is meant to be paired to an operated network.
The LoRaWAN Field Test Device by ADEUNIS RF is a ready to use system, which provides connection to the any operated
network using the LoRaWAN V1.0.1 protocol. It allows transmitting, receiving and instantly viewing the radio frames on the used
network.
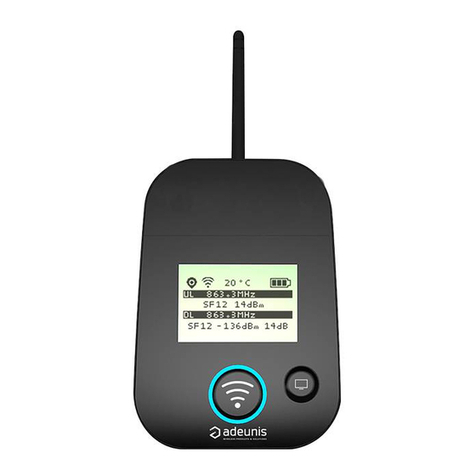
Equipped with a large LCD screen, you can check all operating information (GPS coordinates, temperature, battery ...) and use of
the network (uplink, downlink, SF, Packet Error Rate ...). Its ultra-fast and precise GPS optimizes geolocation operations.
This Field Test Device is particularly suitable for the validation of applications like sensor networks, asset tracking, smart
buildings, metering, security, or M2M.
With built-in rechargeable battery, this demonstrator allows for many hours of use and can be recharged with any type of
mobile phone charger.
1.2 Mechanical description

LoRaWAN 915 FTD –User guide version 1.0
Page 13 / 35
1.3 Technical specifications
Technical specifications
Communication
LoRaWAN protocol & LoRa Modulation
Module configuration
Through AT commands
Radio data rate
Variable
UART configuration
115.2 kbps/N/8/1
Frequency channels
ISM band 902-928
RF output power
20dBm (100mW)
Sensitivity
down to -140dBm in SF12/125kHz
Operating range (Line Of Sight)
Up to 15km
Operating temperature
-30°C / +70°C
Dimensions
186 x 75 x 23 mm
USB Port
Micro-USB –5V –500mA
Standard compliance
FCC part 15.247
1.4 Charging the FTD
The product contains a rechargeable battery. Upon connecting it to a computer via a micro-USB cable, it will automatically begin
charging; even if the ON/OFF switch is on the OFF position (this behavior is similar to the one of mobile phones). The product
can still be used while it’s charging.
During the charging process, the charge state indicator is steady red. When charging is completed, the charge state indicator
becomes steady green.
Figure 1: Product during charge
Figure 2: Product when charge is completed
If the battery is completely discharged, it will need 6 hours of charging time to get back to full charge.

LoRaWAN 915 FTD –User guide version 1.0
Page 14 / 35
2Device operation
2.1 User interface
Figure 3: Front view
Figure 4: Bottom view
2.1.1 Button 1
BTN 1 is used to trigger RF transmissions manually
2.1.2 Button 2
BTN 2 is used to manage the LCD screen and has two functions:
1. 1st push activates LCD backlight
2. If LCD backlight is already activated, pushing BTN2 changes the LCD display
2.1.3 ON/OFF button
The ON/OFF button turns the device ON or OFF. Slide the button to the right to turn the device ON
2.1.4 Charge State Indicator
The CSI indicates the device’s state of charge. See 1.4
2.1.5 USB connector
The USB connector can be used to charge (see 1.4) or configure (see 3) the device.
LCD Screen
BTN 1
BTN 2
ON/OFF
Micro-USB connector
Charge State Indicator

LoRaWAN 915 FTD –User guide version 1.0
Page 15 / 35
2.1.6 LCD screen description
The embedded LCD screen is divided in three pages: Main screen, GPS screen & PER screen
2.1.6.1 Main screen
The main screen displays the most important information:
Figure 5: Main Screen
The STATUS bar contains four different kinds of information:
Item
Icons
Description
GPS status
No Icon
GPS is deactivated
GPS is not synchronized
GPS is synchronized
RF status
No Icon
Product is Idle
Device is trying to Join a network
Manual transmission has been triggered
Periodic transmission has been triggered
Temperature
20°C
Temperature in °C
Battery status
Battery level indicator
The LoRa transmission information section gives information about the current uplink (UL) and resulting downlink (DL)
(if there is any)
STATUS bar
LoRa Transmission information
UpLink (UL)
UL Spreading Factor
UL frequency
UL power
DownLink (DL)
DL Spreading Factor
DL frequency
DL SNR
DL RSSI

LoRaWAN 915 FTD –User guide version 1.0
Page 16 / 35
2.1.6.2 GPS Screen
The GPS screen gives detailed information about the GPS status
Figure 6: GPS screen
In the STATUS bar, RF status and Temperature icons are replaced by GPS-related icons
Item
Icons
Description
Number of satellites
No Icon
GPS not synchronized
Number of satellites that the GPS is
tracking
Positioning Accuracy
No Icon
GPS not synchronized
Indicates the positioning accuracy.
1 bar = poor accuracy
2 bars = medium accuracy
3 bars = good accuracy
The rest of the screen indicates the Latitude and Longitude. If the GPS isn’t synchronized the LAT and LON fields are
left blank, and a satellite dish is displayed indicating that the GPS is attempting a fix
2.1.6.3 Packet Error Rate Screen
The packet error rate screen is dedicated to radio testing, for evaluating the quality of the radio link between the device and a
gateway.
Figure 7: PER Screen
The screen displays:
-Total number of UL (including repetitions)
-Total number of DL
-Packet Error Rate in %
𝑃𝐸𝑅 (%)= 𝐷𝐿 𝐶𝑂𝑈𝑁𝑇
𝑈𝐿 𝐶𝑂𝑈𝑁𝑇 ∗100
Packet Error Rate
Number of Uplink transmissions
Number of Downlink transmissions
transmissions

LoRaWAN 915 FTD –User guide version 1.0
Page 17 / 35
2.2 Using the FTD
2.2.1 Default configuration
The demonstrator is pre-configured at factory with the following default settings:
Parameter
Configuration
Activation mode
OTAA (Over The Air Activation)
DEVEUI
Factory set
Format = 0018B2xxxxxxxxxx
APPEUI
Factory set
APPKEY
Factory set
Device Address
0x00
Accelerometer
Activated
T°C sensor
Activated
GPS
Activated
Communications tables/channels
US table (module tables 0 / 3 / 5)
RX2 Configuration
923.3 MHz / DR8
TX periodicity
20 s
ACK Mode
unconfirmed
2.2.2 Powering up the device
Power–ON the device by sliding the ON-OFF switch to the right. This should power ON the LCD screen
Power–OFF the device by sliding the ON-OFF switch to the left. This should power OFF the LCD screen
2.2.3 Join procedure
If the device is in OTAA mode, it will automatically execute a Join process at power-ON.
Note: In ABP mode, there is no Join procedure. All keys are entered manually by the user
2.2.4 Sending a frame
There are two ways to send a radio frame
-By default, the device is configured to send RF frames automatically and periodically
-Pressing BTN1 will trigger a manual frame transmission
2.2.5 Accelerometer
An accelerometer is available in the device. Shaking the device will trigger a “LinkCheck request”. See 3.3.9 for configuration
options.
2.2.6 GPS
A high performance GPS is available in the device. When available, GPS coordinates are included in the transmission frame to
allow device geolocation. See 3.3.10 for configuration options.

LoRaWAN 915 FTD –User guide version 1.0
Page 18 / 35
3Device configuration
The device’s configuration can be changed from a PC. In order to do so, the device should be turned ON and connected to a PC
via its USB port and a micro-USB cable. The device will be recognized as a serial peripheral (creation of a virtual serial COM
port).
3.1 Serial link parameters
Parameter
Value
Speed
115200 bps
Parity
None
Bits
8
Stop bit
1
When plugged to a PC, the device should be recognized as a serial peripheral:
Figure 8: Device as a serial peripheral
The serial driver is available on ADEUNIS RF Website as “USB_DONGLE_DRIVER_WMBUS”
The product can then be configured via a Terminal such as Hercules:
Figure 9: Hercules Terminal

LoRaWAN 915 FTD –User guide version 1.0
Page 19 / 35
3.2 Command Interface
All commands are written in ASCII
Commands can be used once the device has been placed in command mode. The commands are based on AT commands format
and are structures as follows:
Starts with 2 ASCII characters “AT”
Followed by 1 or more ASCII characters depending on the command
Ends by <CR> or <CR><LF>
After receiving a command, the device will emit the following response:
ASCII character “O” if the command is accepted
ASCII character “E” if the command is rejected
Ends by <CR><LF>
The following commands are available:
Command
Description
Reply example
\FF\FF\FF\FF+++
Entry in command mode
«CM»<cr><lf>
AT/V
Displays the firmware version
«LORA-DEMO _v1.0»<cr><lf>
ATS<n>?
Returns content of register <n>
S<n>=<y><cr><lf> with <y> as the
register content
AT/S
Display all user registers
/
ATS<n>=<m>
Assign value <m> to USER register <n>
«O»<cr><lf> if Ok, «E»<cr><lf> if error
ATR
Reset device configuration to factory settings
«O»<cr><lf>
AT&W
Save the new configuration
«O»<cr><lf>
ATO
Exit command mode
«O»<cr><lf>
ATT63 PROVIDER
PROVIDER password
«O»<cr><lf>
ATBOOT <param>
Bootloader mode
<param> = RTU ou APP
«O»<cr><lf>
NOTE: “\FF” denotes a hexadecimal format (0xFF)
After modifying a parameter, make sure to save the new configuration by issuing the AT&W command.

LoRaWAN 915 FTD –User guide version 1.0
Page 20 / 35
3.3 Registers List
3.3.1 Network Keys
In order to access a LoRa Network, 6 different types of keys exist:
KEY
Who asks for it?
Who provides it?
What is it used for?
APP-EUI
OTAA: User
ABP: unused
Operator
Needed for joint request
APP-KEY
OTAA: User
ABP: unused
Operator
Needed for joint request
DEV-EUI
ADEUNIS
IEEE
Needed for Joint request
Unique device ID
(MAC address)
NWK-SKEY
OTAA: Device
ABP: User
OTAA: Network
ABP: Operator
Network Session key used for
encryption of MAC commands in
FRMPayload (if Fport=0)
APP-SKEY
OTAA: Device
ABP: User
OTAA: Network
ABP: User (arbitrarily chosen)
Application Session key used for
encryption of Applicative payload
in FRMPayload (if Fport≠0)
Device Address
OTAA: Device
ABP: User
OTAA: Network
ABP: Operator
Network address of device
There two different ways to enter a LoRa network: personalization (ABP) and Over-the-air activation (OTAA). In either case the
DEV-EUI, which is essentially a MAC address, is provided by the end-point manufacturer (in this case ADEUNIS).
3.3.1.1 Activation by Personalization mode (ABP)
In personalization mode, the user has to manually enter the following keys in the device:
-NWK-SKEY
-APP-SKEY
-Device Address
APP-EUI and APP-Key are unnecessary.
After turning ON the product, LED1 will be turned steady Red and Green and will stay that way unless the device address is
different from 0. If the address is different from 0, the demonstrator begins normal operation (provided that the other keys are
correct).
3.3.1.2 Over The Air Activation (OTAA) mode
In OTAA mode, the user has to manually enter the following keys in the device:
-APP-EUI
-APP-KEY
After turning ON the product, LED1 will be turned steady Red and Green and will stay that way until the device recovers the
NWK-SKEY and APP-SKEY wirelessly. These keys are automatically provided/calculated by the network. Once the keys are
acquired, the device begins normal operation.
The newly acquired keys (NWK-SKEY and APP-SKEY) can be read from the corresponding registers if the product is placed in
command mode.
Table of contents
Other Adeunis RF Test Equipment manuals

Adeunis RF
Adeunis RF FIELD TEST DEVICE - sigfox RC2 User manual

Adeunis RF
Adeunis RF LoRaWAN AS923 PULSE User manual

Adeunis RF
Adeunis RF FIELD TEST DEVICE sigfox Europe RC1 User manual

Adeunis RF
Adeunis RF DRY CONTACTS V2 LoRaWAN 863-870 User manual

Adeunis RF
Adeunis RF TEMP IP68 LoRaWAN 863-870 User manual

Adeunis RF
Adeunis RF ARF8123AA-V2 User manual

Adeunis RF
Adeunis RF LoRaWAN US 902-928 User manual

Adeunis RF
Adeunis RF LoRaWAN Europe EU863-870 User manual

Adeunis RF
Adeunis RF LoRaWAN Demonstrator User manual

Adeunis RF
Adeunis RF ARF8123AA User manual