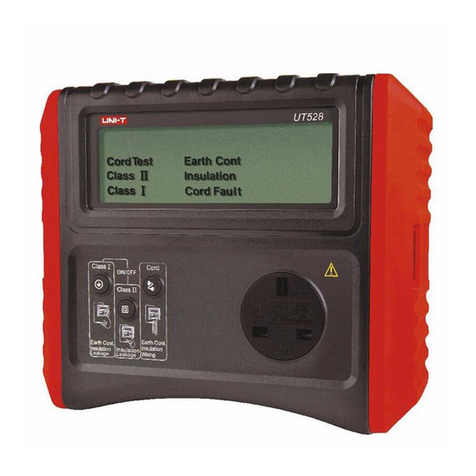
ADInstruments AD1106 User manual

Manual de Usuario ADInstruments
Medidor de impedancia de audio
AD1106

AD Instruments
2
©Copyright Abacanto Digital SA.
Manual de usuario AD1106
Contenido
Diseño del equipo …………………………………………………………..….. 3
Recomendaciones de seguridad …………………………………………… 4
Características ………………………………………………………………..…. 5
Especificaciones ………………………………………………….……………… 6
Métodos de medida …………………………………………….……………… 7
Mantenimiento …………………………………………………………………… 9

AD Instruments
3
©Copyright Abacanto Digital SA.
Manual de usuario AD1106
Diseño del equipo
(1) Terminales para la conexión de las puntas de prueba
(2) Pantalla LCD
(3) Tecla para activar/desactivar la medida
(4) Tecla de retención de la medida
(5) Conmutador giratorio para la selección de rango
(6) Ajuste de 0 Ω

AD Instruments
4
©Copyright Abacanto Digital SA.
Manual de usuario AD1106
Recomendaciones de seguridad
-Lea las siguientes recomendaciones de seguridad cuidadosamente antes
de intentar usar o reparar el medidor.
-Use el medidor sólo como se especifica en este manual, en caso
contrario la protección que proporciona el equipo puede verse alterada.
-Condiciones de uso medioambientales:
a.- Uso en interiores
b.- Instalaciones categoría III 200V.
c.- Grado de polución 2
d.- Altitud hasta 2.000 metros
e.- Humedad relativa máxima 80%
f.- Temperatura de funcionamiento 0º ~ 40º C
- Tenga presentes los siguientes símbolos eléctricos internacionales
El medidor está protegido mediante aislamiento doble o reforzado.
¡Precaución! Vea este manual antes de usar el equipo
AC … Corriente alterna
DC … Corriente continua
Nota: No use este equipo en un sistema activo.

AD Instruments
5
©Copyright Abacanto Digital SA.
Manual de usuario AD1106
Características
§Medida de la impedancia real de sistemas de altavoces a 1KHz.
§Tres rangos de medida (20 Ω / 200 Ω / 2KΩ) lo que permite medir
sistemas de cine en casa y sistemas de sonido comerciales.
§Funcionamiento portátil mediante baterías.
§Indicación de batería baja.
§Función de retención de los datos de la medida.
§Ajuste de 0 Ω.

AD Instruments
6
©Copyright Abacanto Digital SA.
Manual de usuario AD1106
Especificaciones
Rango de medida
20Ω / 200Ω / 2KΩ
Frecuencia de prueba
1Khz.
Precisión
20Ω: ±2% de la lectura ±2 dígitos o ±0,1Ω, la que sea mayor.
Protección
Cumple con IEC-1010 (EN61010), Instalación CAT III 200V
Alimentación
12V DC (8x1,5V baterías AA)
Dimensiones
175 (L) x 85 (A) x 75 (H) mm
Accesorios incluidos
Puntas de prueba, manual de instrucciones, maleta de transporte.
Indicador de batería baja
Aparece en la pantalla el símbolo
Indicación de retención de datos
Aparece en la pantalla el símbolo
Pantalla
LCD de 3 ½ dígitos (2.000 cuentas)
Peso
Aproximadamente 620 gr (con las baterías incluidas).

AD Instruments
7
©Copyright Abacanto Digital SA.
Manual de usuario AD1106
Métodos de medida
Antes de proceder con la medida, lea las recomendaciones de seguridad de la
página 4.
1.- Asegúrese de que el sistema a medir no está conectado.
2.- Cuando esté realizando una medida si aparece en la pantalla el símbolo
deberá sustituir las baterías.
3.- Pong las puntas de prueba en cortocircuito. Ajuste el valor de 0Ω mediante
el correspondiente mando para tener una lectura de cero.
4.- Ponga el mando giratorio en la posición más adecuada para la medida a
realizar y pulse a continuación la tecla TEST para efectuar la medida y
presentar la lectura en la pantalla.
5.- Deberá hacer un dibujo del sistema antes de medirlo de forma que pueda
saber que la medida que está haciendo es atribuible a la red del sistema.
6.- Mida la potencia del sistema hasta 10 W.
P = Z I2
P = V2/ Z
Por ejemplo en un sistema de 100V:
Si P = 50W, Z = V2/P = 1002/ 50 = 200Ω
(1) El medidor puede medir una carga de hasta 2KΩ (10W en una línea de
100V).
(2) El medidor no puede medir un sistema de 100V con una potencia inferior a
10W.

AD Instruments
8
©Copyright Abacanto Digital SA.
Manual de usuario AD1106
7.- Comprobación de un altavoz:
Los altavoces generalmente tienen una impedancia de 2Ω a 16Ω, por lo que
deberá usar el rango de 20Ω, para altavoces de mayor impedancia use los
rangos de 200Ω o 2KΩ.
8.- Comprobación de un sistema de altavoces en paralelo:
Pongamos por ejemplo el siguiente sistema de altavoces en paralelo usando
una configuración de 100V.
Z = V2/ P = 1002/ (10+50+200) = 38,46Ω
(1) Si la Z medida es más pequeña, compruebe que no hay cables
cortocircuitados, o altavoces o transformadores estropeados.
(2) Si la Z medida es más grande, compruebe el cableado o los componentes
(altavoces, transformadores o conexiones).

AD Instruments
9
©Copyright Abacanto Digital SA.
Manual de usuario AD1106
Mantenimiento
Sustitución de la batería:
Cuando aparezca en la pantalla el símbolo , sustituya las baterías por
otras nuevas mediante el siguiente procedimiento:
(1) Desconecte las puntas de prueba del equipo y apáguelo.
(2) Use un destornillador para quitar los tornillos de la tapa trasera y deslícela,
quite las baterías viejas y sustitúyalas por otras nuevas del tipo AA.
(3) Coloque de nuevo la tapa en su sitio y fíjela atornillando de nuevo los dos
tornillos.
Limpieza y almacenamiento:
PRECAUCIÓN
Para evitar descargas eléctricas o daños al equipo, no deje caer agua dentro
del mismo.
Limpie periódicamente la carcasa del equipo con un paño humedecido con agua
jabonosa (no utilice abrasivos ni disolventes).
Si el equipo no va a utilizarse durante períodos mayores a 60 días, quite las
baterías y almacénelas por separado.
Debido a nuestra política de mejora continua y de desarrollo, nos reservamos el derecho a
modificar las especificaciones sin previo aviso.

AD Instruments
10
©Copyright Abacanto Digital SA.
Manual de usuario AD1106
AUDIO IMPEDANCE TESTER
INSTRUCTION MANUAL

AD Instruments
11
©Copyright Abacanto Digital SA.
Manual de usuario AD1106
INDEX
INSTRUMENT LAYOUT......................... 1
SAFETY NOTES ................................... 2
FEATURES ........................................... 3
SPECIFICATIONS ................................ 4
MEASURING METHODS...................... 5-6
MAINTENANCE..................................... 7

AD Instruments
12
©Copyright Abacanto Digital SA.
Manual de usuario AD1106
INSTRUMENT LAYOUT
(1)
(2) (3) (4) (5) (6)
(1) Jacks For Test Leads Connection
(2) LCD
(3) TEST ON/OFF button
(4) DATA HOLD button
(5) Rotary switch for function selection
(6) 0Ω adjustment.

AD Instruments
13
©Copyright Abacanto Digital SA.
Manual de usuario AD1106
SAFETY NOTES
Read the following safety information carefully before attempting to
operate or service the meter.
Use the meter only as specified in this manual : otherwise the protection
provided by the meter may be impaired.
Rated environmental conditions :
(1) Indoor use.
(2) Installation CAT. 200V.
(3) Pollution Degree 2.
(4) Altitude up to 2000 Meter.
(5) Relative Humidity 80% Max.
(6) Ambient Temperature
0°C—40°C
¢ J
.
Observe the International Electrical Symbols listed below.
Meter is protected throughout by double insulation or reinforced
insulation.
Warning ! Risk of electric shock.
Caution ! Refer to this manual before using the meter.
Note
G
Do not use on Live system.

AD Instruments
14
©Copyright Abacanto Digital SA.
Manual de usuario AD1106
FEATURES
·True measurement of speaker systems actual impedance at 1kHz.
·Three test ranges(20 Ω/200 Ω/2k Ω) allow testing of home theater
and commercial sound systems.
·Convenient portable battery operation. Low battery
indication.
·Data hold function.
·0 Ω adjustment.

AD Instruments
15
©Copyright Abacanto Digital SA.
Manual de usuario AD1106
SPECIFICATIONS
·Measurement Range
20 Ω/200 Ω/2kΩ
·Test frequency:
1kHz
·Accuracy:
20 : ± 2%rdg ± 2dgt or ± 0.1 Ω, which is greater.
200 Ω/2kΩ: ± 2%rdg ± 2dgt
·Protection:
Meets IEC-1010(EN61010),Installation CAT. 200V
·Power Requirements:
12VDC(8 x 1.5V “AA“ batteries)
·Dimensions
175(L) x 85(W) x 75(D)mm
·Included Accessories:
Test leads, instruction manual, carry case
·Low battery indication
““symbol appears on the display
·Data hold indication :
“HOLD“ symbol appears on the display
·Display :
LCD 3% digit(2000 counts)
·Weight :
Approx. 620g(battery included)

MEASURING METHODS
BEFORE PROCEEDING MEASUREMENT, READ SAFETY NOTES ON PAGE 3.
1. Ensure the system under test is not live.
2. In proceeding with measurement, if ” ”symbol appears on the
display, replace with new batteries.
3. Short the tips of the leads. Adjust the 0 Ω.ADJ control to set the reading of
zero.
4. Rotary the function switch to suitable range then press the pushbutton to
test and take the reading.
5. A drawing of the system should be made before testing so the
measurement can be attributed to network.
6. Measure system power-an 10W up.
P=ZI2
P=V2 I Z
For example on a 100V system:
If P=50W Z=V2 I P=1002 I50=200
(1) The tester can measure load down to 2k Ω.(10W at
100V line).
(2) The tester can’t measure 100V system with power lower than 10W.

AD Instruments
_____________________________________________________________________
©Copyright Abacanto Digital SA.
Manual de usuario AD300
17
7. Checking a speaker:
Speakers are general from 2 Ω to 16 Ω , use 20 Ω range or for higher
impedance speaker, use 200 Ω or 2k Ω range.
8. Checking a PA system:
For example on a PA system, using a 100V configuration
Z=V2 I P=1002 I P=10000I(10+50+200)=38.46
(1) If Z measured is lower, check for short circuited wires or faulty speakers
or transformers.
(2) If Z measured is higher, check for wiring or components (speakers,
transformers or connections).

AD Instruments
_____________________________________________________________________
©Copyright Abacanto Digital SA.
Manual de usuario AD300
18
MAINTENANCE
·Battery Replacement :
·When the symbol ” ”appears on the display, replace with new
batteries as follows :
(1) Disconnect the test leads from the instrument and turn off the power.
(2) Use a screwdriver to unscrew the screws on back cover then slide the
cover, take out the batteries and replace with new batteries type ”AA”.
(3) Place back cover and secure bay 2 screws.
·Cleaning And Storage :
WARNING
To avoid electrical shock or damage to
the meter, do not get water inside the case.
Periodically wipe the case with a damp cloth and detergent : do not
use abrasives or solvents.
If the meter is not to be used for periods of longer than 60 days, remove the
batteries and store them separately.
Due to our policy of constant improvement and development, we reserve the right to change
specifications without notice.
Table of contents
Languages:
Other ADInstruments Test Equipment manuals
