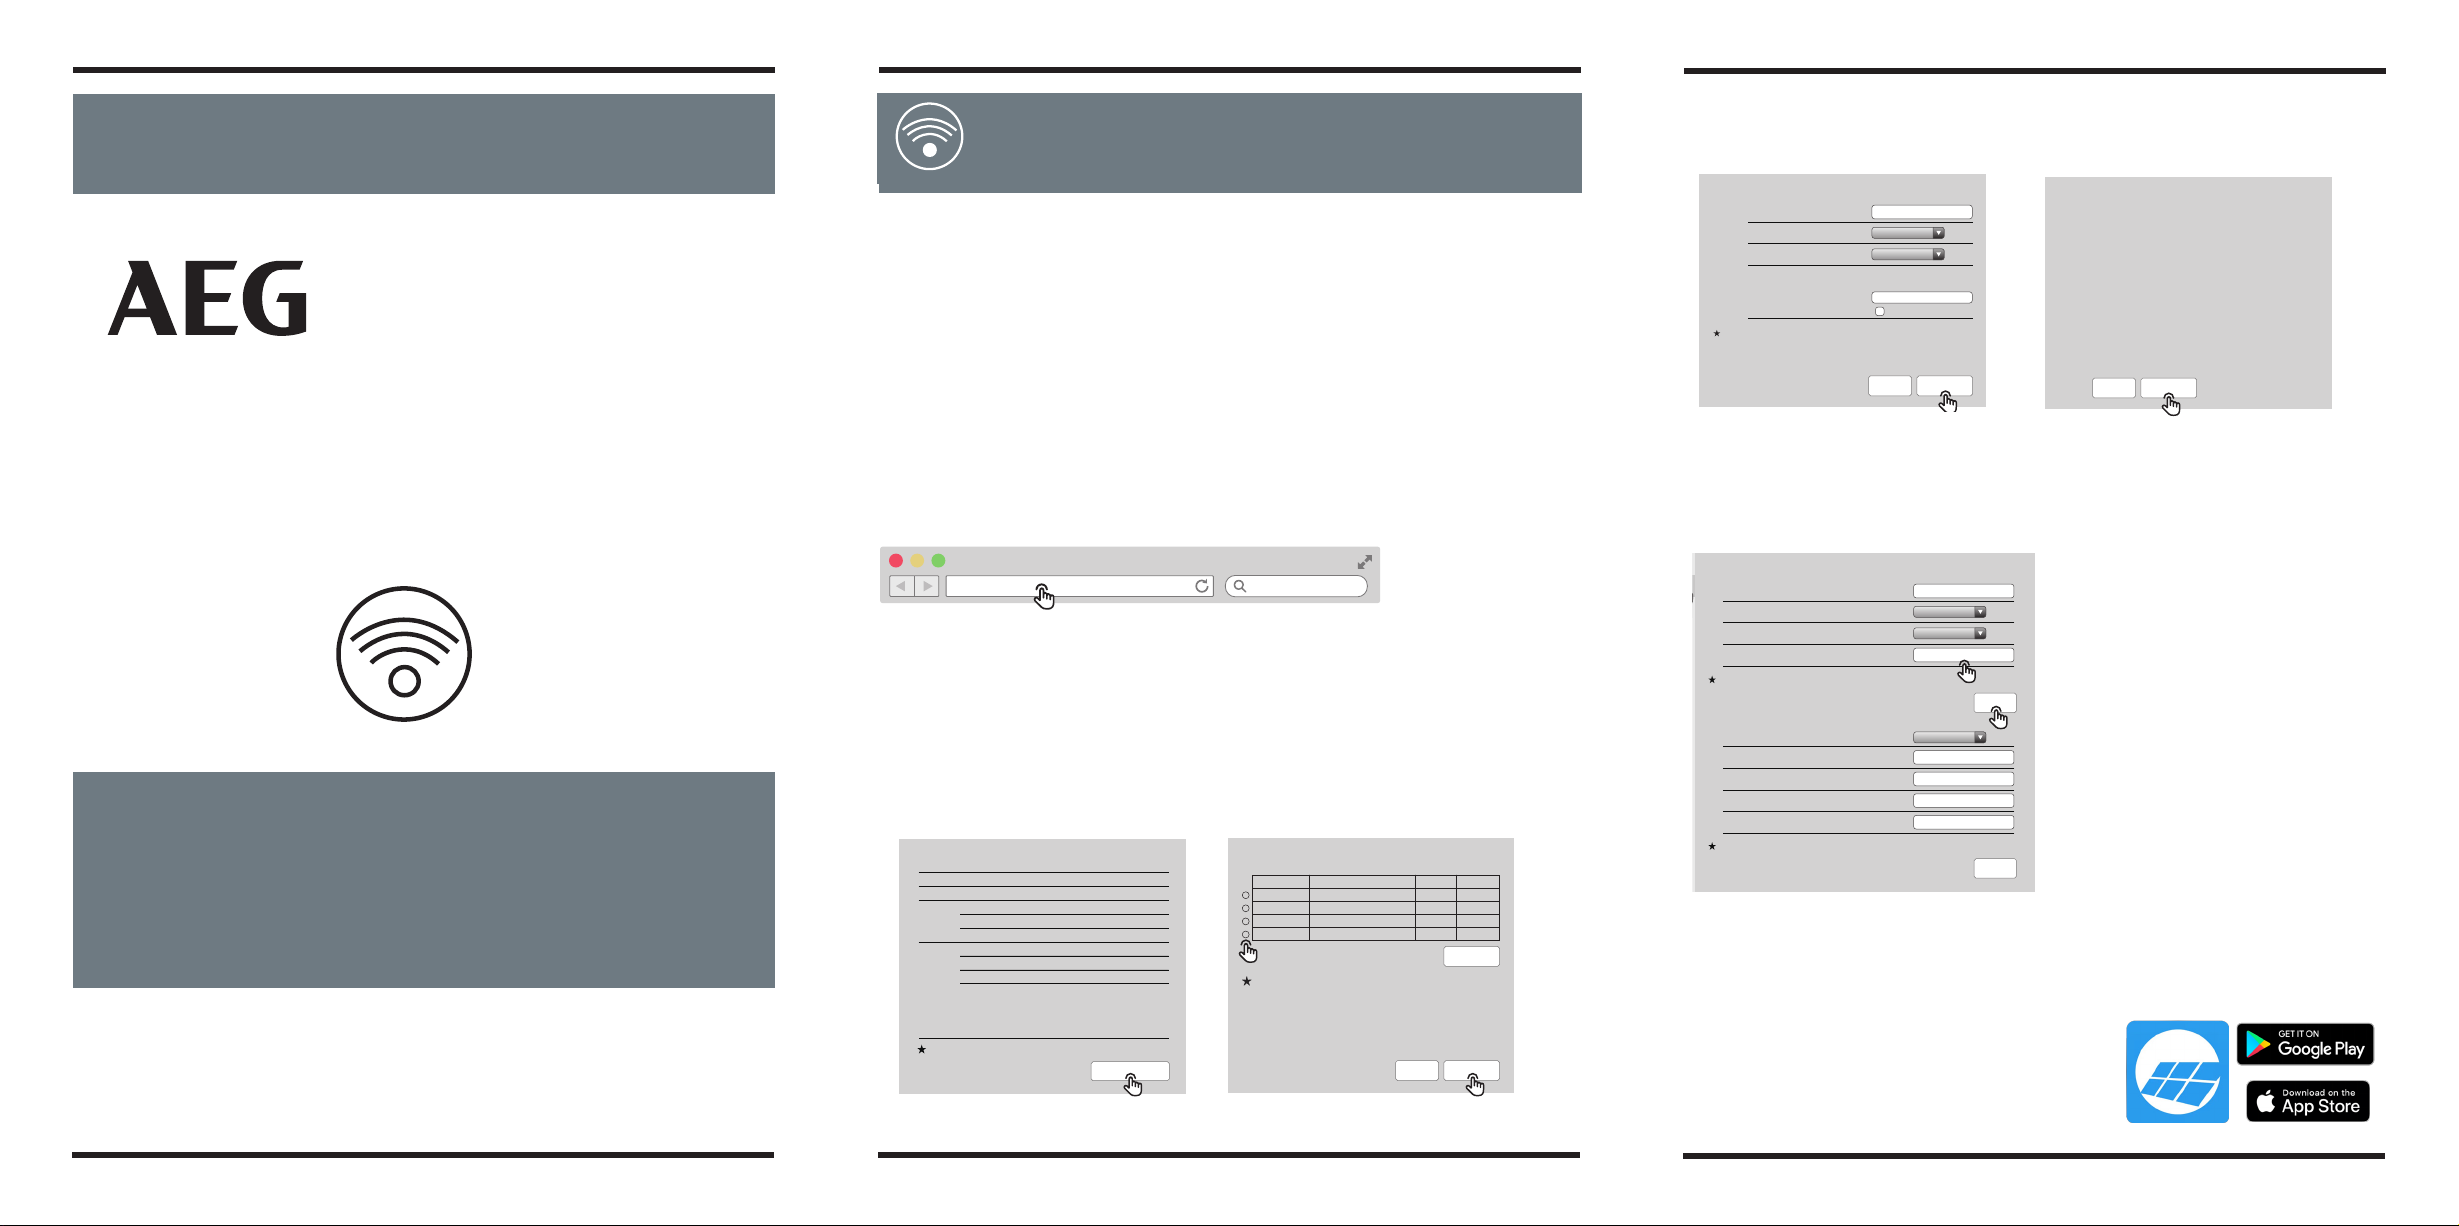
Section 2. Wi-Fi Configuration
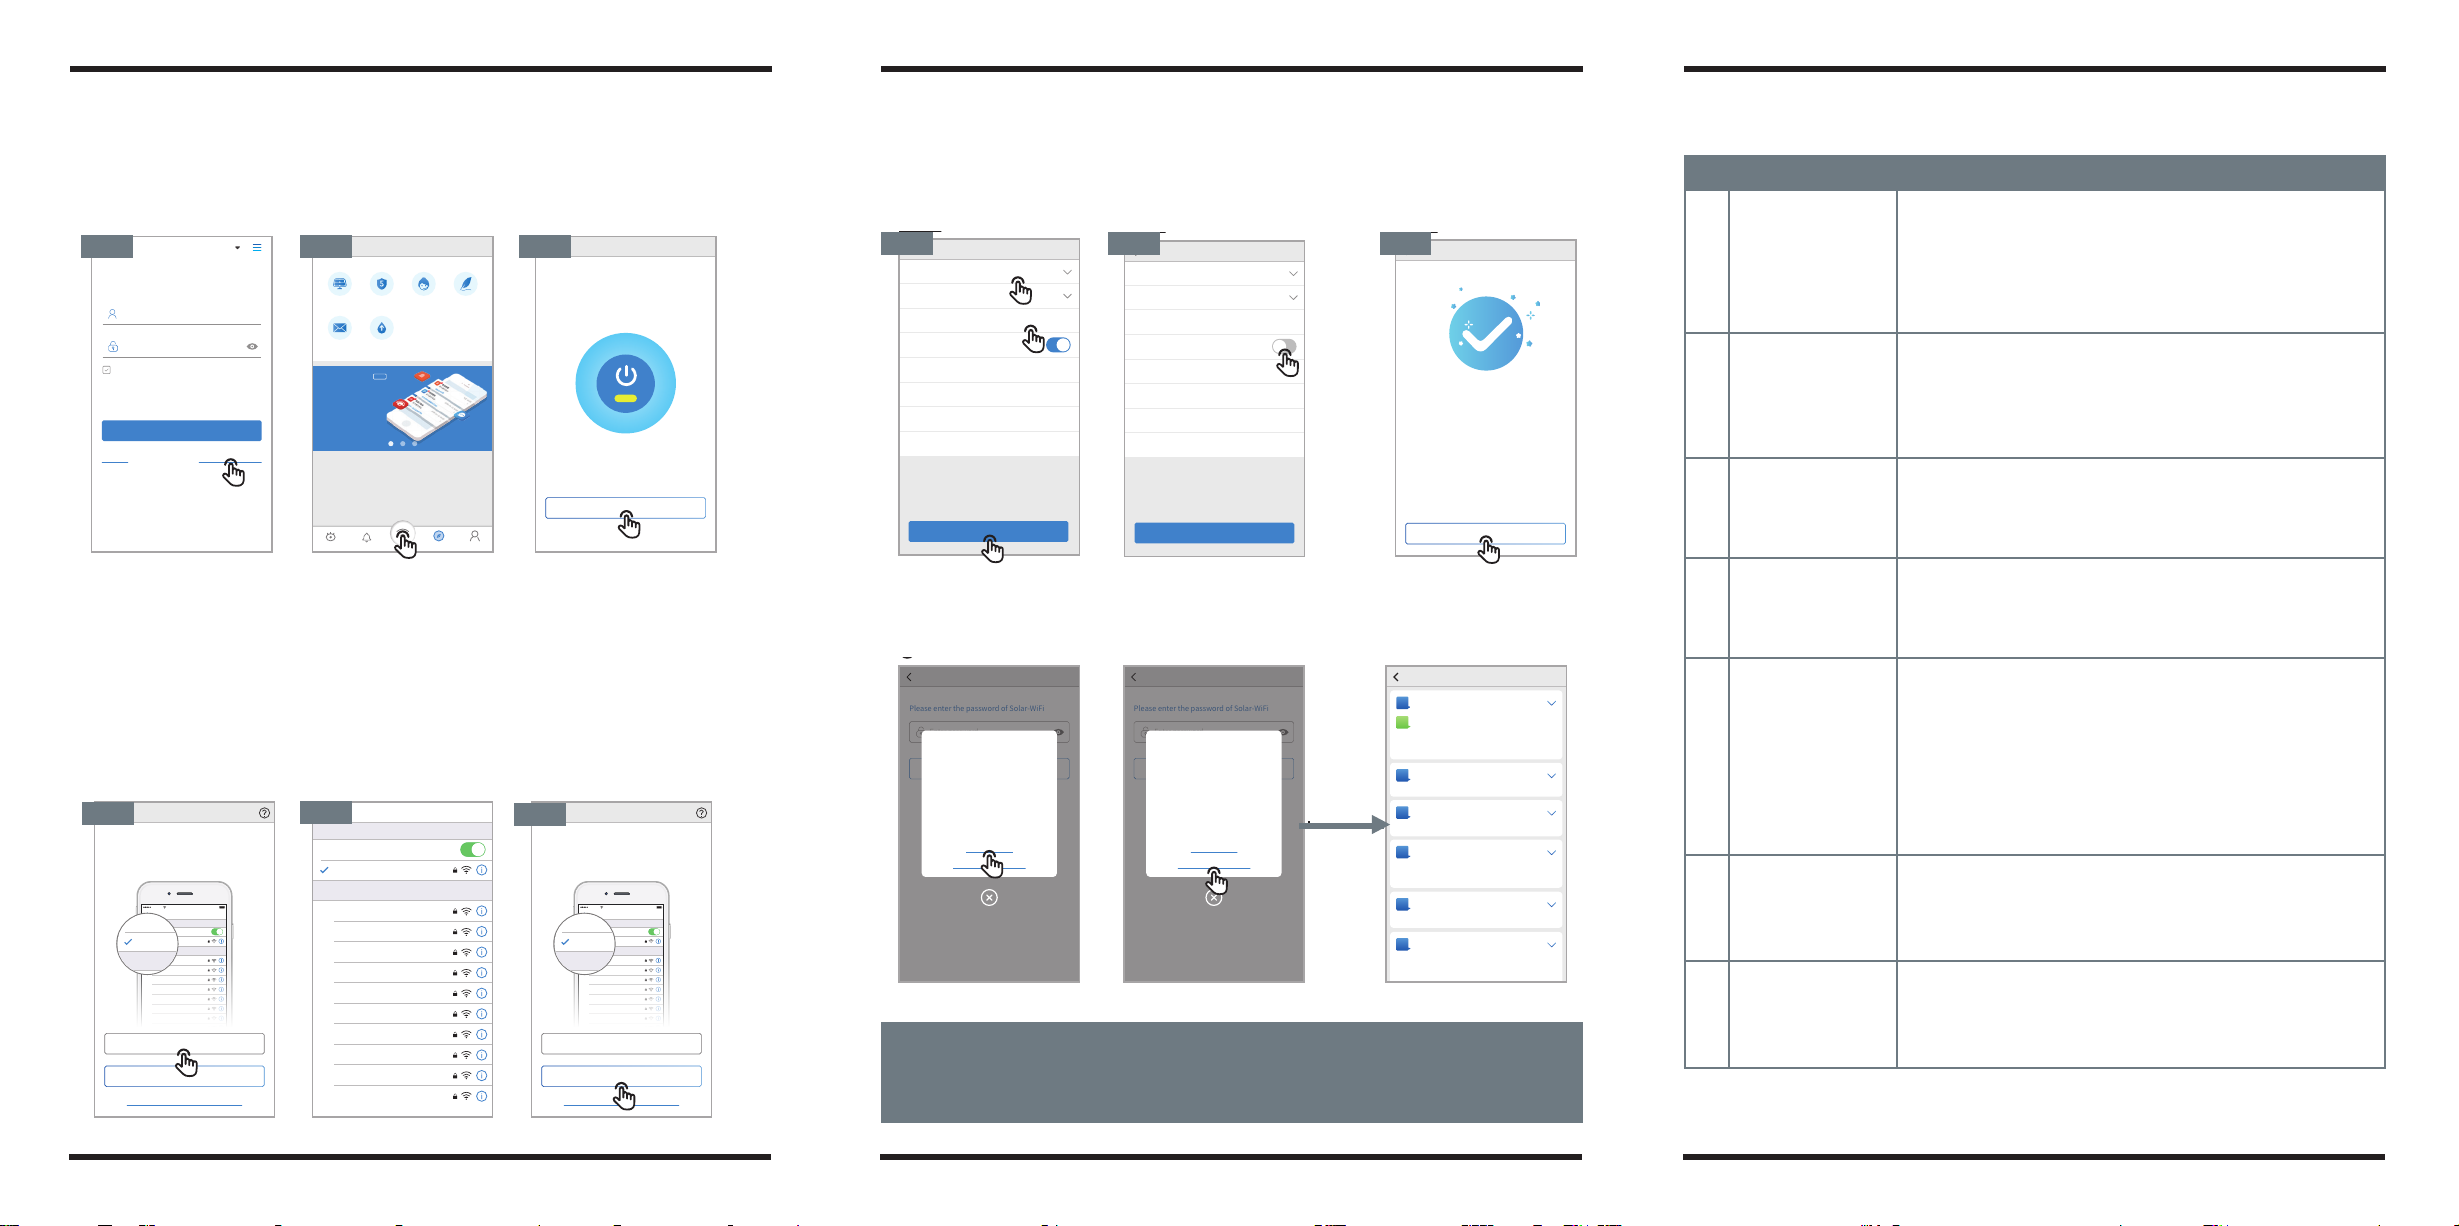
Step 1. Click "Wi-Fi Configuration" at login page or click Wi-Fi icon at homepage.
Step 2. Make sure inverter is power on and then click "Next".
Step 3. Click "Go into WLAN setting interface".
Step 4. Connect smart device to SolarWiFi*and then return to Wi-Fi configuration page of
the AEG Inverter Monitoring Portal.
Please visit www.aeg-industrialsolar.de to download the latest version of this document.
Solar Solutions reserves the right of final explanation to this document and its attachments.
Wi-Fi Configuration
Please open WLAN, connect to Solar-WiFi*
Can't enter the next step? Click me
(* is the last 8 digits of the device serial
number, the passoword is 12345678)
Next
Go into WLAN setting interface
Wi-Fi
Settings
Wi-Fi
Solar-WiFi187W0001
Solar-WiFi*
Blackmore-zhouji-1
Blackmore-zhouji-2
MINDSTEC
QNQYJSH
synpower_guest
Tp-LINK-DOC1
Tp-LINK-DOC2
Tp-LINK-DOC3
Tp-LINK-DOC4
CHOOSE A NETWORK...
4:21 PM 100%
CMCC
Wi-Fi
Settings
Wi-Fi
Solar-WiFi187W0001
Solar-WiFi*
Blackmore-zhouji-1
Blackmore-zhouji-2
MINDSTEC
QNQYJSH
synpower_guest
Tp-LINK-DOC1
Tp-LINK-DOC2
Tp-LINK-DOC3
Tp-LINK-DOC4
CHOOSE A NETWORK...
4:21 PM 100%
CMCC
Wi-Fi
Settings
Wi-Fi
Solar-WiFi187W0001
Solar-WiFi*
Blackmore2
Blackmore1
MINDSTEC
QNQYJSH
synpower_guest
Tp-LINK-DOC1
Tp-LINK-DOC2
Tp-LINK-DOC3
Tp-LINK-DOC4
CHOOSE A NETWORK...
Wi-Fi Configuration
Please open WLAN, connect to Solar-WiFi*
Can't enter the next step? Click me
(* is the last 8 digits of the device serial
number, the passoword is 12345678)
Next
Go into WLAN setting interface
Wi-Fi
Settings
Wi-Fi
Solar-WiFi187W0001
Solar-WiFi*
Blackmore-zhouji-1
Blackmore-zhouji-2
MINDSTEC
QNQYJSH
synpower_guest
Tp-LINK-DOC1
Tp-LINK-DOC2
Tp-LINK-DOC3
Tp-LINK-DOC4
CHOOSE A NETWORK...
4:21 PM 100%
CMCC
Wi-Fi
Settings
Wi-Fi
Solar-WiFi187W0001
Solar-WiFi*
Blackmore-zhouji-1
Blackmore-zhouji-2
MINDSTEC
QNQYJSH
synpower_guest
Tp-LINK-DOC1
Tp-LINK-DOC2
Tp-LINK-DOC3
Tp-LINK-DOC4
CHOOSE A NETWORK...
4:21 PM 100%
CMCC
Step 3 Step 4 Step 5
Wi-Fi Network
Wi-Fi Network
Encryption
Password
DHCP
IP Address
Subnet Mask
Gateway Address
DNS Server
Please select a router
Enter Password
0.0.0.0
0.0.0.0
0.0.0.0
0.0.0.0
Set
Step 6 Step 6
Wi-Fi Network
Wi-Fi Network
Encryption
Password
DHCP
IP Address
Subnet Mask
Gateway Address
DNS Server
Please select a router
Enter Password
0.0.0.0
0.0.0.0
0.0.0.0
0.0.0.0
Set
Successful Configuration
The inverter has connected to the routers
wireless network. It is connecting to the server
and uploading data to the cloud. It may take
several minutes.
Please switch your mobile phone network back to
the router wireless network, or turn off the WiFi to
open data traffic, and then click confirm.
OK
Wi-Fi Configuration
Step 7
English
Email Address
Remember
Register
SEMS PORTAL V2.1.0
Wi-Fi Configuration
Forget password?
Please input your password.
Login
Wi-Fi Configuration
Make sure the inverter is powered on.
When the inverter indicator lights, click "Next"
Next
Plants Discovery
GDPR
Contacts
Push
Setting
Create
Plant
Warranty After-Sales Feedback
Alarms Me
Message Centre New
Fault information
Message of System
Discovery
Step 1 Step 1 Step 2
Enter password
Set
Please enter the password of Solar-WiFi
Enter password
Connect
Reconfigure
Configuration help
WiFi configuration error!
You can try these following methods:
1. Please check the inverter panel
indicator to ensure that the inverter is
powered on
2. Please keep the mobile phone as close
as possible to the inverter and keep the
connection distance
Enter password
Set
Please enter the password of Solar-WiFi
Enter password
Connect
Reconfigure
Configuration help
WiFi configuration error!
You can try these following methods:
1. Please check the inverter panel
indicator to ensure that the inverter is
powered on
2. Please keep the mobile phone as close
as possible to the inverter and keep the
connection distance
Configuration Help
Q
A
What is the WiFi hotspot name of the
inverter?
Solar-Wi-Fi,or Solar-Wi-Fi*(
*represents the last eight characters
of the device serial number)
QWhat is the access password for the
Wi-Fi hotspot of the inverter?
QWhy can't my phone find the Wi-Fi
hotspot of the inverter?
QInverter Wi-Fi hotpost is unstable
and often falls off
QUnable to connect inverter
Wi-Fi hotspot (or display " wrong
password")
Q
In the process of Wi-Fi configuration,
there is no target router hotspot in
the Wi-Fi hotspot list of the inverter
You may click "Reconfigure" or follow the instructionsof "Configuration Help" if t he configuration w as not successful.
Troubleshooting Advice
No.
1
2
3
4
5
6
7
Unable to find Solar-WiFi or
Solar-Wi-Fi*
Unable to connect to
Solar-WiFi or Solar-Wi-Fi*
1. Check if inverter is power on and Wi-Fi module is well attached.
2. Make sure your smart device is close to the inverter.
3. Restart inverter.
4. Press "Wi-FI Reload" button to have Wi-Fi module back to default
mode and follow above Wi-Fi configuration steps again.
Unable to login website
10.10.100.253
Unable to find router SSID
Problem Troubleshooting
1. Try password: 12345678;
2. Check there is any device connected to the Solar-Wi-Fi* already.
3. Press "WiFi Reload" button to have Wi-Fi module back to default mode
and follow above Wi-Fi configuration steps again.
4. Restart inverter and try Wi-Fi configuration again.
5. Check if there is any unacceptable character in the password.
1. Press "WiFi Reload" button to have Wi-Fi module back to default mode
and follow above Wi-Fi configuration steps again.
2. Switch to preferred browsers such as Google Chrome FireFox, IE, Safari.
1. Move the router closer to inverter or use a Wi-Fi router;
2. Check if the channel number of router is higher than 13. If yes, modify it
into a lower number at router configuration page.
1. Restart the inverter.
2. Check if the SSID, encryption method, encryption algorithm and
password on Wi-Fi configuration page is the same with that of WiFiRouter
and correct if different.
3. Check if the maximum amount of devices allowed to connect to the WiFi
router has exceeded. If yes, please disconnect some devices or expand the
router limitation.
4. Restart WiFi Router.
5. Mover WiFi Router closer to the inverter or use a wireless repeater to
enhance Wi-Fi signal.
Wi-Fi LED indicator blinks
twice continuously with all
configuration steps done
Wi-Fi LED indicator blinks
four times continuously
when all configuration
steps done
Offline status of inverter on
SEMS Portal with Wi-Fi LED
indicator always
1. Connect smart device to non-inverter Wi-Fi and access the AEG Inverter
Monitoring Portal to check if the inverter is online
2. Restart the WiFi Router and the inverter.
1. Please wait a few minutes for data transmission and check on AEG
Inverter Monitoring Portal later
Step 5. Click "Next".
Step 6. Enter Wi-Fi network name and password accordingly and then click "Set". Please switch off
DHCP first and input IP address if you want to change inverter's IP into a specific one.
Step 7. Confirm and then click "OK".
It is strongly recommended that you change the password of your "Solar-WiFi*" before or after the installation. The manufactur-
er will NOT be responsible for any of the privacy information leakage caused by using the default password of "Solar-WiFi*". For
how to change the password of "Solar-WiFi*", please refer to "Section 3. More Information" of "Option 1. Web Configuration".
- 04 -- 03 - - 05 -
Solar Solutions GmbH | Brückenstrasse 94 60594 Frankfurt am Main, Germany | +49 (0)69400500810
www.aeg-industrialsolar.de | AEG is a registered trademark used under license from AB Electrolux (publ).
Section 2. Wi-Fi Configuration
Step 1. Click "Wi-Fi Configuration" at login page or click Wi-Fi icon at homepage.
Step 2. Make sure inverter is power on and then click "Next".
Step 3. Click "Go into WLAN setting interface".
Step 4. Connect smart device to SolarWiFi*and then return to Wi-Fi configuration page of
the AEG Inverter Monitoring Portal.
Please visit www.aeg-industrialsolar.de to download the latest version of this document.
Solar Solutions reserves the right of final explanation to this document and its attachments.
Wi-Fi Configuration
Please open WLAN, connect to Solar-WiFi*
Can't enter the next step? Click me
(* is the last 8 digits of the device serial
number, the passoword is 12345678)
Next
Go into WLAN setting interface
Wi-Fi
Settings
Wi-Fi
Solar-WiFi187W0001
Solar-WiFi*
Blackmore-zhouji-1
Blackmore-zhouji-2
MINDSTEC
QNQYJSH
synpower_guest
Tp-LINK-DOC1
Tp-LINK-DOC2
Tp-LINK-DOC3
Tp-LINK-DOC4
CHOOSE A NETWORK...
4:21 PM 100%
CMCC
Wi-Fi
Settings
Wi-Fi
Solar-WiFi187W0001
Solar-WiFi*
Blackmore-zhouji-1
Blackmore-zhouji-2
MINDSTEC
QNQYJSH
synpower_guest
Tp-LINK-DOC1
Tp-LINK-DOC2
Tp-LINK-DOC3
Tp-LINK-DOC4
CHOOSE A NETWORK...
4:21 PM 100%
CMCC
Wi-Fi
Settings
Wi-Fi
Solar-WiFi187W0001
Solar-WiFi*
Blackmore2
Blackmore1
MINDSTEC
QNQYJSH
synpower_guest
Tp-LINK-DOC1
Tp-LINK-DOC2
Tp-LINK-DOC3
Tp-LINK-DOC4
CHOOSE A NETWORK...
Wi-Fi Configuration
Please open WLAN, connect to Solar-WiFi*
Can't enter the next step? Click me
(* is the last 8 digits of the device serial
number, the passoword is 12345678)
Next
Go into WLAN setting interface
Wi-Fi
Settings
Wi-Fi
Solar-WiFi187W0001
Solar-WiFi*
Blackmore-zhouji-1
Blackmore-zhouji-2
MINDSTEC
QNQYJSH
synpower_guest
Tp-LINK-DOC1
Tp-LINK-DOC2
Tp-LINK-DOC3
Tp-LINK-DOC4
CHOOSE A NETWORK...
4:21 PM 100%
CMCC
Wi-Fi
Settings
Wi-Fi
Solar-WiFi187W0001
Solar-WiFi*
Blackmore-zhouji-1
Blackmore-zhouji-2
MINDSTEC
QNQYJSH
synpower_guest
Tp-LINK-DOC1
Tp-LINK-DOC2
Tp-LINK-DOC3
Tp-LINK-DOC4
CHOOSE A NETWORK...
4:21 PM 100%
CMCC
Step 3 Step 4 Step 5
Wi-Fi Network
Wi-Fi Network
Encryption
Password
DHCP
IP Address
Subnet Mask
Gateway Address
DNS Server
Please select a router
Enter Password
0.0.0.0
0.0.0.0
0.0.0.0
0.0.0.0
Set
Step 6 Step 6
Wi-Fi Network
Wi-Fi Network
Encryption
Password
DHCP
IP Address
Subnet Mask
Gateway Address
DNS Server
Please select a router
Enter Password
0.0.0.0
0.0.0.0
0.0.0.0
0.0.0.0
Set
Successful Configuration
The inverter has connected to the routers
wireless network. It is connecting to the server
and uploading data to the cloud. It may take
several minutes.
Please switch your mobile phone network back to
the router wireless network, or turn off the WiFi to
open data traffic, and then click confirm.
OK
Wi-Fi Configuration
Step 7
English
Email Address
Remember
Register
SEMS PORTAL V2.1.0
Wi-Fi Configuration
Forget password?
Please input your password.
Login
Wi-Fi Configuration
Make sure the inverter is powered on.
When the inverter indicator lights, click "Next"
Next
Plants Discovery
GDPR
Contacts
Push
Setting
Create
Plant
Warranty After-Sales Feedback
Alarms Me
Message Centre New
Fault information
Message of System
Discovery
Step 1 Step 1 Step 2
Enter password
Set
Please enter the password of Solar-WiFi
Enter password
Connect
Reconfigure
Configuration help
WiFi configuration error!
You can try these following methods:
1. Please check the inverter panel
indicator to ensure that the inverter is
powered on
2. Please keep the mobile phone as close
as possible to the inverter and keep the
connection distance
Enter password
Set
Please enter the password of Solar-WiFi
Enter password
Connect
Reconfigure
Configuration help
WiFi configuration error!
You can try these following methods:
1. Please check the inverter panel
indicator to ensure that the inverter is
powered on
2. Please keep the mobile phone as close
as possible to the inverter and keep the
connection distance
Configuration Help
Q
A
What is the WiFi hotspot name of the
inverter?
Solar-Wi-Fi,or Solar-Wi-Fi*(
*represents the last eight characters
of the device serial number)
QWhat is the access password for the
Wi-Fi hotspot of the inverter?
QWhy can't my phone find the Wi-Fi
hotspot of the inverter?
QInverter Wi-Fi hotpost is unstable
and often falls off
QUnable to connect inverter
Wi-Fi hotspot (or display " wrong
password")
Q
In the process of Wi-Fi configuration,
there is no target router hotspot in
the Wi-Fi hotspot list of the inverter
You may click "Reconfigure" or follow the instructionsof "Configuration Help" if t he configuration w as not successful.
Troubleshooting Advice
No.
1
2
3
4
5
6
7
Unable to find Solar-WiFi or
Solar-Wi-Fi*
Unable to connect to
Solar-WiFi or Solar-Wi-Fi*
1. Check if inverter is power on and Wi-Fi module is well attached.
2. Make sure your smart device is close to the inverter.
3. Restart inverter.
4. Press "Wi-FI Reload" button to have Wi-Fi module back to default
mode and follow above Wi-Fi configuration steps again.
Unable to login website
10.10.100.253
Unable to find router SSID
Problem Troubleshooting
1. Try password: 12345678;
2. Check there is any device connected to the Solar-Wi-Fi* already.
3. Press "WiFi Reload" button to have Wi-Fi module back to default mode
and follow above Wi-Fi configuration steps again.
4. Restart inverter and try Wi-Fi configuration again.
5. Check if there is any unacceptable character in the password.
1. Press "WiFi Reload" button to have Wi-Fi module back to default mode
and follow above Wi-Fi configuration steps again.
2. Switch to preferred browsers such as Google Chrome FireFox, IE, Safari.
1. Move the router closer to inverter or use a Wi-Fi router;
2. Check if the channel number of router is higher than 13. If yes, modify it
into a lower number at router configuration page.
1. Restart the inverter.
2. Check if the SSID, encryption method, encryption algorithm and
password on Wi-Fi configuration page is the same with that of WiFiRouter
and correct if different.
3. Check if the maximum amount of devices allowed to connect to the WiFi
router has exceeded. If yes, please disconnect some devices or expand the
router limitation.
4. Restart WiFi Router.
5. Mover WiFi Router closer to the inverter or use a wireless repeater to
enhance Wi-Fi signal.
Wi-Fi LED indicator blinks
twice continuously with all
configuration steps done
Wi-Fi LED indicator blinks
four times continuously
when all configuration
steps done
Offline status of inverter on
SEMS Portal with Wi-Fi LED
indicator always
1. Connect smart device to non-inverter Wi-Fi and access the AEG Inverter
Monitoring Portal to check if the inverter is online
2. Restart the WiFi Router and the inverter.
1. Please wait a few minutes for data transmission and check on AEG
Inverter Monitoring Portal later
Step 5. Click "Next".
Step 6. Enter Wi-Fi network name and password accordingly and then click "Set". Please switch off
DHCP first and input IP address if you want to change inverter's IP into a specific one.
Step 7. Confirm and then click "OK".
It is strongly recommended that you change the password of your "Solar-WiFi*" before or after the installation. The manufactur-
er will NOT be responsible for any of the privacy information leakage caused by using the default password of "Solar-WiFi*". For
how to change the password of "Solar-WiFi*", please refer to "Section 3. More Information" of "Option 1. Web Configuration".
- 04 -- 03 - - 05 -
Solar Solutions GmbH | Brückenstrasse 94 60594 Frankfurt am Main, Germany | +49 (0)69400500810
www.aeg-industrialsolar.de | AEG is a registered trademark used under license from AB Electrolux (publ).
2. WIFI CONFIGURATION
STEP #1 - Click on „WiFi Configuration“ in
the Login page or click the WiFi icon on the
Homepage
STEP #2 - Make sure the
inverter is powered on;
click „Next“
Section 2. Wi-Fi Configuration
Step 1. Click "Wi-Fi Configuration" at login page or click Wi-Fi icon at homepage.
Step 2. Make sure inverter is power on and then click "Next".
Step 3. Click "Go into WLAN setting interface".
Step 4. Connect smart device to SolarWiFi*and then return to Wi-Fi configuration page of
the AEG Inverter Monitoring Portal.
Please visit www.aeg-industrialsolar.de to download the latest version of this document.
Solar Solutions reserves the right of final explanation to this document and its attachments.
Wi-Fi Configuration
Please open WLAN, connect to Solar-WiFi*
Can't enter the next step? Click me
(* is the last 8 digits of the device serial
number, the passoword is 12345678)
Next
Go into WLAN setting interface
Wi-Fi
Settings
Wi-Fi
Solar-WiFi187W0001
Solar-WiFi*
Blackmore-zhouji-1
Blackmore-zhouji-2
MINDSTEC
QNQYJSH
synpower_guest
Tp-LINK-DOC1
Tp-LINK-DOC2
Tp-LINK-DOC3
Tp-LINK-DOC4
CHOOSE A NETWORK...
4:21 PM 100%
CMCC
Wi-Fi
Settings
Wi-Fi
Solar-WiFi187W0001
Solar-WiFi*
Blackmore-zhouji-1
Blackmore-zhouji-2
MINDSTEC
QNQYJSH
synpower_guest
Tp-LINK-DOC1
Tp-LINK-DOC2
Tp-LINK-DOC3
Tp-LINK-DOC4
CHOOSE A NETWORK...
4:21 PM 100%
CMCC
Wi-Fi
Settings
Wi-Fi
Solar-WiFi187W0001
Solar-WiFi*
Blackmore2
Blackmore1
MINDSTEC
QNQYJSH
synpower_guest
Tp-LINK-DOC1
Tp-LINK-DOC2
Tp-LINK-DOC3
Tp-LINK-DOC4
CHOOSE A NETWORK...
Wi-Fi Configuration
Please open WLAN, connect to Solar-WiFi*
Can't enter the next step? Click me
(* is the last 8 digits of the device serial
number, the passoword is 12345678)
Next
Go into WLAN setting interface
Wi-Fi
Settings
Wi-Fi
Solar-WiFi187W0001
Solar-WiFi*
Blackmore-zhouji-1
Blackmore-zhouji-2
MINDSTEC
QNQYJSH
synpower_guest
Tp-LINK-DOC1
Tp-LINK-DOC2
Tp-LINK-DOC3
Tp-LINK-DOC4
CHOOSE A NETWORK...
4:21 PM 100%
CMCC
Wi-Fi
Settings
Wi-Fi
Solar-WiFi187W0001
Solar-WiFi*
Blackmore-zhouji-1
Blackmore-zhouji-2
MINDSTEC
QNQYJSH
synpower_guest
Tp-LINK-DOC1
Tp-LINK-DOC2
Tp-LINK-DOC3
Tp-LINK-DOC4
CHOOSE A NETWORK...
4:21 PM 100%
CMCC
Step 3 Step 4 Step 5
Wi-Fi Network
Wi-Fi Network
Encryption
Password
DHCP
IP Address
Subnet Mask
Gateway Address
DNS Server
Please select a router
Enter Password
0.0.0.0
0.0.0.0
0.0.0.0
0.0.0.0
Set
Step 6 Step 6
Wi-Fi Network
Wi-Fi Network
Encryption
Password
DHCP
IP Address
Subnet Mask
Gateway Address
DNS Server
Please select a router
Enter Password
0.0.0.0
0.0.0.0
0.0.0.0
0.0.0.0
Set
Successful Configuration
The inverter has connected to the routers
wireless network. It is connecting to the server
and uploading data to the cloud. It may take
several minutes.
Please switch your mobile phone network back to
the router wireless network, or turn off the WiFi to
open data traffic, and then click confirm.
OK
Wi-Fi Configuration
Step 7
English
Email Address
Remember
Register
SEMS PORTAL V2.1.0
Wi-Fi Configuration
Forget password?
Please input your password.
Login
Wi-Fi Configuration
Make sure the inverter is powered on.
When the inverter indicator lights, click "Next"
Next
Plants Discovery
GDPR
Contacts
Push
Setting
Create
Plant
Warranty After-Sales Feedback
Alarms Me
Message Centre New
Fault information
Message of System
Discovery
Step 1 Step 1 Step 2
Enter password
Set
Please enter the password of Solar-WiFi
Enter password
Connect
Reconfigure
Configuration help
WiFi configuration error!
You can try these following methods:
1. Please check the inverter panel
indicator to ensure that the inverter is
powered on
2. Please keep the mobile phone as close
as possible to the inverter and keep the
connection distance
Enter password
Set
Please enter the password of Solar-WiFi
Enter password
Connect
Reconfigure
Configuration help
WiFi configuration error!
You can try these following methods:
1. Please check the inverter panel
indicator to ensure that the inverter is
powered on
2. Please keep the mobile phone as close
as possible to the inverter and keep the
connection distance
Configuration Help
Q
A
What is the WiFi hotspot name of the
inverter?
Solar-Wi-Fi,or Solar-Wi-Fi*(
*represents the last eight characters
of the device serial number)
QWhat is the access password for the
Wi-Fi hotspot of the inverter?
QWhy can't my phone find the Wi-Fi
hotspot of the inverter?
QInverter Wi-Fi hotpost is unstable
and often falls off
QUnable to connect inverter
Wi-Fi hotspot (or display " wrong
password")
Q
In the process of Wi-Fi configuration,
there is no target router hotspot in
the Wi-Fi hotspot list of the inverter
You may click "Reconfigure" or follow the instructionsof "Configuration Help" if t he configuration w as not successful.
Troubleshooting Advice
No.
1
2
3
4
5
6
7
Unable to find Solar-WiFi or
Solar-Wi-Fi*
Unable to connect to
Solar-WiFi or Solar-Wi-Fi*
1. Check if inverter is power on and Wi-Fi module is well attached.
2. Make sure your smart device is close to the inverter.
3. Restart inverter.
4. Press "Wi-FI Reload" button to have Wi-Fi module back to default
mode and follow above Wi-Fi configuration steps again.
Unable to login website
10.10.100.253
Unable to find router SSID
Problem Troubleshooting
1. Try password: 12345678;
2. Check there is any device connected to the Solar-Wi-Fi* already.
3. Press "WiFi Reload" button to have Wi-Fi module back to default mode
and follow above Wi-Fi configuration steps again.
4. Restart inverter and try Wi-Fi configuration again.
5. Check if there is any unacceptable character in the password.
1. Press "WiFi Reload" button to have Wi-Fi module back to default mode
and follow above Wi-Fi configuration steps again.
2. Switch to preferred browsers such as Google Chrome FireFox, IE, Safari.
1. Move the router closer to inverter or use a Wi-Fi router;
2. Check if the channel number of router is higher than 13. If yes, modify it
into a lower number at router configuration page.
1. Restart the inverter.
2. Check if the SSID, encryption method, encryption algorithm and
password on Wi-Fi configuration page is the same with that of WiFiRouter
and correct if different.
3. Check if the maximum amount of devices allowed to connect to the WiFi
router has exceeded. If yes, please disconnect some devices or expand the
router limitation.
4. Restart WiFi Router.
5. Mover WiFi Router closer to the inverter or use a wireless repeater to
enhance Wi-Fi signal.
Wi-Fi LED indicator blinks
twice continuously with all
configuration steps done
Wi-Fi LED indicator blinks
four times continuously
when all configuration
steps done
Offline status of inverter on
SEMS Portal with Wi-Fi LED
indicator always
1. Connect smart device to non-inverter Wi-Fi and access the AEG Inverter
Monitoring Portal to check if the inverter is online
2. Restart the WiFi Router and the inverter.
1. Please wait a few minutes for data transmission and check on AEG
Inverter Monitoring Portal later
Step 5. Click "Next".
Step 6. Enter Wi-Fi network name and password accordingly and then click "Set". Please switch off
DHCP first and input IP address if you want to change inverter's IP into a specific one.
Step 7. Confirm and then click "OK".
It is strongly recommended that you change the password of your "Solar-WiFi*" before or after the installation. The manufactur-
er will NOT be responsible for any of the privacy information leakage caused by using the default password of "Solar-WiFi*". For
how to change the password of "Solar-WiFi*", please refer to "Section 3. More Information" of "Option 1. Web Configuration".
- 04 -- 03 - - 05 -
Solar Solutions GmbH | Brückenstrasse 94 60594 Frankfurt am Main, Germany | +49 (0)69400500810
www.aeg-industrialsolar.de | AEG is a registered trademark used under license from AB Electrolux (publ).
STEP #3 - Click on
„Go into WLAN (WiFi)
setting interface“
STEP #4 - Connect
your smart device
to „Solar WiFi*“.
Return to the
WiFi configuration
page of the AEG
monitoring portal
STEP #5- Click „Next“
Section 2. Wi-Fi Configuration
Step 1. Click "Wi-Fi Configuration" at login page or click Wi-Fi icon at homepage.
Step 2. Make sure inverter is power on and then click "Next".
Step 3. Click "Go into WLAN setting interface".
Step 4. Connect smart device to SolarWiFi*and then return to Wi-Fi configuration page of
the AEG Inverter Monitoring Portal.
Please visit www.aeg-industrialsolar.de to download the latest version of this document.
Solar Solutions reserves the right of final explanation to this document and its attachments.
Wi-Fi Configuration
Please open WLAN, connect to Solar-WiFi*
Can't enter the next step? Click me
(* is the last 8 digits of the device serial
number, the passoword is 12345678)
Next
Go into WLAN setting interface
Wi-Fi
Settings
Wi-Fi
Solar-WiFi187W0001
Solar-WiFi*
Blackmore-zhouji-1
Blackmore-zhouji-2
MINDSTEC
QNQYJSH
synpower_guest
Tp-LINK-DOC1
Tp-LINK-DOC2
Tp-LINK-DOC3
Tp-LINK-DOC4
CHOOSE A NETWORK...
4:21 PM 100%
CMCC
Wi-Fi
Settings
Wi-Fi
Solar-WiFi187W0001
Solar-WiFi*
Blackmore-zhouji-1
Blackmore-zhouji-2
MINDSTEC
QNQYJSH
synpower_guest
Tp-LINK-DOC1
Tp-LINK-DOC2
Tp-LINK-DOC3
Tp-LINK-DOC4
CHOOSE A NETWORK...
4:21 PM 100%
CMCC
Wi-Fi
Settings
Wi-Fi
Solar-WiFi187W0001
Solar-WiFi*
Blackmore2
Blackmore1
MINDSTEC
QNQYJSH
synpower_guest
Tp-LINK-DOC1
Tp-LINK-DOC2
Tp-LINK-DOC3
Tp-LINK-DOC4
CHOOSE A NETWORK...
Wi-Fi Configuration
Please open WLAN, connect to Solar-WiFi*
Can't enter the next step? Click me
(* is the last 8 digits of the device serial
number, the passoword is 12345678)
Next
Go into WLAN setting interface
Wi-Fi
Settings
Wi-Fi
Solar-WiFi187W0001
Solar-WiFi*
Blackmore-zhouji-1
Blackmore-zhouji-2
MINDSTEC
QNQYJSH
synpower_guest
Tp-LINK-DOC1
Tp-LINK-DOC2
Tp-LINK-DOC3
Tp-LINK-DOC4
CHOOSE A NETWORK...
4:21 PM 100%
CMCC
Wi-Fi
Settings
Wi-Fi
Solar-WiFi187W0001
Solar-WiFi*
Blackmore-zhouji-1
Blackmore-zhouji-2
MINDSTEC
QNQYJSH
synpower_guest
Tp-LINK-DOC1
Tp-LINK-DOC2
Tp-LINK-DOC3
Tp-LINK-DOC4
CHOOSE A NETWORK...
4:21 PM 100%
CMCC
Step 3 Step 4 Step 5
Wi-Fi Network
Wi-Fi Network
Encryption
Password
DHCP
IP Address
Subnet Mask
Gateway Address
DNS Server
Please select a router
Enter Password
0.0.0.0
0.0.0.0
0.0.0.0
0.0.0.0
Set
Step 6 Step 6
Wi-Fi Network
Wi-Fi Network
Encryption
Password
DHCP
IP Address
Subnet Mask
Gateway Address
DNS Server
Please select a router
Enter Password
0.0.0.0
0.0.0.0
0.0.0.0
0.0.0.0
Set
Successful Configuration
The inverter has connected to the routers
wireless network. It is connecting to the server
and uploading data to the cloud. It may take
several minutes.
Please switch your mobile phone network back to
the router wireless network, or turn off the WiFi to
open data traffic, and then click confirm.
OK
Wi-Fi Configuration
Step 7
English
Email Address
Remember
Register
SEMS PORTAL V2.1.0
Wi-Fi Configuration
Forget password?
Please input your password.
Login
Wi-Fi Configuration
Make sure the inverter is powered on.
When the inverter indicator lights, click "Next"
Next
Plants Discovery
GDPR
Contacts
Push
Setting
Create
Plant
Warranty After-Sales Feedback
Alarms Me
Message Centre New
Fault information
Message of System
Discovery
Step 1 Step 1 Step 2
Enter password
Set
Please enter the password of Solar-WiFi
Enter password
Connect
Reconfigure
Configuration help
WiFi configuration error!
You can try these following methods:
1. Please check the inverter panel
indicator to ensure that the inverter is
powered on
2. Please keep the mobile phone as close
as possible to the inverter and keep the
connection distance
Enter password
Set
Please enter the password of Solar-WiFi
Enter password
Connect
Reconfigure
Configuration help
WiFi configuration error!
You can try these following methods:
1. Please check the inverter panel
indicator to ensure that the inverter is
powered on
2. Please keep the mobile phone as close
as possible to the inverter and keep the
connection distance
Configuration Help
Q
A
What is the WiFi hotspot name of the
inverter?
Solar-Wi-Fi,or Solar-Wi-Fi*(
*represents the last eight characters
of the device serial number)
QWhat is the access password for the
Wi-Fi hotspot of the inverter?
QWhy can't my phone find the Wi-Fi
hotspot of the inverter?
QInverter Wi-Fi hotpost is unstable
and often falls off
QUnable to connect inverter
Wi-Fi hotspot (or display " wrong
password")
Q
In the process of Wi-Fi configuration,
there is no target router hotspot in
the Wi-Fi hotspot list of the inverter
You may click "Reconfigure" or follow the instructionsof "Configuration Help" if t he configuration w as not successful.
Troubleshooting Advice
No.
1
2
3
4
5
6
7
Unable to find Solar-WiFi or
Solar-Wi-Fi*
Unable to connect to
Solar-WiFi or Solar-Wi-Fi*
1. Check if inverter is power on and Wi-Fi module is well attached.
2. Make sure your smart device is close to the inverter.
3. Restart inverter.
4. Press "Wi-FI Reload" button to have Wi-Fi module back to default
mode and follow above Wi-Fi configuration steps again.
Unable to login website
10.10.100.253
Unable to find router SSID
Problem Troubleshooting
1. Try password: 12345678;
2. Check there is any device connected to the Solar-Wi-Fi* already.
3. Press "WiFi Reload" button to have Wi-Fi module back to default mode
and follow above Wi-Fi configuration steps again.
4. Restart inverter and try Wi-Fi configuration again.
5. Check if there is any unacceptable character in the password.
1. Press "WiFi Reload" button to have Wi-Fi module back to default mode
and follow above Wi-Fi configuration steps again.
2. Switch to preferred browsers such as Google Chrome FireFox, IE, Safari.
1. Move the router closer to inverter or use a Wi-Fi router;
2. Check if the channel number of router is higher than 13. If yes, modify it
into a lower number at router configuration page.
1. Restart the inverter.
2. Check if the SSID, encryption method, encryption algorithm and
password on Wi-Fi configuration page is the same with that of WiFiRouter
and correct if different.
3. Check if the maximum amount of devices allowed to connect to the WiFi
router has exceeded. If yes, please disconnect some devices or expand the
router limitation.
4. Restart WiFi Router.
5. Mover WiFi Router closer to the inverter or use a wireless repeater to
enhance Wi-Fi signal.
Wi-Fi LED indicator blinks
twice continuously with all
configuration steps done
Wi-Fi LED indicator blinks
four times continuously
when all configuration
steps done
Offline status of inverter on
SEMS Portal with Wi-Fi LED
indicator always
1. Connect smart device to non-inverter Wi-Fi and access the AEG Inverter
Monitoring Portal to check if the inverter is online
2. Restart the WiFi Router and the inverter.
1. Please wait a few minutes for data transmission and check on AEG
Inverter Monitoring Portal later
Step 5. Click "Next".
Step 6. Enter Wi-Fi network name and password accordingly and then click "Set". Please switch off
DHCP first and input IP address if you want to change inverter's IP into a specific one.
Step 7. Confirm and then click "OK".
It is strongly recommended that you change the password of your "Solar-WiFi*" before or after the installation. The manufactur-
er will NOT be responsible for any of the privacy information leakage caused by using the default password of "Solar-WiFi*". For
how to change the password of "Solar-WiFi*", please refer to "Section 3. More Information" of "Option 1. Web Configuration".
- 04 -- 03 - - 05 -
Solar Solutions GmbH | Brückenstrasse 94 60594 Frankfurt am Main, Germany | +49 (0)69400500810
www.aeg-industrialsolar.de | AEG is a registered trademark used under license from AB Electrolux (publ).
1 1 2
345
STEP #6 - Enter WiFi network name and password. Click
„Set“. Switch o the DHCP first and input the IP address if
you want to change the inverter IP to a specific one.
STEP #7 -Confirm
and click „OK“
Section 2. Wi-Fi Configuration
Step 1. Click "Wi-Fi Configuration" at login page or click Wi-Fi icon at homepage.
Step 2. Make sure inverter is power on and then click "Next".
Step 3. Click "Go into WLAN setting interface".
Step 4. Connect smart device to SolarWiFi*and then return to Wi-Fi configuration page of
the AEG Inverter Monitoring Portal.
Please visit www.aeg-industrialsolar.de to download the latest version of this document.
Solar Solutions reserves the right of final explanation to this document and its attachments.
Wi-Fi Configuration
Please open WLAN, connect to Solar-WiFi*
Can't enter the next step? Click me
(* is the last 8 digits of the device serial
number, the passoword is 12345678)
Next
Go into WLAN setting interface
Wi-Fi
Settings
Wi-Fi
Solar-WiFi187W0001
Solar-WiFi*
Blackmore-zhouji-1
Blackmore-zhouji-2
MINDSTEC
QNQYJSH
synpower_guest
Tp-LINK-DOC1
Tp-LINK-DOC2
Tp-LINK-DOC3
Tp-LINK-DOC4
CHOOSE A NETWORK...
4:21 PM 100%
CMCC
Wi-Fi
Settings
Wi-Fi
Solar-WiFi187W0001
Solar-WiFi*
Blackmore-zhouji-1
Blackmore-zhouji-2
MINDSTEC
QNQYJSH
synpower_guest
Tp-LINK-DOC1
Tp-LINK-DOC2
Tp-LINK-DOC3
Tp-LINK-DOC4
CHOOSE A NETWORK...
4:21 PM 100%
CMCC
Wi-Fi
Settings
Wi-Fi
Solar-WiFi187W0001
Solar-WiFi*
Blackmore2
Blackmore1
MINDSTEC
QNQYJSH
synpower_guest
Tp-LINK-DOC1
Tp-LINK-DOC2
Tp-LINK-DOC3
Tp-LINK-DOC4
CHOOSE A NETWORK...
Wi-Fi Configuration
Please open WLAN, connect to Solar-WiFi*
Can't enter the next step? Click me
(* is the last 8 digits of the device serial
number, the passoword is 12345678)
Next
Go into WLAN setting interface
Wi-Fi
Settings
Wi-Fi
Solar-WiFi187W0001
Solar-WiFi*
Blackmore-zhouji-1
Blackmore-zhouji-2
MINDSTEC
QNQYJSH
synpower_guest
Tp-LINK-DOC1
Tp-LINK-DOC2
Tp-LINK-DOC3
Tp-LINK-DOC4
CHOOSE A NETWORK...
4:21 PM 100%
CMCC
Wi-Fi
Settings
Wi-Fi
Solar-WiFi187W0001
Solar-WiFi*
Blackmore-zhouji-1
Blackmore-zhouji-2
MINDSTEC
QNQYJSH
synpower_guest
Tp-LINK-DOC1
Tp-LINK-DOC2
Tp-LINK-DOC3
Tp-LINK-DOC4
CHOOSE A NETWORK...
4:21 PM 100%
CMCC
Wi-Fi Network
Wi-Fi Network
Encryption
Password
DHCP
IP Address
Subnet Mask
Gateway Address
DNS Server
Please select a router
Enter Password
0.0.0.0
0.0.0.0
0.0.0.0
0.0.0.0
Set
Step 6 Step 6
Wi-Fi Network
Wi-Fi Network
Encryption
Password
DHCP
IP Address
Subnet Mask
Gateway Address
DNS Server
Please select a router
Enter Password
0.0.0.0
0.0.0.0
0.0.0.0
0.0.0.0
Set
Successful Configuration
The inverter has connected to the routers
wireless network. It is connecting to the server
and uploading data to the cloud. It may take
several minutes.
Please switch your mobile phone network back to
the router wireless network, or turn off the WiFi to
open data traffic, and then click confirm.
OK
Wi-Fi Configuration
Step 7
English
Email Address
Remember
Register
SEMS PORTAL V2.1.0
Wi-Fi Configuration
Forget password?
Please input your password.
Login
Wi-Fi Configuration
Make sure the inverter is powered on.
When the inverter indicator lights, click "Next"
Next
Plants Discovery
GDPR
Contacts
Push
Setting
Create
Plant
Warranty After-Sales Feedback
Alarms Me
Message Centre New
Fault information
Message of System
Discovery
Step 1 Step 1 Step 2
Enter password
Set
Please enter the password of Solar-WiFi
Enter password
Connect
Reconfigure
Configuration help
WiFi configuration error!
You can try these following methods:
1. Please check the inverter panel
indicator to ensure that the inverter is
powered on
2. Please keep the mobile phone as close
as possible to the inverter and keep the
connection distance
Enter password
Set
Please enter the password of Solar-WiFi
Enter password
Connect
Reconfigure
Configuration help
WiFi configuration error!
You can try these following methods:
1. Please check the inverter panel
indicator to ensure that the inverter is
powered on
2. Please keep the mobile phone as close
as possible to the inverter and keep the
connection distance
Configuration Help
Q
A
What is the WiFi hotspot name of the
inverter?
Solar-Wi-Fi,or Solar-Wi-Fi*(
*represents the last eight characters
of the device serial number)
QWhat is the access password for the
Wi-Fi hotspot of the inverter?
QWhy can't my phone find the Wi-Fi
hotspot of the inverter?
QInverter Wi-Fi hotpost is unstable
and often falls off
QUnable to connect inverter
Wi-Fi hotspot (or display " wrong
password")
Q
In the process of Wi-Fi configuration,
there is no target router hotspot in
the Wi-Fi hotspot list of the inverter
You may click "Reconfigure" or follow the instructionsof "Configuration Help" if t he configuration w as not successful.
Troubleshooting Advice
No.
1
2
3
4
5
6
7
Unable to find Solar-WiFi or
Solar-Wi-Fi*
Unable to connect to
Solar-WiFi or Solar-Wi-Fi*
1. Check if inverter is power on and Wi-Fi module is well attached.
2. Make sure your smart device is close to the inverter.
3. Restart inverter.
4. Press "Wi-FI Reload" button to have Wi-Fi module back to default
mode and follow above Wi-Fi configuration steps again.
Unable to login website
10.10.100.253
Unable to find router SSID
Problem Troubleshooting
1. Try password: 12345678;
2. Check there is any device connected to the Solar-Wi-Fi* already.
3. Press "WiFi Reload" button to have Wi-Fi module back to default mode
and follow above Wi-Fi configuration steps again.
4. Restart inverter and try Wi-Fi configuration again.
5. Check if there is any unacceptable character in the password.
1. Press "WiFi Reload" button to have Wi-Fi module back to default mode
and follow above Wi-Fi configuration steps again.
2. Switch to preferred browsers such as Google Chrome FireFox, IE, Safari.
1. Move the router closer to inverter or use a Wi-Fi router;
2. Check if the channel number of router is higher than 13. If yes, modify it
into a lower number at router configuration page.
1. Restart the inverter.
2. Check if the SSID, encryption method, encryption algorithm and
password on Wi-Fi configuration page is the same with that of WiFiRouter
and correct if different.
3. Check if the maximum amount of devices allowed to connect to the WiFi
router has exceeded. If yes, please disconnect some devices or expand the
router limitation.
4. Restart WiFi Router.
5. Mover WiFi Router closer to the inverter or use a wireless repeater to
enhance Wi-Fi signal.
Wi-Fi LED indicator blinks
twice continuously with all
configuration steps done
Wi-Fi LED indicator blinks
four times continuously
when all configuration
steps done
Offline status of inverter on
SEMS Portal with Wi-Fi LED
indicator always
1. Connect smart device to non-inverter Wi-Fi and access the AEG Inverter
Monitoring Portal to check if the inverter is online
2. Restart the WiFi Router and the inverter.
1. Please wait a few minutes for data transmission and check on AEG
Inverter Monitoring Portal later
Step 5. Click "Next".
Step 6. Enter Wi-Fi network name and password accordingly and then click "Set". Please switch off
DHCP first and input IP address if you want to change inverter's IP into a specific one.
Step 7. Confirm and then click "OK".
It is strongly recommended that you change the password of your "Solar-WiFi*" before or after the installation. The manufactur-
er will NOT be responsible for any of the privacy information leakage caused by using the default password of "Solar-WiFi*". For
how to change the password of "Solar-WiFi*", please refer to "Section 3. More Information" of "Option 1. Web Configuration".
- 04 -- 03 - - 05 -
Solar Solutions GmbH | Brückenstrasse 94 60594 Frankfurt am Main, Germany | +49 (0)69400500810
www.aeg-industrialsolar.de | AEG is a registered trademark used under license from AB Electrolux (publ).
If the configuration was not successful, you can click on „Reconfigure“ or
follow the instructions on „Configuration Help“.
Section 2. Wi-Fi Configuration
Step 1. Click "Wi-Fi Configuration" at login page or click Wi-Fi icon at homepage.
Step 2. Make sure inverter is power on and then click "Next".
Step 3. Click "Go into WLAN setting interface".
Step 4. Connect smart device to SolarWiFi*and then return to Wi-Fi configuration page of
the AEG Inverter Monitoring Portal.
Please visit www.aeg-industrialsolar.de to download the latest version of this document.
Solar Solutions reserves the right of final explanation to this document and its attachments.
Wi-Fi Configuration
Please open WLAN, connect to Solar-WiFi*
Can't enter the next step? Click me
(* is the last 8 digits of the device serial
number, the passoword is 12345678)
Next
Go into WLAN setting interface
Wi-Fi
Settings
Wi-Fi
Solar-WiFi187W0001
Solar-WiFi*
Blackmore-zhouji-1
Blackmore-zhouji-2
MINDSTEC
QNQYJSH
synpower_guest
Tp-LINK-DOC1
Tp-LINK-DOC2
Tp-LINK-DOC3
Tp-LINK-DOC4
CHOOSE A NETWORK...
4:21 PM 100%
CMCC
Wi-Fi
Settings
Wi-Fi
Solar-WiFi187W0001
Solar-WiFi*
Blackmore-zhouji-1
Blackmore-zhouji-2
MINDSTEC
QNQYJSH
synpower_guest
Tp-LINK-DOC1
Tp-LINK-DOC2
Tp-LINK-DOC3
Tp-LINK-DOC4
CHOOSE A NETWORK...
4:21 PM 100%
CMCC
Wi-Fi
Settings
Wi-Fi
Solar-WiFi187W0001
Solar-WiFi*
Blackmore2
Blackmore1
MINDSTEC
QNQYJSH
synpower_guest
Tp-LINK-DOC1
Tp-LINK-DOC2
Tp-LINK-DOC3
Tp-LINK-DOC4
CHOOSE A NETWORK...
Wi-Fi Configuration
Please open WLAN, connect to Solar-WiFi*
Can't enter the next step? Click me
(* is the last 8 digits of the device serial
number, the passoword is 12345678)
Next
Go into WLAN setting interface
Wi-Fi
Settings
Wi-Fi
Solar-WiFi187W0001
Solar-WiFi*
Blackmore-zhouji-1
Blackmore-zhouji-2
MINDSTEC
QNQYJSH
synpower_guest
Tp-LINK-DOC1
Tp-LINK-DOC2
Tp-LINK-DOC3
Tp-LINK-DOC4
CHOOSE A NETWORK...
4:21 PM 100%
CMCC
Wi-Fi
Settings
Wi-Fi
Solar-WiFi187W0001
Solar-WiFi*
Blackmore-zhouji-1
Blackmore-zhouji-2
MINDSTEC
QNQYJSH
synpower_guest
Tp-LINK-DOC1
Tp-LINK-DOC2
Tp-LINK-DOC3
Tp-LINK-DOC4
CHOOSE A NETWORK...
4:21 PM 100%
CMCC
Step 3 Step 4 Step 5
Wi-Fi Network
Wi-Fi Network
Encryption
Password
DHCP
IP Address
Subnet Mask
Gateway Address
DNS Server
Please select a router
Enter Password
0.0.0.0
0.0.0.0
0.0.0.0
0.0.0.0
Set
Step 6 Step 6
Wi-Fi Network
Wi-Fi Network
Encryption
Password
DHCP
IP Address
Subnet Mask
Gateway Address
DNS Server
Please select a router
Enter Password
0.0.0.0
0.0.0.0
0.0.0.0
0.0.0.0
Set
Successful Configuration
The inverter has connected to the routers
wireless network. It is connecting to the server
and uploading data to the cloud. It may take
several minutes.
Please switch your mobile phone network back to
the router wireless network, or turn off the WiFi to
open data traffic, and then click confirm.
OK
Wi-Fi Configuration
Step 7
English
Email Address
Remember
Register
SEMS PORTAL V2.1.0
Wi-Fi Configuration
Forget password?
Please input your password.
Login
Wi-Fi Configuration
Make sure the inverter is powered on.
When the inverter indicator lights, click "Next"
Next
Plants Discovery
GDPR
Contacts
Push
Setting
Create
Plant
Warranty After-Sales Feedback
Alarms Me
Message Centre New
Fault information
Message of System
Discovery
Step 1 Step 1 Step 2
Enter password
Set
Please enter the password of Solar-WiFi
Enter password
Connect
Reconfigure
Configuration help
WiFi configuration error!
You can try these following methods:
1. Please check the inverter panel
indicator to ensure that the inverter is
powered on
2. Please keep the mobile phone as close
as possible to the inverter and keep the
connection distance
Enter password
Set
Please enter the password of Solar-WiFi
Enter password
Connect
Reconfigure
Configuration help
WiFi configuration error!
You can try these following methods:
1. Please check the inverter panel
indicator to ensure that the inverter is
powered on
2. Please keep the mobile phone as close
as possible to the inverter and keep the
connection distance
Configuration Help
Q
A
What is the WiFi hotspot name of the
inverter?
Solar-Wi-Fi,or Solar-Wi-Fi*(
*represents the last eight characters
of the device serial number)
QWhat is the access password for the
Wi-Fi hotspot of the inverter?
QWhy can't my phone find the Wi-Fi
hotspot of the inverter?
QInverter Wi-Fi hotpost is unstable
and often falls off
QUnable to connect inverter
Wi-Fi hotspot (or display " wrong
password")
Q
In the process of Wi-Fi configuration,
there is no target router hotspot in
the Wi-Fi hotspot list of the inverter
You may click "Reconfigure" or follow the instructionsof "Configuration Help" if t he configuration w as not successful.
Troubleshooting Advice
No.
1
2
3
4
5
6
7
Unable to find Solar-WiFi or
Solar-Wi-Fi*
Unable to connect to
Solar-WiFi or Solar-Wi-Fi*
1. Check if inverter is power on and Wi-Fi module is well attached.
2. Make sure your smart device is close to the inverter.
3. Restart inverter.
4. Press "Wi-FI Reload" button to have Wi-Fi module back to default
mode and follow above Wi-Fi configuration steps again.
Unable to login website
10.10.100.253
Unable to find router SSID
Problem Troubleshooting
1. Try password: 12345678;
2. Check there is any device connected to the Solar-Wi-Fi* already.
3. Press "WiFi Reload" button to have Wi-Fi module back to default mode
and follow above Wi-Fi configuration steps again.
4. Restart inverter and try Wi-Fi configuration again.
5. Check if there is any unacceptable character in the password.
1. Press "WiFi Reload" button to have Wi-Fi module back to default mode
and follow above Wi-Fi configuration steps again.
2. Switch to preferred browsers such as Google Chrome FireFox, IE, Safari.
1. Move the router closer to inverter or use a Wi-Fi router;
2. Check if the channel number of router is higher than 13. If yes, modify it
into a lower number at router configuration page.
1. Restart the inverter.
2. Check if the SSID, encryption method, encryption algorithm and
password on Wi-Fi configuration page is the same with that of WiFiRouter
and correct if different.
3. Check if the maximum amount of devices allowed to connect to the WiFi
router has exceeded. If yes, please disconnect some devices or expand the
router limitation.
4. Restart WiFi Router.
5. Mover WiFi Router closer to the inverter or use a wireless repeater to
enhance Wi-Fi signal.
Wi-Fi LED indicator blinks
twice continuously with all
configuration steps done
Wi-Fi LED indicator blinks
four times continuously
when all configuration
steps done
Offline status of inverter on
SEMS Portal with Wi-Fi LED
indicator always
1. Connect smart device to non-inverter Wi-Fi and access the AEG Inverter
Monitoring Portal to check if the inverter is online
2. Restart the WiFi Router and the inverter.
1. Please wait a few minutes for data transmission and check on AEG
Inverter Monitoring Portal later
Step 5. Click "Next".
Step 6. Enter Wi-Fi network name and password accordingly and then click "Set". Please switch off
DHCP first and input IP address if you want to change inverter's IP into a specific one.
Step 7. Confirm and then click "OK".
It is strongly recommended that you change the password of your "Solar-WiFi*" before or after the installation. The manufactur-
er will NOT be responsible for any of the privacy information leakage caused by using the default password of "Solar-WiFi*". For
how to change the password of "Solar-WiFi*", please refer to "Section 3. More Information" of "Option 1. Web Configuration".
- 04 -- 03 - - 05 -
Solar Solutions GmbH | Brückenstrasse 94 60594 Frankfurt am Main, Germany | +49 (0)69400500810
www.aeg-industrialsolar.de | AEG is a registered trademark used under license from AB Electrolux (publ).
TROUBLESHOOTING
Nr. Problem Troubleshooting instructions
1Unable to find Solar-
WiFi or
Solar-Wi-Fi*
1. Check if inverter is powered on and if the Wi-Fi module is well
connected.
2. Make sure your smart device is close enough to the inverter.
3. Restart the inverter.
4. Press the „WiFi Reload“ button to reset
the Wi-Fi module.
5. Repeat the WiFi configuration steps.
2Unable to connect to
Solar-WiFi or Solar-
Wi-Fi*
1. Try the password: 12345678;
2. Check if there is already another device connected to the Solar-Wi-Fi*.
3. Press the „Wi-FI Reload“ button to reset
the Wi-Fi module.
4. Restart the inverter and repeat the WiFi configuration steps.
5. Check if there is any invalid / not accepted character in the password.
3Unable to login at
10.10.100.253
1. Press the „Wi-FI Reload“ button to reset
the Wi-Fi module and repeat the WiFi configuration steps.
2. Switch to other browsers such as: (preferred) Google Chrome FireFox,
IE, Safari.
4Unable to find router
SSID
1. Move the WiFi router closer to the inverter or use a WiFi repeater;
2. Check if the channel number of the router is higher than 13. If yes,
change it into a lower number at the router configuration page.
5Wi-Fi LED indicator
keeps blinking twice
even if all configuration
steps were already
taken
1. Restart the inverter.
2. Check if the SSID, encryption method, encryption type and password
on the WiFi configuration page are the same as those of the WiFi
router. Correct if dierent.
3. Check if the maximum amount of devices allowed to connect to the
WiFi router was exceeded. If yes, please disconnect some devices or
modify the limitation.
4. Restart the WiFi router.
5. Move the WiFi router closer to the inverter or use a WiFi repeater to
enhance the WiFi signal
6The WiFi LED indicator
blinks four times
continuously even if all
configurations steps
were already taken
1. Connect the smart device to another WiFi network (not the one of
the inverter) and check in the AEG Monitoring Portal if the inverter
is online.
2. Restart the WiFi router and the inverter.
7The AEG Monitoring
Portal shows the
inverter is oline, but
the WiFi LED indicator
is always on
1. Please wait a few minutes for data transmission and check the AEG
Monitoring Portal later
Please visit www.aeg-industrialsolar.de to download the latest version of this document. Solar
Solutions reserves the right of final explanation to this document and its attachments.
667
Solar Solutions Products BV
Finlandlaan 1 2391PV Hazerswoude-Dorp The Netherlands |
service@aeg-industrialsolar.de | www.aeg-industrialsolar.de
AEG is a registered trademark used under license from AB Electrolux (publ).
03 04 05