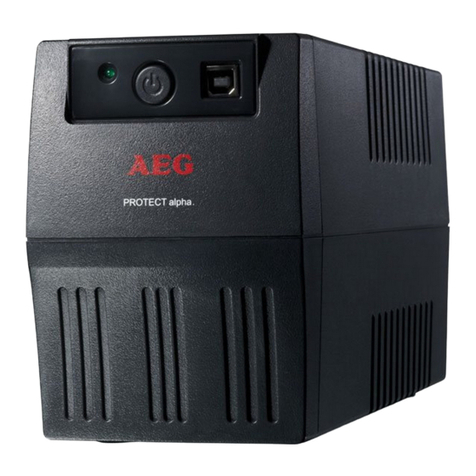
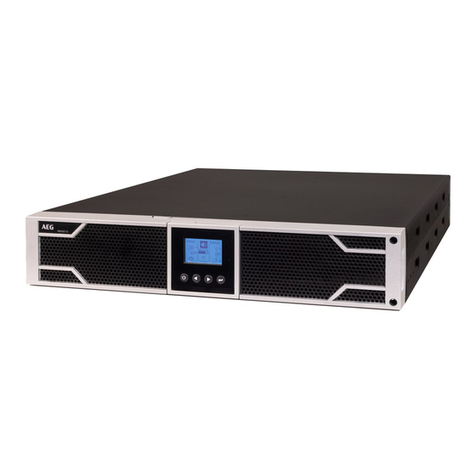
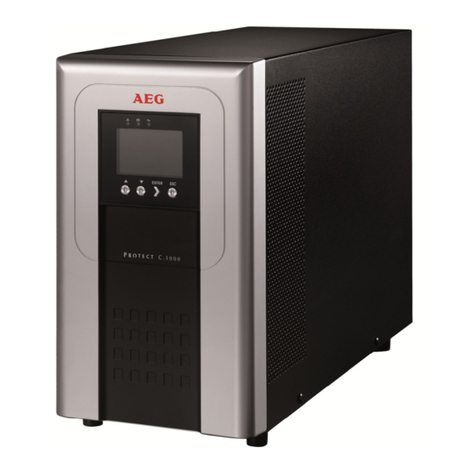
AEG CompuMaster 300 User manual

AEG
POWER
SUPPLY
SYSTEMS
Unterbrechungsfreie Stromversorgung
Uninterruptible Power Supply
CompuMaster
300
/
600
/
1000
Betriebsanleitung
Operating Manual

Hints concerning this manual
Responsibility of information
This manual will help you to install and to operate the
Uninterruptable
rower Supply (UPS) CompuMaster 300,
CompuMaster 600 or CompuMaster 1000
-
generally
simplified called CompuMaster in this manual
-
properly and
safe according to the assigned use. The manual includes im-
portant hints which will be helpful for a use without danger.
Please read this manual carefully before commissioning
!
This manual is a constituent part of the CompuMaster. The user
of this unit is obliged to provide this manual to all persons
handling the CompuMaster , e.g. transport, commissioning,
maintaining or other activity.
Validity
These operating instructions comply with the current technical
specifications of the CompuMaster at the moment of issue. The
contents do not constitute a subject of contract, but serve
information purposes only.
AEG reserves the right to make modifications with regard to
contents and technical data in these operating instructions
without prior notification.
AEG cannot be held liable for any inaccuracies or inapplicable
information in these operating instructions, as no obligation to
continuously update the data and maintain their validity has
been entered into.
31

Warranty
Our goods and services are subject to the general conditions of
supply for products of the electrical industry and our general
sales conditions. We reserve the right to alter any specifications
given in these operating instructions, especially with regard to
technical data, operation, weights and dimensions.
AEG will warrant for a period of one year after delivery of the
respective unit that all failures caused by faulty material or
-workmanship will be repaired accordingly, provided that the
products have been-used under normal conditions and by
appropriate operation. The a.m. warranty period will be also valid
for products being repaired according to this warranty conditions
during the time of one year. The warranty time will not be pro-
longed by repairs.
Claims in connection with supplied goods must be submitted
within one week of receipt along with the packing slip.
Subsequent
clai.ms
cannot be considered.
AEG will rescind all obligations such as warranty agreements,
service contracts etc. entered into by AEG or its representatives
without notice in the event of maintenance and repairs being
carried out with anything other than original AEG parts or spare
parts purchased by AEG as well as in case of unadequate
handling against instructions of this manual. AEG w-ill not be
responsible for damage outside the
used,product
caused by
internal failures.
Handling
The
realized
construction of the
CompuMaster
allows the user
to
ctiFy
out all necessary steps for erection, commissioning
and suitable operation without any internal manipulation.
Maintenance and repair of the unit should be performed by
qualified skilled personnel.
32
Illustrations are provided to elucidate and facilitate certain
work-
steps. If any work possibly involves danger to personnel and the
unit, it is highlighted accordingly by pictograms explained in
Chapter 2, Safety Instructions.
Hotline
Our service department is at your disposal for any questions on
the Hotline number given below:.
.Hotline”
:
1p’I
AEG Stromversorgungs-Systeme
GmbH
Emil-Siepmann-S
traRe
3 2
D
-
59581 Warstein
s?
(0 29
02)
763
-
100
:
FAX
(0 29
02) 763
-
1203
Copyright
No part of these operating instructions may
be
reproduced or
transmitted by any mechanical or electronic means without the
express prior written permission of AEG.
0
Copyright AEG 1996. All rights reserved.
33

Table
of
contents
Notes on these operating instructions
Instruction obligation, validity
31
Handling, warranty
32
Hotline, copyright
33
1
System description 36
2
Safety 38
2.1
General safety hints
38
2.2
Safety hints for the
UPS CompWIaster 300
/
600
/
1000
39
3
Technical data 43
4Commissioning and operation 45
4.1
4.2
4.3
4.4
4.5
4.6
4.6.1
4.6.2
4.6.3
4.6.4
4.7
Uncasing
and testing
45
Site conditions
45
Principle sketch of connecting points
and operation/display elements
46
Initial start up
47
Operation
48
Danger signals
49
Normal operation
50
Battery operation
51
Overload conditions
52
Troubleshooting
54
Communication interface
57
UPS management- and shutdown software
CompuWatch
58
5
Storage, dismounting
and
scrapping 59
5.1
Storage
59
5.2
Dismounting
59
5.3
Scrapping
59
35

1 System description
0
The CompuMaster is an Uninterruptible Power Supply
(UPS) for essential loads like PC’s, IT systems and
similar device, consisting of
-
a rectifier (battery charging)
-
a battery as energy storage device during mains failure
(input supply for the inverter)
-
an inverter to supply the connected loads when a
mains failure occurs
-
a static stitch-over circuit to change AC-power supply
from mains to inverter as long as mains is not available
and
-
a filter circuit, situated on the mains input
cbzuger
1’1
iwerter
battery
i
load
Bloc diagram of a UPS
The UPS has to be connected between mains distribution
and the load via standard mains socket.
Under normal operating conditions, i.e. the
Compu-
Master is supplied by mains, the battery will be fully
charged by the rectifier. Loads connected to the Compu-
Master will be supplied with filtered mains voltage.
36

pm-.-
--
When mains is not available or in case of decreased mains
voltage to 85% of nominal value or less the inverter will take
over the supply of the connected loads.
The CompuMaster w-ill supply the load for a time according to the
battery capacity. This autarky time depends in general on the
load power. In case of restored mains supply the UPS will switch
over the load from inverter to mains operation, i.e. the load will
be supplied by mains again and the battery will be recharged.
In case of a mains blackout the mains input will be automatically
disconnected by a two-pole-switch to fulfil1 safety requirements of
german standards (VDE) and to avoid backfeeding from the
inver-
ter to the mains.
The availability of the following three protecting functions is
guaranteed:
+
Protection against mains blackout
Due to the type of CompuMaster the UPS will provide automati-
cally output power up to
3OOVA,
600VA oder
IZOOVA
for a time
being sufficient to shut down and switch off the system accor-
dingly via shut-down software. The effective autarky time differs
individually and depends in general on the power consumption of
your connected system load.
+
Protection against mains disturbance
In case of an input voltage change to less than 85% or more than
110% of nominal value, the CompuMaster initialises the change-
over to battery operation automatically and supplies the load with
AC-voltage to minimize the risk of data loss or damage.
+
Protection against electromagnetical disturbance
Disturbanc.es
and problems caused by HF will be reduced by the
use of an EMI filter network
37

2 Safety regulations
2.1 General safety instructions
Read these operating instructions carefully before initial
start-up of the
CompuMaster
and pay attention to the
safety instructions in any case
!
Use the unit only in a perfect technical state according
to the intended purpose and subject to the operating
instructions
!
Eliminate failures and any trouble which
can influence safety of personnel and goods.
The following symbols are used in these operating in-
structions to point at possible danger or for any other
reference:
CAUTION
!
This symbol identifies all working and operational
procedures requiring absolute compliance to avoid any
danger to personnel.
ATTENTION
!
This symbol identifies all working and operational
procedures requiring absolute compliance to prevent
danger of hurt to the personnel and any damage, irrepa-
rable or otherwise, to the
CompuMaster
or its
comnents.
NOTE
!
This symbol identifies technical requirements and
additional information requiring the operator’s attention.
38

i
2.2 Safety hints subject to
CompuMastcr
300/400/
1000
The contents of this chapter are important instructions
subject to the
CompuMaster
as well as the battery
concerning erection, operation and maintenance to be
complied with.
The UPS is connected to hazardous voltage.
Opening of
the unit is only allowed to qualified and authorized
personnel.
Repairs are only allowed to qualified service
personnel
!
Hazardous voltage may be applied to the output termi-
nals as well as mains is not connected, because the UPS
will be still running on it’s internal power supply
(battery)
!
A
/’
/
Is
Duly earthing
of the unit is a must regarding the pro-
tection of the personnel
!
It is only allowed to connect to and operate the
Compu-
Master at AC-voltage 230V of a mains distribution with
protective earth by using a VDE-tested or equivalent
mains connection cable with protective earth contact
(enclosed).
Attention regarding burn (personnel) and fire
!
The ability of potential high
short-circuit currents
may
lead to melting connectors and firing with the result of
severe skin burns
!
The unit is provided with an acoustic signalling device to
warn in case of low battery voltage as well as if the UPS
does work in an abnormal state (see chapter 4.6, danger
signals).
39

To keep the UPS in good condition as well as for safe
working with, please pay attention to the following
safety instructions:
Don’t disassemble the UPS
!
The unit is provided for erection in
Don’t use the UPS near water or in
excessive humidity
!
heated interior.
environments with
Never connect mains input terminals to the UPS output
!
Please make safe, that no liquids or foreign matter can
enter the UPS
!
Don’t cover air inlet or outlet of the cabinet
!
Please make
safe, that children or other people don’t enter foreign
matter into this cooling openings
!
Don’t use the UPS as power supply for household
appliance, e.g. hair drier
!
i
Don’t erect the unit near heaters;
avoid direkt solar radiation
!
The mains wall plug should be situated near the unit:
Disconnecting should be possible without problems to
simplify maintaining of the UPS without input voltage
available
!
40
.

Electric
shot
hazard
!
Despite disconnecting from the
mains the battery remains still connected to several
components of the UPS, so that the danger of electric
shot
remains continuously. To avoid unnecessary danger
the battery-circuit should absolutely be disconnected
prior to maintenance or other business
!
A
Replacement and maintaining of the battery must be.-
.’
i’
4done by or in attendance of skilled personnel who have
the knowledge about those activities as well as the re-
quired preventive actions
!
Keep away non-authorized people from batteries
!
Replacement of batteries is only allowed by using
VRLA-
types of the built-in design with the following technical
data: I
2V/
7,OAh.
Danger of explosion
!
Don’t throw batteries into fire. Don’t open batteries and
avoid damage, as outcoming electrolyte is toxic and
harmful for skin and eyes
!
Batteries can cause
electric
shot
and
high short-circuit
currents.
Take the following precautions when handling with bat-
teries:
Lay aside wrist-watches, rings and other metal objects
!
Use insulated tools only
!
41

For daily use of PC’s or other device the mains switch
should remain in the on-position. It should be avoided
to switch on or off the Computer by using the mains
switch.
For longer periods without necessity of using the UPS
the mains switch should be set to the off-position. In the
case that the mains distribution will be disconnected
each evening, the CompuMaster should be switched off
too to avoid discharging of the battery, because the
in-
verter will start automatically after mains break down.
To protect the battery aginst damage you never should
close the mains switch with disconnected UPS from the
mains
!
The battery will not be charged when the UPS has been
switched off. Please note chapter 5.1.
42

3 Technical data
Input
Rated connection voltage
Nominal frequency
Input current
230 V
50 Hz
1,5A
2,8
A
5,6
A
Connection type
Overvoltageprotection
EMI-Filtering
output
Nominal load voltage
Nominal frequency
Output power
Waveform
Load connection type
Overload capacity
Overload protection
Autonomy operation
Switch-over time
Autarky time (full load)
AC
+lO%
-15%
_+5%
(CompuMaster
(CompuMaster 300)
600)
(CompuMaster 1000)
according to IEC 320
cable, connector with earthing contact
Spike voltage clamping circuit
L-C-Filter aginst EMI
230 V AC
50 Hz
300 VA
(cos
cp
=
0,67
ind.)
/
200 W
(CompuMaster 300)
600 VA (cos
‘p
=
0,67
ind.)
/
400 W
(CompuMaster 600)
1200
VA
(cos
cp
=
0,67
ind)
/800
W
(CompuMaster 1000)
approx. sinewave
female plug socket according
to IEC 320
HO%,
cut off at battery operation
Electronic overload monitoring
at max.
2OOW
/
400W
/
800W
<
4,6
ms after mains breakdown
-
10 min. (CompuMaster 300)
-
4 min. (CompuMaster 600)
-
6 min. (CompuMaster 1000)
43

Battery charging time
Battery type
Efficiency
Physically data
Weight (battery included)
-
Dimensions
(
W x H x D
)
(jutting out
connectors
excluded)
Cooling
Operation temperature range
Storage temperature range
Humidity
min.
12h
to
80%,
48h to 100%
VRLA (valve regulated lead acid):
1
12V
bloc 7,0Ah
(300/600VA)
2
12V
blocs 7,0Ah (1
ZOOVA)
90
%
98
%
(if mains available)
4,7
kg (CompuMaster 300)
4,9
kg (CompuMaster 600)
9,3
kg (CompuMaster 1000)
1OOmm
x 175mm x
185mm
(CompuMaster 300
/
600)
lOOmmx175mmx36Omm
(CompuMaster 1000)
Air cooling
5°C to
+4O”C
-10°C to
+4O”C
class F act. to DIN 40040
max. altitude (at nominal load) up to
IOOOm
above sea level
Enclosure
IP21
act.
to DIN 40050
Case colour black
Interface Sub-D
9-pole
female
44

4 Erection and operation
4.1
Uncasing
and testing
The unit has been fully checked and tested. Although
packing and shipping have been prepared carefully
shipping damage is not to be excluded in each case.
Please test the incoming goods and shipping containers
for eventually damages, if necessary in presence of the
carrying agent. Note the extend of damages and inform
your
AEGrepresentative
if it is not caused by shipping.
Claims in connection with supplied goods must be sub-
mitted within one week after receipt along with the
packing slip.
0
Claims caused by shipping must be generally submitted
to the carrying agent
!
4.2 Site conditions
The CompuMaster is specified for erection and operation
in a proper and safe environment. Please carefully look
at sufficient cooling and suitable environmental
conditions.
The CompuMaster is cooled by air. For that reason co-
vering of any air- inlet and -outlet should be avoided!
The UPS should be operated within an ambient tempera-
ture between 15°C and 30°C.
The UPS should be erected in a relatively dust-free room
without any content of chemical vapors.
Please check the type plate (rear panel of the
Compu-
Master) for accordance with the data concerning mains
voltage and frequency being valuable for your country.
45

------I_-
---
-
4.3 Principle overview of connection points,
operational control and display elements
AEG
fi
compumastcr xxxx
front view rear side (connections)
Explanations:
1
2
3
4-
9
IO
11
Load connection via plug-in socket
act.
to IEC 320
12
Mains connection (input) via plug-in socket act. to IEC 320
13
Input fuse with integrated spare fuse
14
Communication interface (D-Sub9 female
-
see chapter 4.7)
15
Phillips screws (removable cover for battery change)
AEG UPS type identifier
,compuma.ster“
apparent power of UPS in VA
ON-/OFF-switch of UPS (mains switch)
8 Signalisation
4 LED
,NORMAL“
5 LED
&JTONOMY”
6 LED
,OVERLOAD“
7 LED ,,BATT-LOW”
8 LED
,FAULT“
1
see
chapter 4.6
(page 49ff.)
Outer case with lock seam
Battery cover with technical data of the UPS,
serial no. and safety hints
46

4.4 Initial start-up
Marking of the mains switch (item 3 of
pict.
on page 46):
,,I“ for
,ON”
and
,,O”
for
,,OFF“
1) Make sure, that the mains switch of UPS is in the
OFF-position (item 3 of picture on page 46)
2) Connect the input of UPS (item 12 of
pict.
on page 46)
with the connection cable (female contact) enclosed
and plug the connector to a suitable wall plug with
earthing contact.
3) Connect the output of the UPS (item 11 of picture on
page 46) to the load. Please use the enclosed second
connection cable only. The load (e.g. PC) should still
be switched off.
4) Set the mains switch of UPS to the ON-position.
5) The UPS will start with a self test changing automati-
cally to normal operation afterwards. In the case that
the UPS will be remaining in testing mode, please fol-
low the instructions in chapter 4.6
,,Danger
signals“
(page
49ff)-
0
If you can’t find any solution concerning the problem
occured, please switch off the equipment completely and
contact your
dealer.
6) When the UPS is running in normal operation, please
switch on your load (e.g. PC).
Afterwards the UPS should remain in the ON-position for
battery charging for two days. Thus the battery capacity
will be increased to a normal state.
47

4.5 Operation
At first the UPS must be connected to a suitable mains
wall plug. Then set the mains switch to the ON-position.
Following to that procedure output voltage will be
available. The green LED
,,NORMAL”
will be illuminated
or blinking when mains voltage is within nominal range;
if not, another LED will be illuminated in connection
with a sounding danger signal.
In normal operation,
i.e.
mains voltage is available, the
integrated battery charger will float the battery and the
inverter will be set to the stand-by mode by the
monitoring. In case of mains blackout as well as with de-
creasing mains voltage to 85% or increasing mains volta-
ge to 110% the inverter
w-ill
be set to the stand-alone mo-
de supplying the load with AC voltage.
In case of battery undervoltage a danger signal of the
UPS will sound for approx. 1 to 3 minutes. Afterwards
the battery will be disconnected by the UPS.
In this case please switch off the UPS by the mains
switch
asap
!
After mains has been restored, the UPS must be switched
on manually by the mains switch for battery charging to
overcome the next mains failure.
48

4.6
Danger
signals
Danger signal
LED
Normal
TVORMAL
Battery operation
AUTONOMY
Overload
OVERLOAD
Battery undervoltage
BATT-LOW
UPS or mains fault
FAULT
acoustic signal via integrated signal buzzer!
Explanations to the following used
Dictographs:
oc
0
33
LED permanently illuminated
LED blinking
LED off
Integrated signal buzzer
49

4.4.1
Normal operation
I
1
-I
I
ILil
0
0
0
03
no sounding
I
cl
Ll
0
0
0no sounding
During normal operation
(Battery fully charged):
Under normal conditions
only LED
,,NORMAL“
is
illuminated.
No action required.
During normal operation
(Battery being charged):
LED
,,NORMAL”
blinking.
No action required, but it is
recon-unendated
to use the
CompuMaster
after
hatter-y
being fully charged to be
sure that the stored energy
will be sufficient for the next mains failure. The charging time
will be in minimum 48 hours.
0
will be blinking.
0
no sounding
No action required, but
mains voltage might be in
During normal operation
(mains undervoltage):
LED
,,NORMAL”
will be
illuminated. In addition to
that LED
,,AUTONOMY”
an insufficient state (e.g. out of tolerance or exceeding value of
distortion). This signal has been supplied as supplementary
information without any influence concerning the eventual
necessity of automatic change-over to battery operation.
50
This manual suits for next models
2
Table of contents
Other AEG UPS manuals

AEG
AEG PROTECT D LCD+ User manual

AEG
AEG Protect A. 1400 User manual

AEG
AEG Protect B. 750 PRO User manual

AEG
AEG Protect C.3000 User manual

AEG
AEG PROTECT C Series User manual

AEG
AEG MBS 6000 User manual

AEG
AEG PROTECT C. 1000 (S) User manual

AEG
AEG PROTECT C. 10000 User manual

AEG
AEG Protect A Series User manual

AEG
AEG Protect D. 6000 (BP) User manual

AEG
AEG Protect NAS Owner's manual

AEG
AEG Protect D Series User manual

AEG
AEG IST7 User manual

AEG
AEG Protect Home. 600 User manual

AEG
AEG Protect 5.31 User manual

AEG
AEG Protect C 1000 LCD+ User manual

AEG
AEG Protect B User manual

AEG
AEG Protect alpha. 1200 User manual

AEG
AEG protect d. 1000 User manual

AEG
AEG Protect C.R User manual