Aerpro FP9450G8 Guide

Scan QR code
for the install information
USER/INSTALLATION
MANUAL
FP9450G8


Example of factory fitted dual zone stereo
Product overview
This Aerpro FP9450G8 HVAC/Facia Installation Kit is an Australian designed and
engineered product that has been tuned and optimised to work on US delivered
Pontiac G8 Left hand drive vehicles with dual zone climate controls. (OEM system
that has a Full colour Display). This Kit is NOT compatible with single zone
models. This special G8 version can be identified by its start-up screen.
This genuine G8 version will indicate “G8” where the temperature is normally
displayed when it powers on during its opening ceremony.
Please note, Australian versions of this kit are NOT compatible with the G8 and
they can not be modified to do so.
Inclusions
1
NOTE: The FP9450G8 is not compatible with the
factory change pocket that has a opening/closing
door. If you have this type of change pocket you
will need to replace it with either of the following
Aerpro pockets. AWCGM1 (With wireless charging)
or WC62P Pocket without wireless charging.
1x ABS Plastic facia (Black or Grey colour) H-VAC
controller and steering wheel control module built in
1x Universal patch lead
1x Vehicle specific wiring loom
1x Antenna adapter
1x Mounting kit
1x User/Install manual

Product structure
Screen display
1. Front/Rear demister air button
2. Left rotary dial button (Rotate,Tap,Hold)
3. Right rotary dial button (Rotate,Tap,Hold)
4. Fan speed UP
5. Recirculated air on/off button
6. LCD display information screen
7. Fan speed DOWN
8. USB charging and sync port
12 3 4
5687
Rear Demister Front Demister
Manual/Auto
setting
Fan Speed
Air conditioner
Number/Temp
SZ/DZ
Recirculation air
Product structure
Screen display
1. Front/Rear demister air button
2. Left rotary dial button (Rotate,Tap,Hold)
3. Right rotary dial button (Rotate,Tap,Hold)
4. Fan speed UP
5. Recirculated air on/off button
6. LCD display information screen
7. Fan speed DOWN
8. USB charging and sync port
12 3 4
5687
Outside Temp
MAX
MAN
OUTSIDE
TEMP
2
5. Recirculated air on/off button
6. LCD display information screen
7. Fan speed DOWN
8. USB charging and sync port
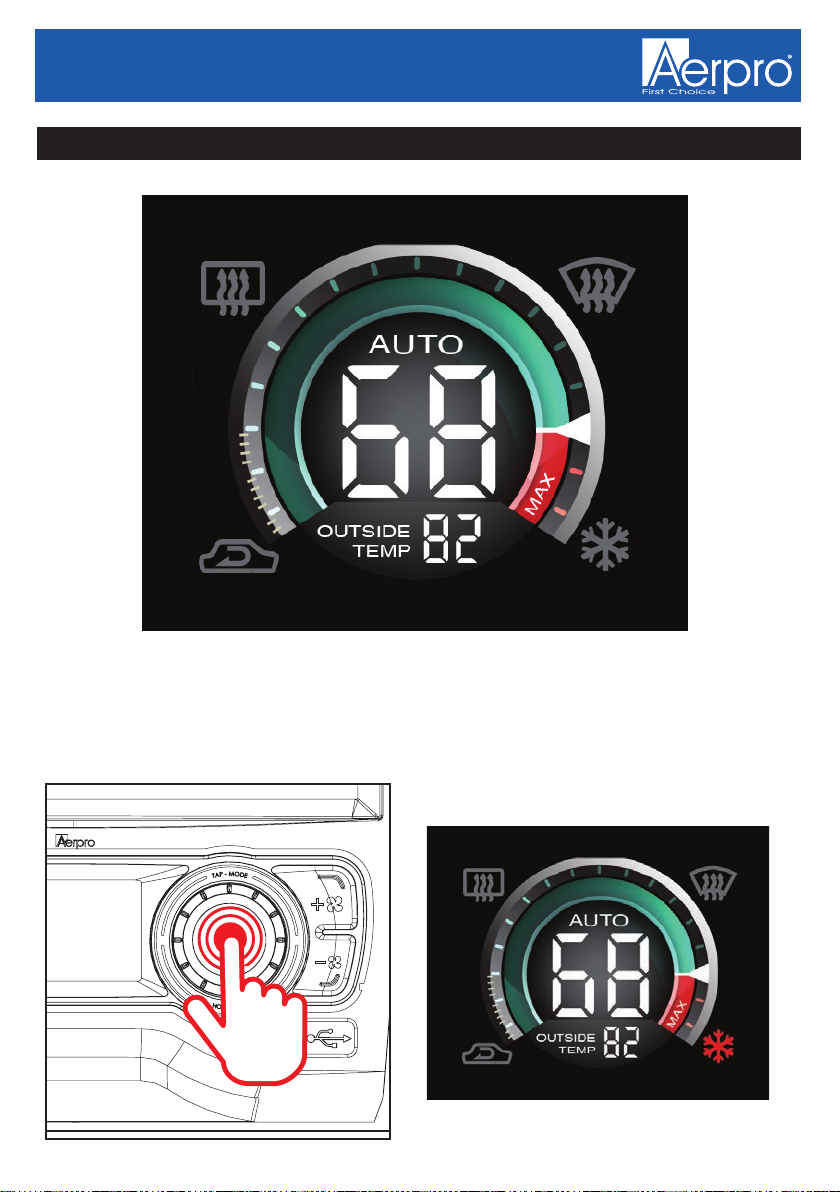
Functions
Turning air-conditioning ON/OFF
Once powered up, tap and hold the right rotary dial button to turn the
air-conditioner on. The LCD screen illuminates and the air-conditioner icon
(Snowflake) illuminates. Tap and hold again to turn off. When turning on the
air-conditioner the system will remember your previous user settings.
Tap
&Hold
3
Table of contents
Other Aerpro Automobile Accessories manuals

Aerpro
Aerpro FP9750 Guide

Aerpro
Aerpro Connects 2 CHFO6C User manual

Aerpro
Aerpro ABT510B User manual

Aerpro
Aerpro VE 2 Series Instruction Manual

Aerpro
Aerpro APMSWC1 User manual

Aerpro
Aerpro Connects 2 User manual

Aerpro
Aerpro FP8020 User manual

Aerpro
Aerpro CHNIUNI User manual

Aerpro
Aerpro AMHJP1K User manual

Aerpro
Aerpro FP9450BK Guide


Popular Automobile Accessories manuals by other brands


ULTIMATE SPEED
ULTIMATE SPEED 279746 Assembly and Safety Advice

SSV Works
SSV Works DF-F65 manual

ULTIMATE SPEED
ULTIMATE SPEED CARBON Assembly and Safety Advice

Witter
Witter F174 Fitting instructions

WeatherTech
WeatherTech No-Drill installation instructions

TAUBENREUTHER
TAUBENREUTHER 1-336050 Installation instruction