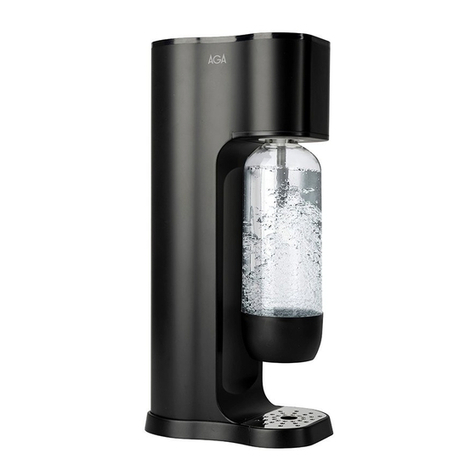
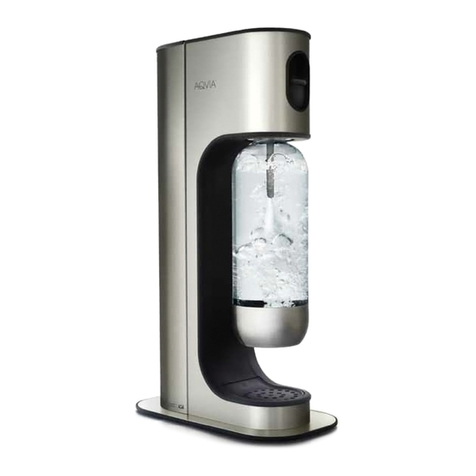
AGA AQVIA User manual

FR
사용자 설명서/Bedienungsanleitung/Manual del usuario/Manuel de l’utilisateur
AQVIA®sparkling water maker user manual
AQVIA®BALANCE
BEST IN TEST
GE
ES
UK
한국

112238 -14 0613 - 1.3 HL ® AQVIA is a registered trademark of The Linde Group.

English 4
한국어 12
German 20
Spanish 28
France 36
Content • 목차 • Inhalt • Índice • Table des matières

4
Introduction
Congratulations on your new AQVIA®sparkling water maker. Now you can
make
delicious, refreshing carbonated water at home, and even flavour it with fruit or
natural concentrates available from our retailers. One AGA carbon dioxide cylinder
is enough for about 60 litres of carbonated water.
Before using the machine for the first time, you should read through the usage and
safety instructions provided in this manual.
Please note that the guarantee for your sparkling water maker is only valid on
condition that it has been treated with care and in compliance with these safety
instructions.
General safety instructions
– Never transport the sparkling water maker with the gas cylinder attached
to the machine. Always make sure that the gas cylinder has been fully detached
before transportation.
– Keep the sparkling water maker out of the reach of children.
– Never place the sparkling water maker close to a source of heat, such as a
hob or a radiator, and keep it out of direct sunlight.
– Only use 425 g gas cylinders and PET bottles that are approved for the
carbonator. Other bottles may seem to fit but could reduce the function, damage
the machine or cause a safety risk.
– Never press the gas button before attaching a water bottle.
– Never inject gas into an empty water bottle.
– Never fill a water bottle above the maximum volume mark.
– Never try to use your sparkling water maker when it is broken or damaged,
as doing so can be dangerous.
– The machine is not intended for commercial use.
– If your sparkling water maker breaks or malfunctions, do not try to repair or
open the machine yourself. Contact AGA’s customer service on:
Sweden +46 8 731 15 00, Denmark +45 328 366 00,
Norway +47 220 277 60, Finland +358 102 429 002.

5
Safety instructions for the gas cylinder
– Never transport the gas cylinder when attached to the sparkling water
maker. Always make sure that the gas cylinder has been fully detached
before transportation.
– Do not store the cylinder close to a source of heat, such as a hob or a
radiator, and keep it out of direct sunlight.
– Keep the cylinder out of the reach of children.
– The gas cylinder must only be used when at room temperature. After
transportation and frequent use, the cylinder can become cold and less
efficient. Avoid touching the cylinder if it is covered in ice.
– We recommend that you only use 425 g gas cylinders from AGA.
– Do not tamper with or otherwise alter the design or shape of the gas cylinder.
– If the gas cylinder breaks or becomes damaged, contact AGA’s customer
service on: Sweden +46 8 731 15 00, Denmark +45 328 366 00,
Norway +47 220 277 60, Finland +358 102 429 002.
Safety instructions for the water bottle
– Never fill water bottles with anything other than pure drinking water, and never
carbonate any other fluids than water. If other fluids are carbonated, there is a
serious danger that the fluid will leak into the machine, and that additives such
as sugar will cause the pressure relief valves to stick. If the relief valves stop
working, the machine will not be safe to use.
– Never fill the bottle above the maximum volume mark; if you do, water can
enter the machine and spurt out through the pressure relief valves.
– The water bottles can withstand water temperatures up to 40oC. The bottles
must therefore be washed only in warm water and never in a dishwasher.
– Never freeze the water bottles.
– Never use water bottles that have exceeded their use-by date, as this poses a
safety hazard. Use-by dates are printed on the bottles.
– Never use discoloured, deformed or cracked water bottles.
– To avoid the buildup of bacteria in the bottle, always make sure to rinse it
thoroughly before use.
– Never drink straight from the bottle.
– Only use AQVIA® water bottles.
GB
6
Using the sparkling water maker
Your new sparkling water maker enables you to carbonate your own water, which
you can then flavour with concentrates from AQVIA®. To carbonate your own water,
you need the AGA 425 g carbon dioxide gas cylinder. When the cylinder is empty, a
replacement can be bought from the store where you made your original purchase
and the old bottle returned for deposit.
Inserting the gas cylinder
Remove the seal and the protective cap from the cylinder. Keep the cap in a safe place
as it will be needed when you replace the cylinder when empty.
Place the carbonator
on a flat surface and remove the back cover of the machine: hold in the catches on
the side and angle the cover backwards and then lift it upwards.
Tilt the sparkling water maker forwards and insert the gas cylinder through the
opening in the bottom of the machine so that the cylinder is standing on the work
surface. Gently tilt the sparkling water maker back so that the upper part of the
machine rests against the threaded neck of the cylinder.
Screw the cylinder into the machine as far as
it will go (see illustration), at which point the
sparkling water maker will have returned to
its original resting position. Make sure that the
cylinder is rmly in place.
Now replace the back cover by inserting the
bottom lip into the hole in the base and then
angling the cover forward carefully until you
hear a click from the catches.

7
Removing the gas cylinder
Place the carbonator on a flat surface and remove the back cover of the machine:
hold in the catches on the side and angle the cover backwards and then lift it
upwards. Unscrew the cylinder, at which point the sparkling water maker will tip
forwards slightly. Tilt the sparkling water maker a little further forwards and lift out
the cylinder.
Filling the water bottle
Clean the bottle before use. Do not use water
hotter than 40oC. Fill the bottle with cold water
up to the maximum volume mark. If the bottle
is overfilled, water can enter the machine
and leak out. For best results, use cold water;
the colder the water, the greater the volume
of gas that can be dissolved. It is therefore a
good idea to store an extra bottle of water in
the fridge. Make sure, however, not to keep
the water for too long in the bottle as it might
become stale.
Important! Never carbonate anything other than pure drinking water, as sugar
or other additives might cause the pressure relief valves to stick, rendering the
machine unsafe to use.
GB

8
Attaching the water bottle
Remove the lid from the water bottle.
Position
the bottle so that the gas tube protrudes into
the water and then push the bottle up as far
as it will go. Turn the bottle as shown in the
illustration until you feel it engage. Make sure
that the water bottle is firmly in place before
use.
Carbonating water
Important! Never carbonate anything other than pure drinking water, as sugar
or other additives might cause the pressure relief valves to stick, rendering the
machine unsafe to use.
The degree of carbonation is a matter of
personal taste, so for the first few times you
use the machine, you will have to experiment
until you find the degree of carbonation that
is right for you.
To carbonate the water, press the button and
keep it pressed for 3-4 seconds or until you
hear a hiss as the pressure relief valve opens.
Depending on the water temperature, this will
give you a normal degree of carbonation.
You can add more gas as desired by pressing
the button again briefly once or twice.
Release the button and wait until you hear
another hiss as any excess pressure is
discharged and the water bottle is vented.
Unscrew the water bottle and enjoy your carbonated water. Store the water in a
cool place with the lid tightly screwed on to prevent the water going flat.

9
GB
Removing the water bottle
Grasp the water bottle and turn it as shown
until you feel it disengage. The bottle has a
bayonet fitting and should click slightly as it
does so.
Flavour your carbonated water
Flavour your carbonated water with fruit or AQVIA®essences, ciders or sodas.
Please carefully read the instructions on the bottles and pour the right amount of
essence in a glass or a pitcher, and then add the carbonated water.
Emptying the spill tray
Wipe out the drip tray as required. Check that
there is no water under the machine. If the
PET bottle is filled above the max mark, the
surplus water may run down the front of the
machine and into the drip tray.
Maintenance and cleaning
– To clean your sparkling water maker , wipe it with a damp cloth. A mild
cleaning agent may also be used.
– Clean water bottles in warm water with a mild detergent and rinse well.
Store empty bottles with their lids off.
– Never wash water bottles in a dishwasher. Water bottles can only withstand
a maximum water temperature of 40oC.
– Never use solvents or powerful cleaning agents.

10
Troubleshooting
Problem Possible cause Remedy
The amount of gas in the
water gradually drops
The gas cylinder is empty Replace the cylinder
The gas cylinder is too
cold
Wait until the cylinder
warms up
Water runs down the
front of the machine.
The water bottle is
overfull
Do not fill bottles above
the maximum volume
mark
The amount of gas in the
water is low but your gas
consumption is high
The washer on the
cylinder holder is missing
or leaking
Change the washer. New
washers can be ordered
from AGA’s customer
service
Technical specifications
– Height x Width x Length: 436 mm x 143 mm x 266 mm
– Weight: 2.5 kg including gas cylinder and PET bottle
Contact AGA
AGA’s customer service:
Sweden +46 8 731 15 00
Denmark +45 328 366 00
Norway +47 220 277 60
Finland +358 102 429 002
MyAGA.me

11
Guarantee terms
AGA guarantees product performance for two years from the date of purchase.
Cylinder refills and spare parts fitted on repair are guaranteed up to five years after
date of manufacture.
This guarantee only applies to manufacturing defects (factory or other faults that
the product had before sale).
In the unlikely event of a manufacturing defect, AGA will repair or replace the
product free of charge.
The guarantee is invalidated if the product is damaged due to:
– an accident occurring after purchase
– improper care
– improper use
– failure to follow the maintenance and service instructions
Complaints
A complaint about the product is to include a description of the defect or problem
that you believe the product to have, and must be made within either the
guarantee period or a reasonable time from discovery. Return the product to the
place of purchase with the original receipt.
GB
Recycling
When disposing of the product, under national and international environ-mental
regulations it must be taken to the place of purchase or to a recycling centre
prescribed by the local council.

12
소개
AQVIA® 소다수 메이커를 구입해 주셔서 감사합니다. 이제
맛있고 신선한 탄산수를
집에서 직접 만들 수 있으며 당사 판매점에서 과일 농축액 또는 천연 농축액을
구입하여 맛을 낼 수도 있습니다. AGA 이산화탄소 실린더 하나로 60리터의 탄산수를
만들 수 있습니다.
기계를 처음으로 사용하기 전에 반드시 본 설명서에 나온 사용법 및 안전 지침을
충분히 읽어보십시오.
소다수 메이커에 대한 보증은 주의 있게 제품을 다루고 안전 지침을 준수한
상태에서만 유효합니다.
일반 안전 지침
– 가스 실린더가 기계에 부착된 상태에서 소다수 메이커를 이동하지 마십시오.
기계를 이동하기 전에 항상 가스 실린더가 완전히 분리되었는지 확인하십시오.
– 소다수 메이커는 어린이의 손에 닿지 않는 곳에 보관하십시오.
– 소다수 메이커를 요리판이나 방열기와 같은 열원 근처에 두지 마십시오. 또한 직사
광선을 피하십시오.
– 소다수 제조기용으로 승인된 425g의 가스 실린더와 PET 병만 사용하십시오.
기계에 맞는 다른 물병을 사용할 수도 있지만 기능을 떨어트리거나, 기계에 손상을
입히거나, 안전 위험을 유발할 수 있습니다.
– 물병을 연결하기 전에 가스 버튼을 누르지 마십시오.
– 빈 물병에는 가스를 주입하지 마십시오.
– 물병의 최대 용량 표시 이상으로 물을 채우지 마십시오.
– 소다수 메이커가 고장 나거나 손상된 경우에는 절대 사용하지 마십시오. 위험할 수
있습니다.
– 이 기계는 상업용으로 제조되지 않았습니다.
– 소다수 메이커가 고장 나거나 오작동하는 경우라도 직접 기계를 수리하거나 열지
마십시오.
AGA 고객 서비스 연락처 정보:
스웨덴 +46 8 731 15 00, 덴마크 +45 328 366 00,
노르웨이 +47 220 277 60, 핀란드 +358 102 429 002.

13
가스 실린더 사용 시 안전 지침
– 가스 실린더를 소다수 메이커에 부착된 상태로 이동하지 마십시오
. 기계를 이동하기
전에 항상 가스 실린더가 완전히 분리되었는지 확인하십시오.
– 가스 실린더를 요리판이나 방열기와 같은 열원 근처에 보관하지 마십시오. 또한
직사 광선을 피하십시오.
– 가스 실린더는 어린이의 손에 닿지 않는 곳에 보관하십시오.
– 가스 실린더는 반드시 실온에서만 사용해야 합니다. 이동 및 잦은 사용 후에는 가스
실린더가 차가워져서 효율이 떨어질 수 있습니다. 가스 실린더 표면에 성에가 끼어
있을 경우 만지지 마십시오.
– AGA의 425g 가스 실린더만 사용할 것을 권장합니다.
– 가스 실린더의 구조나 모양을 임의로 변경 또는 변형하지 마십시오.
– 가스 실린더가 고장 나거나 손상된 경우에는 다음 AGA 고객 서비스 센터로
문의하십시오.
스웨덴 +46 8 731 15 00, 덴마크 +45 328 366 00,
노르웨이 +47 220 277 60, 핀란드 +358 102 429 002.
물병 사용 시 안전 지침
– 순수한 식수 외에는 물병에 넣지 마십시오. 그리고 물 이외의 어떤 액체도 탄산수로
만들지 마십시오. 다른 액체를 탄산수로 만드는 경우, 액체가 기계 안으로 새어
들어가며 설탕과 같은 첨가물이 압력 분사 밸브를 막게 되는 등의 심각한 위험이
발생할 수 있습니다. 분사 밸브가 작동하지 않을 경우 기계를 사용하는 것은
안전하지 않습니다.
– 물병의 최대 용량 표시 이상으로 물을 채우지 마십시오. 물이 기계 안으로
들어가거나 압력 분사 밸브를 통해 분출할 수 있습니다.
– 물병이 견딜 수 있는 최대 수온은 40oC입니다.
따라서 물병을 미지근한 물로만
세척하고 식기 세척기로 세척하지 마십시오.
– 물병을 얼리지 마십시오.
– 사용 기한이 지난 물병은 사용하지 마십시오. 안전 위험을 일으킬 수 있습니다.
사용 기한은 물병에 인쇄되어 있습니다.
– 변색, 변형 또는 균열이 발생한 물병은 사용하지 마십시오.
– 물병에 세균이 번식하는 것을 막으려면 사용 전에 항상 물로 깨끗하게
세척하십시오.
– 물병에 직접 입을 대고 마시지 마십시오.
– AQVIA® 물병만 사용하십시오.
한국

14
소다수 메이커 사용법
이 소다수 메이커를 이용하면 평소에 마시는 물을 탄산수로 만들 수 있으며 AQVIA®
의 농축액으로 맛을 낼 수 있습니다. 식수를 탄산수로 만들려면 AGA 425g 이산화탄소
가스 실린더가 필요합니다. 실린더의 가스를 모두 사용한 경우, 제품을 구입했던
매장에서 사용한 실린더를 반납하여 교체할 수 있습니다.
가스 실린더 삽입하기
가스 실린더에서 씰과 보호 캡을 제거합니다. 보호 캡은 다 사용한 실린더를 교체할 때
필요하므로 안전한 장소에 보관하십시오.
소다수 메이커를 안전한 평면 위에 놓고
기계의 뒤쪽 덮개를 제거합니다. 그리고 측면 걸쇠 부분을 잡고 덮개를 뒤쪽으로
기울인 다음 앞쪽으로 들어 올립니다.
탄산수 메이커를 앞으로 기울인 다음 가스 실린더가 작업면에 서도록 기계 바닥의
개구부 쪽으로 가스 실린더를 삽입합니다. 실린더의 나사목 부분이 기계의 상단 부분에
지지되도록 탄산수 메이커를 부드럽게 뒤로 기울입니다.
가스 실린더를 돌려서 기계에 단단히 고정(
그림 참조)시키면서 탄산수 메이커를 원래의
직립 상태로 세웁니다. 이 때 가스 실린더가
안전하게 고정되었는지 확인하십시오.
이제 받침대의 구멍에 덮개의 아래쪽 부분을
삽입하여 뒤쪽 덮개를 다시 덮은 다음
걸쇠에서 찰칵 하는 소리가 들릴 때까지
조심해서 덮개를 앞쪽으로 비스듬하게
밉니다.

15
가스 실린더 제거하기
소다수 메이커를 안전한 평면 위에 놓고 기계의 뒤쪽 덮개를 제거합니다. 그리고
측면 걸쇠 부분을 잡고 덮개를 뒤쪽으로 기울인 다음 앞쪽으로 들어 올립니다. 가스
실린더를 고정하고 있는 나사를 제거하면 탄산수 메이커가 앞으로 약간 기울어집니다.
탄산수 메이커를 앞으로 좀 더 기울인 다음 실린더를 들어 올립니다.
물병에 물 채우기
사용 전에 물병을 세척합니다. 40oC 이상의
물은 사용하지 마십시오. 물병의 최대 용량
표시까지 찬물을 채웁니다. 용량 표시 이상으로
물을 채우면 물이 기계 안으로 들어가며 새어
나올 수 있습니다. 최상의 결과를 얻으려면
찬물을 사용하십시오. 물이 찰수록 더 많은
이산화탄소를 용해시킬 수 있습니다. 따라서
여분의 물병에 물을 담아 냉장고에 보관하는
것도 좋은 방법입니다. 단, 물의 신선도가 떨어질
수 있으므로 병에 너무 오래 담아두지 않도록
하십시오.
중요! 순수한 식수 외에는 탄산수로 만들지 마십시오. 설탕이나 기타 첨가물로 인해
압력 분사 밸브가 막히게 되면 기계를 사용하는 것이 위험해집니다.
한국

16
물병 연결하기
물병의 뚜껑을 제거합니다.
가스 튜브가 물 속에
잠기도록 물병을 위치시킨 다음 물병을 최대한
위쪽으로 밀어 올립니다. 그림과 같이 연결된
느낌이 들 때까지 물병을 돌립니다. 사용하기
전에 물병이 제자리에 고정되어 있는지
확인합니다.
탄산수 만들기
중요! 순수한 식수 외에는 탄산수로 만들지 마십시오. 설탕이나 기타 첨가물로 인해
압력 분사 밸브가 막히게 되면 기계를 사용하는 것이 위험해집니다.
탄산 포화 정도는 개인적인 취향의 문제이므로
기계를 처음 사용하는 동안 몇 번의 실험을 거쳐
자신의 입맛에 맞는 탄산 포화 정도를 찾을 수
있습니다.
탄산수를 만들려면, 버튼을 3-4초 동안 누르거나
압력 분사 밸브가 열리면서 쉬익 하는 소리가
들릴 때까지 버튼을 누릅니다. 수온에 따라
차이는 있지만, 이 방법으로 일반적인 탄산 포화
수준의 탄산수를 만들 수 있습니다.
원하는 경우, 버튼을 가볍게 한 번 또는 두 번
정도 더 눌러서 탄산가스를 추가할 수 있습니다.
버튼을 놓은 다음 과잉 압력이 떨어지고 물병에
공기가 들어가면서 다시 쉬익 하는 소리가 날
때까지 기다립니다.
물병을 돌려서 기계에서 떼어내면 이제 직접 만든 탄산수를 즐길 수 있습니다.
탄산가스가 날아가지 않도록 하려면 뚜껑을 단단히 돌려 닫아서 시원한 장소에
보관하십시오.

17
한국
물병 제거하기
물병을 잡고 기계에서 분리된 느낌이 들
때까지 그림과 같이 돌립니다. 물병에는 삽입형
고정장치가 있기 때문에 기계에서 분리할 때
찰칵 하는 소리가 들려야 합니다.
탄산수에 맛 첨가하기
과일 농축액이나 AQVIA® 농축액, 사이다 또는 소다를 첨가하여 탄산수에 맛을
첨가할 수 있습니다. 물병에 있는 지침을 주의 깊게 읽은 다음 잔이나 주전자에
알맞은 농축액을 부은 후 탄산수를 추가하십시오.
액체 트레이 비우기
필요한 경우 액체 트레이를 깨끗하게
비웁니다. 기계 아래에 물기가 없는지
확인합니다. PET 병의 최대 용량 표시까지
물을 채울 경우 넘치는 물이 기계 앞쪽으로
흘러내려 액체 트레이에 고이게 됩니다.
유지보수 및 청소
– 소다수 메이커를 청소할 때는 젖은 천으로 기계를 닦아냅니다. 순한
세정제를
사용할 수도 있습니다.
– 순한 세제를 미지근한 물과 함께 사용하여 세척한 다음 물로 잘 헹굽니다.
빈 물병은 뚜껑을 분리한 상태로 보관하십시오.
– 물병을 식기 세척기로 세척하지 마십시오. 물병이 견딜 수 있는
최대 수온은
40oC입니다.
– 용제나 강한 세정제를 사용하지 마십시오.

18
문제 해결
문제 가능한 원인 해결방법
물 속의 탄산가스의 양이
점점 줄어듭니다.
가스 실린더가
비었습니다.
가스 실린더를
교체하십시오.
가스 실린더가 너무
차갑습니다.
실린더의 온도가 올라올
때까지 기다리십시오.
기계 앞쪽으로 물이
흘러내립니다.
병에 물을 너무 많이
넣었습니다.
최대 용량 표시 이상으로
물병을 채우지 마십시오.
가스 사용량은 높은데, 물
속에 포화된 탄산 가스의
양은 부족합니다.
실린더 홀더의 와셔가
없거나 새고 있을 수
있습니다.
와셔를 교체하십시오.
새로운 와셔는 AGA 고객
서비스 센터에서 주문할
수 있습니다.
기술 규격
– 높이 x 너비 X 길이: 436mm x 143mm x 266mm
– 무게: 2.5kg (가스 실린더 및 PET 병 포함)
AGA 연락처
AGA 고객 서비스:
스웨덴 +46 8 731 15 00
덴마크 +45 328 366 00
노르웨이 +47 220 277 60
핀란드 +358 102 429 002
MyAGA.me

19
보증 조건
AGA는 구매일로부터 2년 동안 제품의 성능을 보증합니다.
가스 실린더 재충전과
수리에 필요한 예비 부품은 제조일로부터 최대 5년까지 보증됩니다.
이에 대한 보증은 제조상의 결함(판매 전에 제품에 발생한 제조 과정의 결함 또는
기타 결함)이 발생한 경우에만 적용됩니다.
만약 제조상의 결함이 발생하는 경우, AGA는 무료로 제품을 수리 또는 교체해
드립니다.
다음과 같은 이유로 제품이 손상된 경우에는 보증이
적용되지 않습니다.
– 제품 구매 후 사고 발생
– 부적절한 관리
– 부적절한 사용
– 유지보수 및 정비 지침 미준수
불만사항
제품에 대한 불만사항은 제품에 이상이 있다고 판단되는 결함 또는 문제에 대한
설명과 함께 보증 기간이나 문제를 발견한 후 합당한 시간 내에 제기되어야
합니다. 영수증 원본과 함께 구입한 장소로 제품을 반납합니다.
한국
재활용
제품을 폐기 처분하는 경우에는 국내 및 국제 환경 규제에 따라 제품을 구입한
장소나 지방자치단체가 지정한 재활용 센터로 가져가야 합니다.

20
Einleitung
Herzlichen Glückwunsch zu Ihrem neuen AQVIA®-Trinkwassersprudler. Damit können Sie
jetzt
auch zu Hause köstliches, erfrischendes Sprudelwasser herstellen und es sogar mit den bei
unseren Händlern erhältlichen Frucht- oder natürlichen Konzentraten aromatisieren. Eine AGA-
Kohlensäurepatrone reicht dabei für ca. 60 Liter Sprudelwasser.
Bevor Sie das Gerät erstmalig verwenden, sollten Sie sich die Anwendungs- und
Sicherheitshinweise in dieser Bedienungsanleitung durchlesen.
Bitte beachten Sie, dass die Garantie für Ihren Trinkwassersprudler nur gültig ist, wenn dieser
mit Sorgfalt und gemäß den hier enthaltenen Sicherheitshinweisen eingesetzt wird.
Allgemeine Sicherheitshinweise
– Transportieren Sie den Trinkwassersprudler niemals mit der Kohlensäurepatrone im
Gerät. Vergewissern Sie sich, dass die Kohlensäurepatrone vor dem Transport vollständig
herausgenommen wurde.
– Halten Sie den Trinkwassersprudler von Kindern fern.
– Stellen Sie den Trinkwassersprudler nicht in der Nähe von Wärmequellen wie Herd
oder Heizung auf und setzen Sie ihn keiner direkten Sonneneinstrahlung aus.
– Verwenden Sie ausschließlich 425-g-Kohlensäurepatronen und PET-Flaschen, die für
den Sprudler zugelassen sind. Auch wenn andere Flaschen zu passen scheinen, können
sie zu Funktionsbeeinträchtigungen oder Beschädigungen des Geräts führen bzw. ein
Sicherheitsrisiko darstellen.
– Drücken Sie den Gasknopf nicht, wenn noch keine Wasserasche eingesetzt wurde.
– Spritzen Sie niemals Kohlensäure in eine leere Wasserasche.
– Befüllen Sie die Wasserasche nicht über die Maximalmarkierung.
– Verwenden Sie Ihren Trinkwassersprudler nicht, wenn er kaputt oder beschädigt ist, da dies
gefährlich sein kann.
– Das Gerät ist nicht für die gewerbliche Nutzung bestimmt.
– Geht Ihr Trinkwassersprudler kaputt oder funktioniert er nicht richtig, reparieren
oder öffnen Sie das Gerät nicht selbst. Wenden Sie sich an den Kundendienst von
AGA unter: Schweden +46 8 731 15 00, Dänemark +45 328 366 00,
Norwegen +47 220 277 60, Finnland +358 102 429 002.
Other manuals for AQVIA
1
Table of contents
Languages:
Other AGA Kitchen Appliance manuals

AGA
AGA OC Instruction Manual

AGA
AGA PROFESSIONAL 110 Gas Instruction Manual

AGA
AGA OC User manual

AGA
AGA eR3 110-4 Instruction Manual

AGA
AGA exclusive User manual

AGA
AGA Fusion User manual

AGA
AGA 160/3 User manual

AGA
AGA COOKMASTER R40G User manual

AGA
AGA 100/3 Instruction Manual

AGA
AGA APRO30DFSS User manual