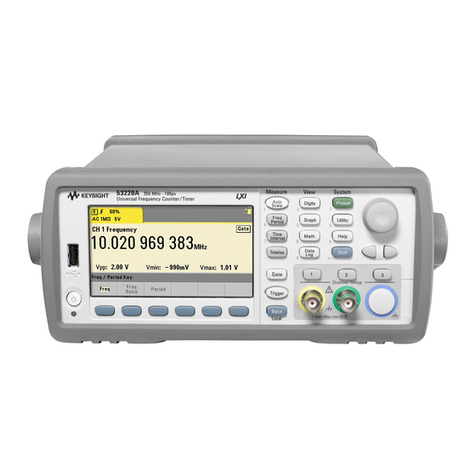
Agilent Technologies 53210A User manual

1
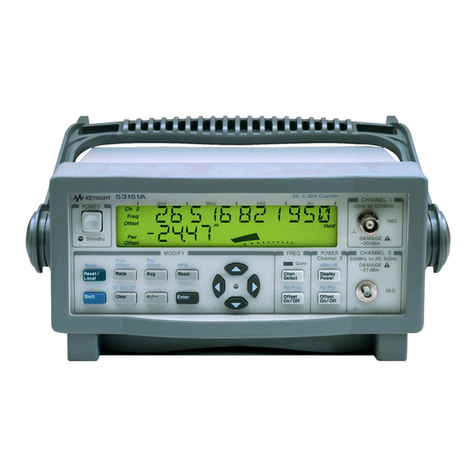
Agilent 53210A/53220A/53230A RF and Universal Counter/Timer
Option Installation
Agilent Technologies
53210A/53220A/53230A
Option Installation
Introduction 2
To o l s R e q u i r e d 2
Do This First 2
Removing the Cover and Rear Bezel 3
Moving the Internal Battery (Option 300) 5
Moving the Optional Channel Assembly (Option 106) 6
Ultra-High Stability Timebase (Option 010) 7
GPIB Interface (Option 400) 7
Internal Battery DC Power (Option 300) 9
53210A/53220A/53230A Rear Panel Parallel Inputs (Option 201) 16
53210A Channel 2 Front Panel Input (Option 106 and Option 202) 17
53210A Channel 2 Rear Panel Input (Option 106 and Option 203) 27
53220A/53230A Channel 3 Front Panel Input (Options 106 and 202) 31
53220A/53230A Channel 3 Rear Panel Input (Options 106 and 203) 40
53230A Option 150 (Pulse Microwave Measurements) 43
This document contains installation instructions for the options available
with the Agilent 53210A/53220A/53230A RF and Universal counters.
© Agilent Technologies, Inc. 2010, 2013
Printed in Malaysia E0613
Edition 2 June 2013
*53200-90020*
53200-90020

2 53210A/53220A/53230A Option Installation
53210A/53220A/53230A Option Installation
Introduction
The following information generally applies to all options.
Tools Required
The following tools are required for the installation procedures:
•Hand TORX‚ 8 screwdriver (T8)
•Hand TORX‚ 10 screwdriver (T10)
•Hand TORX‚ 20 screwdriver (T20)
•7- mm spintight or 9/32" manual nut driver (GPIB connector screws)
•14- mm deep- socket or deep spintight (TypeN and BNC connectors)
•1/4" spintight (Option 115 standoffs)
•5/16" open- end wrench (SMA connectors)
•Long- nose Pliers
•3/16" or 1/4" wide medium slot screwdriver
Do This First
NOTE
Before performing any of the retrofit procedures turn the counter off and remove
ac line power from the rear ac line socket.
WARNING
Hazardous Voltages exist on some internal circuits of the counter. After discon-
necting the AC line power cord, wait at least 6 minutes for the High-Voltage
capacitors to discharge before removing the cover.
CAUTION
ESD damage caused by customer access to the internal circuits of the counter
without proper ESD protection may void the instrument warranty.

53210A/53220A/53230A Option Installation 3
53210A/53220A/53230A Option Installation
Except for Option 010 (Ultra- high stability timebase), disconnect the
Option 300 internal battery, if installed, as described in the section “Mov-
ing the Internal Battery (Option 300)”.
To prevent Electrostatic Discharge (ESD) damage to the counter, place the
counter on a static- safe mat that is grounded to earth ground.
Ensure that you are wearing a static- safe wristband that is grounded to
the mat and to earth ground.
Removing the Cover and Rear Bezel
The follow steps are for removing the cover and rear bezel. The cover is
removed to access the board and cable assemblies, and all other internal
parts.
1. Turn off power and remove the power cord.
2. Remove the handle by rotating it to the vertical position and pulling the
ends outward as shown in Figure 1.
CAUTION
DO NOT swap the motherboard, the processor board, or the front panel board
from one instrument to another. These boards contain model number and serial
number information that uniquely identifies a specific unit, and boards that are
mismatched to the instrument may result in problems with its performance,
licensing, serviceability, importability/exportability or warranty.
WARNING
When the cover is removed from the instrument line voltages are exposed which
are dangerous and may cause serious injury if touched. Disconnect power and
wait six minutes before starting.
4 53210A/53220A/53230A Option Installation
53210A/53220A/53230A Option Installation
Figure 1. Removing the Handle.
3. To remove the rear bezel and cover, loosen the captive screws on the
sides as shown in Figure 2 using a Torx 20 screwdriver.
Figure 2. Rear Bezel and Cover Removal.

53210A/53220A/53230A Option Installation 5
53210A/53220A/53230A Option Installation
Moving the Internal Battery (Option 300)
When installing options it may be necessary to temporarily move the
internal battery (Option 300) for easier access. To move the battery if
installed:
1. Remove the two T20 TORX screws and lockwashers holding the Option
300 assembly to the left- hand side panel (as viewed from the rear of the
instrument).
2. Lift up carefully on the left side of the assembly and remove the assem-
bly from the three large tabs holding it on the right side (Figure 3). Dis-
connect the two cables going to the assembly.
3. Lay the assembly on its back to the right side of the chassis and place
the three small tabs on the back side of the three large tabs into the three
slots on the assembly deck.

6 53210A/53220A/53230A Option Installation
53210A/53220A/53230A Option Installation
Figure 3. Temporarily Moving the Internal Battery (Option 300).
Moving the Optional Channel Assembly (Option 106)
When installing options it may be necessary to temporarily move 53210A
Option 106 or 53220A/53230A Option 106 for easier access. To move the
optional channel if installed:
1. Remove the T20 TORX screw and lockwasher at the rear end of the
Option 106/115 aluminum deck.
2. Remove the two flathead screws that secure the assembly to the side
panel.

53210A/53220A/53230A Option Installation 7
53210A/53220A/53230A Option Installation
3. Using a 5/16" open end wrench, loosen the SMA connector on the end
of the semi- rigid cable that is connected to the PC board.
4. Slide the Option 106/115 assembly to the rear of the chassis, as neces-
sary, to expose the two gold- connectors at the front of the motherboard
near the front panel (J101 and J201).
Ultra-High Stability Timebase (Option 010)
GPIB Interface (Option 400)
Option 400 GPIB Connector Parts (53200U - 400)
Item Agilent Part No. Qty.
• PC Board Assembly P0001-63001 1
• Ribbon Cable, 16-pin 53200-61601 1
• 7mm Hex-head standoff 0380-0644 2
• Washer, lock 2190-0577 2
NOTE
Option 010 (Ultra-High Stability Timebase) must be performed by technicians at an
Agilent Technologies Service Center. Go to www.agilent.com/find/assist for
information on contacting Agilent in your region, or contact your Agilent Technol-
ogies Representative.
NOTE
To order the Ultra-High Stability Option 010, you will need to place an order with
Agilent for 53200U-010 and identify which counter you have (Agilent 53210A,
53220A, or 53230A).

8 53210A/53220A/53230A Option Installation
53210A/53220A/53230A Option Installation
Preliminary Steps
1. Remove the cover and rear bezel as described under “Removing the
Cover and Rear Bezel” at the beginning of this document.
2. If installed, temporarily move the Option 300 internal battery as
described under “Moving the Internal Battery (Option 300) at the begin-
ning of this document.
Procedure
1. Remove the GPIB Cover Plate using a T20 TORX screwdriver.
2. Insert the GPIB Connector through the connector hole on the rear
panel.
3. Use a 7mm spin- tite to install the two supplied Hex- head standoffs and
lock washers. Tighten the two standoffs securely (do not over- tighten).
4. Connect one end of the supplied 16- pin ribbon cable to connector J901
on the motherboard chassis.
5. Connect the other end of the ribbon cable to J1 on the GPIB PCB
assembly.
6. Re- install the Option 300 Internal Battery (if moved). Be sure to
re- connect any disconnected cables.
7. Re- install the cover, rear bezel, and handle (if applicable).
CAUTION
Before proceeding with the installation, follow all the ESD steps as outlined in the
section titled "Do This First"at the beginning of this document.
NOTE
Be sure the non-insulated side of the pins on the cable is facing the pins in the
motherboard connector to provide electrical contact.

53210A/53220A/53230A Option Installation 9
53210A/53220A/53230A Option Installation
Internal Battery DC Power (Option 300)
Option 300 Battery Pack Parts (53200U - 300)
Item Agilent Part No. Qty.
• Battery charger PCB Assembly 53200-66507 1
• Battery 1420-0909 1
• Y-Cable 53200-61602 1
• Ribbon cable, 6-pin 53200-61603 1
• Deck 53200-00601 1
• Cover 53200-00602 1
• TORX 10 screws 0515-0430 7
• TORX 20 screws 0515-0433 2
Preliminary Steps
1. Remove the cover and rear bezel as described under “Removing the
Cover and Rear Bezel” at the beginning of this document.
Procedure
1. Using a medium slot- head screwdriver, gently push back the 4- pin con-
nector lock tab on the motherboard end of the jumper cable that connects
between the Motherboard (J1000) and the PowerSupply board (J2). Refer
to Figures 4 and 5.
CAUTION
Before proceeding with the installation, follow all the ESD steps as outlined in the
section titled "Do This First"at the beginning of this document.

10 53210A/53220A/53230A Option Installation
53210A/53220A/53230A Option Installation
Figure 4. Connector Locking Tab
2. Gently move the cable 4- pin connector side- to- side while pulling
upward on the cable connector until the jumper cable is free from the
motherboard.
3. Repeat steps 1 and 2 for the other end of the jumper cable where it
connects to the AC power supply assembly (6-pin connector) on the side
wall of the instrument. See Figure 5. Set the jumper cable aside in a safe
location in case it is needed in the future.

53210A/53220A/53230A Option Installation 11
53210A/53220A/53230A Option Installation
Figure 5. Jumper Cable Installed.
4. Next, connect the 6- pin connector on the supplied Y- cable assembly
(Figure 6) to the AC power supply 6- pin connector, and then connect the
4- pin connector on the cable to the motherboard 4- pin connector where
the jumper cable was removed in step 2.
5. Be sure the locking tabs on the PC board connectors lock the cable
connectors at each end, preventing the cable connectors from working
loose on their own.

12 53210A/53220A/53230A Option Installation
53210A/53220A/53230A Option Installation
Figure 6. Digital and Y-Cables.
6. Connect one end of the supplied (digital) 6- pin ribbon cable (Figure 6)
to the 6- pin connector J1200 (next to 4- pin connector J1000 on the moth-
erboard).
7. On the Battery assembly, push and hold the white test button while
observing the charge- level indicator (Figure 7). The charge level should be
at least 25%. It should charge to 100% after installation when AC power is
applied.
DIGITAL
Y - CABLE

53210A/53220A/53230A Option Installation 13
53210A/53220A/53230A Option Installation
Figure 7. Test Button and Charge Indicator.
8. Set the Battery assembly on its back on the right-hand side of the
chassis and insert the three small plastic tabs on the chassis into the
three slots on the assembly deck. Connect the two cables (just installed) to
the battery charger assembly 6- pin (J101) and 8- pin (J100) PC board con-
nectors. (Figure 8).
NOTE
Be sure the lock tabs on the PC board connectors lock the cable connectors at
their ends, preventing the cable connectors from working loose on their own.

14 53210A/53220A/53230A Option Installation
53210A/53220A/53230A Option Installation
Figure 8. Battery Assembly Connectors.
9. Move the whole assembly from the three small tabs and insert the three
large tabs on the plastic AC power supply cover into the three slots on the
battery assembly deck shown in Figure 9. Press the opposite side of the
battery assembly down until the two tabs on the battery assembly deck
rest in the the cutouts of the chassis side panel.

53210A/53220A/53230A Option Installation 15
53210A/53220A/53230A Option Installation
Figure 9. Battery Assembly Held By Three Small Tabs.
10. Install the supplied TORX T20 screws and lockwashers (2 each)
through the provided chassis holes into the imbedded nuts in the battery
deck and secure.
11. Re- install the cover, rear bezel, and handle (if applicable).

16 53210A/53220A/53230A Option Installation
53210A/53220A/53230A Option Installation
53210A/53220A/53230A Rear Panel Parallel Inputs (Option 201)
Installation of Option 201 (Rear Panel Parallel Inputs) must be performed
by technicians at an Agilent Technologies Service Center. The purchase of
this option (53200U- 201) includes the cost of Agilent installing the
option and verifying that the instrument is operating correctly. You
must send your instrument and the option kit to Agilent for installation to
occur.
Obtaining Installation Service (worldwide)
To arrange for option installation, contact Agilent Technologies at one of
the following telephone numbers:
•United States:(800) 829- 4444
•Europe: 31 20 547 2111
•Japan: 0120- 421- 345
For other locations, go to www.agilent.com/find/assist or contact your Agi-
lent Technologies Representative. The Service Center will provide informa-
tion on how to ship the instrument and the option kit to the center for
installation.
Repackaging for Shipment
In preparation for shipment to Agilent, be sure to:
1. Attach a tag to the instrument identifying the owner and indicating the
required installation (Option 201). Include the model number and full
serial number on the tag.
2. Retain all loose accessories, power cords, CDs, manuals, and the like.
Only ship the instrument and the option kit.
3. Place the instrument and the option kit in the instrument's original

53210A/53220A/53230A Option Installation 17
53210A/53220A/53230A Option Installation
container with appropriate packaging material for shipping.
4. Secure the container with strong tape or metal bands.
If the original shipping container is not available, place the instrument in
a container which will ensure at least 10 cm (4 inches) of compressible
packaging material around all sides of the instrument. Use static- free
packaging materials to avoid damage. Agilent suggests that you always
insure shipments.
53210A Channel 2 Front Panel Input (Option 106 and Option 202)
Option 106/202 Channel 2 Parts (53200U - 106)
Item Agilent Part No. Qty.
• 6.0 GHz PC Assembly 53200-67505 1
• Ribbon Cable, 40-pin 53200-61605 1
• Labels, 6 GHz 53200-84301 2
• Bracket, Aluminum 53200-00603 1
• TORX 10 screws 0515-0430 4
• Screws, Flathead 0515-1946 2
• TypeN-to-SMA Connector-Adapter E4418-20009 1
• RF Cable, Front, SMA Semi-rigid 53200-61612 1
• Washer Plate (with "LIFT" tab) E4418-00016 1
• 14mm Hex Nut 2950-0132 1

18 53210A/53220A/53230A Option Installation
53210A/53220A/53230A Option Installation
Preliminary Steps
1. Remove the cover and rear bezel as described under “Removing the
Cover and Rear Bezel” at the beginning of this document.
2. If installed, temporarily move the Option 300 internal battery as
described under “Moving the Internal Battery (Option 300)” at the
beginning of this document.
3. Assemble the parts in the Option 106/115 package as follows (Figure
10):
•Position the A3 PC board over the aluminum bracket so that the
SMA edge connector is pointed toward the front flange (without the
hole) and sits on top of the standoffs.
•Install the 4 (Option 106) T10 TORX screws to secure the PC board
to the aluminum deck.
CAUTION
Before proceeding with the installation, follow all the ESD steps as outlined in the
section titled "Do This First"at the beginning of this document.

53210A/53220A/53230A Option Installation 19
53210A/53220A/53230A Option Installation
Figure 10. 53210A Channel 2 Front Panel Option 106/202.
Channel 2 Front Panel Installation Procedure (53210A)
1. Remove the front panel assembly as follows:
2. Turn the chassis upside down. On the bottom of the motherboard,
remove the T10 TORX screw that secures the smaller P500 Processor
board to the motherboard (see Figure 11; for illustration purposes only,
the P500 board is shown with plastic support bracket removed).
Figure 11. P500 Processor Board.
NOTE
Read each instruction step in its entirety, while examining the hardware and refer-
ring to the appropriate figure(s), before proceeding with the step. This will
acquaint you completely, in advance, with the action to be performed. The actions
in some steps must be accomplished simultaneously to succeed. Read all nearby
NOTES carefully.

20 53210A/53220A/53230A Option Installation
53210A/53220A/53230A Option Installation
3. Note how the left rear corner of the P500 board fits into its slot (above
the small plastic standoff inside the slot) to hold the board horizontal.
Press the two tabs securing the edge connector of the PC board to release
the PC board.
4. Remove the P500 board carefully from its connector and set it aside in
a safe location on the ESD mat.
5. Turn the counter chassis upright and position the rear panel facing you
as shown in Figure 12.
6. Remove the T20 TORX screw on the front left- hand side of the A1
motherboard as shown in Figure 12.
NOTE
The four standoffs on the aluminum side panels (two on each side, front) secure
the front panel into the four holes cut out on the plastic sides of the front panel
(two on each side). The next steps free the standoffs from the holes so the front
panel can be removed.
This manual suits for next models
2
Table of contents
Other Agilent Technologies Cash Counter manuals

Agilent Technologies
Agilent Technologies 5352B User manual

Agilent Technologies
Agilent Technologies 53220A User manual

Agilent Technologies
Agilent Technologies 53181A User manual

Agilent Technologies
Agilent Technologies 53151A User manual

Agilent Technologies
Agilent Technologies 53131A User manual

Agilent Technologies
Agilent Technologies 5385A User manual