Page
3Air Techniques, Inc.
Important: The user must be logged on as the local Administrator to perform the
installation, conguration and calibration procedures provided in this guide.
Once setup, any user can acquire images. Contact the ofce network
administrator as necessary.
Introduction.
This document provides the instructions necessary to set up the software used to operate the
ProVecta S-Pan and the ProVecta S-Pan Ceph X-ray units. The ProVecta S-Pan and the ProVecta
S-Pan Ceph are hereafter referred to as ProVecta throughout this document. Review and follow
the instructions to ensure that the ProVecta gives the highest level of service. The steps to install
and configure the software are summarized below.
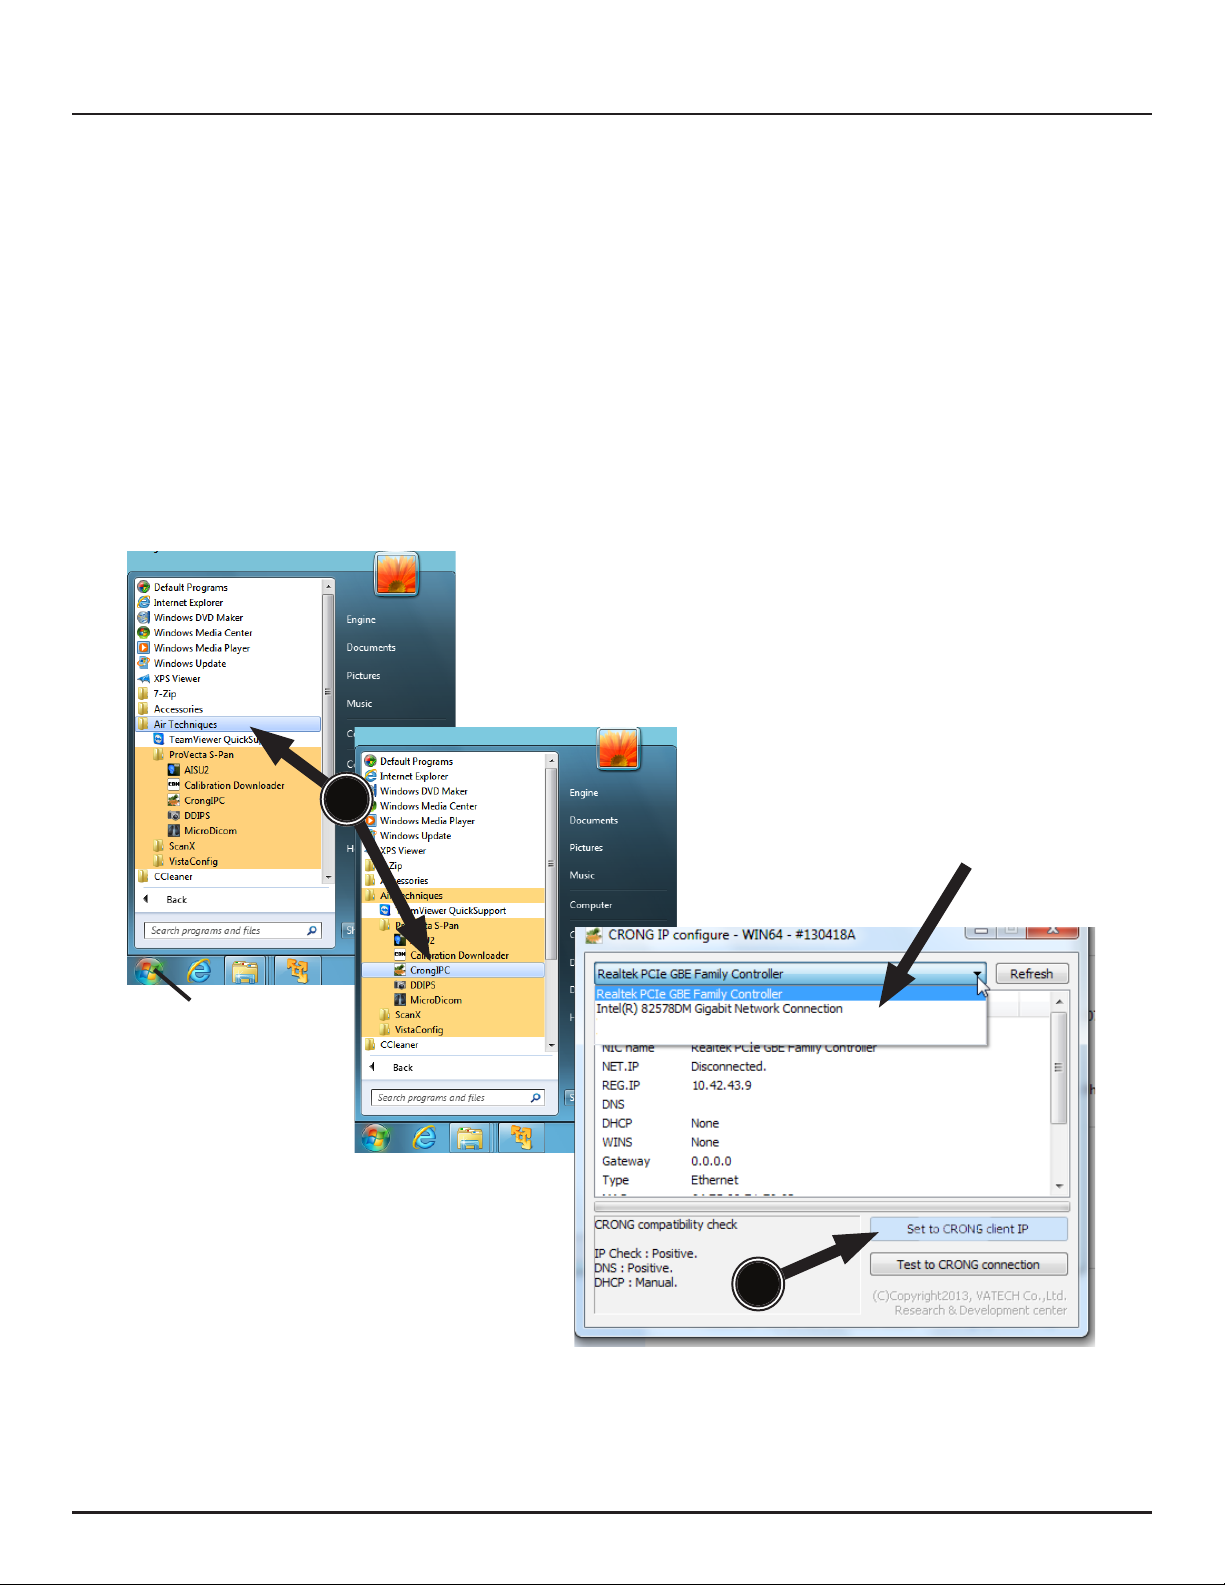
1. Setting up the ProVecta network.
2. ProVecta Utilities Installation.
3. Congure the Client IP.
4. Download Prerequisite Files.
5. Testing ProVecta Setup.
6. Third Party Imaging Management Application Setup.
7. Advanced Procedures (DDIPS Software and retrieving interrupted image acquisition).
Important: A PCI Express slot is necessary to install the Gigabit Ethernet card.
The Gigabit Ethernet card adds a separate second network connection
used only for ProVecta. The original adapter card still provides the connection
to the ofce network.
1. Setting up the ProVecta network. Data transmission between ProVecta and PC is accom-
plished over a separate network connection made via a additional Gigabit Ethernet adapter
card. The required network cable and the Ethernet card are included with the ProVecta.
Install the Ethernet card in the PC by performing the following Hardware Installation and
Setup procedures.
Hardware Installation
1. Turn off your computer, disconnect the power and remove its cover.
2. Remove the metal cover plate on the back of an available PCI Express slot.
3. Insert the card into the slot and use the bracket screws to secure it rmly in place.
4. Replace the cover on the computer.
5. Re-connect the power.
6. Connect the network cable from the ProVecta to the card.
7. Turn on the computer.
Setup
1. Windows should automatically detect the new network card and load suitable drivers.
If not, insert the driver disk supplied with network card into the CD-ROM drive to com-
plete the software installation.
2. Turn on ProVecta.
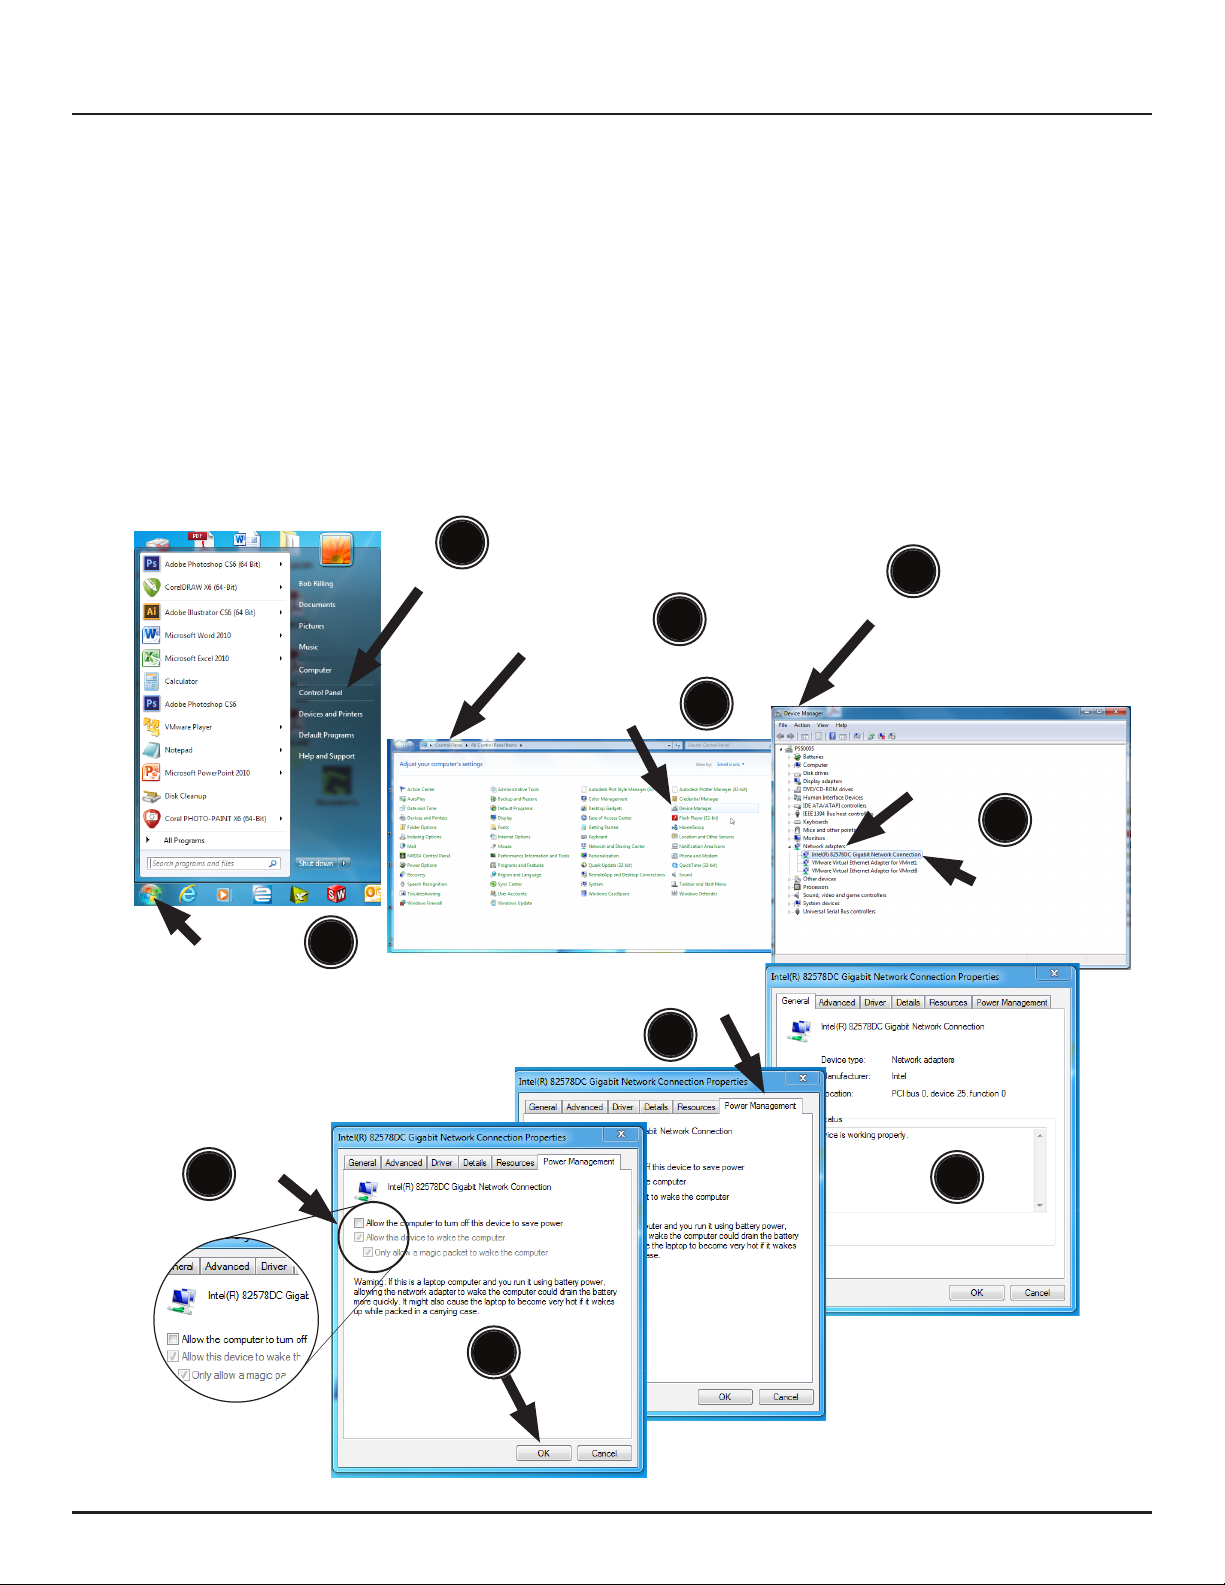
Important: Windows power savings mode must be disabled to keep the ProVecta network
connection operating.
3. Disable the power savings mode by performing the Windows power management procedure
provided on the next page. This procedure keeps the new Gigabit Ethernet adapter card
powered and operating as long as the computer is on.
NETWORK SETUP