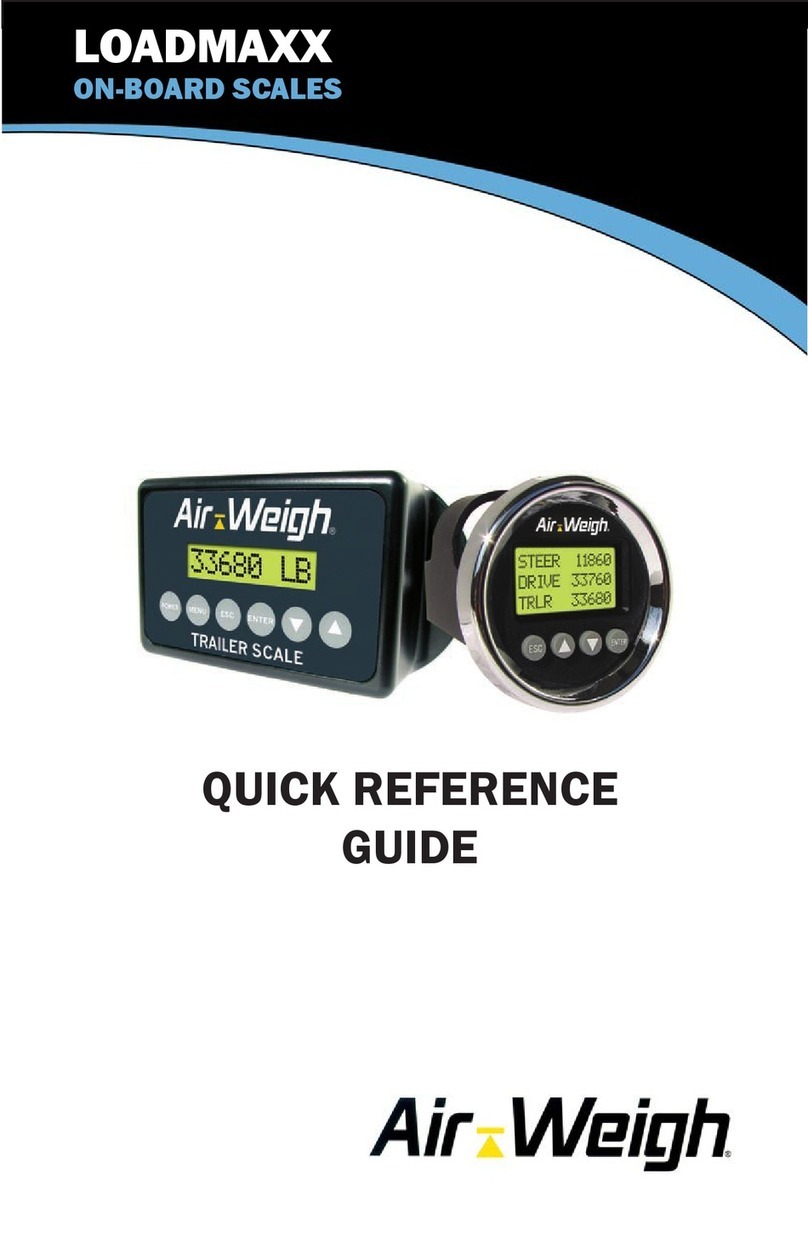
Air Weigh BinMaxx User manual

BinMaxx
User Guide
PN:901-0147-002 R0
On-Board Truck and Trailer Scales

2
Contents
BinMaxx Overview...........................................................................1
Navigating the Scale Menu..................................................................1
Calibrating Your Scale....................................................................2
Equipment Needed................................................................................2
Determining Bin Weights for Calibration............................................3
Entering Empty and Heavy Weights...................................................4
Calibrating Heavy Weights...................................................................5
Calibrating Empty Weights...................................................................7
Check-Weighing Your Scale................................................................8
Using BinMaxx................................................................................9
Getting Accurate Weight Readings.....................................................9
Navigating the Weight Display...........................................................10
Reset Lifts Prompt.................................................................10
Weight Display.......................................................................10
Resetting and Erasing Lift Data.........................................................12
Resetting Lift Data.................................................................12
Erasing Lift Data....................................................................13
Printing Lift Data..................................................................................14
Setting Up Your Scale.........................................................................15
Calibrating Your Scale..........................................................15
Setting Up Your Display........................................................15
Turning the Default Reset Lifts Prompt Off or On.............17

3
Assigning a Truck Number...................................................17
Setting a PIN..........................................................................18
ConguringthePrinterPort.................................................18
Setting Your Calibration Weights........................................19
Setting Up Date and Time....................................................19
Troubleshooting Your Scale........................................................20
Navigating the Diagnostics Menu.....................................................20
Diagnostics Menu Options..................................................21
Weight Readings Are Inaccurate......................................................22
Scale Won’t Turn On...........................................................................24
Lift Data Was Not Recorded..............................................................25
What to Do if you Forget Your PIN....................................................27
Identifying the Causes of Error Messages......................................28
Limited Warranty...........................................................................30
Procedure For Warranty Claims..................................................31

1
Section 1
BinMaxx Overview
The BinMaxx scale calculates and displays the bin net (content)
weight of any bin greater than 40 pounds and records the lift
number associated with that bin. BinMaxx can also display the
accumulated net weight of all bins emptied, which helps users
determine when the truck has reached its maximum legal weight.
Users can record the date and time of each lift using the optional
date and time printer; the printer allows you to print weights of
individual lifts immediately, or all lift weights together at the end
of the workday. Or, using the BinMaxx XL kit, users can send all
weight data, including lift weight, date and time, GPS location, and
anyerrormessages,fromthetruckdirectlytoanofcePC.
Navigating the Scale Menu
To illuminate the display: press any key one time.
To go back: push the ESC key to revert to the previous screen. Any
unsaved changes will be erased if you press ESC.
To select a menu item: usetheupordownarrowkeys▲or▼
tohighlightyourchosenmenuitem.Theitemwillashwhenitis
highlighted.ChooseOKtoselecttheashingitem.
To save a change: Press the OK key.
Main menu: Throughout this manual, the term “Main Menu” refers
to the top menu. This menu shows PRINT, ERASE / SETUP /
DIAGNOSTICS if you are using the BinMaxx RS 232 port to print,
or ERASE / SETUP / DIAGNOSTICS otherwise.
Weight display: This term refers to the scale’s default screen,
which shows the bin net weight of the last bin lifted and the lift
number.
BinMaxx Overview
2
Section 2
Calibrating Your Scale
You must calibrate your scale before you begin weighing bins. If you
do not do so you will not see accurate weight readings.
Note: Do not calibrate until you have seated the sensors. See
the BinMaxx Installation Guide for instructions.
Equipment Needed
• Access to an accurate ground scale
• Two refuse bins with similar dimensions and weight, or use
one bin and empty after completing the heavy calibration.
• Calibrationmaterialtollthebin.Thismaterialshould
be equal to the heavy calibration weight, which you will
determine in Steps 2 or 3 below. Choose a material that will
not shift much during calibration, such as gravel, sandbags,
or tires. Avoid liquids. We recommend using sandbags
placed on a pallet inside the bins, braced with a 2x4 to
avoid movement during calibration. Make sure to store the
sandbagsinside,asretainingwatercansignicantlychange
the weight of the bags.
Calibrating Your Scale | Equipment Needed

3
Determining Bin Weights for Calibration
For calibration to be accurate, you must determine the average
sizeandtheaverageweightofthecontentsofthelledbinsyou
encounter on route (referred to in the BinMaxx display as bin net
weight).
1. Find the average bin size by using the median number of
yards. If customers mostly have bins between 2 and 4 yards,
3 yards would be the average size. If customers’ bins range
from 2 to 8 yards, 4 yards would be average.
2. Find the average bin net weight for your route.
• On a day when you consider your route to be average,
record the number of bins emptied into your truck before
you arrive at the transfer station.
• Record the net weight of your truck’s contents that the
transfer station reports.
• Divide the weight of the contents by the number of bins
you emptied while on route. This number is your average
bin weight.
3. Once you’ve determined the average bin content weight,
add the weight of an average empty bin plus 100 pounds
to that number. This total will be the heavy weight you will
use for calibration. However, your total must not be less
than300pounds.Ifyoucannotndtheaveragebincontent
weight from your route, however, use 500 pounds for the
heavy weight.
Calibrating Your Scale | Determining Bin Weights

4
Entering Empty and Heavy Weights
1. Select two bins that are the same size and the same weight
within 20 to 40 pounds of each other. Alternatively, you can
use one bin and empty it after the heavy weight calibration,
but this may be more time consuming.
2. Weigh one of the bins on the ground scale while it is empty.
3. Enter the empty weight of the bin, with no contents, into your
BinMaxx scale. This weight will be subtracted from the weight
the scale measures to give you the content weight of the bin.
• Turn the vehicle on. Press ESC to access the main menu.
• Press▼untilSETUPisashing.PressOK.
• Press▼untilCALWTSETUPisashing.PressOK.
• Press▼untilEMPTYWEIGHTisashing.PressOK.
• Use▲or▼toentertheemptyweightrecordedabove.
Press OK. The screen will read ACCEPTED.
4. Remove the empty bin from the ground scale.
5. Add the weight of the empty bin to the average weight of your
bin contents (see Determining Bin Weights for Calibration).
Add100poundstothistotaltondtheheavyweight.
6. Enter the heavy weight into your BinMaxx scale.
• Press ESC to return to the CAL WT SETUP screen.
• Press▼untilHEAVYWEIGHTisashing.PressOK.
• Use▲or▼toentertheheavyweight.PressOK.The
screen will read ACCEPTED.
7. Remove the heavy bin from the ground scale.
8. Place the empty and heavy bins near the vehicle.
Calibrating Your Scale | Entering Empty, Heavy Weights

5
Calibrating Heavy Weights
1. Turn the vehicle on and wait for the scale to power up.
2. Place the heavy bin on the forks.
3. Follow the instructions below on the display menu:
• From the weight display, press ESC to reach the main
menu.
• Press▼untilSETUPisashing.PressOK.
• Press▼untilCALIBRATIONisashing.PressOK.
• Press▼untilHEAVYWEIGHTisashing.PressOK.
4. In a few seconds, the screen should read USE FILLED
AIR-WEIGH CAL WEIGHT. Wait a few seconds longer. The
display will then show RAISE WEIGHT UNTIL DISPLAY
FLASHES.
5. Begin lifting the bin. During the lift, the display will show LIFT
#1.Lifttheheavybinuntilthedisplayashes.
6. WaituntilthedisplaystopsashingandreadsLOWER
WEIGHT UNTIL DISPLAY FLASHES. Lower the calibration
weight again in one slow, smooth motion. While lowering the
weight, the display will show DROP #1.
7. When you reach the height of the low-proximity sensor
location,thedisplaywillash.Immediatelystoploweringthe
weight, being careful not to touch the ground.
8. If you stop or pause at any time while raising or lowering
thebinbeforethedisplayashes,youmayreceiveaLIFT
ERROR. The error message will instruct you to restart the
calibration process.
Calibrating Your Scale | Calibrating Heavy Weights

6
9. Repeat lifting and lowering the bin until the heavy calibration
iscomplete-vesuccessfulliftsanddropsintotal.Thescale
will repeat the instructions and show the count of lifts and
drops completed.
10. Aftervesuccessfulliftsanddrops,youhavecompleted
theheavycalibration.ThescalewillshowHEAVYWEIGHT
CALIBRATION DONE... After a few seconds, the display
will show EMPTY CALIB REQUIRED BEFORE USE.
Calibrating Your Scale | Calibrating Heavy Weights

7
Calibrating Empty Weights
1. Remove the heavy bin from the forks and replace with the
empty bin.
2. Follow the instructions below on the display:
• From the weight display, press ESC to reach the main
menu.
• Press▼untilSETUPisashing.PressOK.
• Press▼untilCALIBRATIONisashing.PressOK.
• Press▼untilEMPTYWEIGHTisashing.PressOK.
3. Wait a few seconds after the USE EMPTY AIR-WEIGH CAL
WEIGHT screen appears. The display will then show RAISE
WEIGHT UNTIL DISPLAY FLASHES.
4. Repeat the above instructions to lift and lower the empty bin
vetimes.Asabove,thedisplaywillshowthecompleted
LIFTandDROPnumbers,andwillashwhenitistimeto
reverse the arm direction from lift to lower and lower to lift.
5. If you stop or pause at any time while raising or lowering the
calibrationweight,beforethedisplayashes,youmaysee
LIFT ERROR. Restart the calibration process.
6. Whenyouhavecompletedveemptyliftsanddrops
without an error, calibration is complete. The display will
show EMPTY WEIGHT CALIBRATION DONE. After a few
seconds, the display will show the weight display.
Note: You can change the empty calibration weight after it
has been entered. Once you enter a new empty calibration
weight, the scale will automatically recalculate the empty ratio
and offset. You cannot change the heavy weight unless you
recalibrate.
Calibrating Your Scale | Calibrating Empty Weights

8
Check-Weighing Your Scale
Once you’ve calibrated your scale, perform a check-weigh to ensure
the calibration is accurate. It’s also a good idea to check-weigh your
BinMaxx scale periodically to ensure continued accuracy.
1. Gather between six and eight old tires. Place them on a
certiedscaletoobtaintheirweights.Recordthisdata.
2. Place between two and eight tires into an empty bin.
3. Use your vehicle to lift the bin and empty the tires into the
vehicle.
4. Record the weight shown on the display.
5. Compare the displayed weight to the weight of the tires,
which you recorded earlier. The two weights should be within
40 pounds of each other.
Note: With the proper calibration, BinMaxx will provide net
weight readings to within 20 pounds of any size bin with a
net weight of at least 100 pounds. A net weight less than 40
pounds in a bin will display a net weight of 0 pounds.
Calibrating Your Scale | Check-Weighing Your Scale

9
Section 3
Using BinMaxx
Getting Accurate Weight Readings
BinMaxx measures weight while the bin is in motion, during a
window of time we refer to here as the measurement zone. The
measurement zone is the time and distance between when the bin
leaves the ground and when it reaches its highest point before it is
emptied into the truck. It usually begins when the forks are about 50
inches from the ground and ends when they are about 100 inches
from the ground. However, the measurement zone can vary by 10
to 15 inches on either end. See the BinMaxx Installation Guide for
more information on determining your measurement zone. When
you are using BinMaxx, you should be aware of the measurement
zone to get the most accurate readings. Refer to the following list to
use BinMaxx accurately.
Do
• Provide as smooth and consistent a lift and drop as possible
while the bin is travelling through the measurement zone.
Do Not
• Pause during a lift or drop.
• Try to arrange or shift the bin load while the bin is in motion.
BinMaxx will update the lift number and net weight soon after the
bin has dropped below the low proximity switch measurement area.
Using BinMaxx | Getting Accurate Weight Readings

10
Navigating the Weight Display
Reset Lifts Prompt
The default factory setting for BinMaxx is to display the Reset Lifts/
Weight prompt before allowing you to view the weight display. This
screen gives you the option to reset the number of lifts and/or the
weight of the last bin displayed on the main screen so it will show
only the current day’s totals. Resetting the lifts or weight does NOT
delete lift information from the ComLink - it only clears it from the
display. To erase lift data, see Resetting and Erasing Lift Data, p.
12. If you would rather reset lifts manually instead of seeing this
screen before the weight display, see Turning the Default Reset Lifts
Prompt Off or On, p. 16.
Weight Display
When BinMaxx is on and the truck is in use, BinMaxx will show
the weight display. This is the screen that provides information on
lift number and bin net weight. The weight display shows the most
recent lift number and bin net weight. The weight display will appear
as in Fig. 1.
Note: If your scale displays a warning message stating
CALIBRATION REQUIRED BEFORE USE instead of the weight
display, see the p. 4 for calibration instructions.
Using BinMaxx | Navigating the Weight Display

11
If Screen 1 appears, the printer is not connected or is not turned on,
or you have chosen to use BinMaxx’s RS 232 port for data stream
output rather than printing. The ComLink will record all data, which
can be printed or transferred at a later time. For data stream output
rather than printing, reference the document BinMaxx, Output Data
Stream on RS232 Port.
If Screen 2 appears, BinMaxx recognizes the printer and it is
turned on. Note that you must turn on the printer manually; it will not
automatically turn on when BinMaxx does If you would like to print
lift data, see the section entitled Printing Lift Data.
NOTE: Air-Weigh’s date and time printer must be connected to
the scale and turned on in order to record the current date and
time. If the ComLink does not detect a printer, it will record an
elapsed time but not a current time.
Fig. 1 BinMaxx Weight Display
Using BinMaxx | Navigating the Weight Display

12
Resetting and Erasing Lift Data
Resetting Lift Data
As noted in the previous section, BinMaxx is set to display the
Reset Lift prompt by factory default. The following instructions are
for manual reset.
1. From the weight display, press ESC to reach the main menu
(Fig.2).ERASELIFTSorPRINT,ERASEwillash.Main
Menu 2 will display if you have installed that date/time printer
and it is turned on.
2. Press OK to select ERASE. The
menu shown in Fig. 3 will appear.
RESETLIFTSwillash.Notethat
the option PRINT LIFTS will not
appear if a printer is not installed and
turned on.
3. Press OK to select RESET LIFTS.
The screen shown in Fig. 4 will
appear.YESwillash.
4. Press OK to reset lift number. The
screen will read ACCEPTED, then switch to the screen
showninFig.5.YESwillash.
Fig. 2 BinMaxx Main Menu Screens
Fig. 3 Erase/Reset Menu
Fig. 4 Reset Lift Number
Using BinMaxx | Resetting and Erasing Lift Data

13
5. Press OK to select RESET WEIGHT.
The screen will read ACCEPTED,
then switch to the display menu. The
lift number and net weight will now
read 0.
Note: If you do not want to reset lift or weight data, select NO
on either menu or hit ESC until you see the main menu, shown
in Fig. 2.
Erasing Lift Data
BinMaxx can store up to 1000 lifts and associated data. You can
print or transfer the data at any time. If the ComLink has stored
1000 lifts without being cleared, new lifts will not be recorded and
the operator will see an error message reading MEMORY FULL,
NO RECORDINGS. It is a good idea to periodically erase lift data to
avoid this error.
1. From the weight display, press ESC to reach the main menu
(Fig. 2).
2. ERASELIFTSorPRINT,ERASEwillash.PressOKto
select.
3. ThemenushowninFig.3willappear.Press▼untilERASE
ALLisashing.PressOKtoselectERASEALL.
4. The screen will read USE CAUTION! PUSH “OK” TO ERASE
ALL. Press OK again to delete all lift and weight data from the
BinMaxx scale.
Fig. 5 Reset Weight
Using BinMaxx | Resetting and Erasing LIft Data

14
Printing Lift Data
Make sure your printer is plugged in and turned on before
attempting to print. Reference the document entitled Installing the
Printer Kit for setup instructions.
1. From the weight display, press ESC to reach the main menu.
2. Press▼untilPRINT,ERASEisashing.PressOK.Ifthe
menu instead reads ERASE LIFTS, the printer is not plugged
in or turned on.
3. Fromtheerase/resetmenu(Fig.3),press▼untilPRINT
LIFTSisashing.PressOK.
4. If the print request is successful, the screen will display
PRINTING ALL LIFTS…ESC CANCELS. If the error
message NO PRINTER is displayed, the ComLink does not
detect a printer. Press ESC at any time during the printing
process to cancel printing.
Using BinMaxx | Printing Lift Data

15
Setting Up Your Scale
The setup menu allows you to calibrate and set parameters for your
scale. To reach the setup menu, select SETUP from the main menu
and press OK.
Calibrating Your Scale
To calibrate your scale, select CALIBRATION from the setup menu
and press OK. Follow the instructions on pp. 4-8.
Setting Up Your Display
The display setup menu allows you to choose whether the scale
displays weight in pounds or kilograms; the brightness of the screen;
and the amount of time elapsed before the scale’s backlight turns off.
To select units of weight:
1. From the weight display, press ESC to reach the main menu.
2. Press▼untilSETUPisashing.PressOK.
3. Press▼untilDISPLYSETUPisashing.PressOK.
4. Press▼untilLBS/KGSisashing.PressOK.
5. Use▲or▼toselecteitherPOUNDSorKILOGRAMS.
Press OK. The screen will display POUNDS, (Now Lbs) or
KILOGRAMS, (Now Kgs) respectively.
Using BinMaxx | Setting Up Your Scale

16
To select brightness:
1. From the weight display, press ESC to reach the main menu.
2. Press▼untilSETUPisashing.PressOK.
3. Press▼untilDISPLYSETUPisashing.PressOK.
4. Press▼untilBRIGHTNESSisashing.PressOK.
5. Use▲or▼toselecteitherBRIGHTorDIM.PressOK.The
screen will display either BRIGHT, (Now Bright) or DIM, (Now
Dim), respectively.
To select light timeout:
1. From the weight display, press ESC to reach the main menu.
2. Press▼untilSETUPisashing.PressOK.
3. Press▼untilDISPLYSETUPisashing.PressOK.
4. Press▼untilLITETIMEOUTisashing.PressOK.
5. ThedisplayshowsBACKLIGHTTIMEOUTandaashing
numbernexttoMINS.Use▲or▼toselectthenumber
of minutes you want the backlight to stay on after your last
keypad use. Press OK to accept your changes.
To select Show or Hide Accumulated Net Weight:
1. From the weight display, press ESC to reach the main menu.
2. Press▼untilSETUPisashing.PressOK.
3. Press▼untilDISPLAYSETUPisashing.PressOK.
4. Press▼threetimes.YouwillseeSHOWTOTALandHIDE
TOTAL.Use▲or▼toselectSHOWTOTALorHIDE
TOTAL, whichever is appropriate for your use. Press OK to
accept your changes. The screen will read ACCEPTED.
Using BinMaxx | Setting Up Your Scale

17
Turning the Default Reset Lifts Prompt Off or On
Under the menu heading Power-Up Mode, you can decide whether
the scale asks you to reset the lift number and net weight each time
it is turned on, or whether you need to go into the erase menu to do
so. If you reset your lift information daily, using power-up mode may
save you time.
1. From the weight display, press ESC to reach the main menu.
2. Press▼untilSETUPisashing.PressOK.
3. Press▼untilPWRUPMODEisashing.PressOK.
4. The screen will show PROMPT RESET (select to show reset
prompts each time you turn on the scale) or DON’T PROMPT
(selecttohideprompts).Use▲or▼toselectanoption.
Press OK to save changes.
Assigning a Truck Number
If you have multiple vehicles, you may use truck numbers
to organize weight information. Truck number will display on
documents printed with the date/time printer and in data streams to
the onboard computer, as well as on spreadsheets generated with
BinMaxx XL.
1. From the weight display, press ESC to reach the main menu.
2. Press▼untilSETUPisashing.PressOK.
3. Press▼untilTRUCKNUMBERisashing.Itisnot
immediately visible on the setup menu. Press OK.
4. The screen will display TRUCK NUMBER and below this,
aashingnumber.Use▲or▼arrowstoselectanumber
between 0 and 9999. Press OK to accept the selection.
Using BinMaxx | Setting Up Your Scale
Other manuals for BinMaxx
3
Table of contents
Other Air Weigh Scale manuals

Air Weigh
Air Weigh BinMaxx User manual

Air Weigh
Air Weigh LoadMaxx 5809 User manual

Air Weigh
Air Weigh LOADMAXX User manual

Air Weigh
Air Weigh QuickLoad User manual

Air Weigh
Air Weigh BinMaxx User manual

Air Weigh
Air Weigh LoadMax User manual

Air Weigh
Air Weigh LoadMaxx Plus User manual

Air Weigh
Air Weigh LOADMAXX User manual

Air Weigh
Air Weigh LOADMAXX Operating and maintenance instructions